User Tools
This is an old revision of the document!
Table of Contents
Integration Settings
Facebook App Integration tutorial
1/ Go to developers.facebook.com
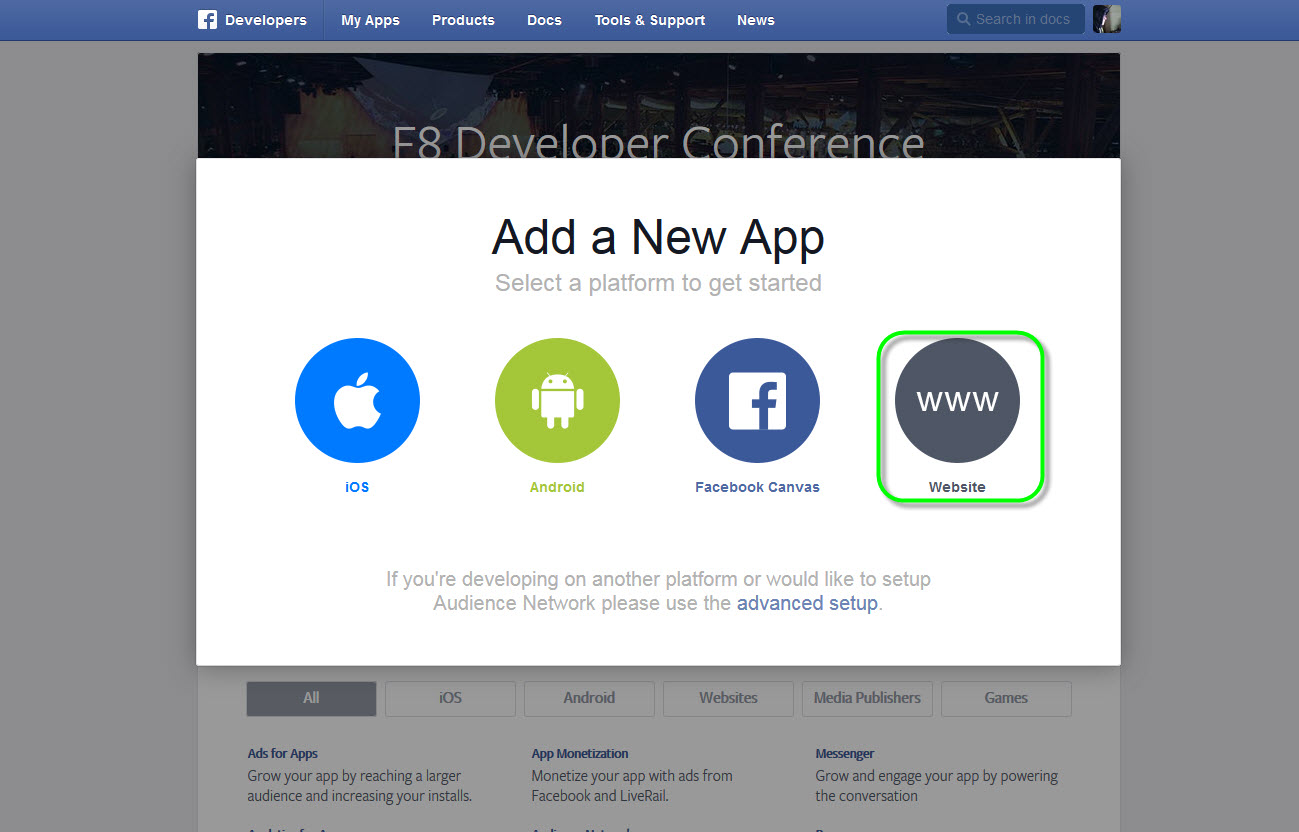
2/Login & select My apps/Add a New App:
3/Select platform for your app, select Website platform:
4/Fill in your app’s name:
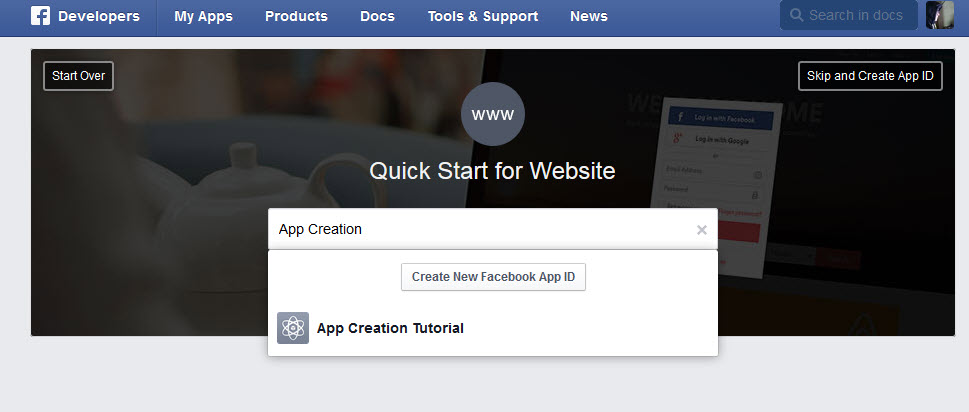
5/Select your app’s category:
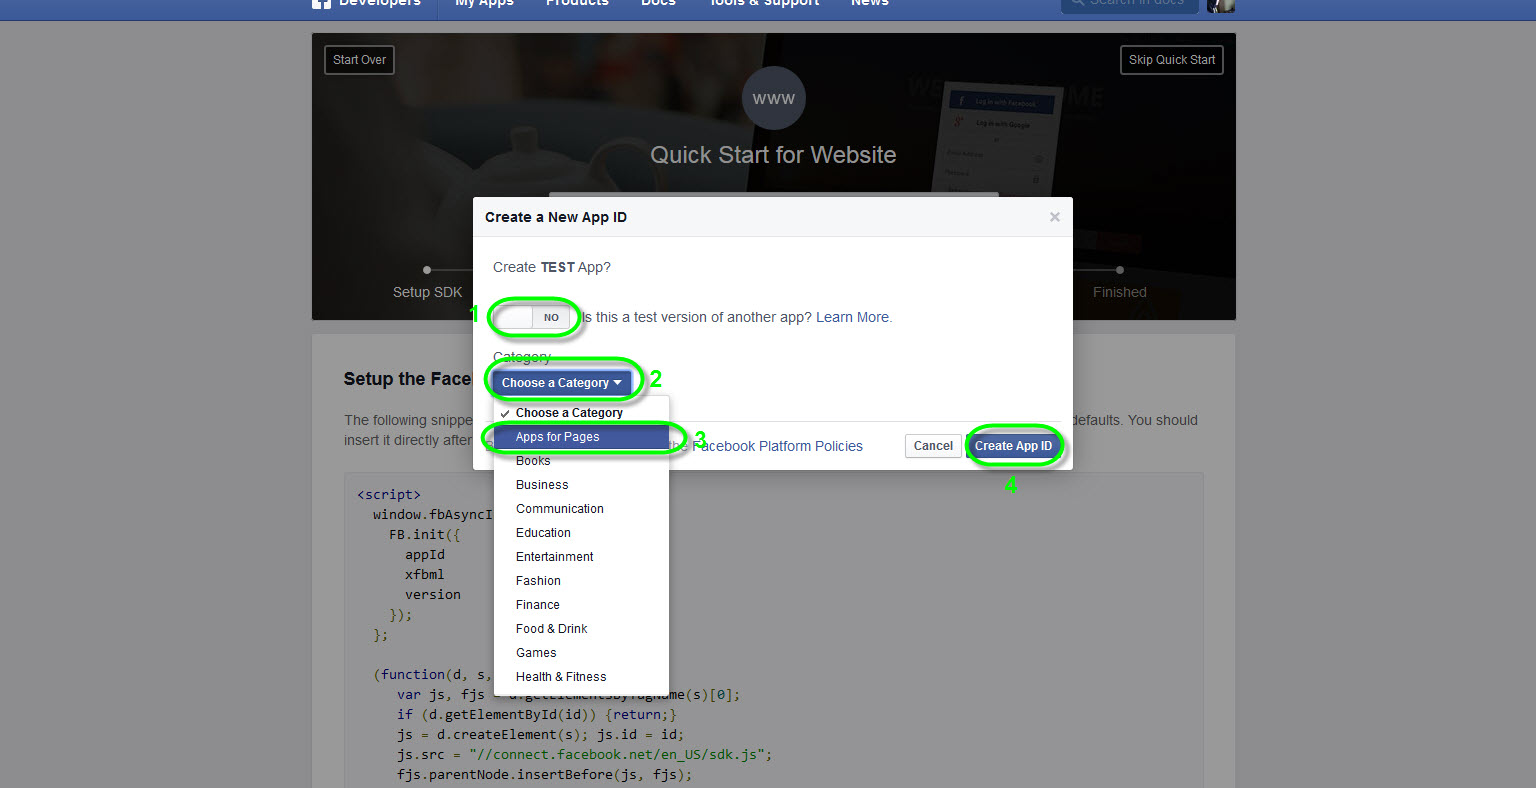
#1: Select NO
#2: Click to drop down
#3: Select App for Pages
#4: Press on Create App ID
6/After Created App ID, scroll down then fill in your information of your site:
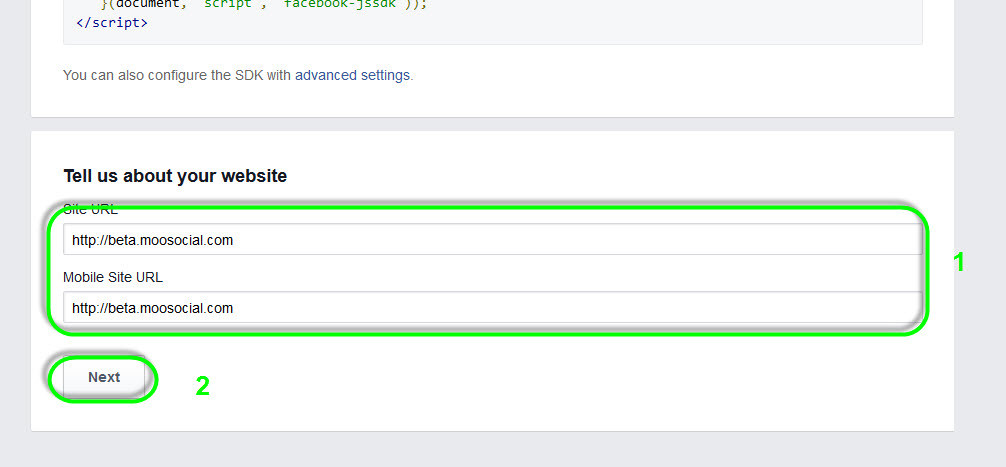
#1 Fill in your site's domain.
#2 Press Next button.
7/After Your App was successfully created, make sure it is activated (live):
To make your app live, go to My Apps/YourNewCreatedApps/Settings/Basic
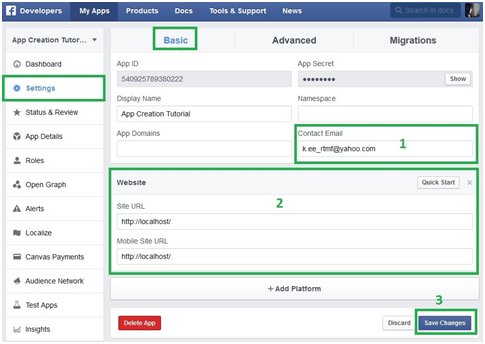
#1:Ensure your Contact Email is correct.
#2:Ensure your Website is correct.
#3:Save Changes.
If any of # above incorrect, your app cannot be lived.
Go to Status & Review below Settings tab, switch to Yes:
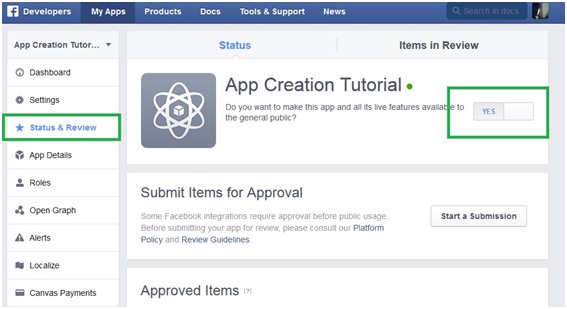
Configure your call back URL:
- Go to Settings/Advanced/OAuth Settings:
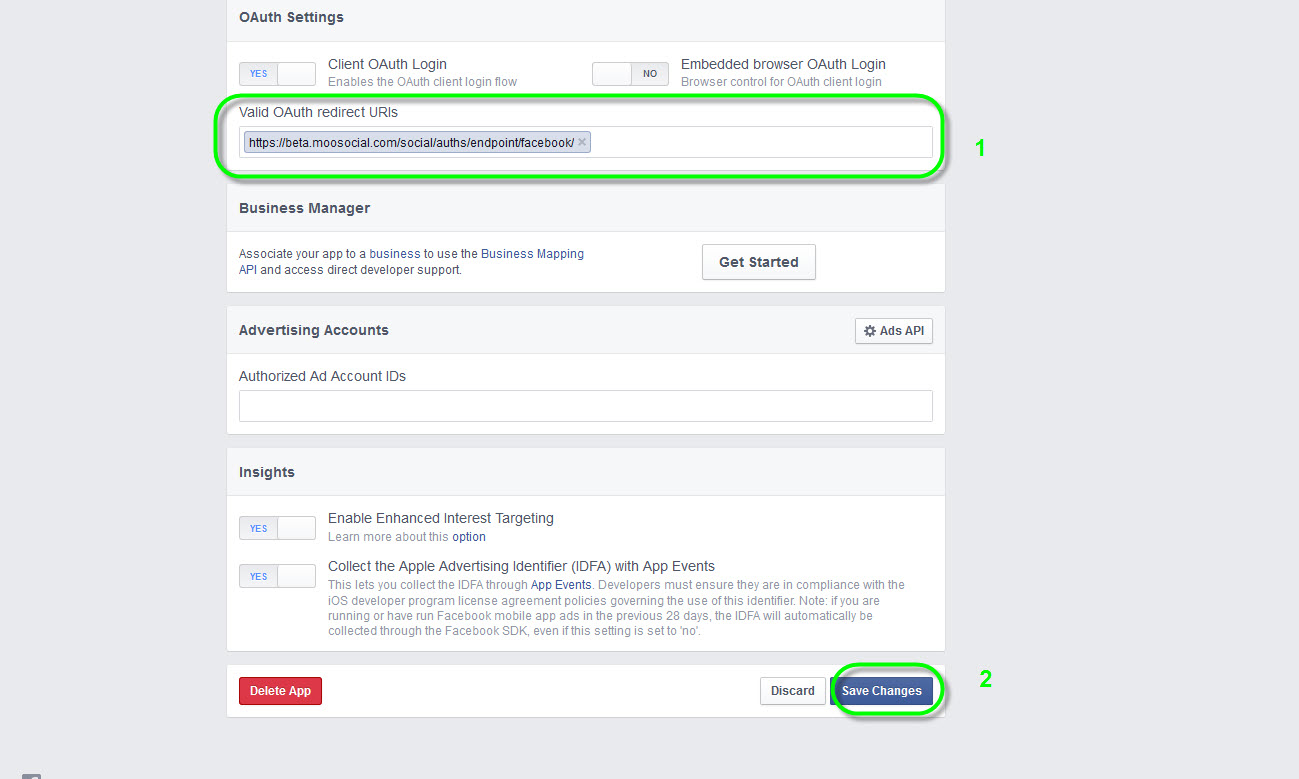
#1: Input your site callback’s url, the format will be: [yoursite/social/auths/endpoint/facebook/]
#2: Save changes after input callback’s url
8/How to configure your Admin Dashboard:
Go to Admin Dashboard/Socials Integration/Facebook
Then:
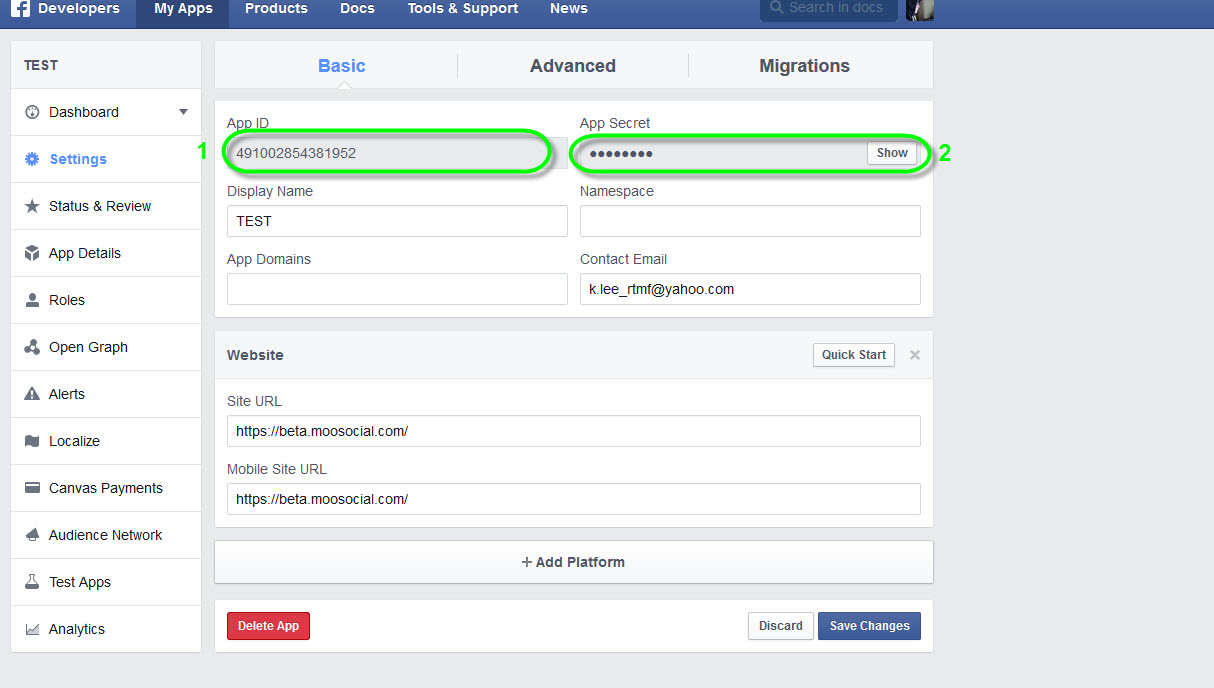
Get #1 and #2 from fb app and copy to your Admin Dashboard/Socials Integration/Facebook
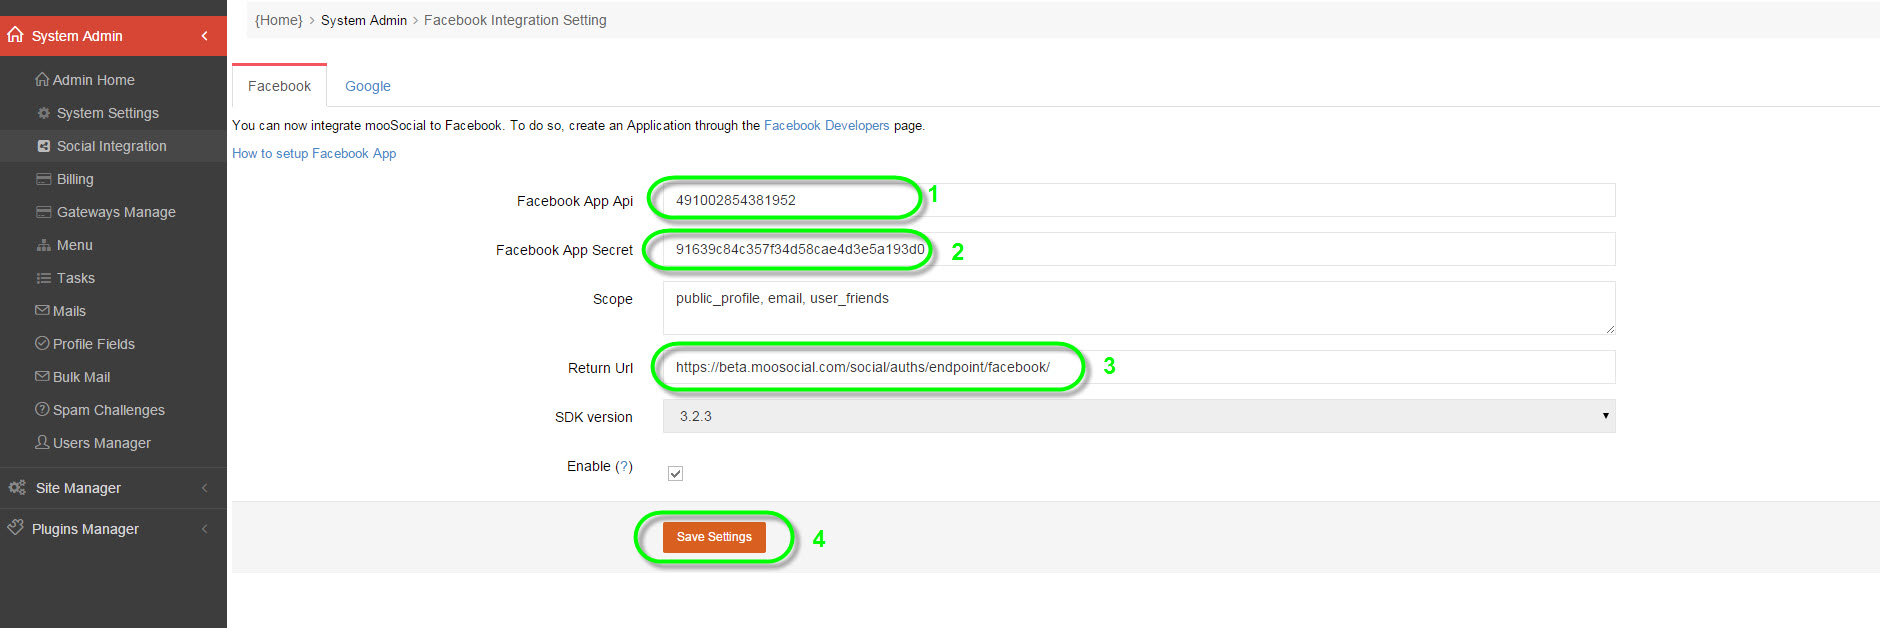
#1: Your App ID from your FB app (in your FB app/Settings/Basic)
#2: Your App Secret from your FB app (in your FB app/Settings/Basic, the App Secret will show after pressing Show button and re-enter your FB password.
#3: Your callback url that configured from step 7.3 which has the format: [yoursite/social/auths/endpoint/facebook/]
#4: Save Changes.
*You dont need to config SDK version used in Admin Dashboard, system will be detected automatically.
*Remember to check if any space in the fields.
*Remember your site could be [https] instead of [http], they will not recognize if site was [https] and Client ID & Admin Dashboard were [http].
Google App Integration tutorial
1/ Go to console.developers.google.com
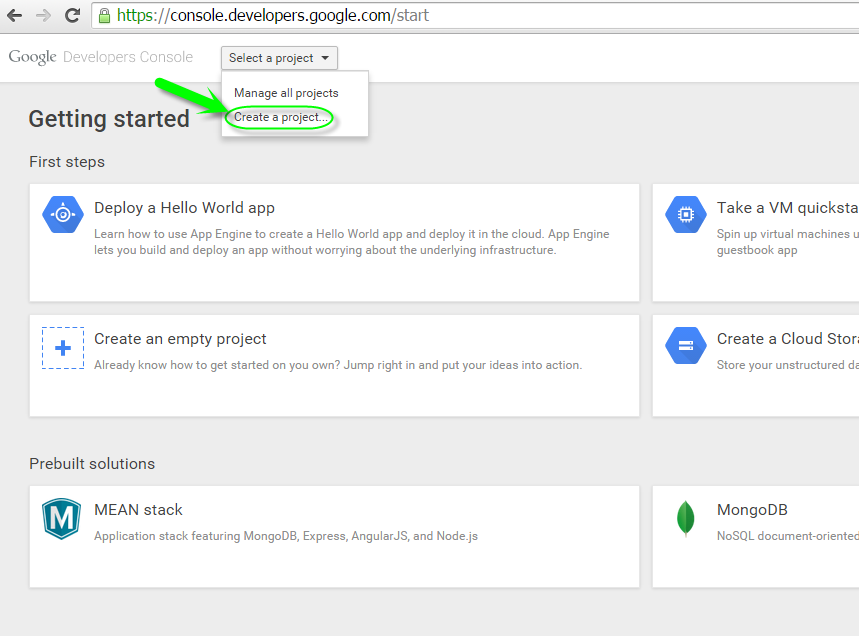
2/Login your google account & create a project:
#Press on Create a Project.
3/Fill in your Project’s Name :
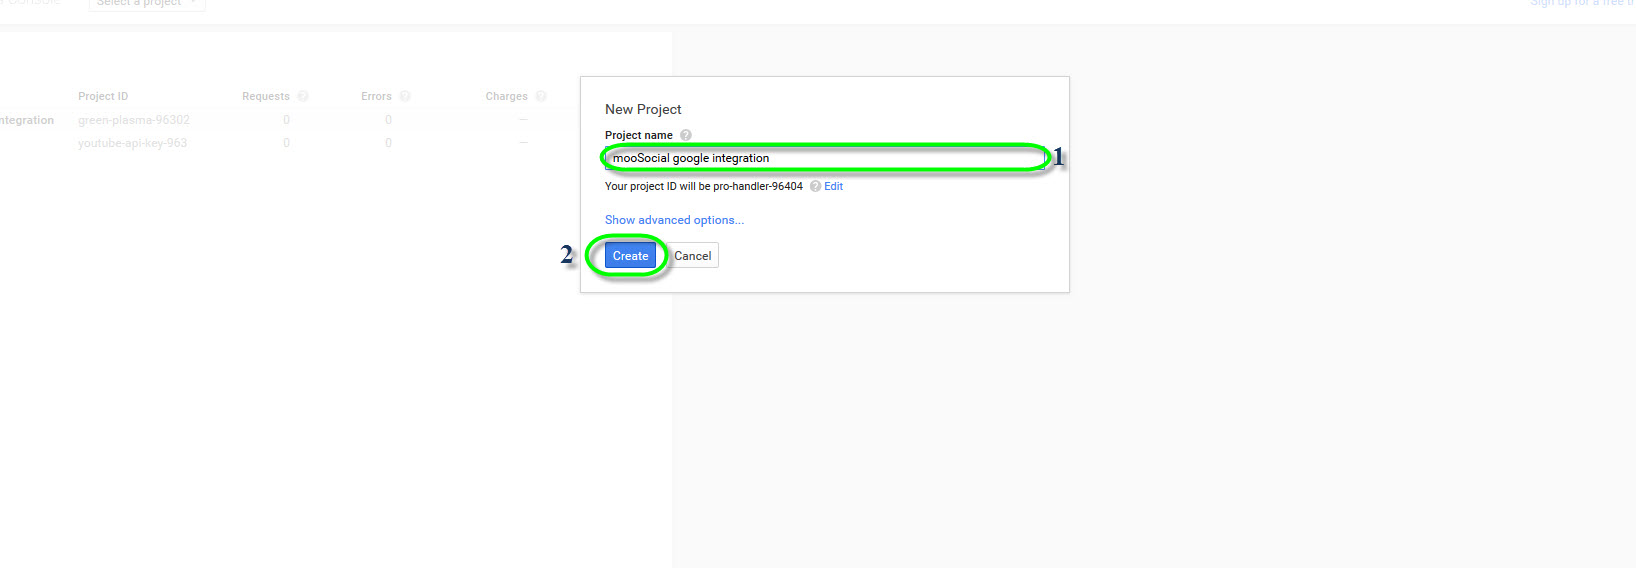
#1 Fill your project’s name
#2 Create
*Agree to Terms and Conditions if they’re showing up.
4/After your project is done creating, go to APIs & auth/APIs of your project :
#1 Select API tab
#2 Select Google+ API
5/Enable your Google+ API:
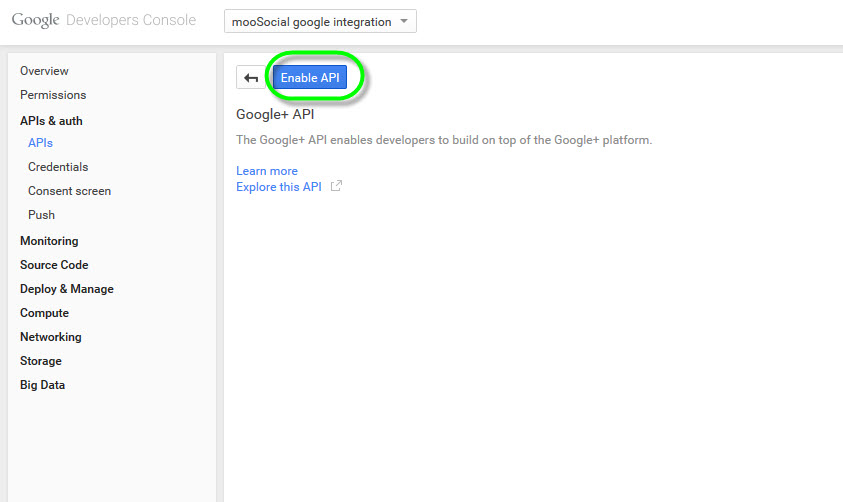
#Press on Enable API to enable.
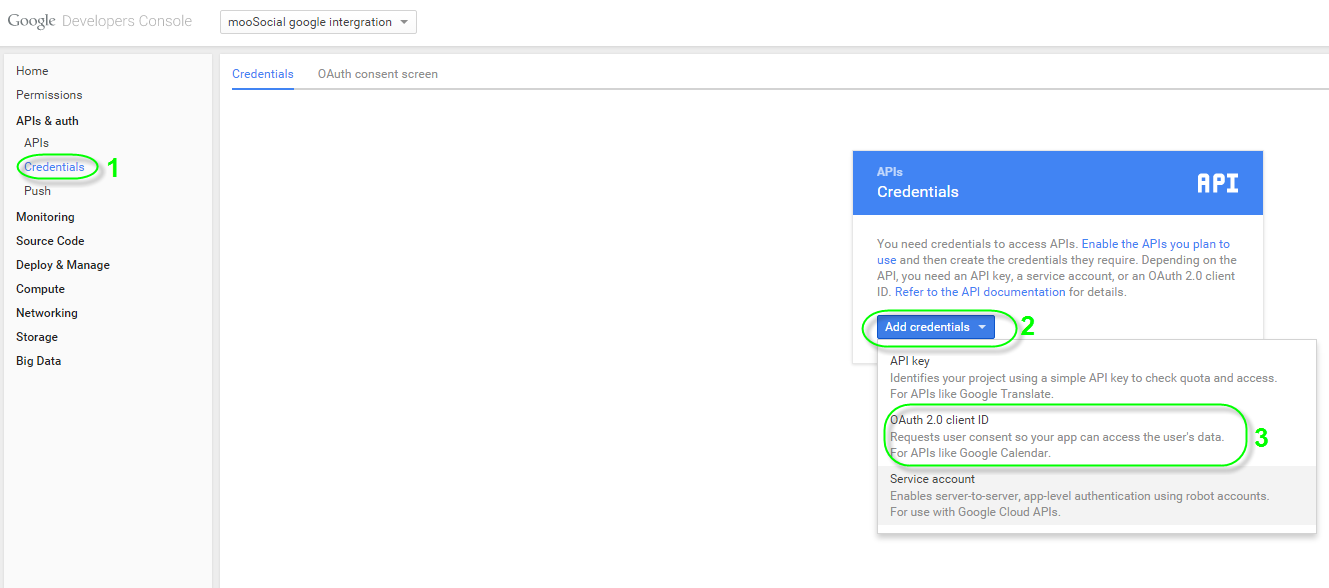
6/Go to Credentials tab, and add new credentials:
#1/Go to Credentials tab
#2/Add credentials.
#3/Select OAuth 2.0 client ID.
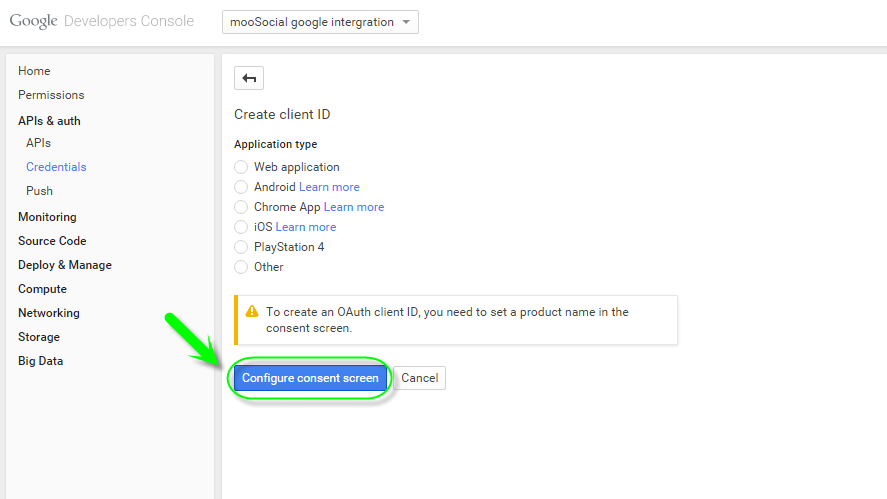
7/We have to configure consent screen first:
#Press on Configure consent Screen then continue
8/Register at your Consent Screen :
#1 Check your Email
#2 Enter your Product’s name
#3 Save
9/Once you had registered your consent screen, Start Creating Client ID :
#1 Select Web Application
#2 Enter your site’s domain
#3 Enter your callback’s URL, this URL has the format: [yoursite/social/auths/endpoint/google?hauth.done=Google]
#4 Create Client ID
10/ Review your Client ID, it should be looked like this:
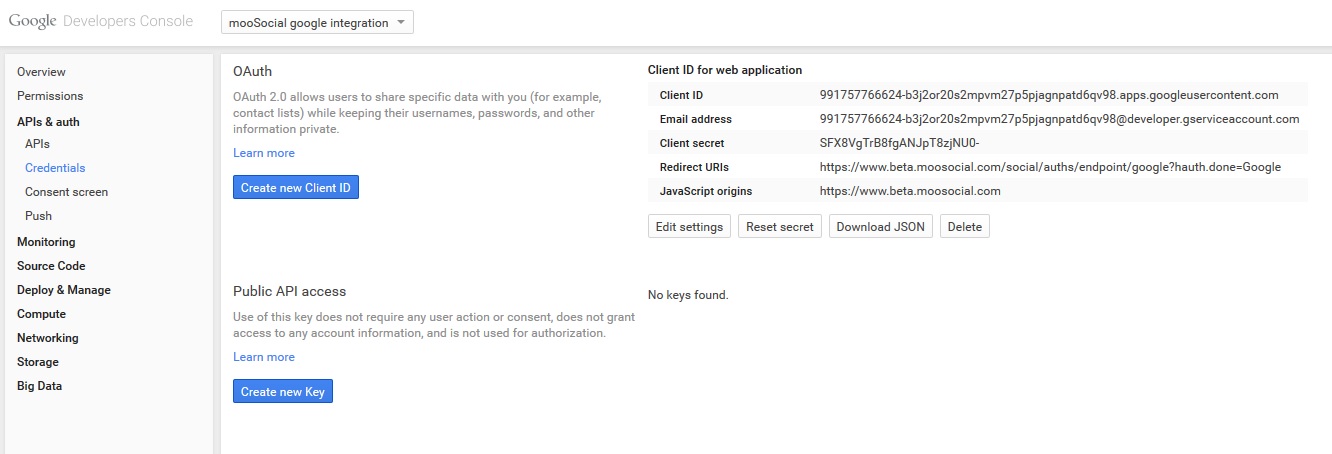
#Your Client ID
11/Go to Admin Dashboard/Socials Integration/Google, start configuring:
The Client Id on Google:

-Copy 1, 2, 3 to your settings Admin Dashboard/Socials Integration/Google one by one.
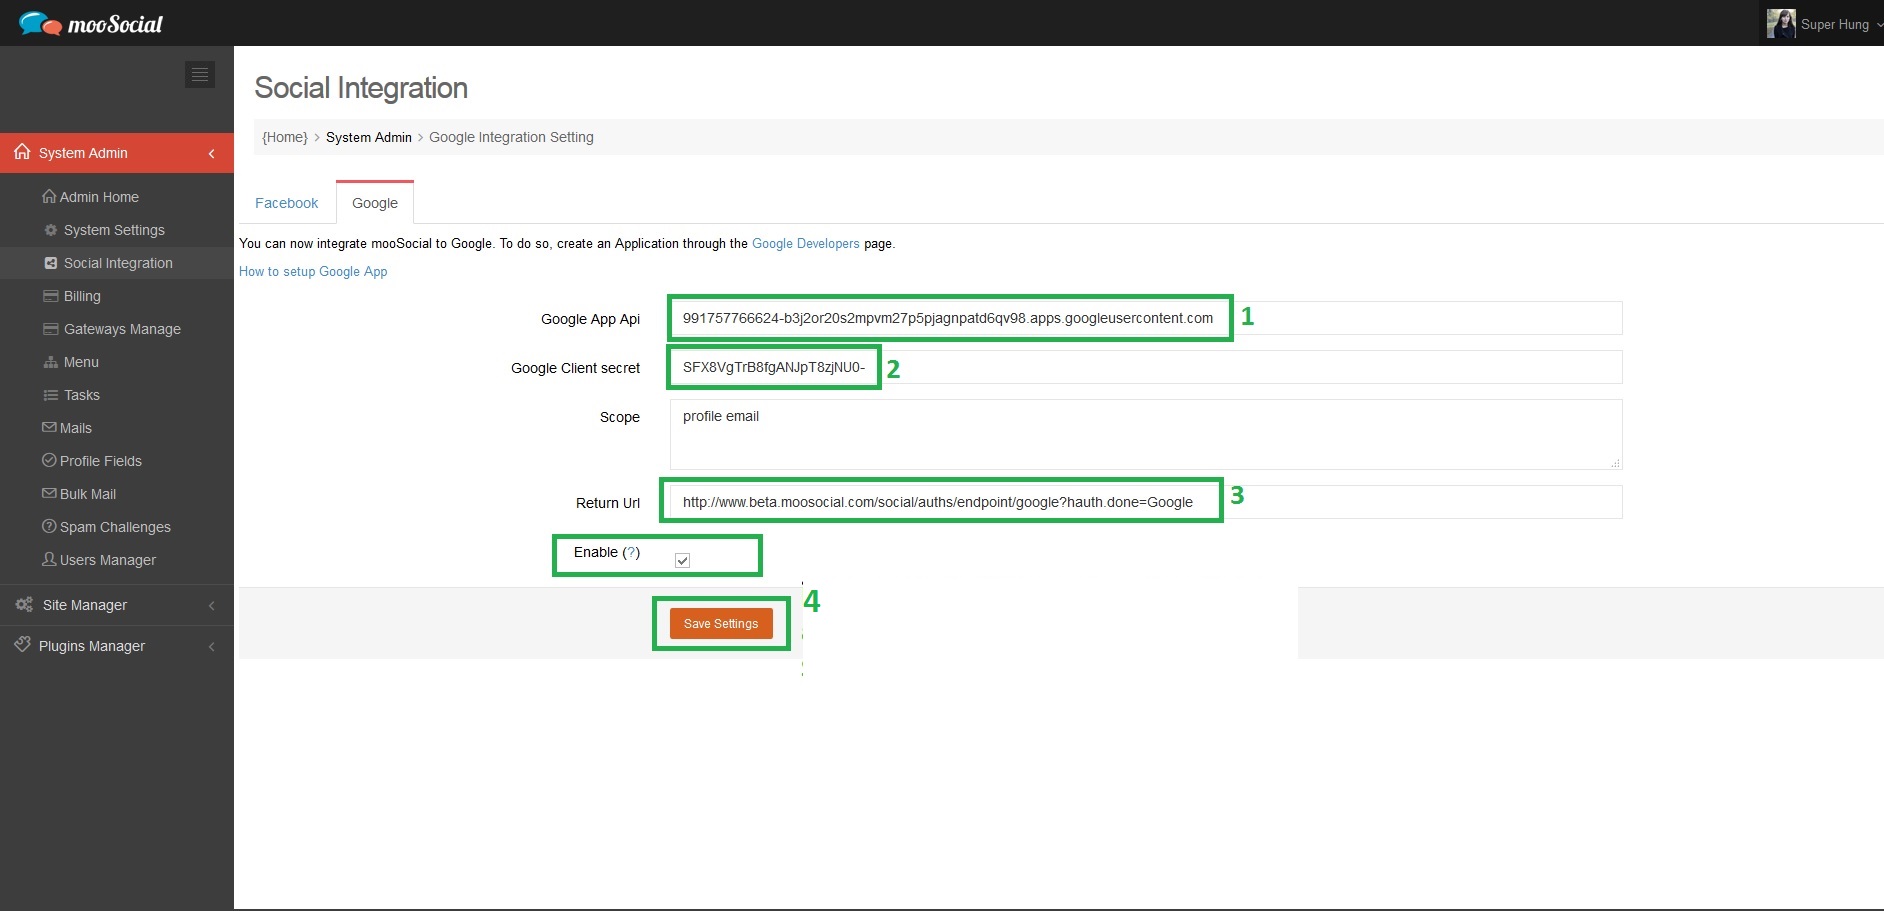
-Copy 1, 2, 3 to your settings Admin Dashboard/Socials Integration/Google one by one.
-Enable, check!
-Save Settings
*Remember to check if any space in the fields.
*Remember your site could be [https] instead of [http], they will not recognize if site was [https] and Client ID & Admin Dashboard were [http].
* Both sides, Admin Dashboard and Client ID must be configured synchronously for the 1, 2, 3, they must be same to each others.
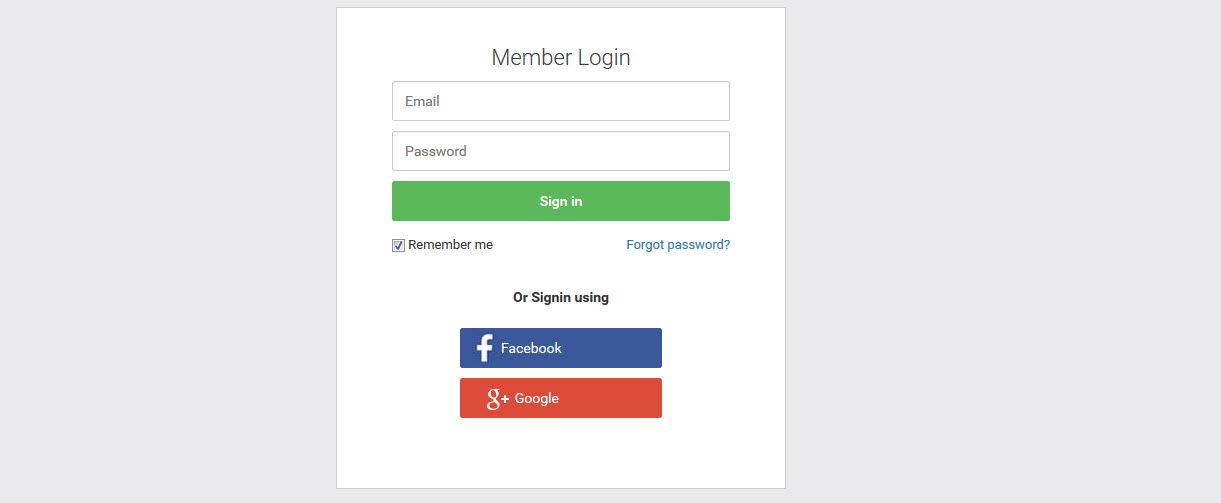

Your Login Page and Sign Up Page should be looking like this, with Facebook and Google button

