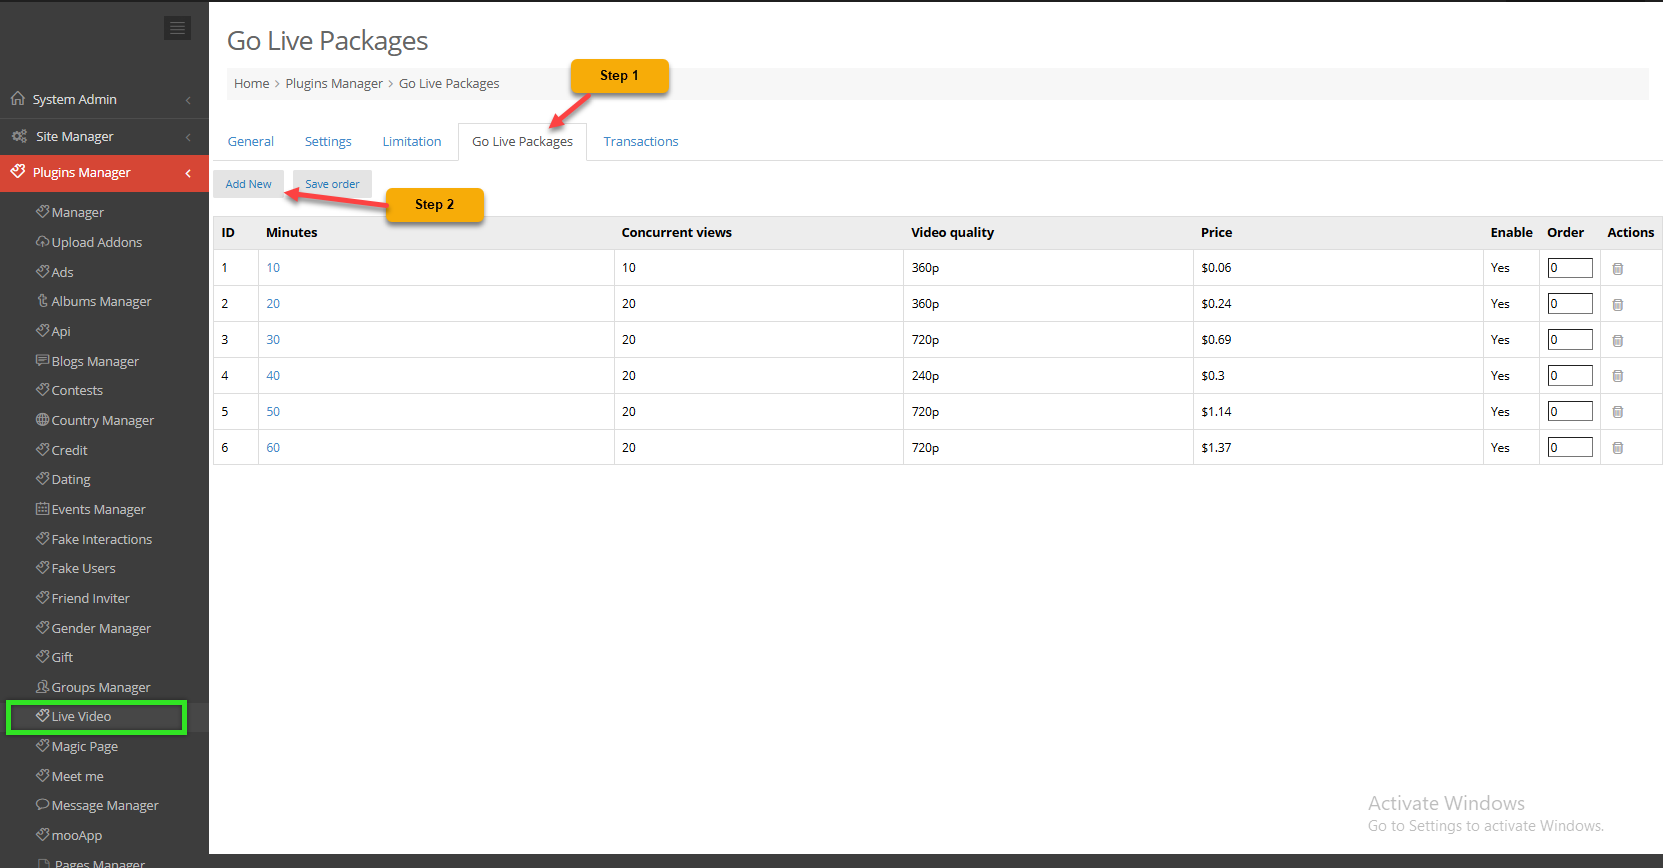
STEP 1: Access Admin Dashboard => Plugins Manager => Live Video => Go Live Packages tab
STEP 2: Click on “Add New” button
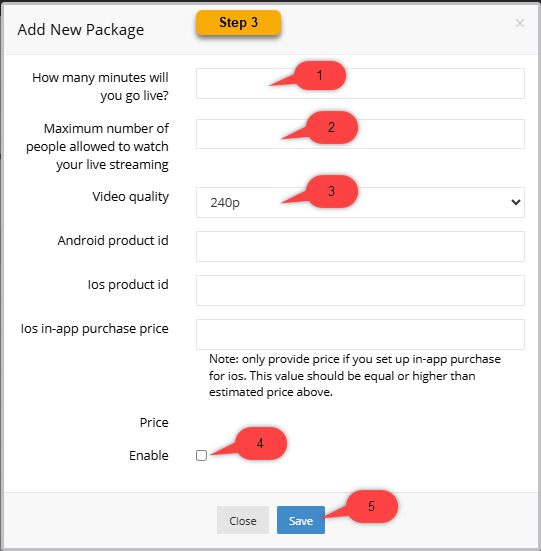
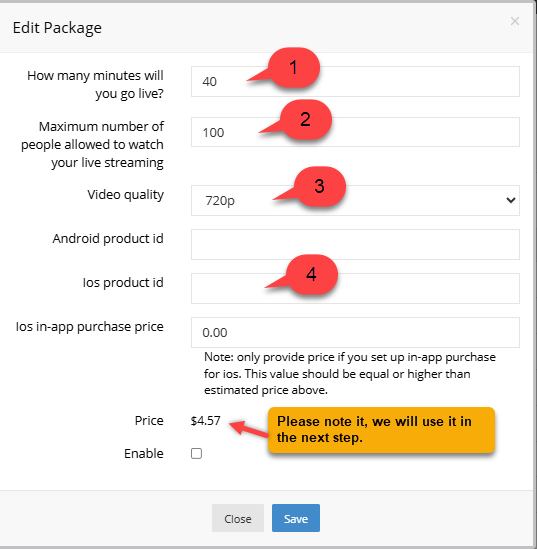
STEP 3: “Add New Package” pop-up display
1. How many minutes will you go live? – Enter the livestream duration for the package.
2. Maximum number of people allowed to watch your live streaming – Enter the maximum number of viewers for the livestream.
3. Video quality – Select the video quality for the host’s livestream.
4. iOS product id – Enter product id as you want. Example: product_001
Must start with a number or lowercase letter, and can contain numbers (0-9), lowercase letters (a-z), underscores (_), and periods (.).
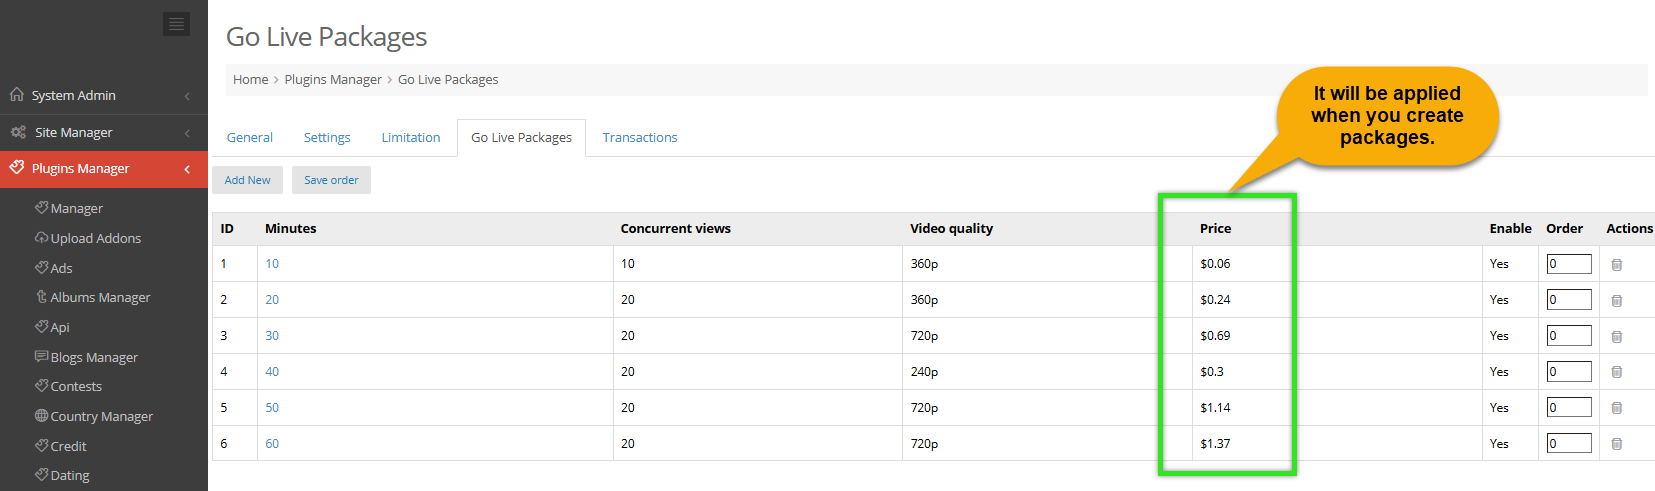
– The price will be displayed. Please note, we will use it in the next step.
STEP 4: Open new tab => Go to https://appstoreconnect.apple.com/ then login
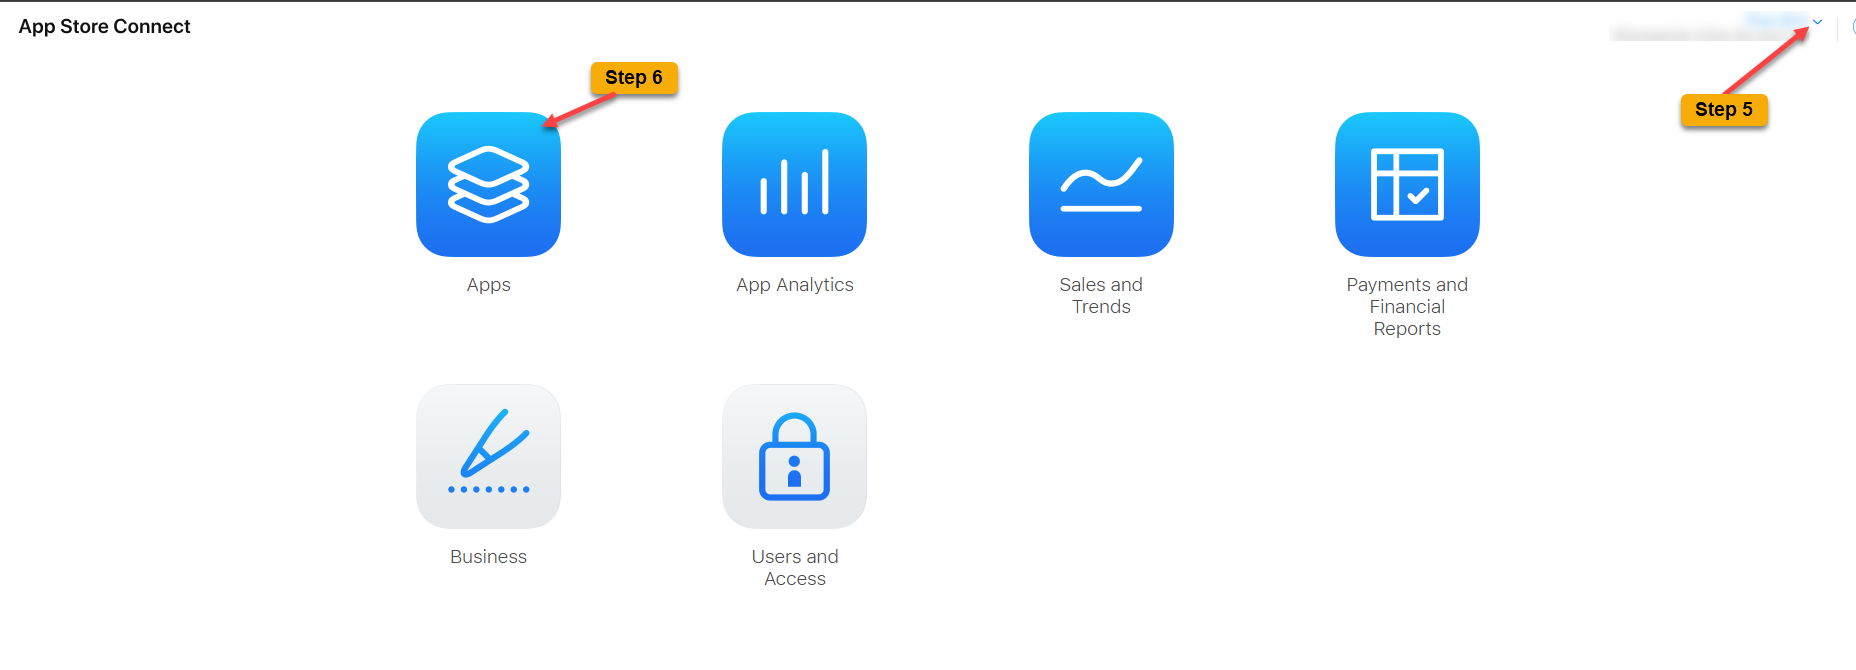
STEP 5: at App store Connect, Click the dropdown menu and select the company your app belongs to.
STEP 6: Click on App
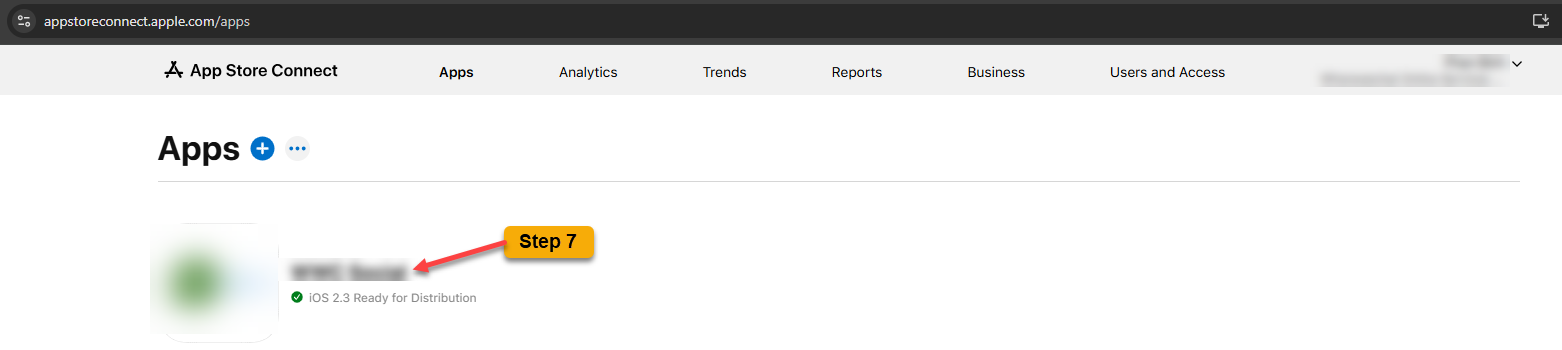
STEP 7: Click on your project
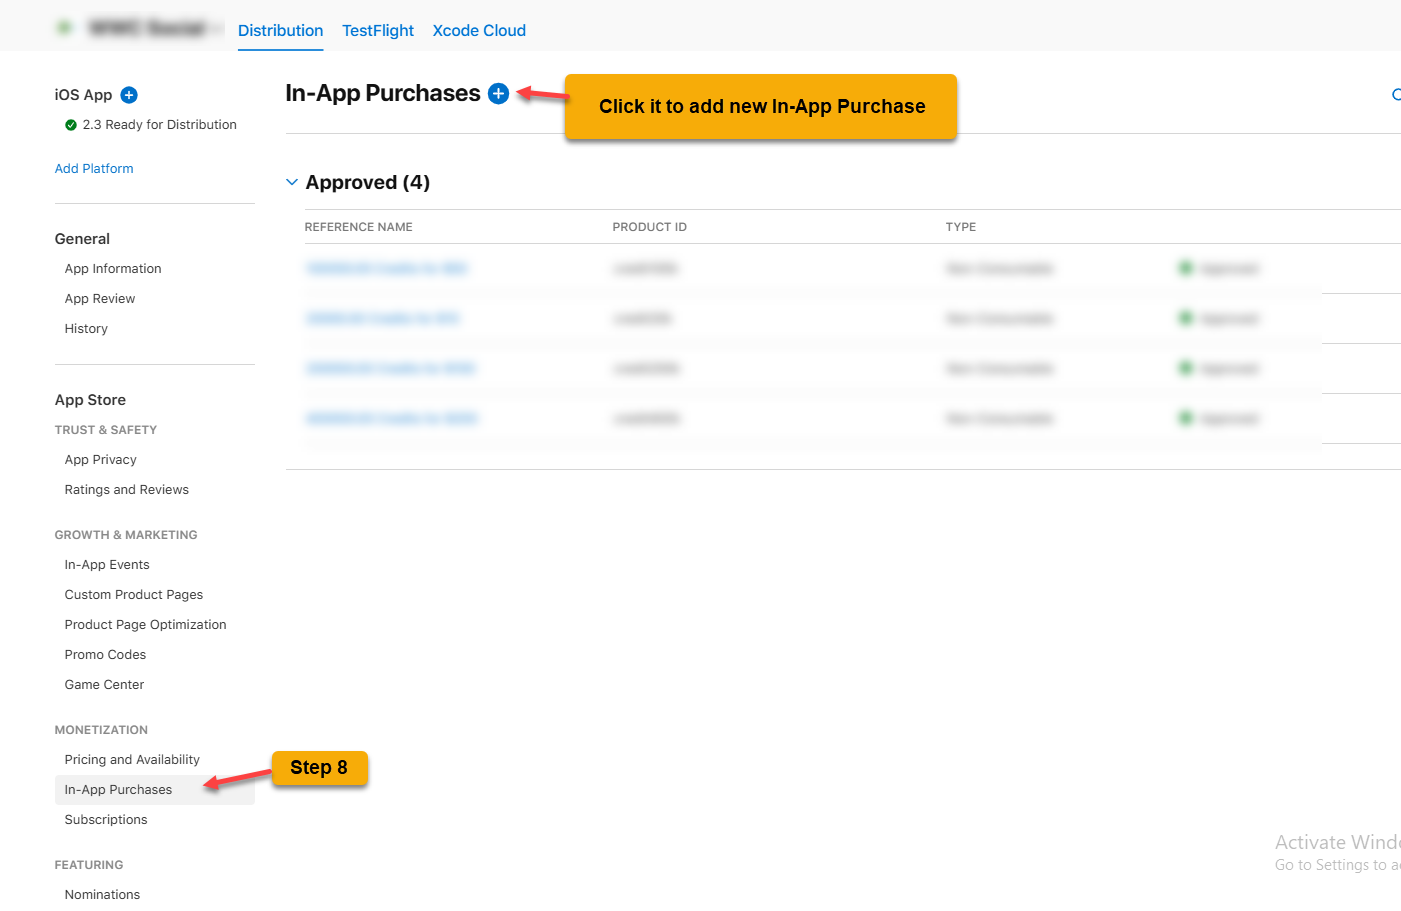
STEP 8:
Click on In-App Purchase
Then click on ( + ) to add new In-App Purchase
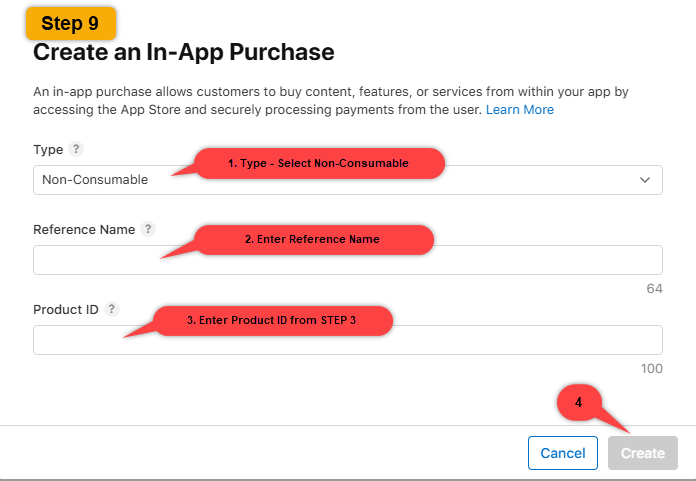
STEP 9: a pop-up Create an In-App Purchase display
Enter all fields
1. Type – Select Non-Consumable
2. Reference Name – Enter Reference Name as you want
3. Product ID – Enter Product ID from STEP 3. Example: product_001
4. Click Create
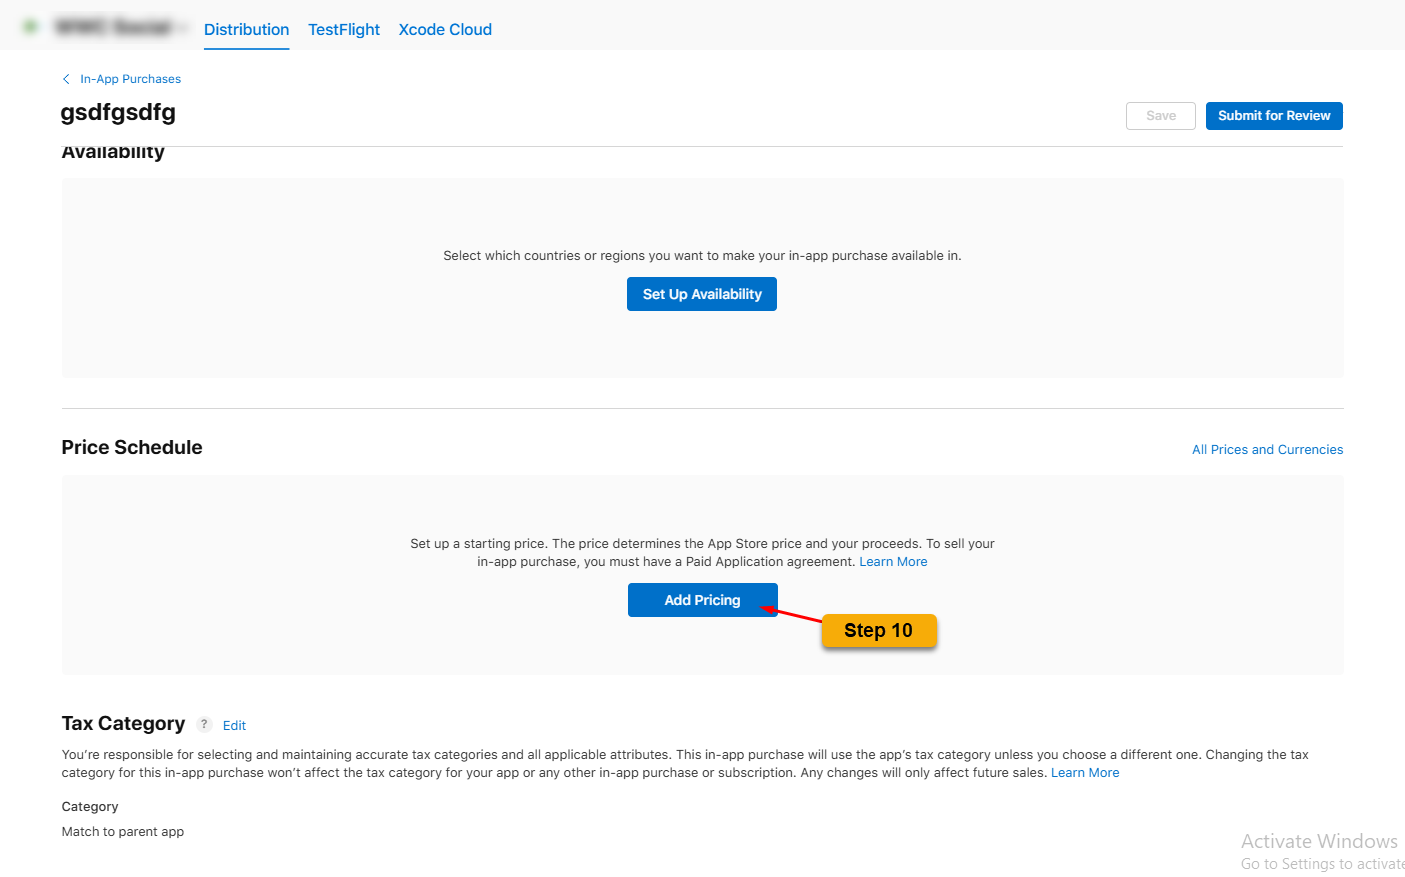
STEP 10: in a In-App Purchase
Click on Add Pricing
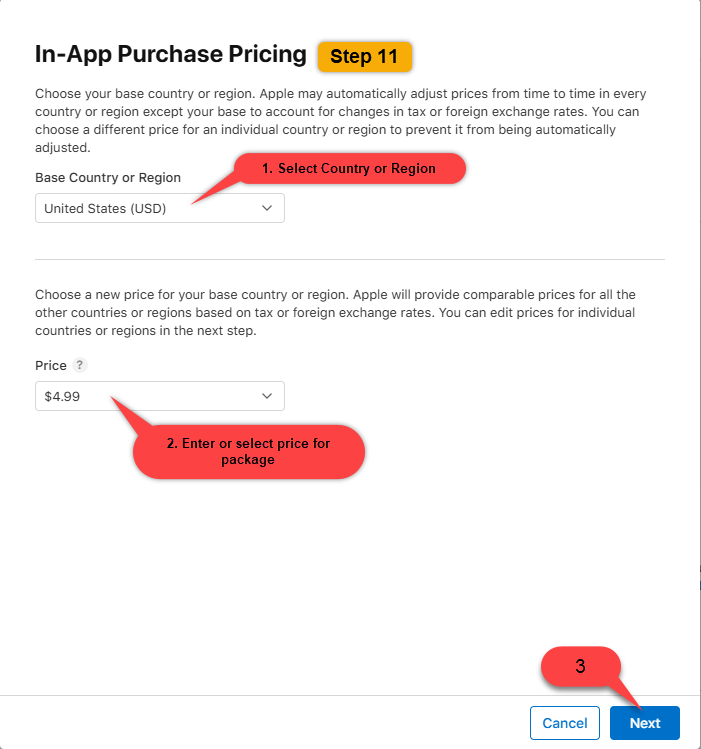
STEP 11: in In-App Purchase Pricing pop-up
1. Base Country or Region – Select Country or Region
2. Price – Select the price. Example: 4.99
In STEP 3, the estimated price is $4.75. The price must be equal to or higher than the estimated amount, so $4.99 was selected.
3. Click Next
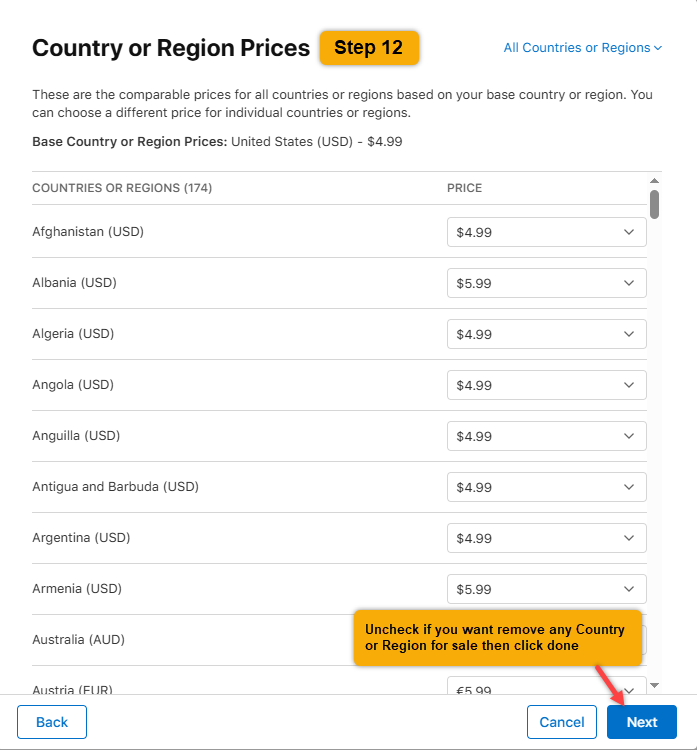
STEP 12: Next to Country or Region Prices pop-up
You can edit Country or Region Prices as you want then click Next
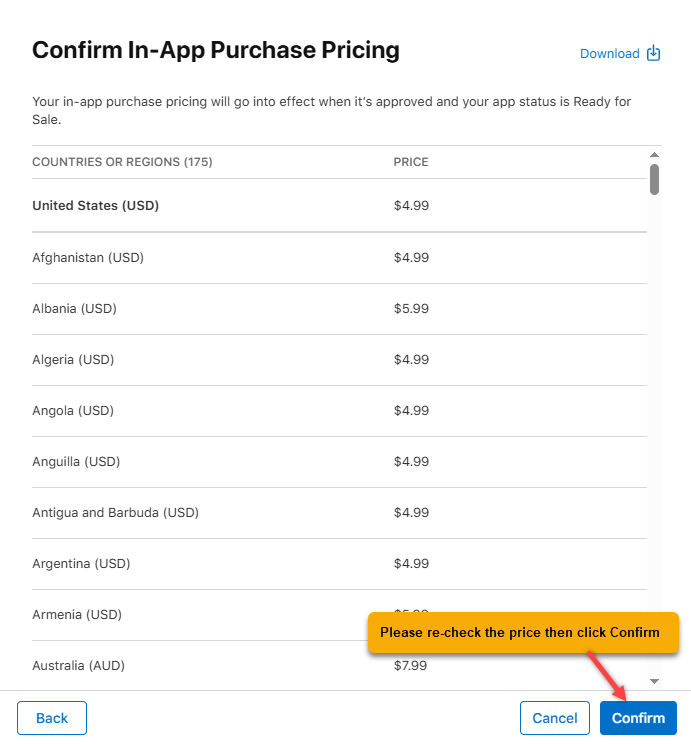
Next to Confirm In-App Purchase Pricing pop-up, please recheck then click Confirm
STEP 13: Click on Set Up Availability
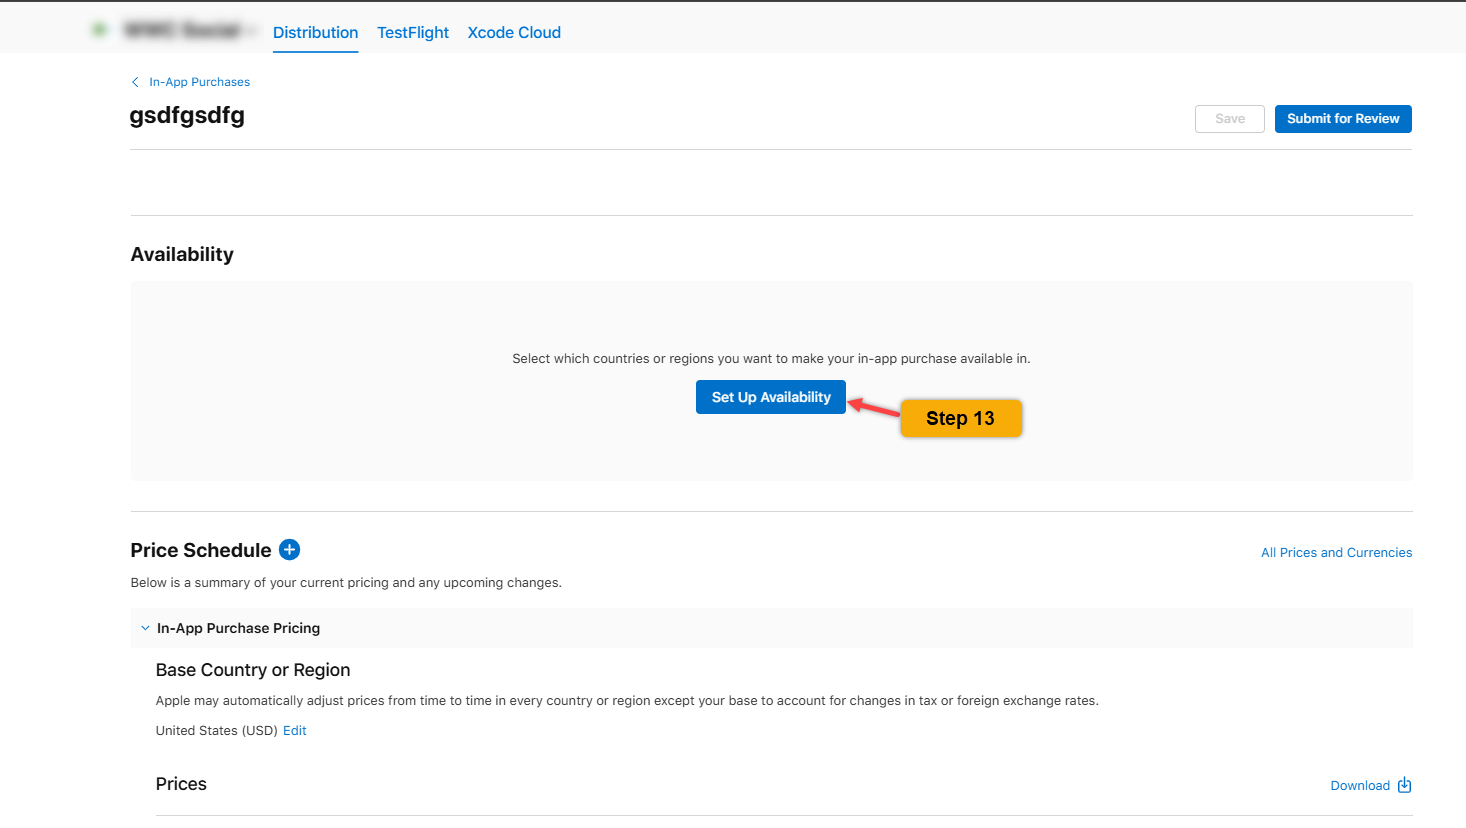
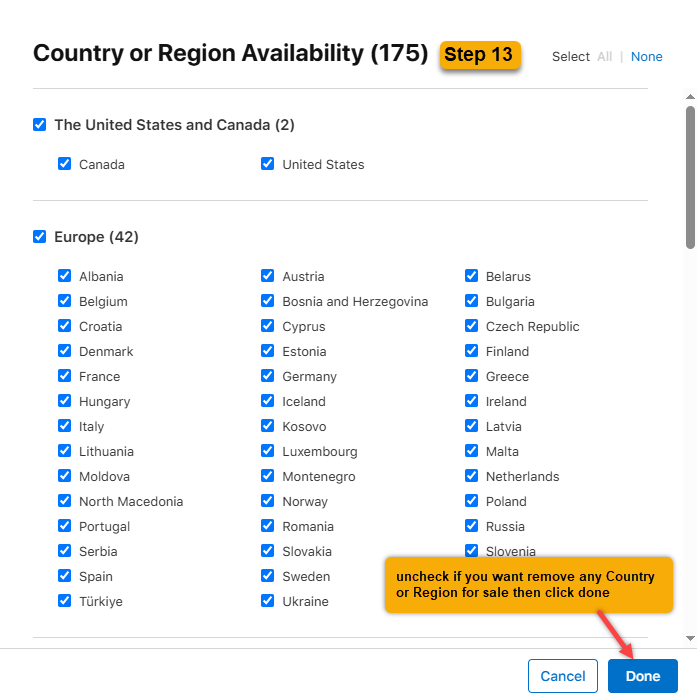
Country or Region Availability pop-up will display
All Country or Region was checked as default, uncheck if you want remove any Country or Region for sale
Then click Done
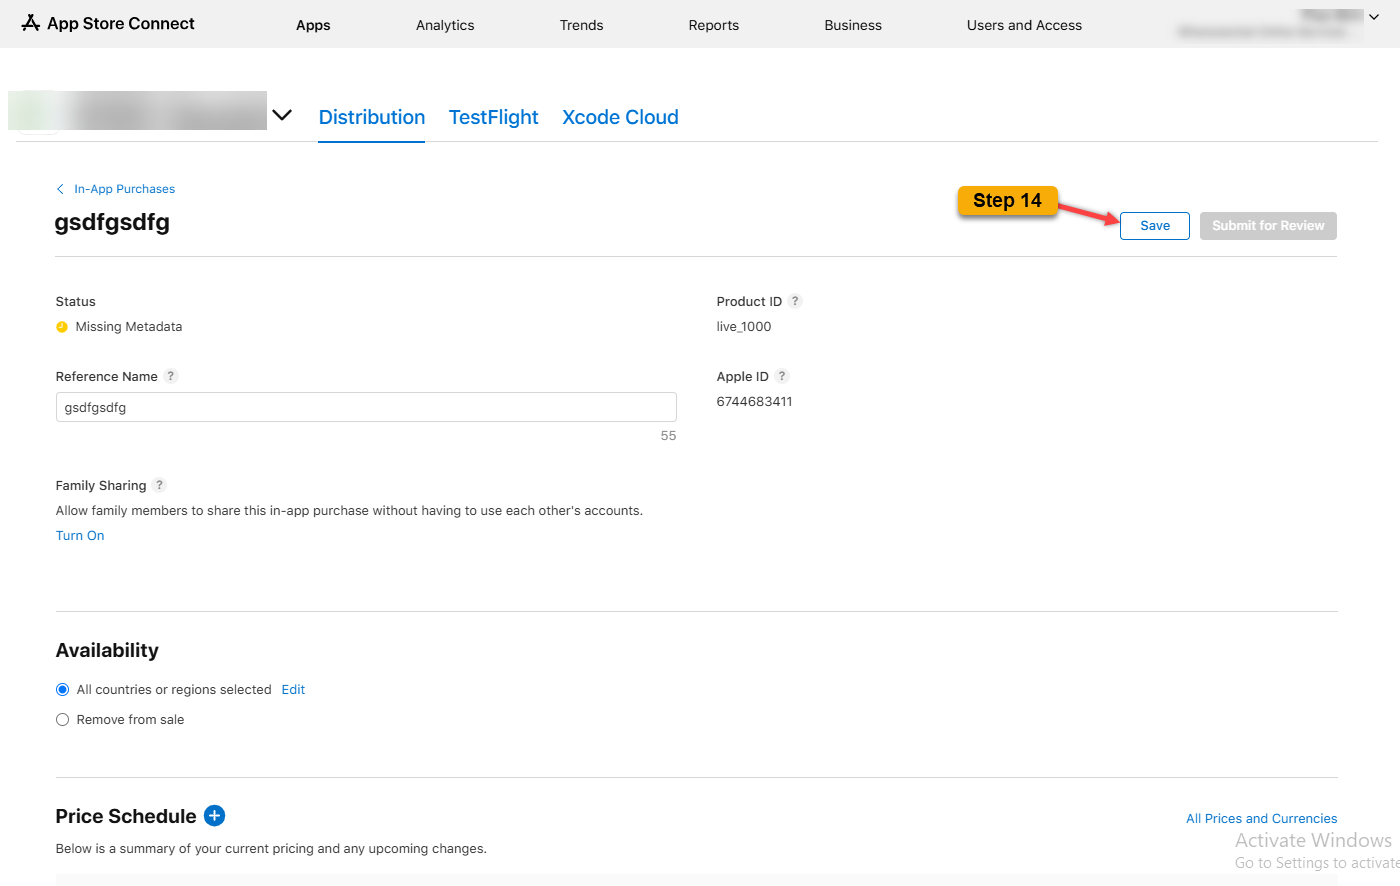
STEP 14: Click Save
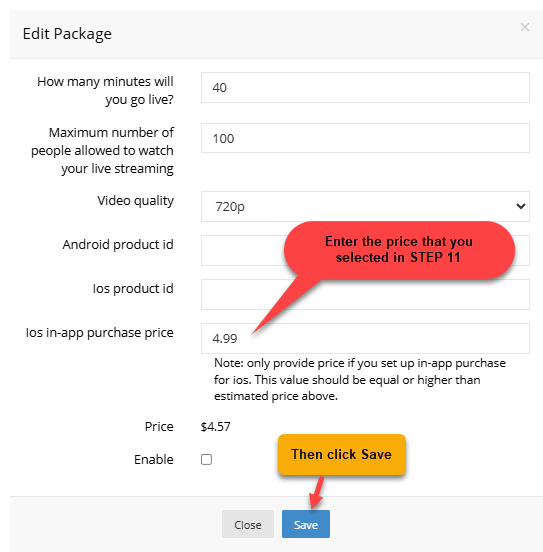
STEP 15: Back to tab in STEP 3
At iOS in-app purchase price – enter the price that you selected in STEP 11 Example: 4.99
Then click Save
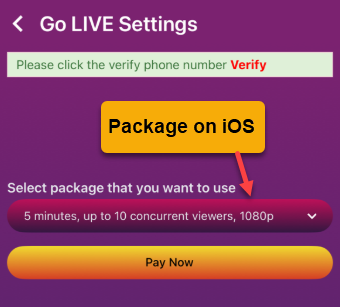
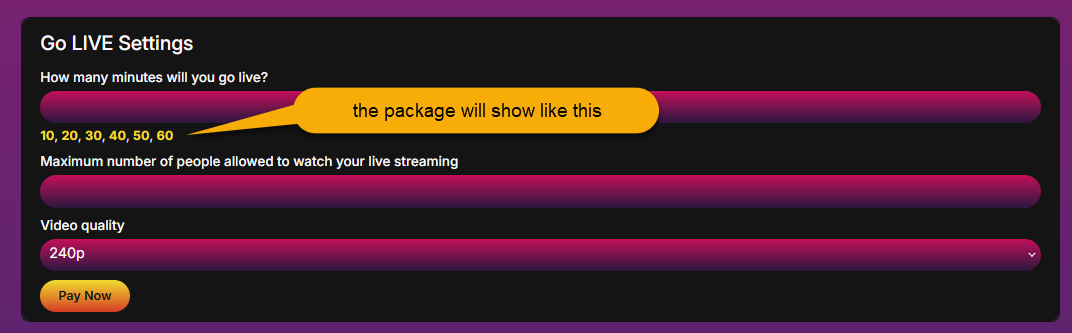
After Save, the package will appear like this on the iOS App.