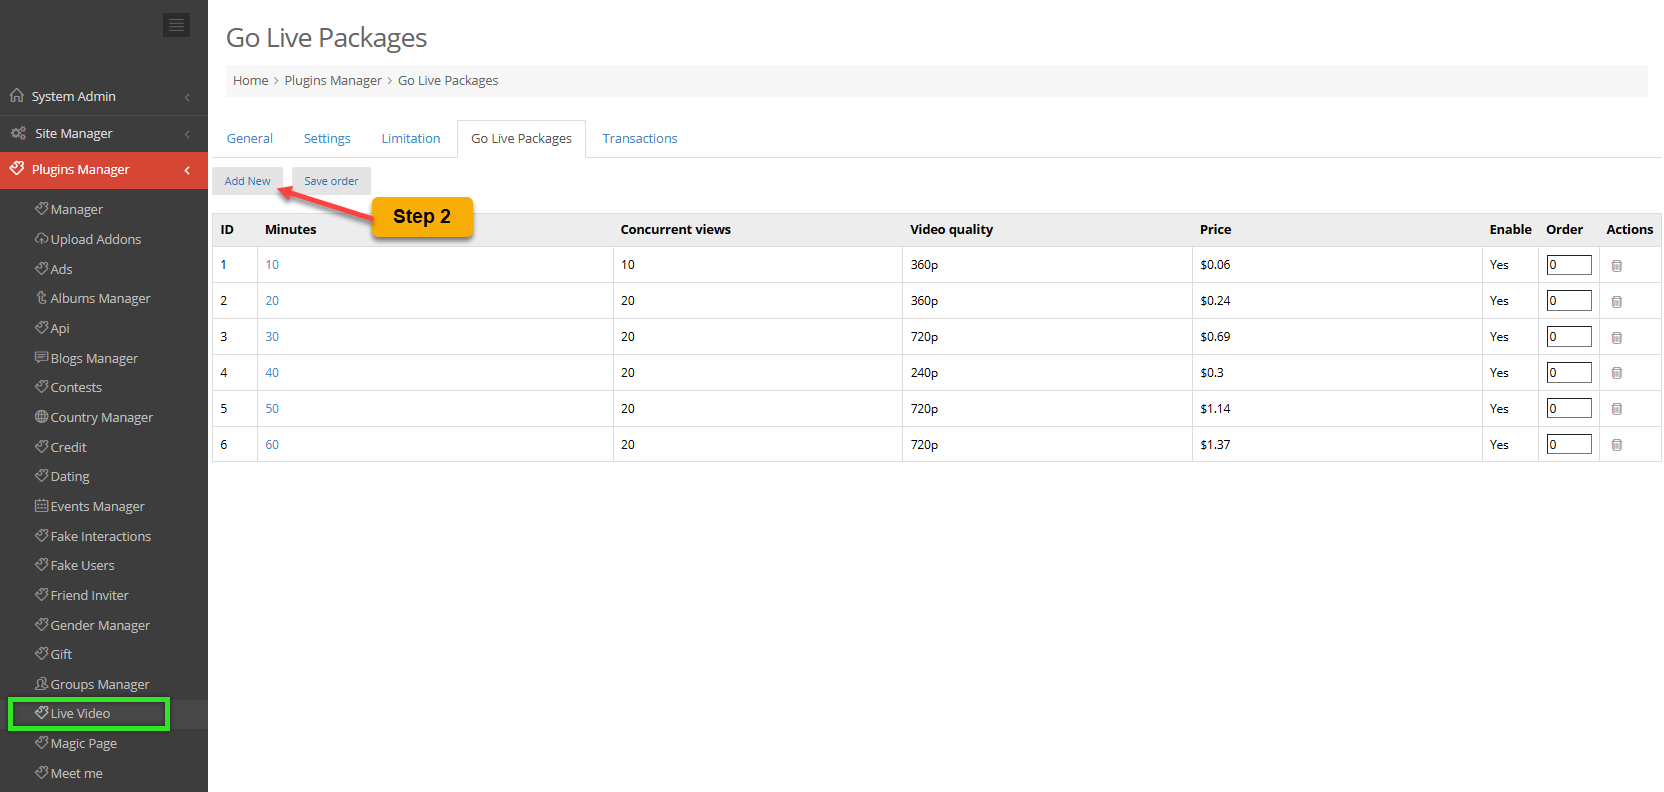
STEP 1: Access Admin Dashboard => Plugins Manager => Live Video => Go Live Packages tab
STEP 2: Click on “Add New” button
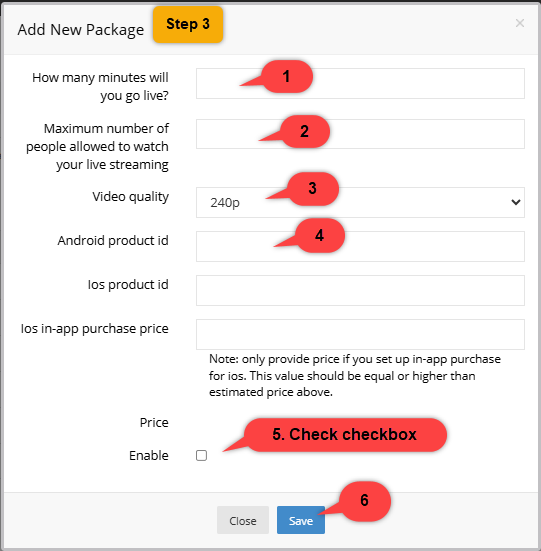
STEP 3: A pop-up “Add New Package” display
Enter all fields
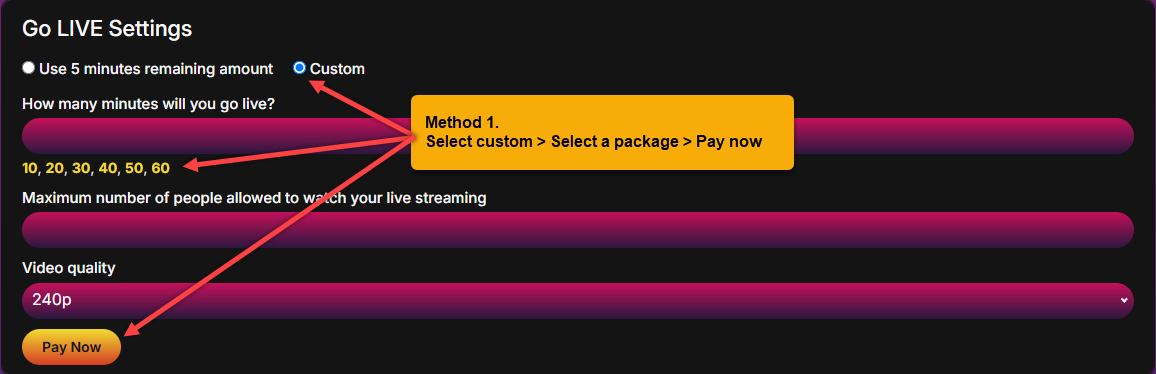
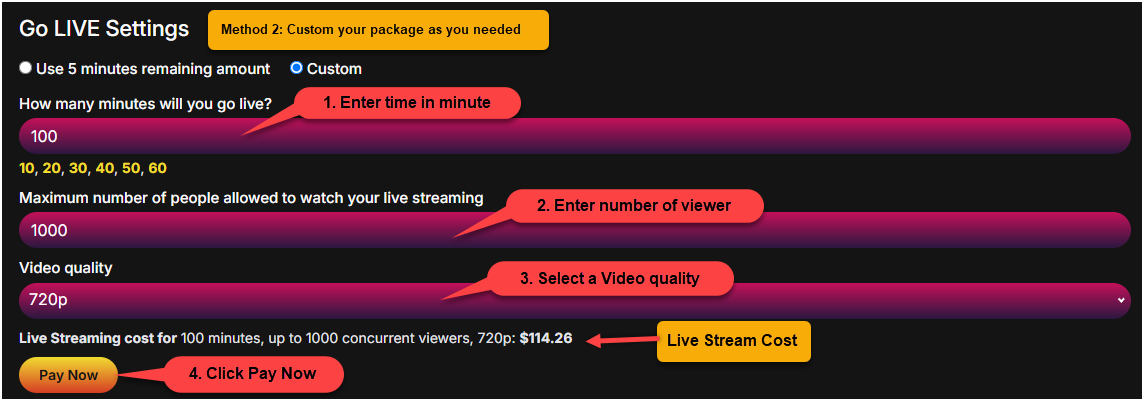
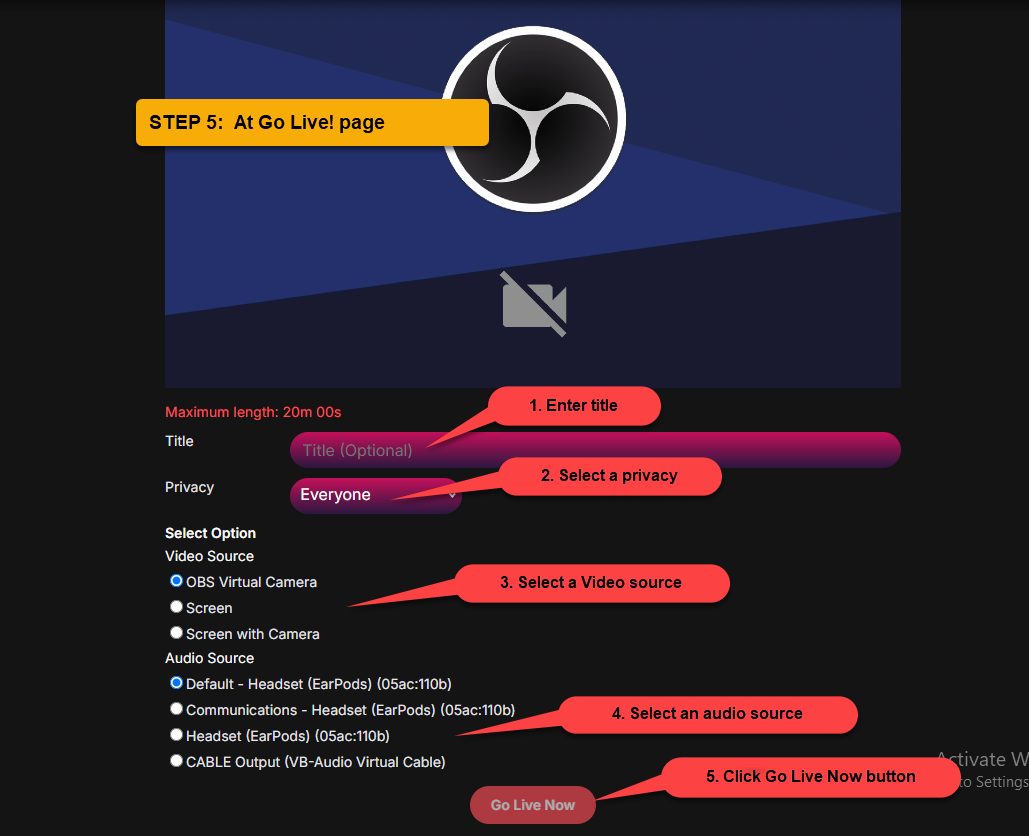
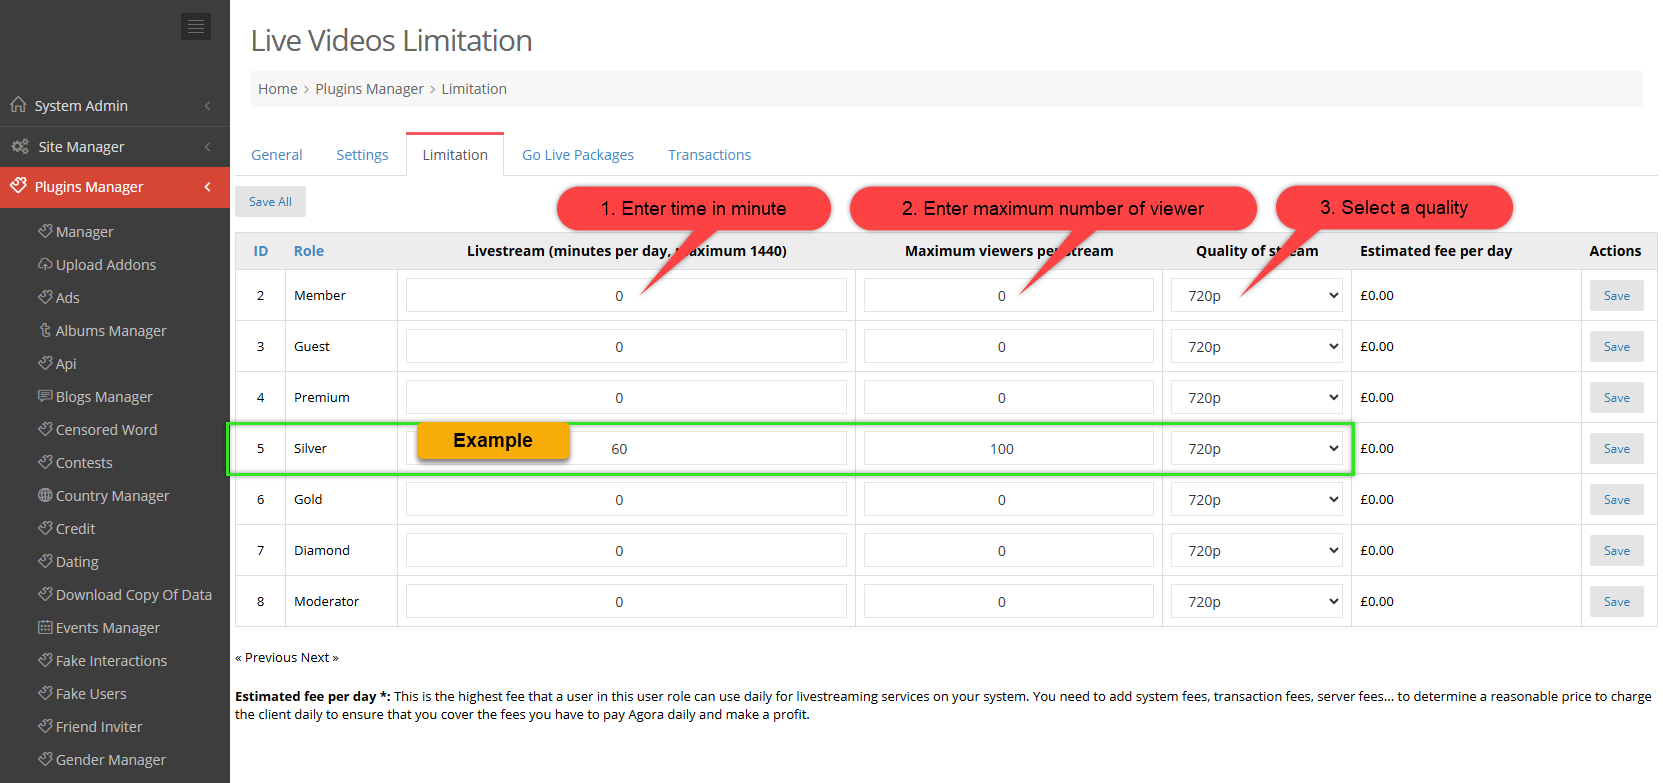
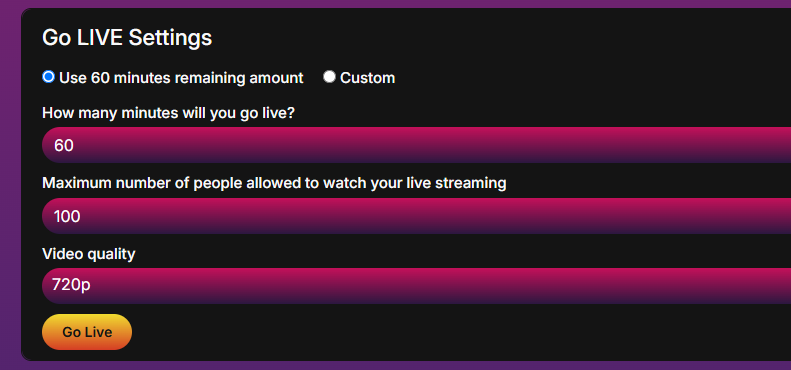
1. How many minutes will you go live? – Enter the livestream duration for the package.
2. Maximum number of people allowed to watch your live streaming – Enter the maximum number of viewers for the livestream.
3. Video quality – Select the video quality for the host’s livestream.
4. Android product id -Enter product id as you want. Example: product_001
Must start with a number or lowercase letter, and can contain numbers (0-9), lowercase letters (a-z), underscores (_), and periods (.).
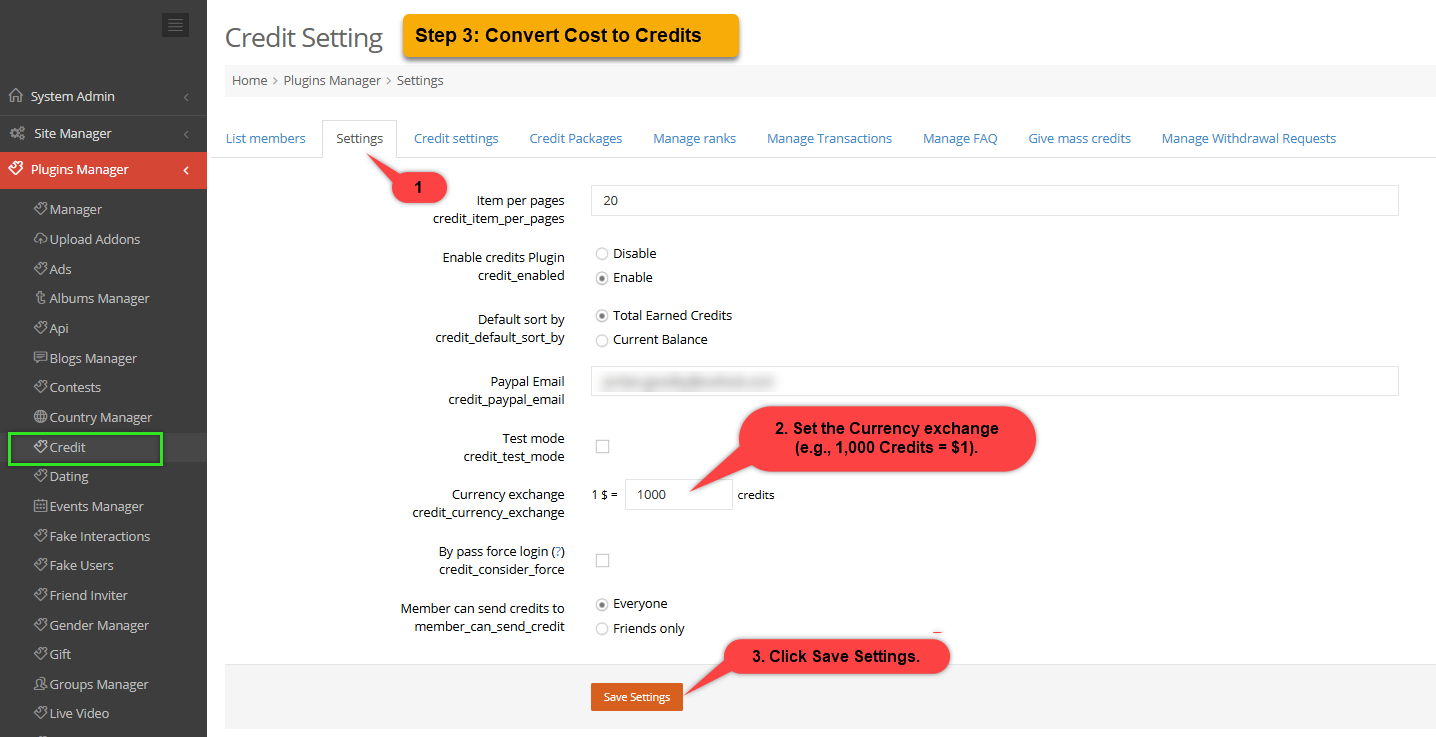
– The price will be displayed. Please note, we will use it in the next step.
5. Enable – Check checkbox
6. Click “Save” button
STEP 4: Go to https://play.google.com/console then login
Select a developer account

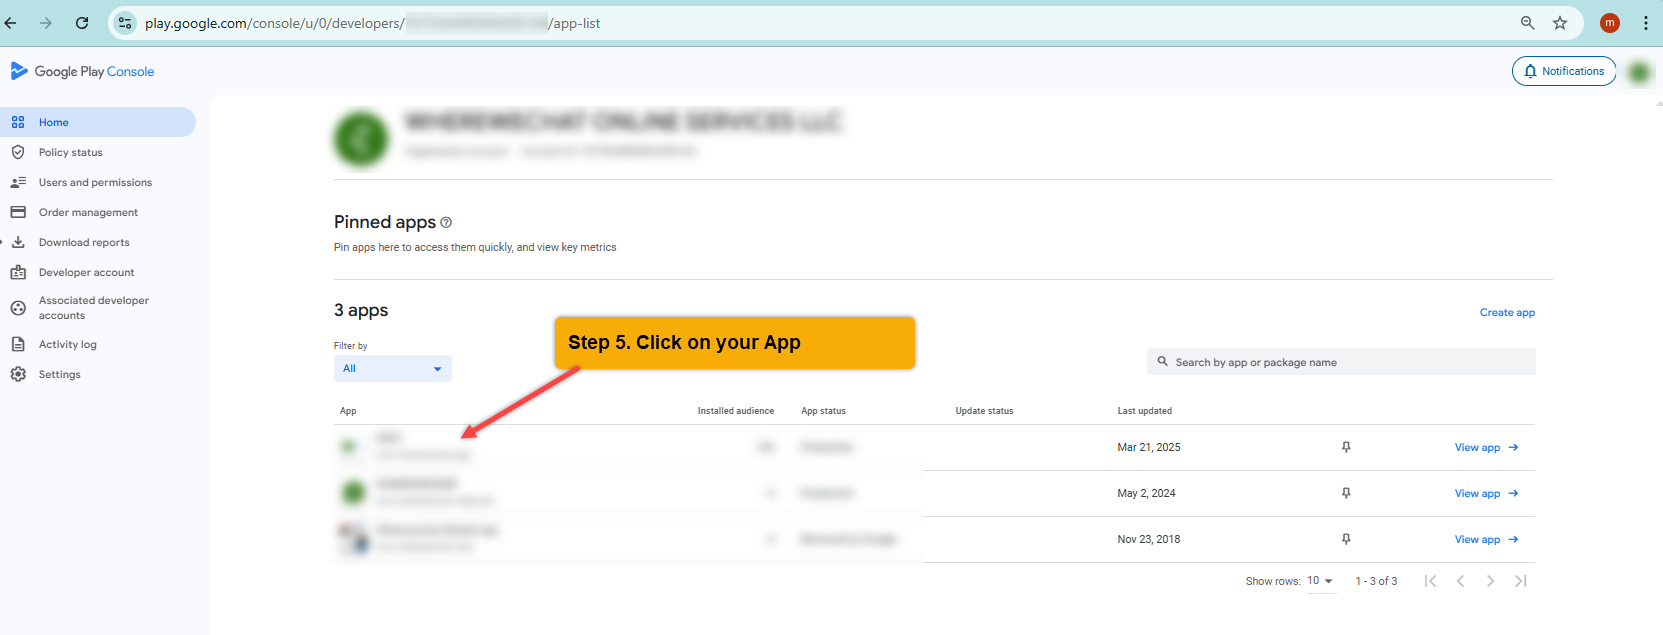
STEP 5: Click on your App
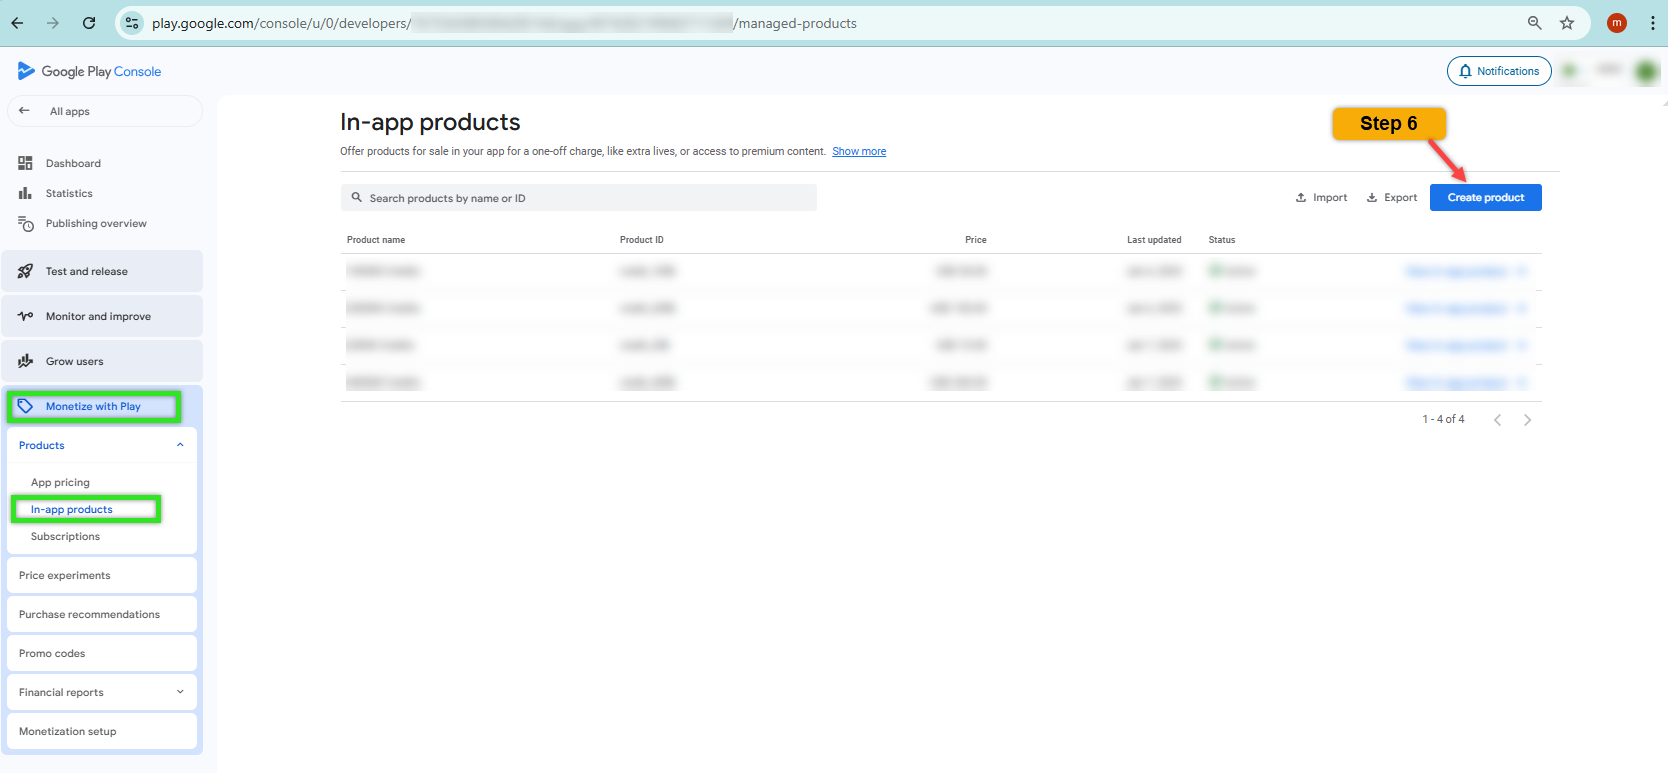
STEP 6: at Dashboard
Access Monetize with Play => Products => In-app products => Create product
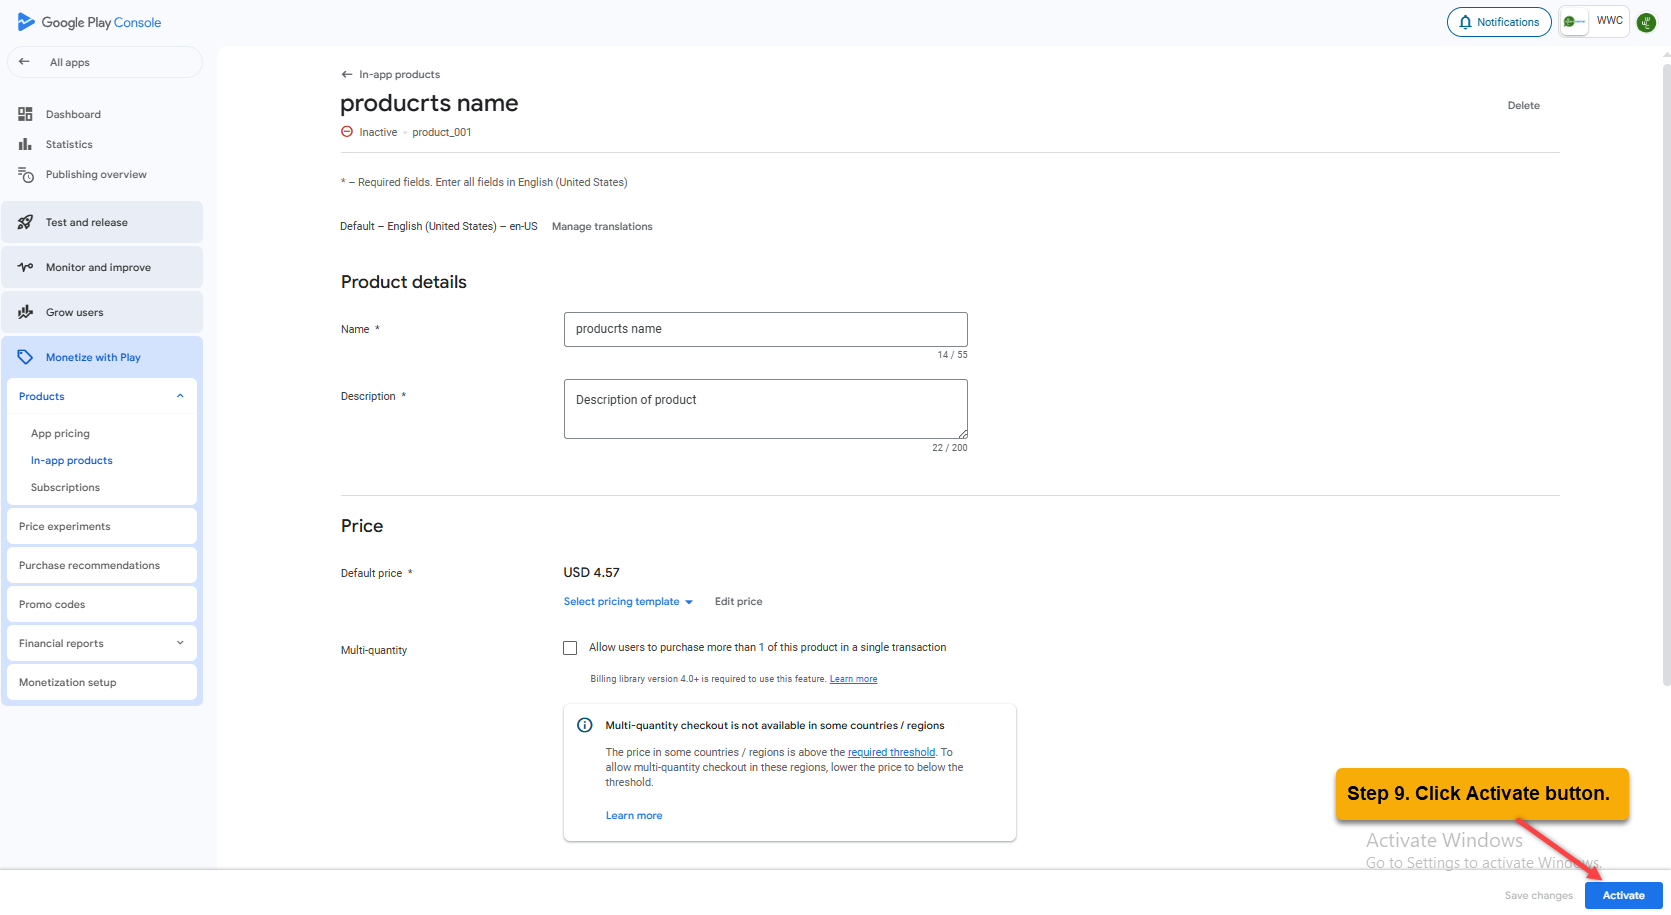
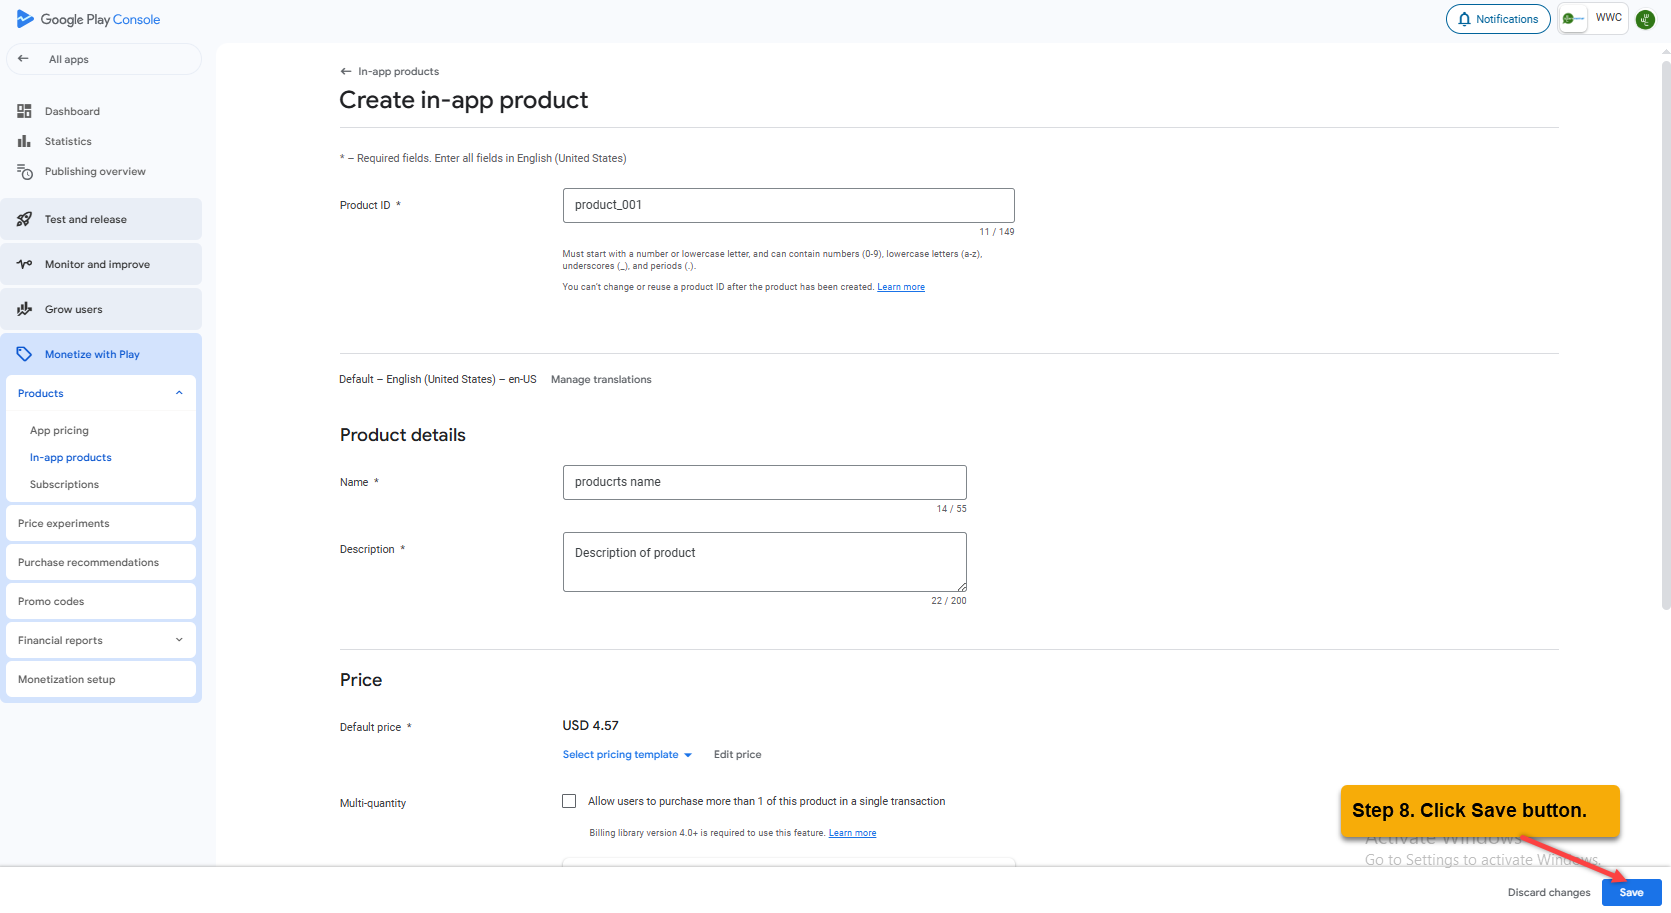
STEP 7: at Create in-app product
1. Product ID – Enter Product ID from STEP 3. Example: product_001
2. Name – Enter Product’s name
3. Description – Enter Description
4. Default price – Click Set price

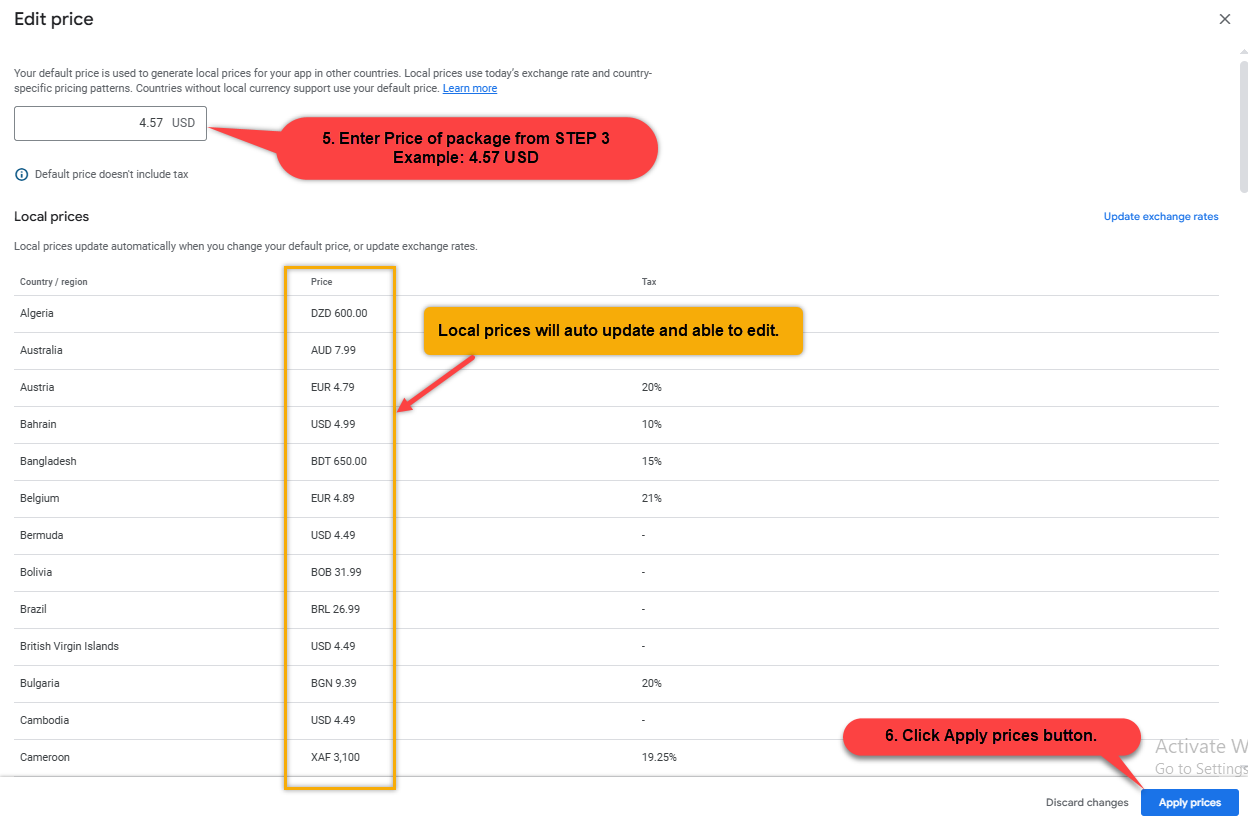
5. at Edit price
Enter Price of package from STEP 3. Example: 4.57.
> Local prices will auto update and able to edit.
6. Click Apply prices button.
STEP 8: Click Save button.
STEP 9: Click Activate button.