Archives

How to change color and customize theme in 3.1.5 or above?

1. Login to your admin dashboard

2. Go to Site manager > Theme Manager

3. Click Default Theme

4. Click Theme Settings Tab

5. Select Light to apply on Normal Theme

6. Select Section to customize

7. Appearance Setting

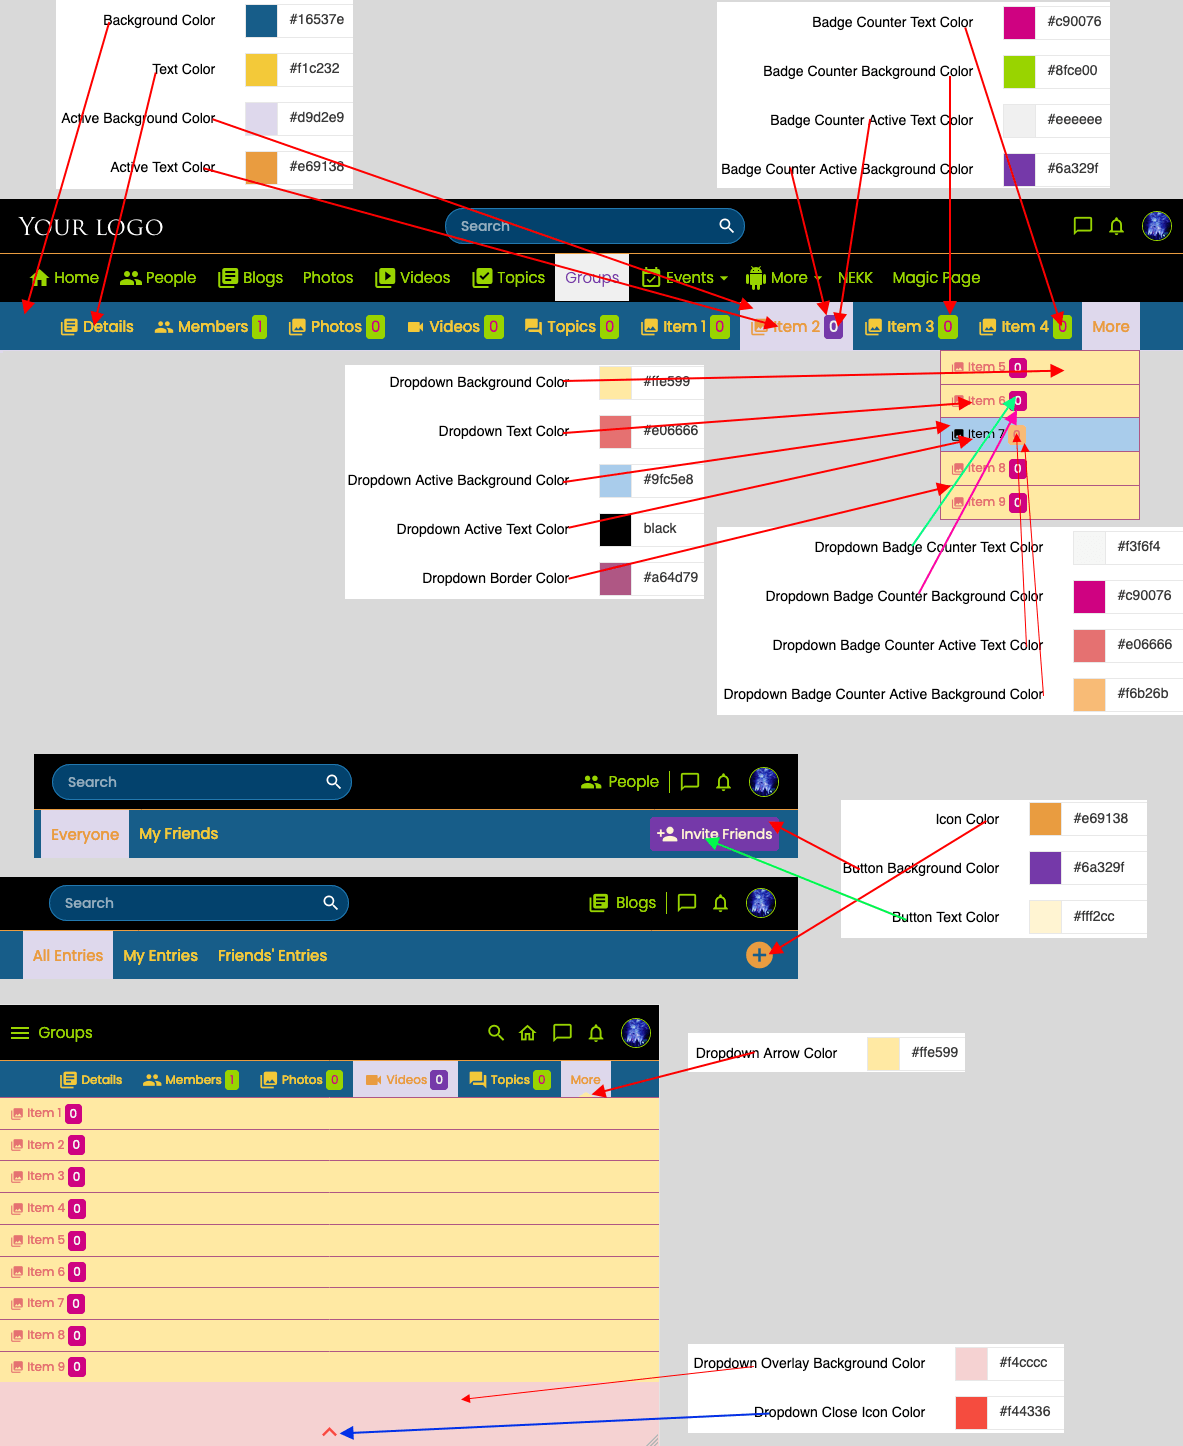
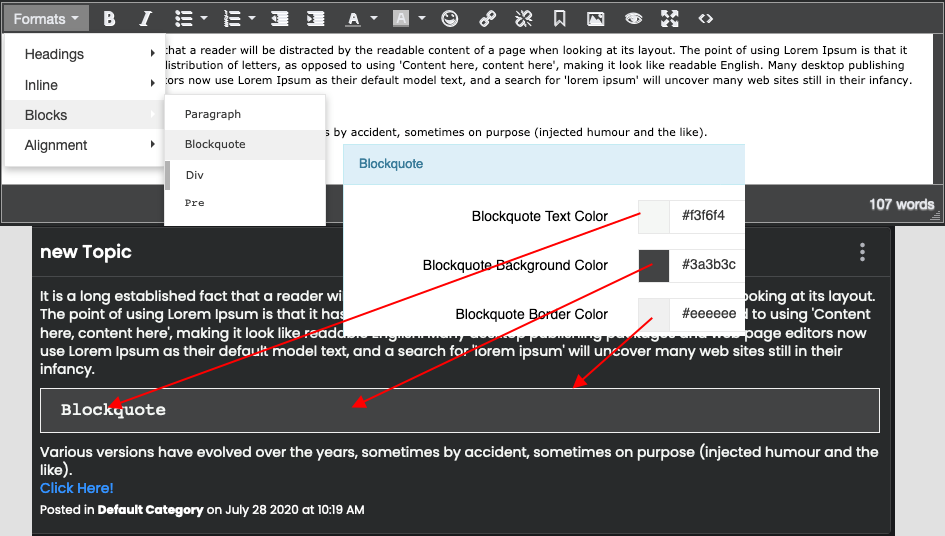
# Layout Tab

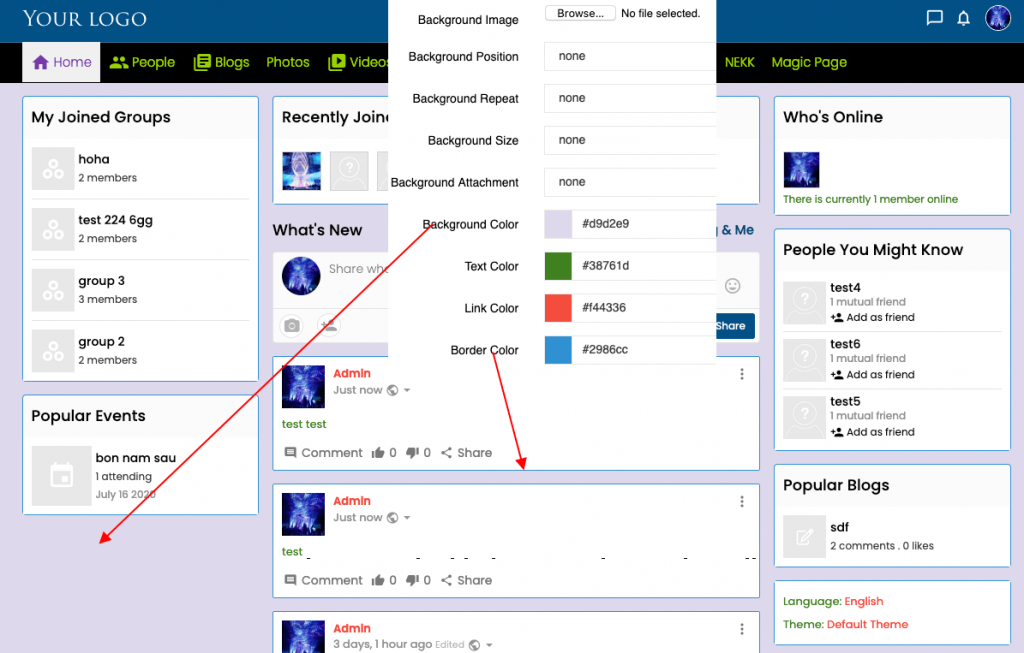
# Layout Tab > Body Section Setting

body

# Layout Tab > Header Section Setting

header

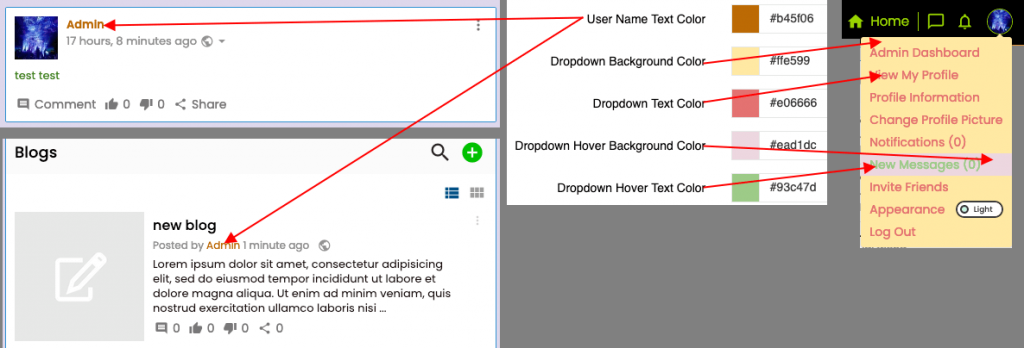
# Layout Tab > User section setting

user

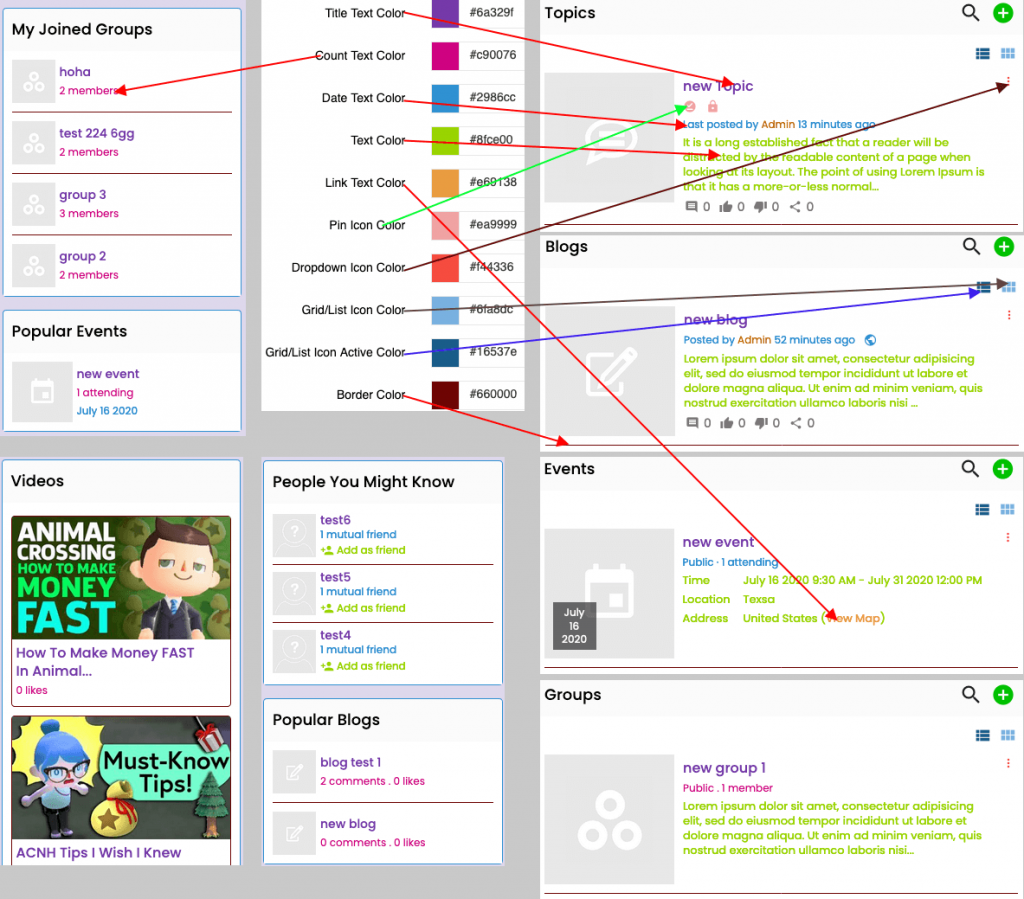
# Layout Tab > List Items Settings

listitem

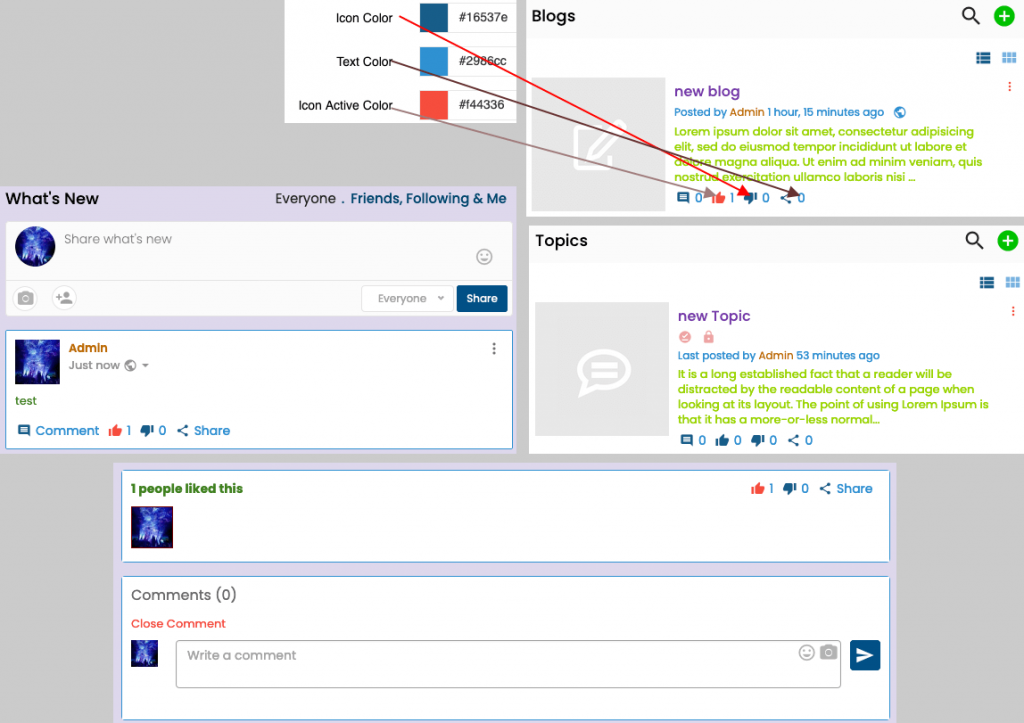
# Layout Tab > Like section settings

likesection

# Layout Tab > Footer

footer

# Menu Section

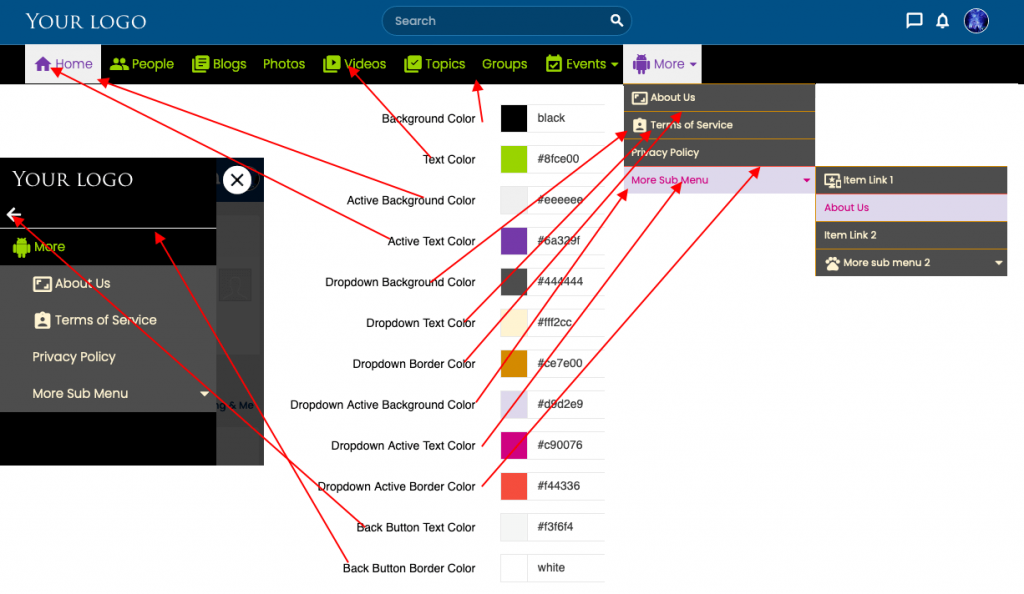
# Menu > Navigation

navigation

# Menu > Sticky Menu

# Menu > Category Menu

# What’s New Section

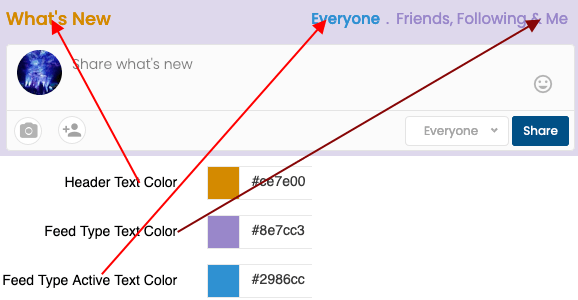
# What’s New > Feed Header Section
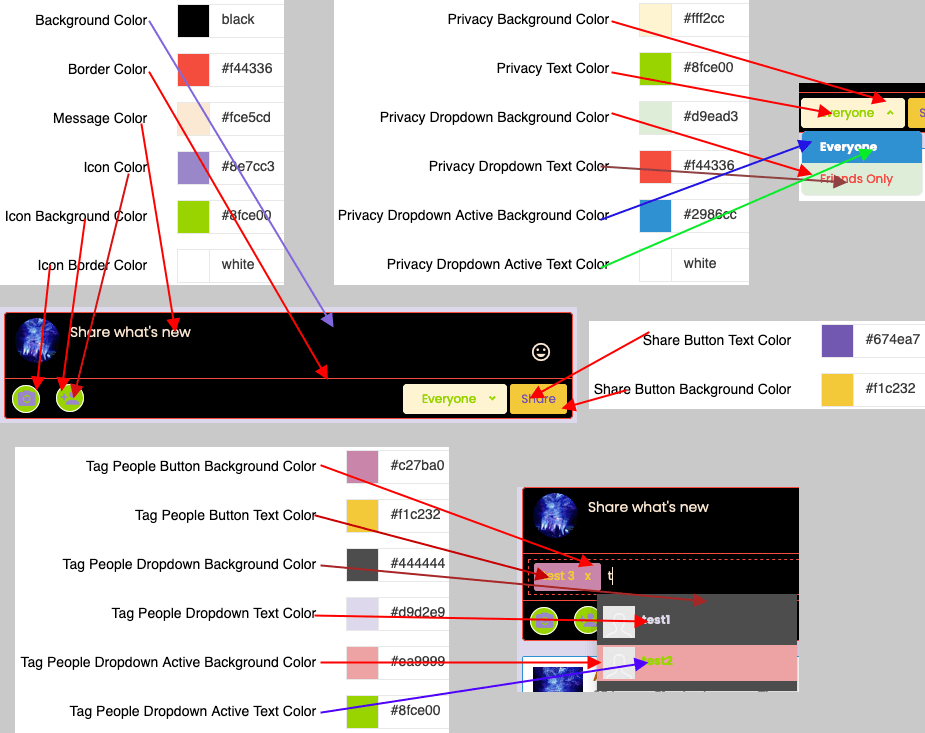
# What’s New > Status Box
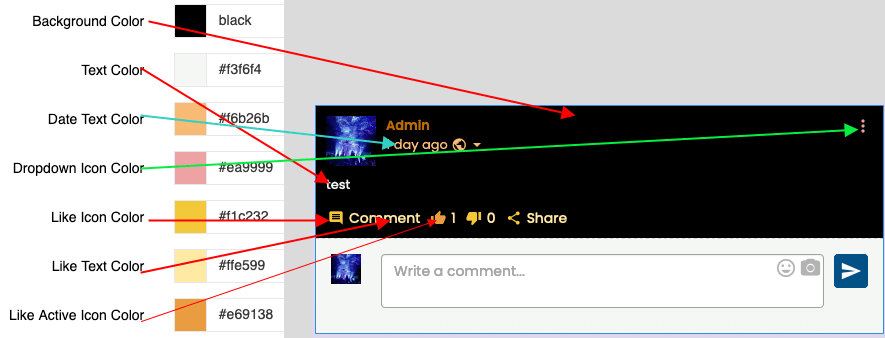
# What’s New > Feed Item
# What’s New > Feed Comment
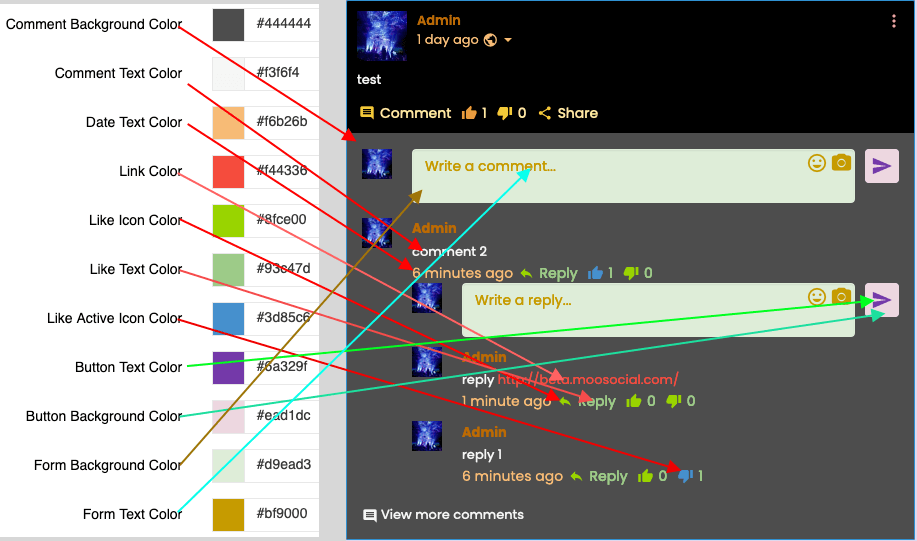
# Comment section

# Profile Section > Header Profile Section

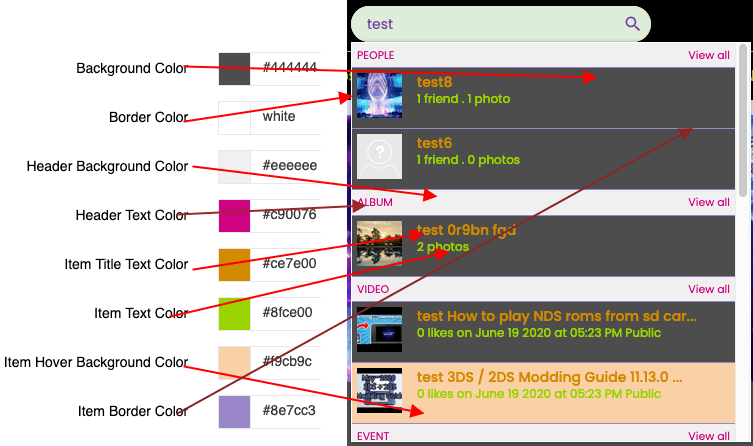
# Global Search Section

# Block Settings

# Block > Block

# Block > Content Search Setting
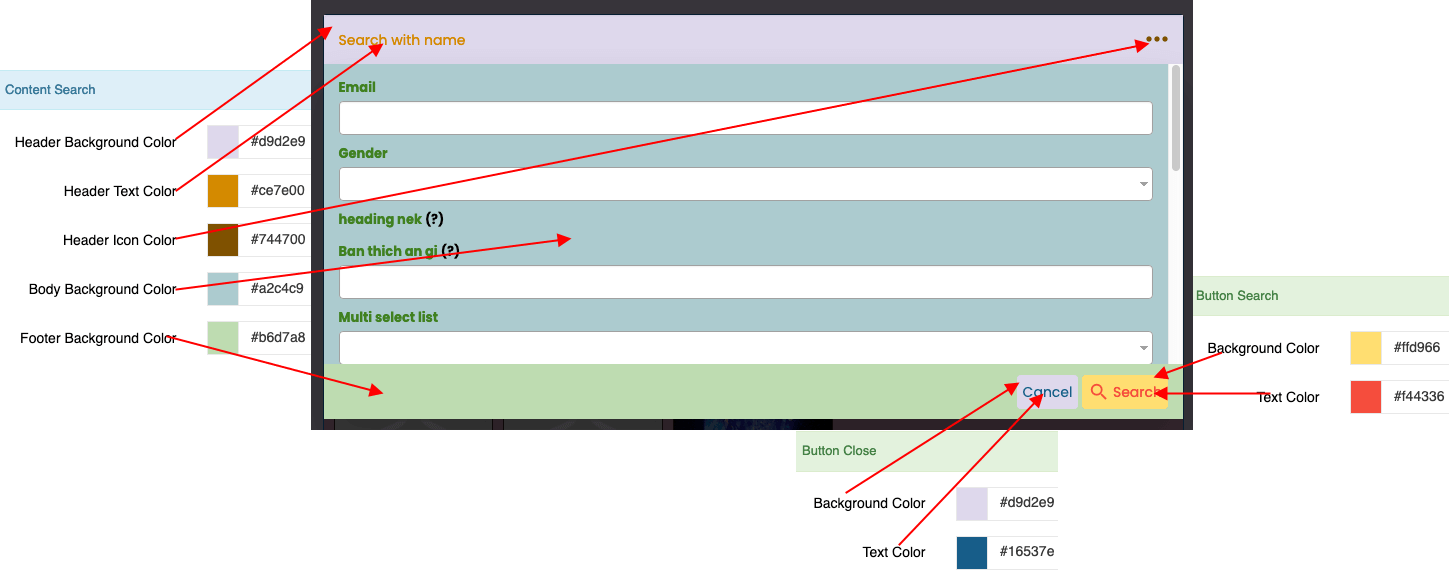
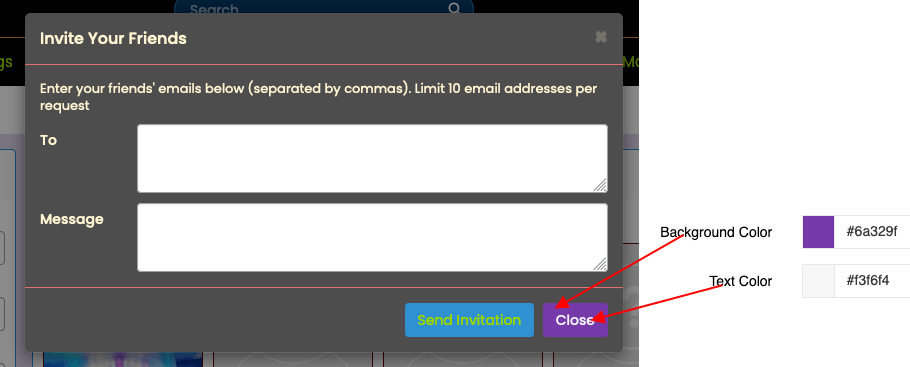
# Modal settings

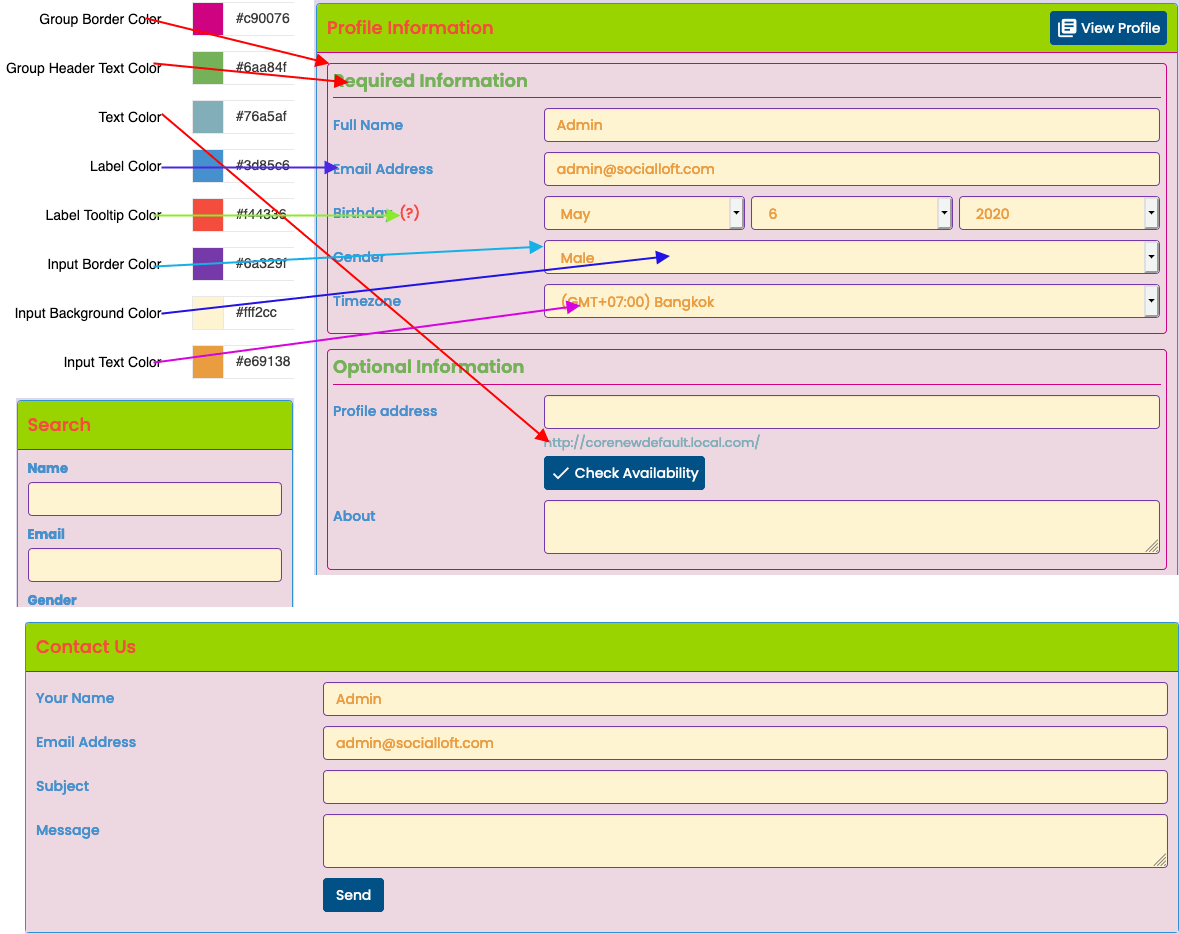
# Form
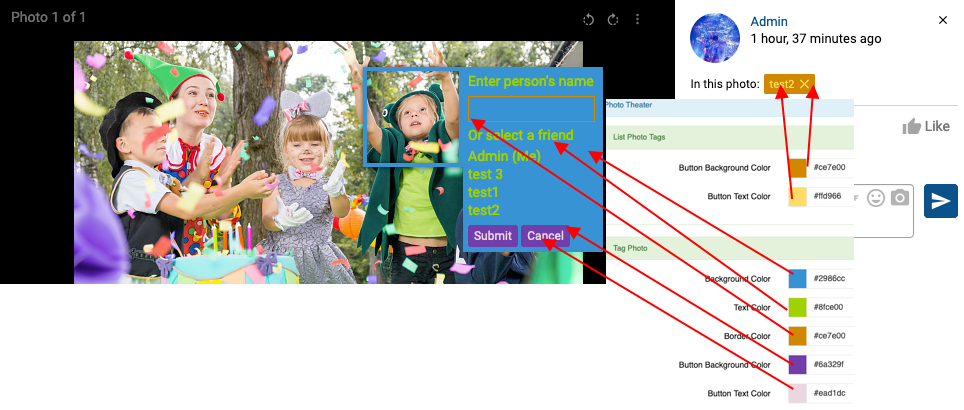
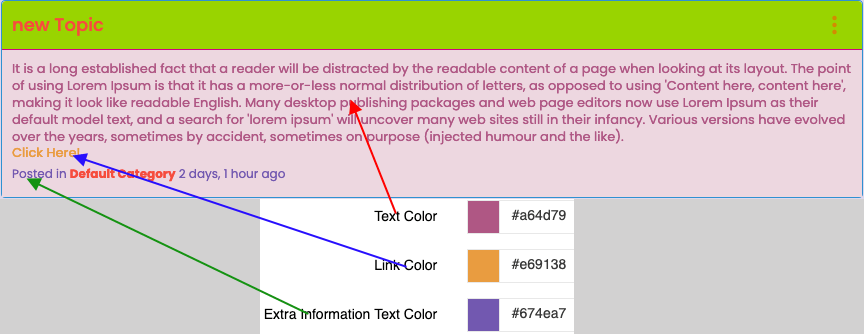
# Content
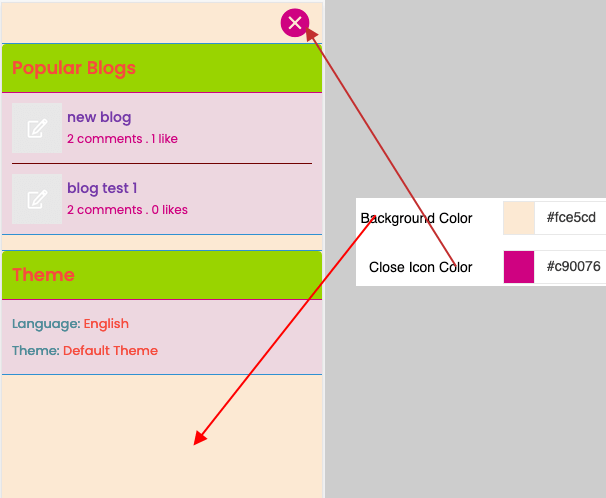
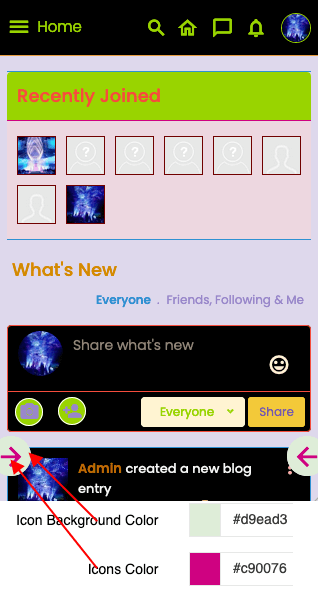
# Mobile Responsive
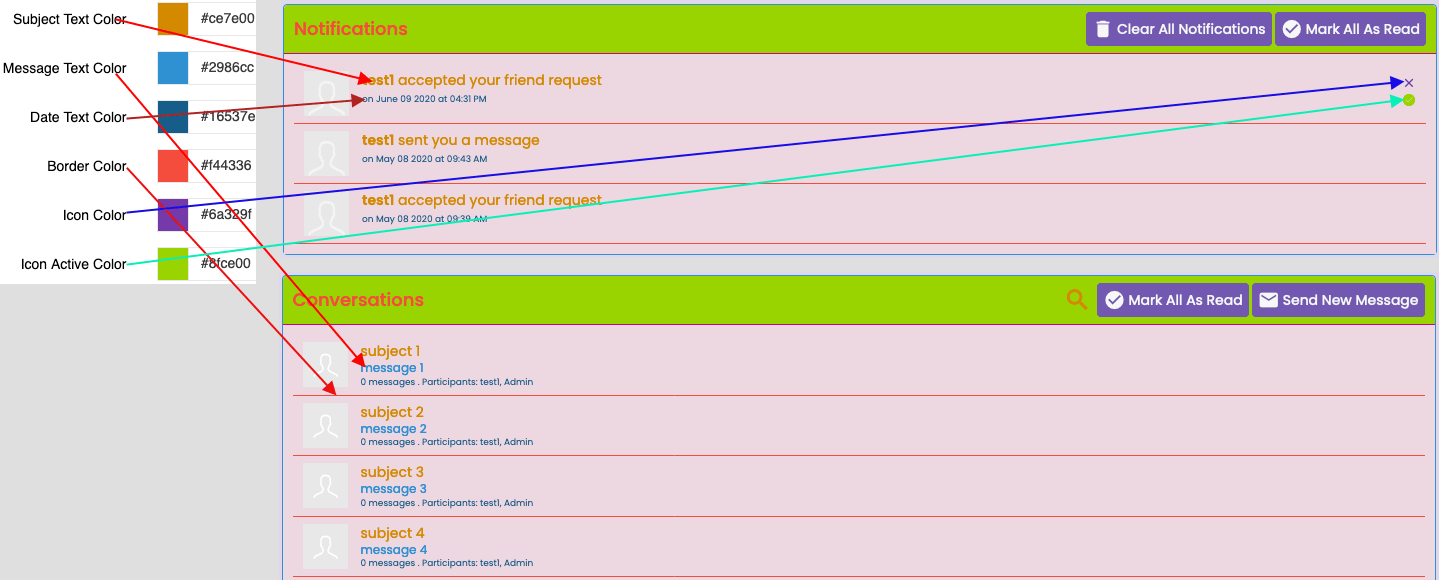
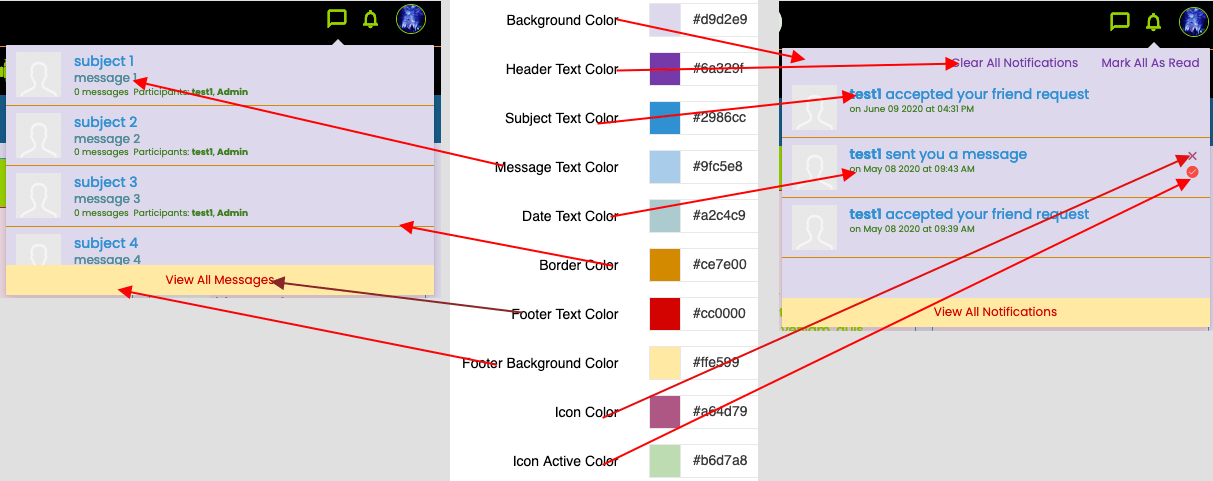
# Notification
# More SEction

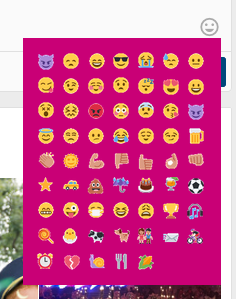
#Emoji
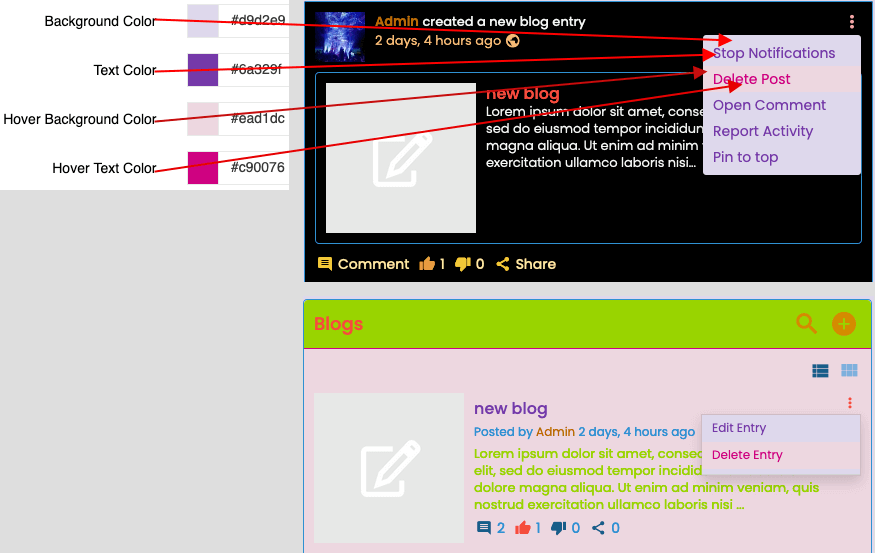
# More Menu Popup
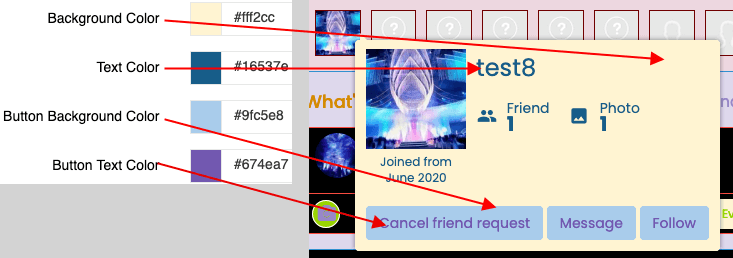
#Profile Popup
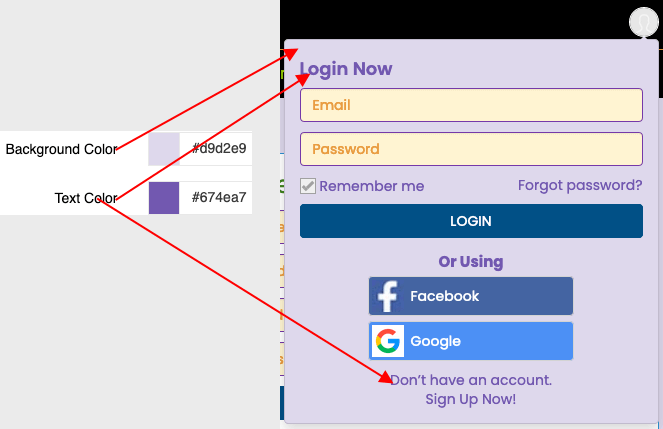
# Login Popup
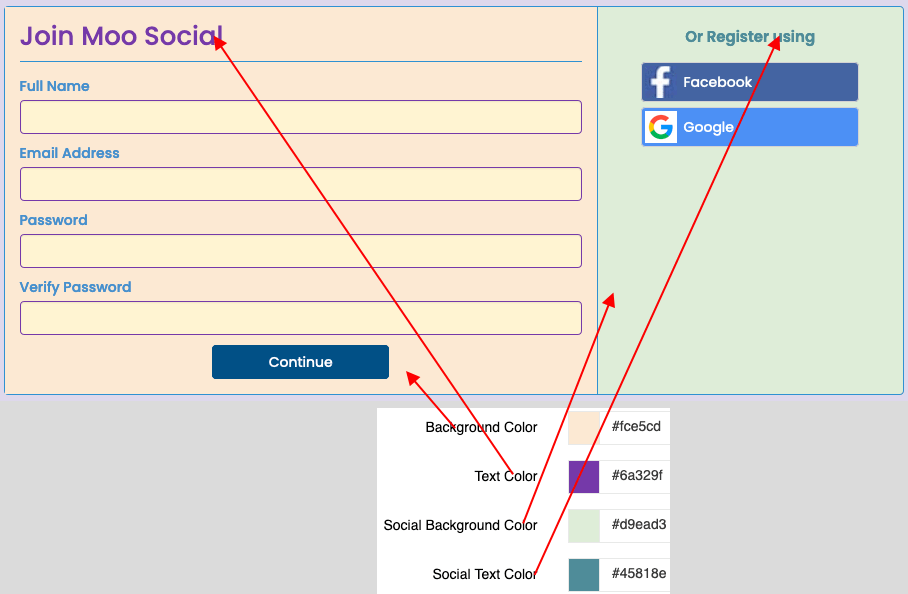
# SIgn up Page
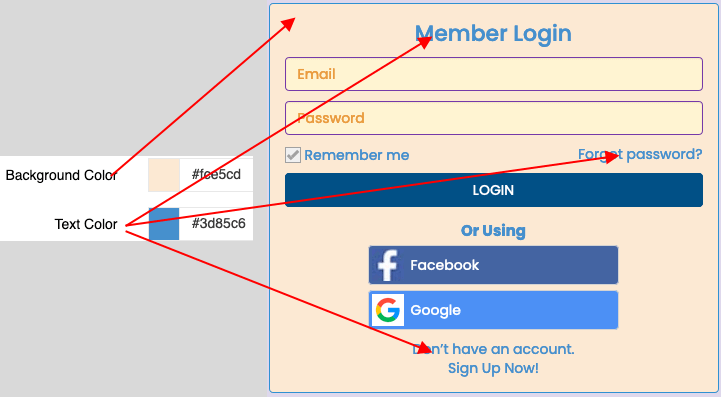
# Login Page
# Landing Page

# Tags Block

#Cookies

8. Check the apply to landing page if you want your settings to applied to non login page

9. Check/Uncheck to enable or disable settings

10. You can customize dark theme like you did with light theme

12. Save and Check again your site


How to change content of “about us”, “Policies” and “Terms of services”

Please follow this document to know how to change content of about us page, privacy policy page and terms of service page.

Admin panel -> Plugins manager -> Pages managers -> Select page you want to edit, click on it then enter your new content -> save changes.

You also can translate content of these pages into the languages that you installed in your site.

Clear global cache after changing.

Hope it helps.

Layout Editor

Selecting a Page to Edit

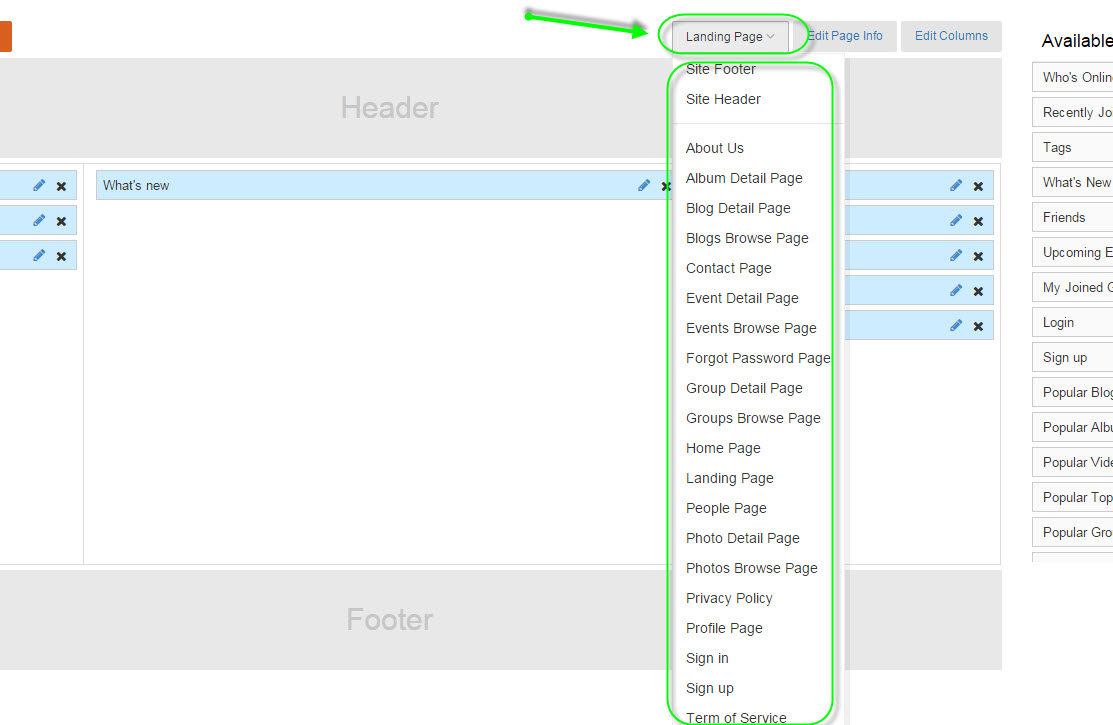
Click on the drop-down button, it is located on top-right.

d27bdab3afc888a2eab3bda1c435f7d9.jpg

#Click on the Dropdown button to select a page

Please note that not every page can be edited using the Layout Editor. If you do not see the page that you want to modify in the “Editing” list then you will most likely have to modify some of the code to alter its content.

Edit a Page Info

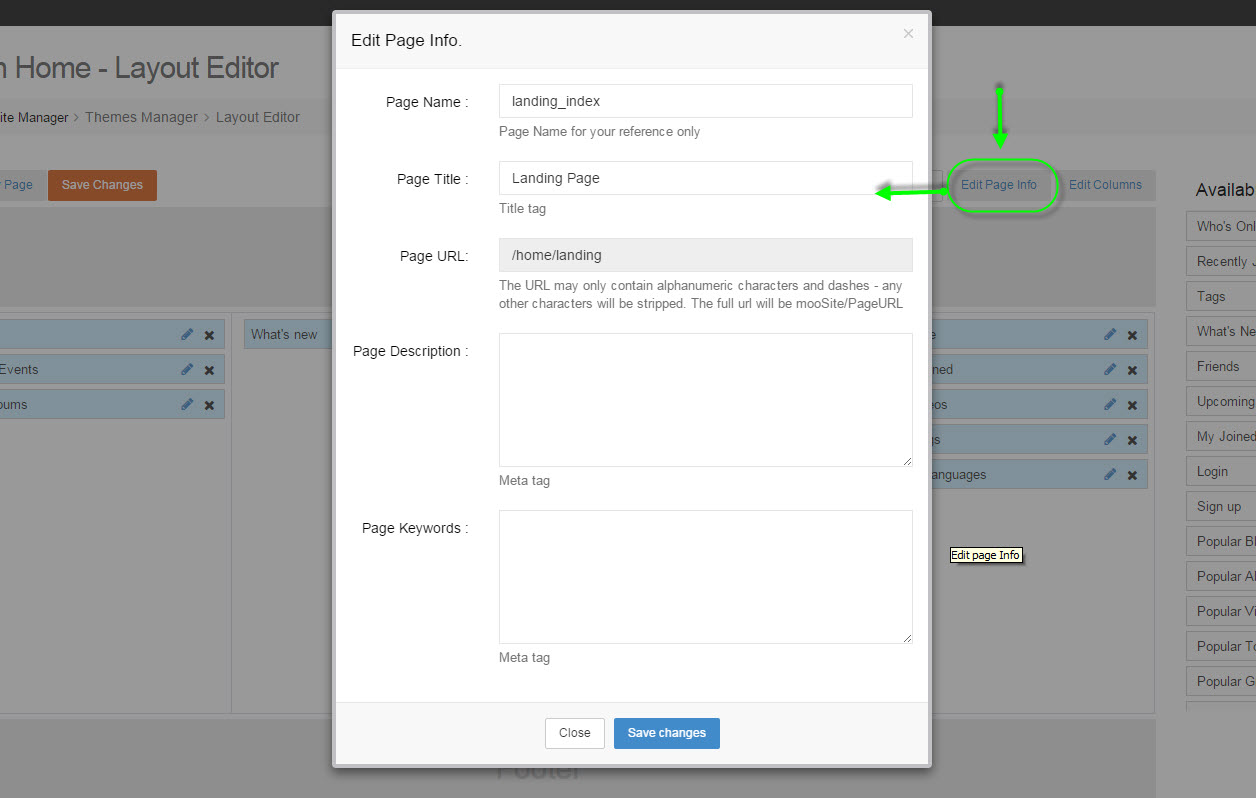
Pressing on Edit Page Info button located at top-right will open a new window, in this window, it allows you to edit page info

fe1db7c64a2fc796bc7d2b7ccfb2a38e.jpg

#Edit Page Info window.

  1. Page Name: The name that will show up in the drop-down list when you select a page to edit. This name is purely for your own reference for use in the Layout Editor.
  2. Page Title: The title that will be displayed to users at Front-End.
  3. Page URL: This field is where you enter the last part of the URL in order to link directory to this new page. You can reference the page by going to {your domain}/pages/[Page URL]. For example, the Page URL in the screenshot is “Review-of-the-Day”. If my domain was http://www.mysite.com then to access this page I created, I would go to http://www.mysite.com/pages/Review-of-the-Day
  4. Page Description (meta tag): The page description should be a brief, concise description of this page. Include any keywords or phrases that you want to appear in search engine listings. This will be the basis for your HTML “meta” description tag. There are two places where you can add data for your “meta” description tag. The site description found on the General Settings page will be on every page on your website under the “meta” description tag. There is also this page description which will give just this page its own “meta” description tags which will be in addition to this site description. Please know that a good page description will increase SEO.
  5. Page Keywords (meta tag): Provide some keywords (separated by commas) that describe this new page. These will be the default keywords that appear in the HTML “meta” tag in your page header. Enter the most relevant keywords you can think of to help this page’s search engine rankings. There are two places where you can add data for your “meta” description tag. The site description found on the General Settings page will be on every page on your website under the “meta” description tag. There is also this page description which will give just this page its own “meta” description tags which will be in addition to the site keywords. Also know well thought out keyword will also help your SEO.

Creating a New Page

To create a new page, click on “Create New Page” located at the top left.

3d57db92748f24f360e64151f9ebdcd9.jpg

#Create New Page

With this function, a guideline is existing at https://www.moosocial.com/wiki/doku.php?id=admin_dashboard:site_manager:pages_manager

Please take a view for creating pages.

Columns Template

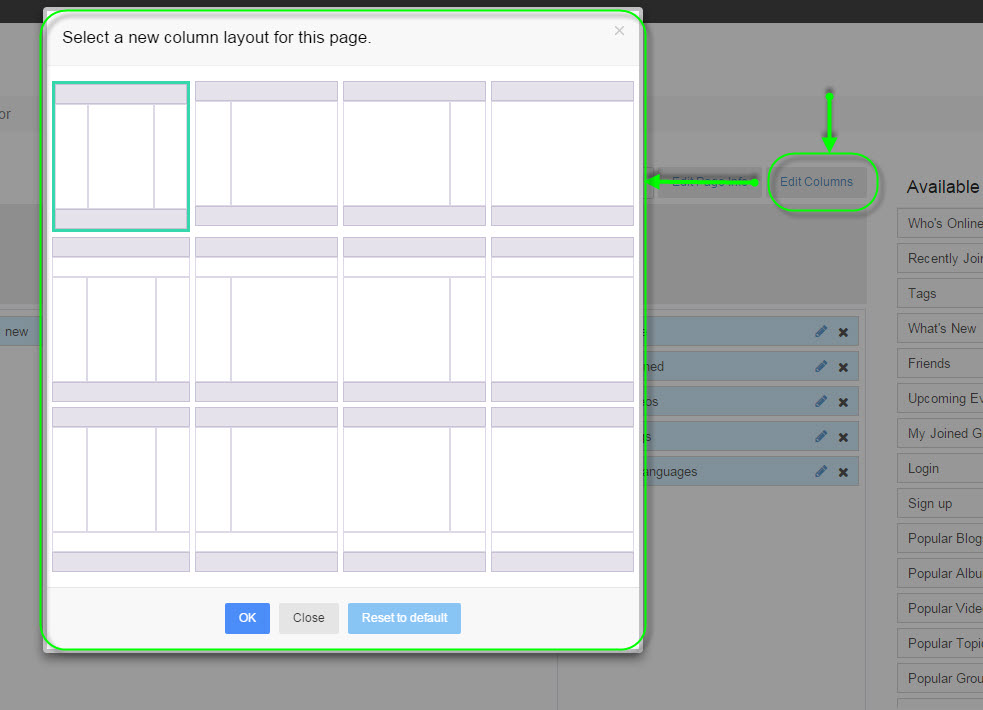
Decide the overall layout by deciding how many columns you want to have on this page by clicking on the “Edit Columns” button. Choose a template by clicking on the template that fits your page best. The horizontal blocks on the top and the bottom represent the Site Header page and the Site Footer page, which do not need to be displayed.

Find Edit Columns button at top-right, pressing on it and a new window will pop-up,

a26c173b6c15aeadbb1e1cddf15252f2.jpg

#Columns Layouts Selection

With many choices for your layout.


**II. Changing the Content on Your Page**

Adding Content to Your Page

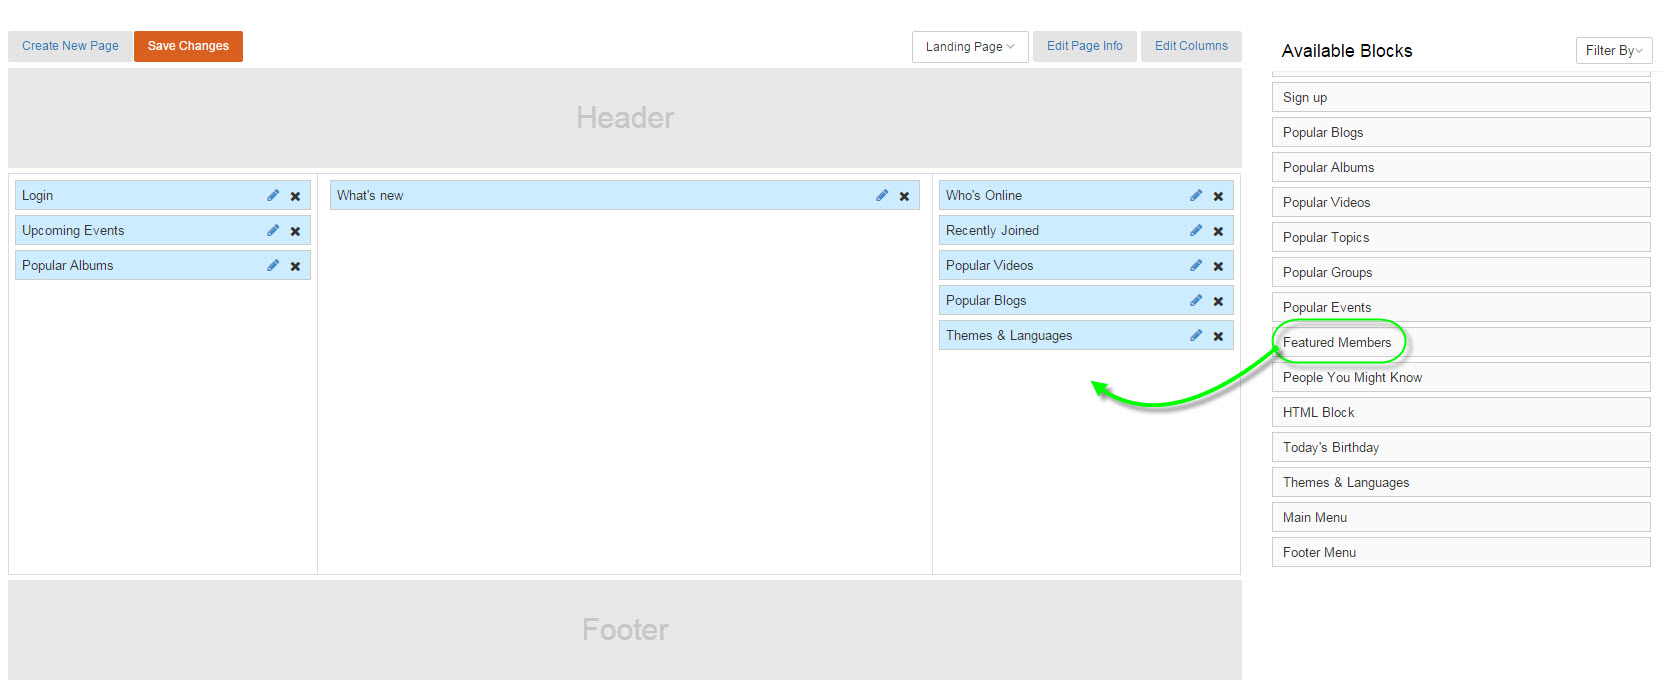
Click and drag the “blocks” to arrange the content you want on each page. Drag blocks from the “Available Blocks” area into the “Page Block Placement” area to add them from your page.

770016715e333b0cce0e46c651926bd5.jpg

#Drag a block from Available Blocks to your page columns for a more control over what is displayed use an “HTML Block” if you want to add your own custom HTML code or other commonly available code snippets.

NOTE:** All blocks cannot be used on all page. For instance, the blocks that begin with “Profile” can generally only be used on the Profile pages (Member Profile, Group profile, etc.). Please see the following article for a list of Which Widgets are Allowed on Which Pages.

Removing Content from Your Page

You can drag blocks from the “Page Block Placement” area into the “Available Blocks” area to remove them from your page or click on the black “x” in the block you want to remove.

74f3a89edd5eda486f24339541f0373c.jpg

#Press on X to remove.

Editing a Content Block

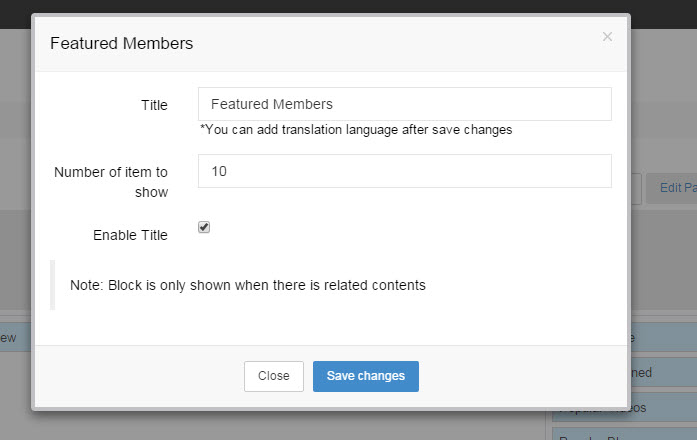
Click on the “edit” on the content block to change any of the parameters that this content block may allow you to modify.
401b03cb6613a9d13ccdaed04ddadcd1.jpg

#Click on the pencil button to begin modifying.This block allows you to edit the “title”. The title will display in bold print right above this content block on the page where you are placing it. It is also let you modify a number of items to show, default = 10.

a246e399476f529bf47924450dcaf9d0.jpg

#Editing Contents Parameters

Saving Your Changes

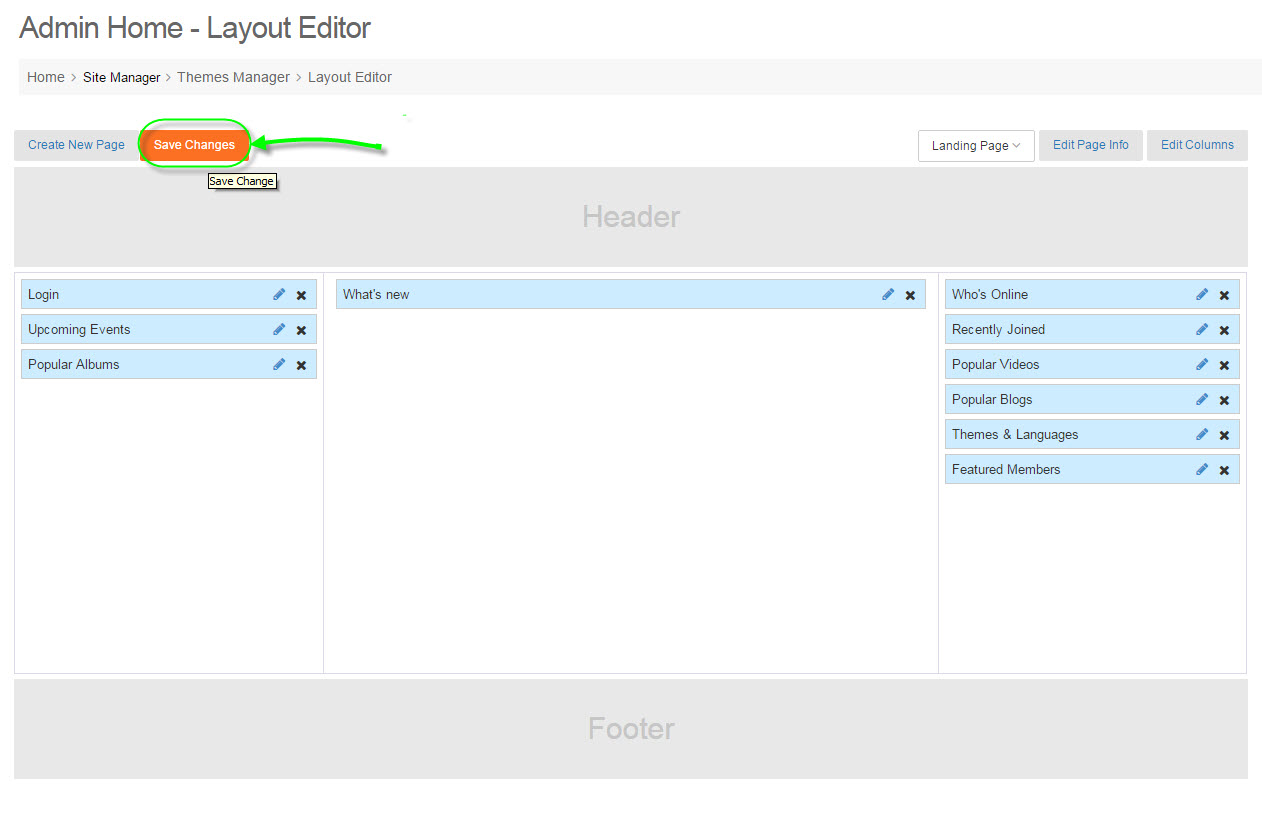
Click on the “Save Changes” button on the blue bar to save all the changes you have made to the layout.

f1511be797397448c6a7848b5f0a1bdb.jpg

Install New Theme

1/ When you already had the plugin package, extract file template (in zip) to a folder and upload “app” folder and their contents to your site (allow overwrite old files)

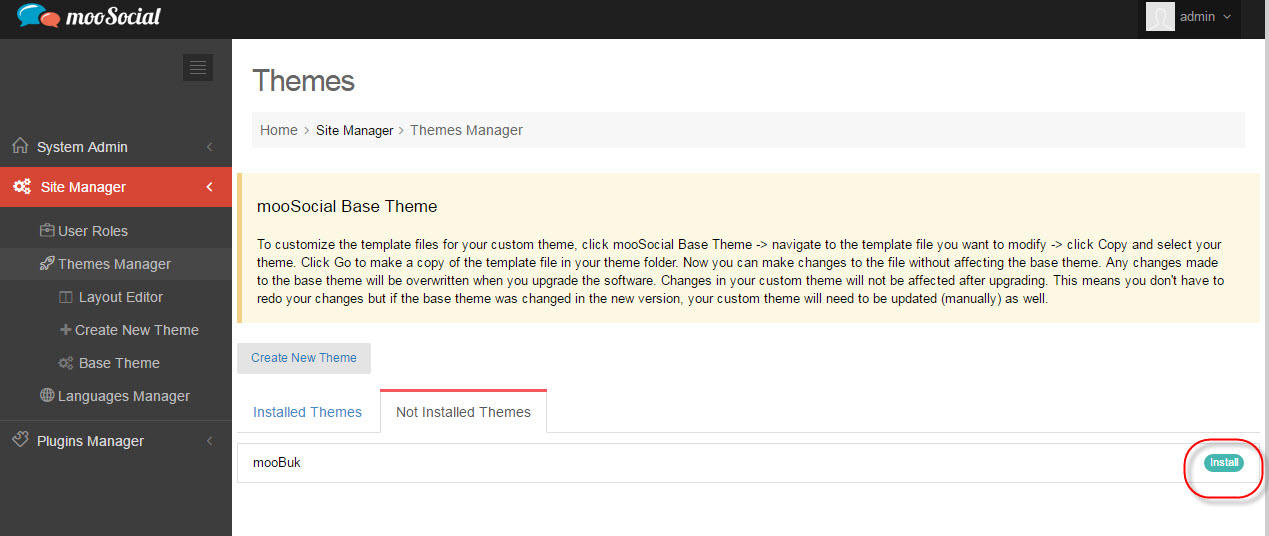
Example, we added ‘mooBuk’ as new theme

2/ Go to Admin Dashboard/Site Manager/Theme Manager/Not Installed Theme, find the ‘mooBuk’ theme and press Install button:

moosocial.com_wiki_lib_plugins_ckgedit_fckeditor_userfiles_image_how_to_install_theme.jpg

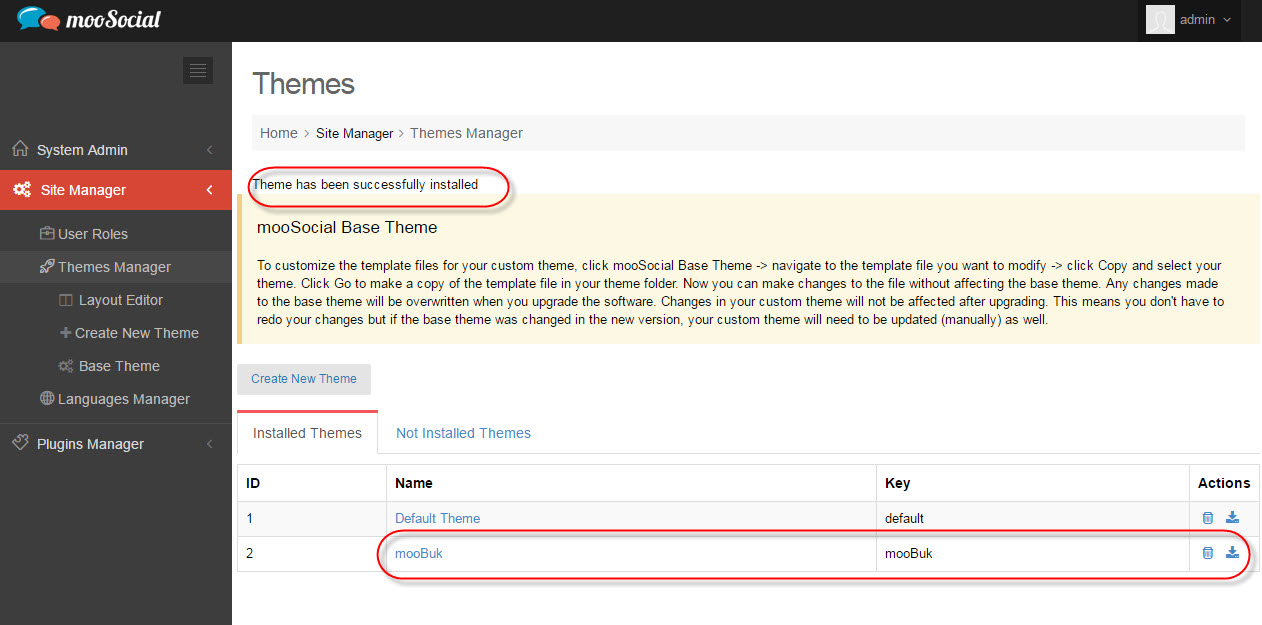
3/ After installation, there will be a Message:

moosocial.com_wiki_lib_plugins_ckgedit_fckeditor_userfiles_image_how_to_installtheme_successfully.jpg

#Installation successful.

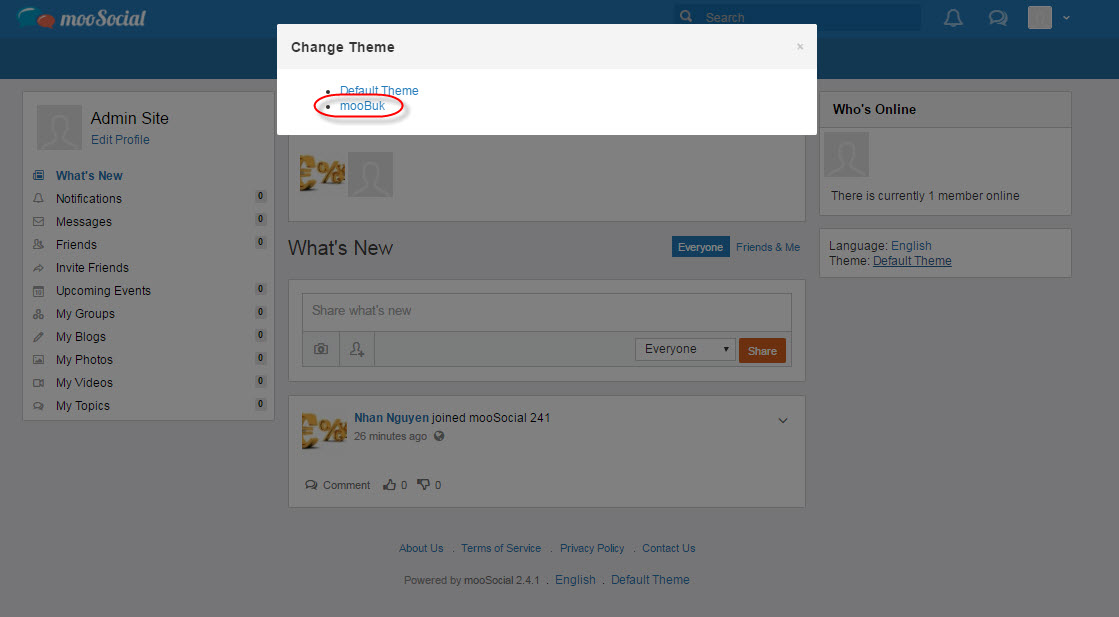
4/ Front-end, users can see new theme has been added:

moosocial.com_wiki_lib_plugins_ckgedit_fckeditor_userfiles_image_how_to_theme_frontend.jpg

#New theme has been added.