Archives

Bulk Mail Settings

Follow these steps to send Bulk Mail to users:

1. Select “Bulk Mail” under System Admin control.

2. Input Mail Subject, Emails Cycle (Number of emails will be sent out in a cycle) and Mail Body

bulkmail1.jpg

3. Click Send Emails button to send the email to all users or click Send Test Email button to (TBD).

4. A confirmation popup will be shown, click Ok to continue or Close to abort.

bulkmail4.jpg

5. Click Close button to close the popup when all emails have been sent out successfully.

bulkmail2.jpg

6. Now all members will see a new email as below sample:

bulkmail3.jpg

Access mooSocial Admin Dashboard

Video guid

This tutorial demonstrates how to access mooSocial’s Admin Dashboard.

Step 1: Go to your mooSocial website and login with an admin account (email address and password)

Access Admin Dashboard 01

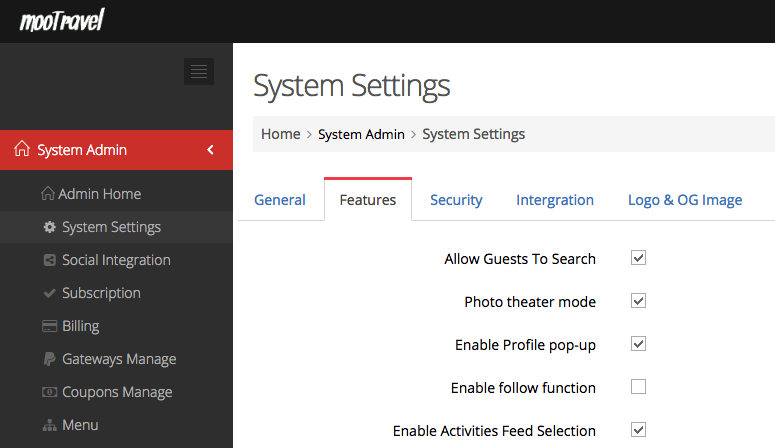
Step 2: Locate and click the “Admin Dashboard” menu in user’s dropdown list. Optionally, you could add /admin to your site’s URL (Example: yoursitename.com/admin) to go to the Admin Dashboard section.

Access Admin Dashboard 02

Step 3:Log in to Admin Dashboard using the same admin account.

Access Admin Dashboard 03

NOTE: Only your mooSocial website’s administrator(s) will see and be able to access these links. This double authentication process prevents unauthorized or accidental access to Admin Dashboard when admin account is being used on a shared or public computer.

Remove powered by, mooSocial logo & favicon icon

1. Remove powered by mooSocial

Screenshot at May 09 10-24-36

– Access Admin Dashboard => System Settings => General Tabs
– Search for Powered by checkbox and untick.
– Click on Save Settings button.

2. Remove mooSocial Logo

1

Access Admin Dashboard => System Settings => Logo & OG Image & Favicon:

  • Upload “New Logo” for Light/Dark mode (ideal size: 150x25px)
  • Upload “New Og image” (ideal size: 200x200px)

=> Click on Save Settings button.

3. Add new favicon icon

– Access Admin Dashboard => System Settings => Logo & OG Image & Favicon

– Upload “New Favicon Image” => Click on Save Settings button.

2

Sitemaps and SEO Settings

1. Login to your admin dashboard
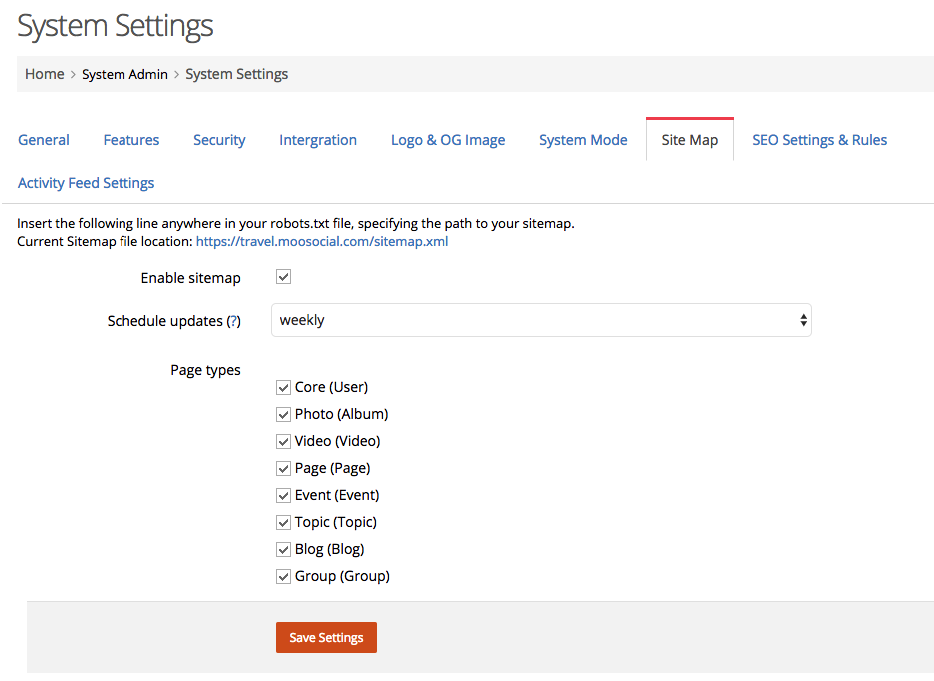
2. Under System Admin > System Setting, click Site Map Tab

Screenshot at Mar 16 11-15-18

3. Tick enable sitemap check box to enable the sitemap for your site
4. Schedule Updates
– Daily: Generate Site Map for the selected module daily
– Weekly: Generate Site Map for the selected module weekly
– Monthly: Generate Site Map for the selected module weekly
5. Select The Modules to generate Site Map
6. Save