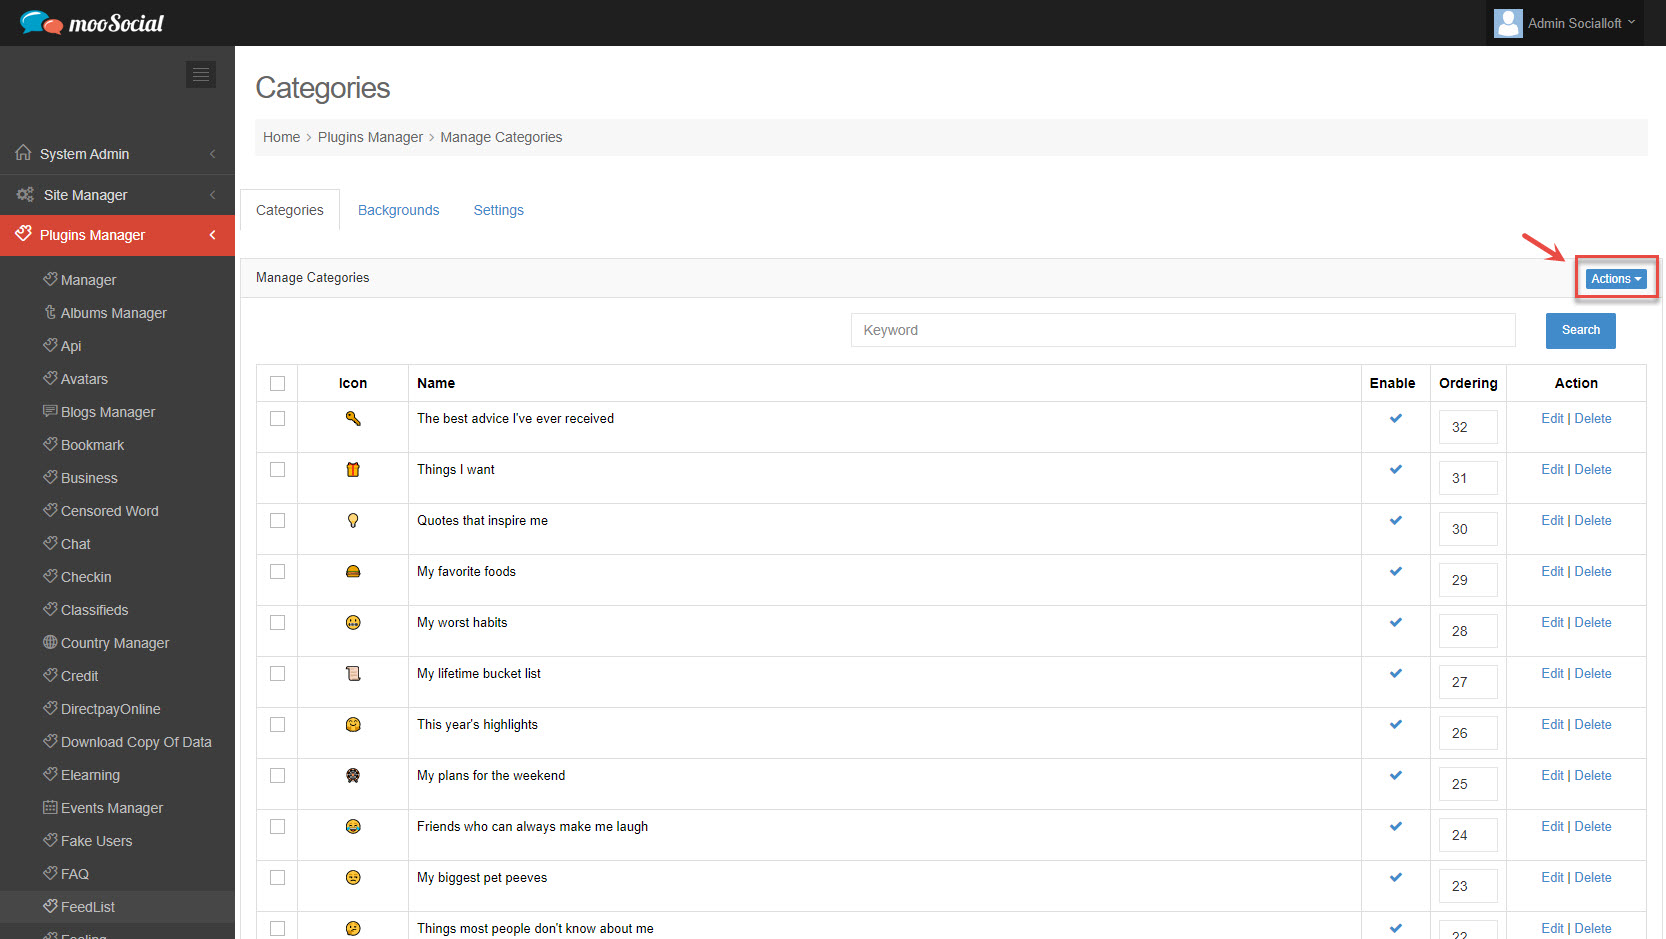
This tutorial will demonstrate how the Site Admin can create a new category for the Feedist plugin.
Step 1: Access to Admin Dashboard => Plugin Manager => Feedlist => Categories tab.
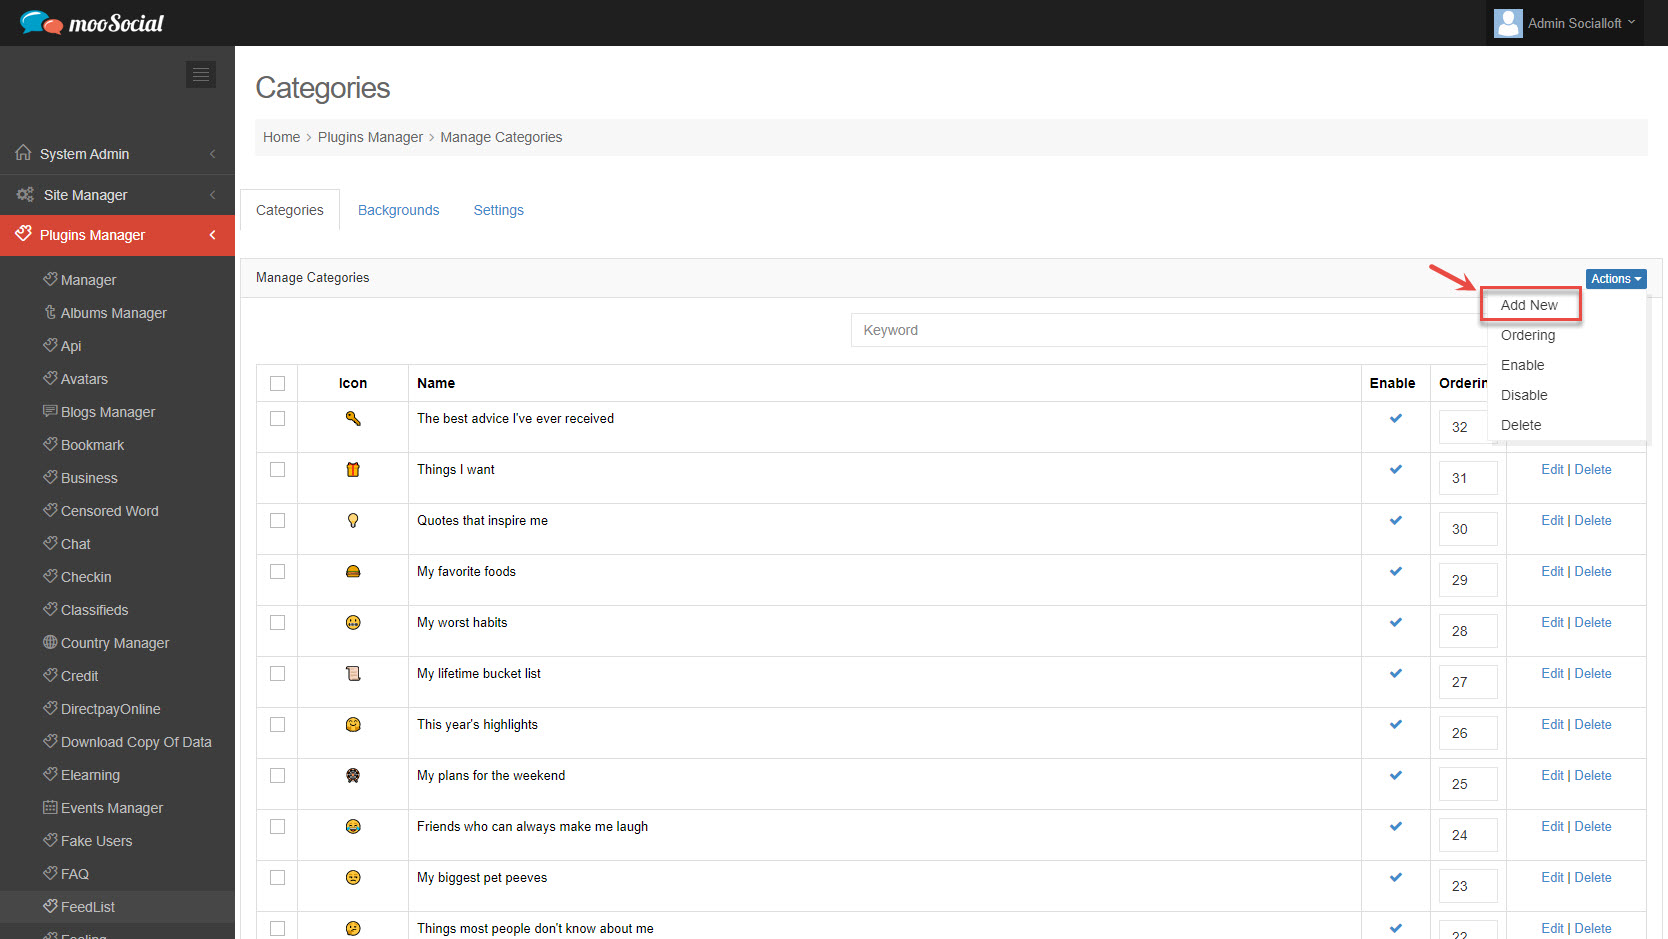
Step 2: Click on the Action button => select Add New option on the drop-down list.
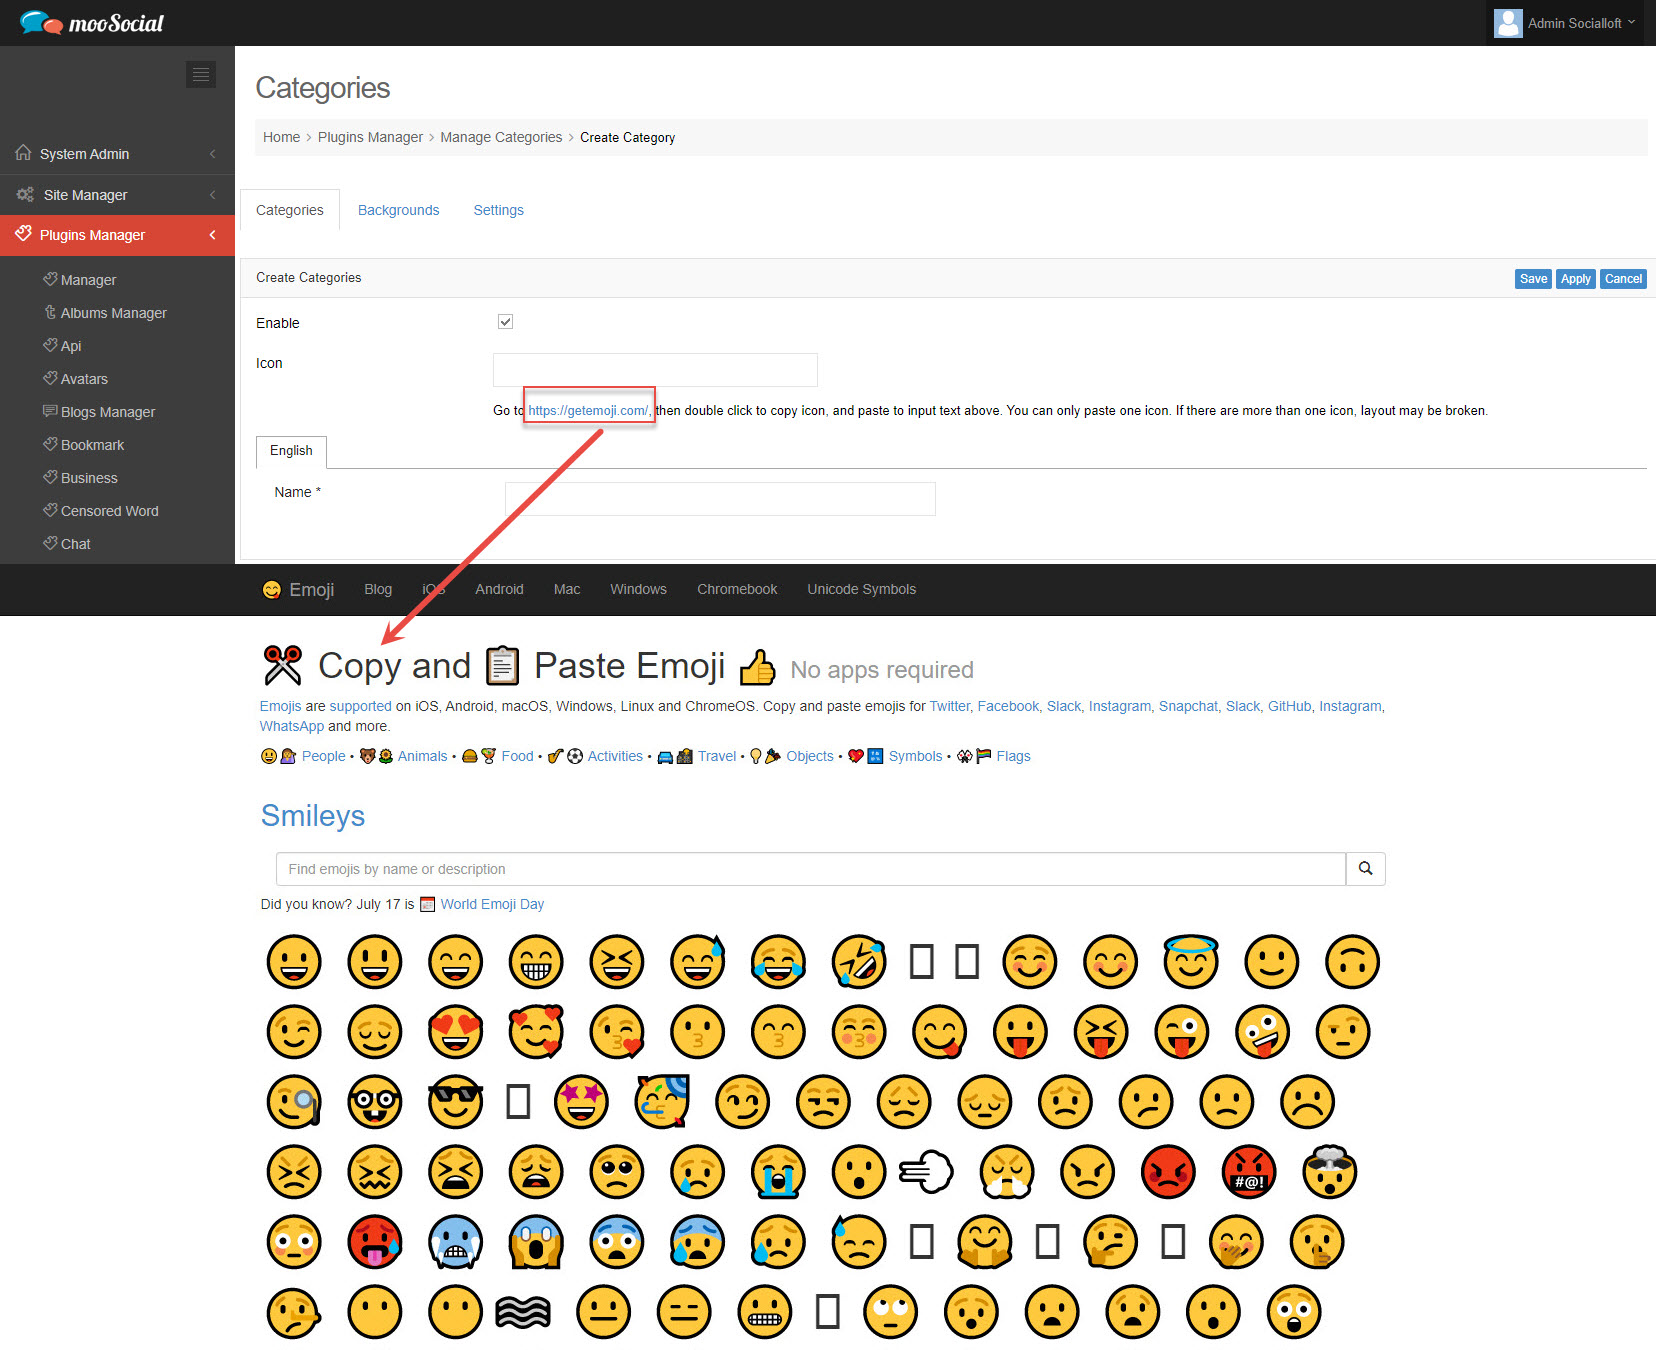
Step 3: At the Create Categories page:
1) Click on the URL link https://getemoji.com/ to be redirected to the Get Emoji page.
2) Copy the icon, then paste the value into the Icon field.
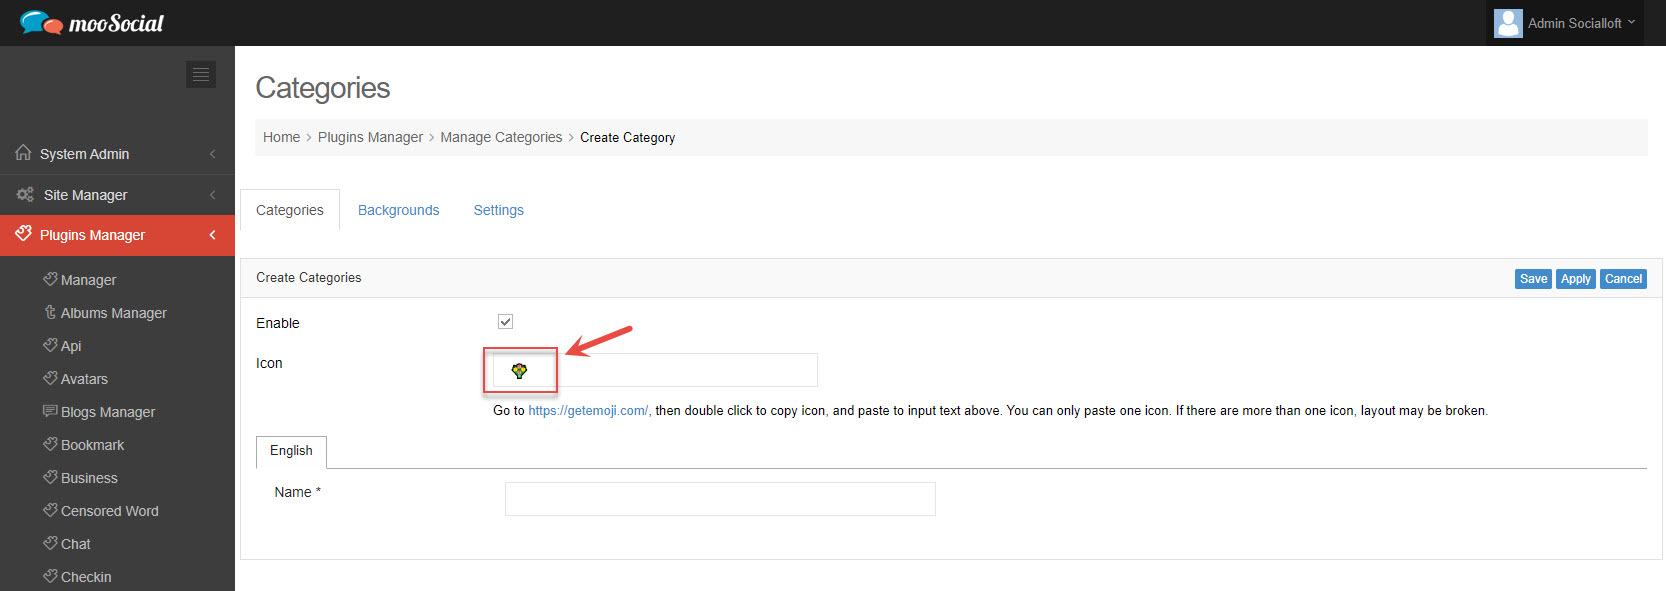
3) Enter the category name into the Name field.
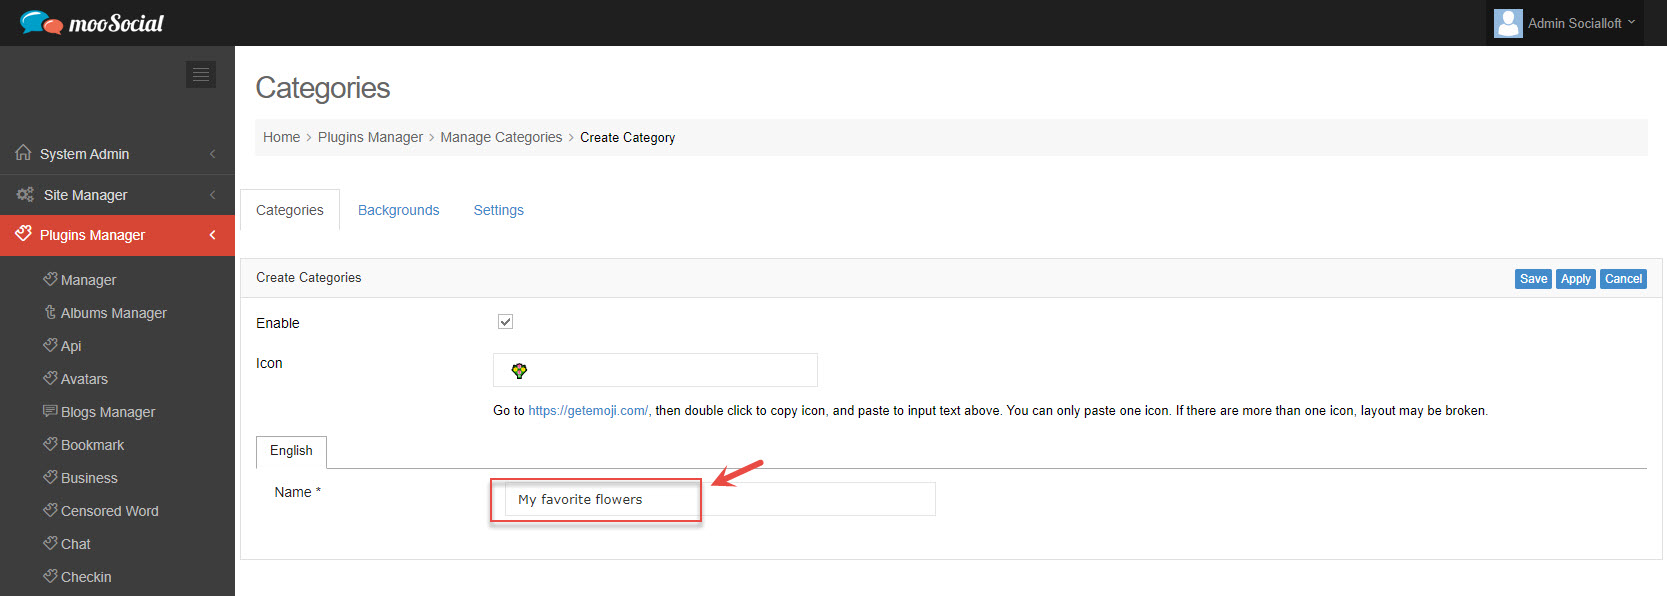
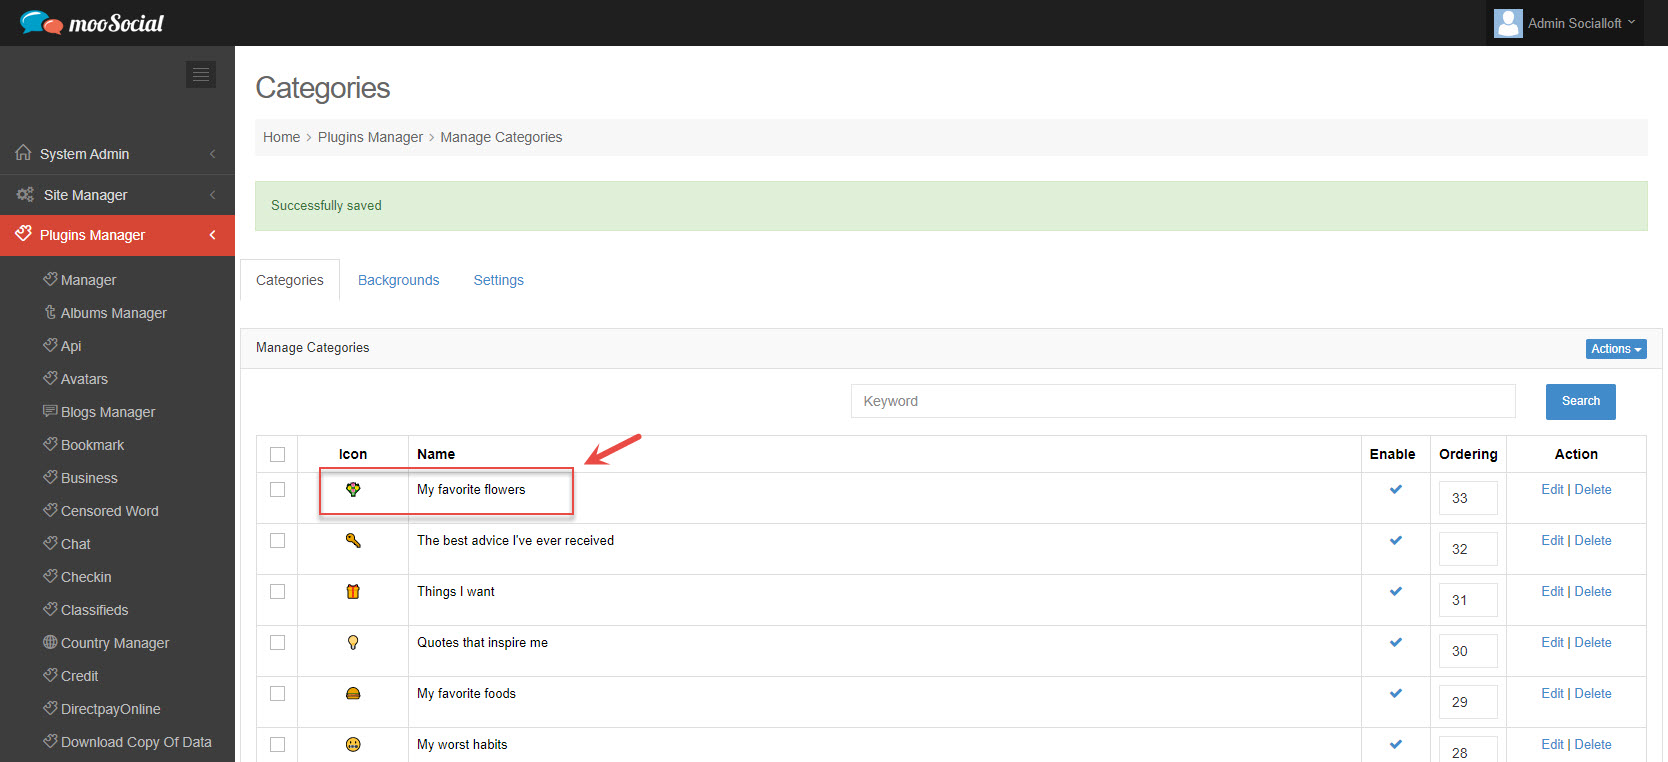
=> Click the Save button. The new category has been added.
(Front-end)
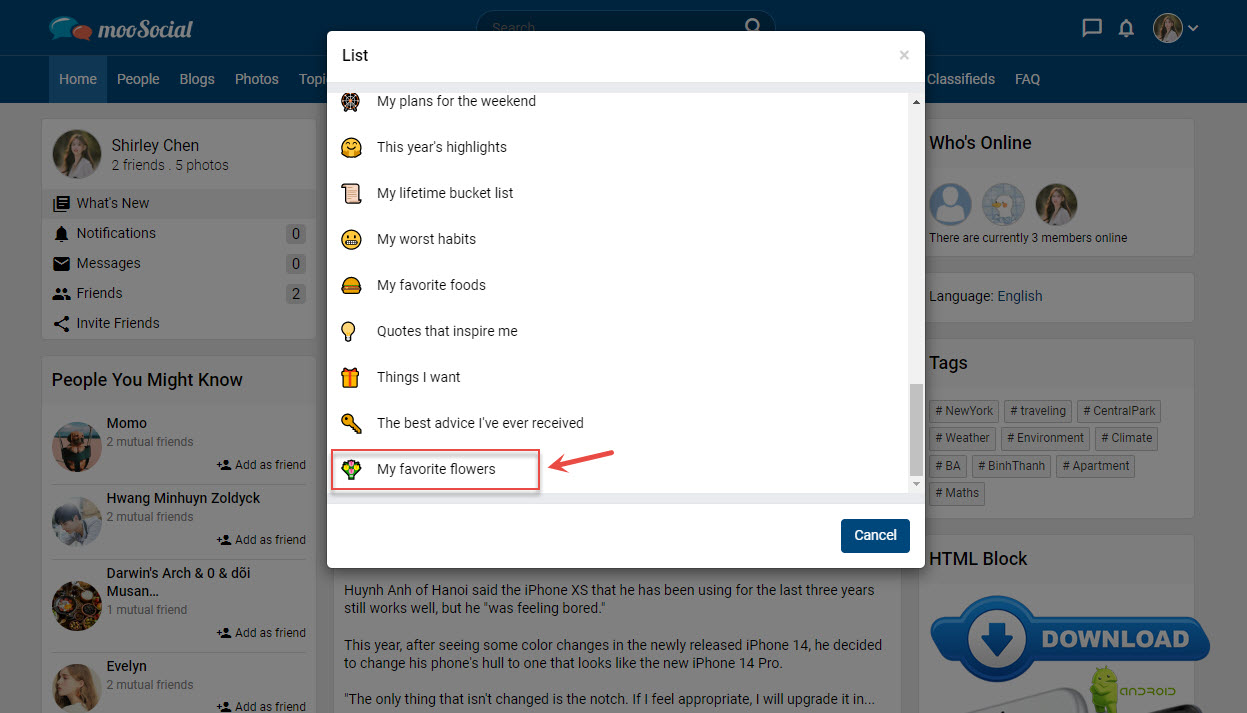
This category will be visible to site members when they create a new feedlist.
The Feedlist plugin allows the Site Admin to customize the list’s background. To learn how to add a new gradient background, follow this tutorial.
Access to Admin Dashboard => Plugin Manager => Feedlist => Backgrounds tab.

Click on the Action button => select Add New option on the drop-down list.
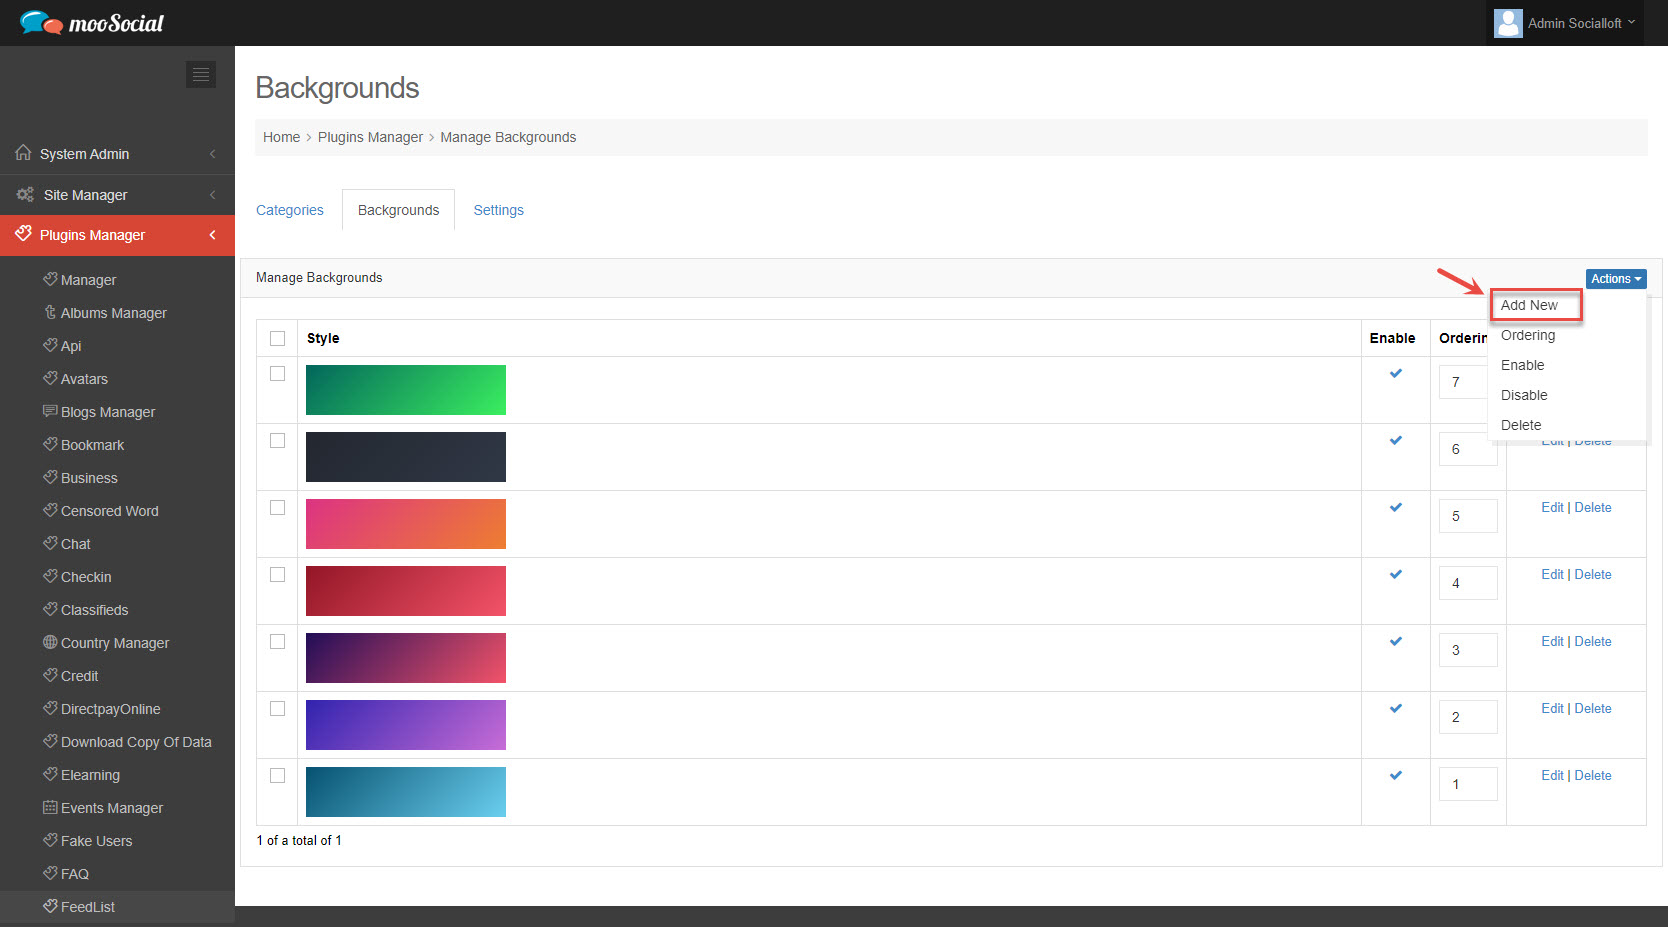
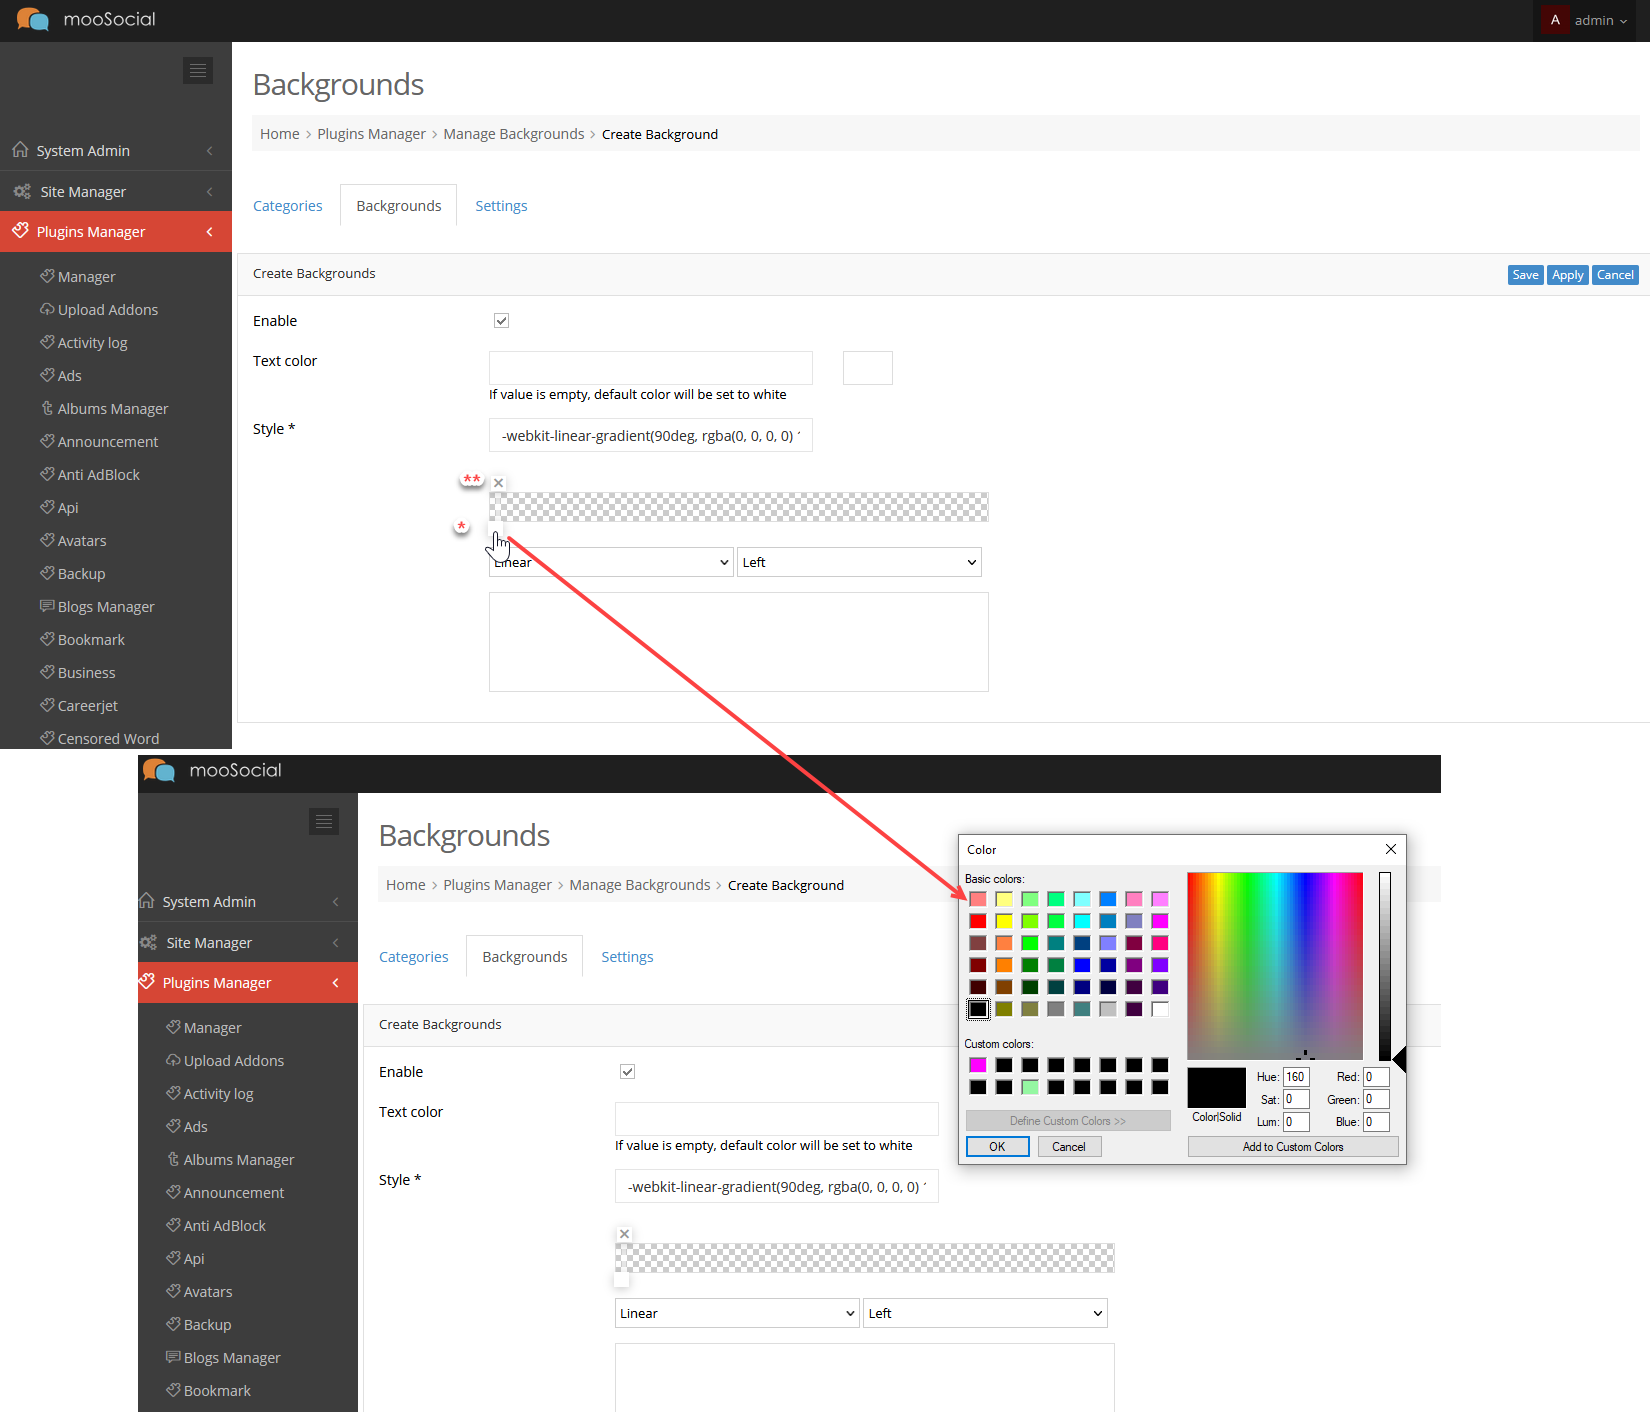
Go to the Create Background page.
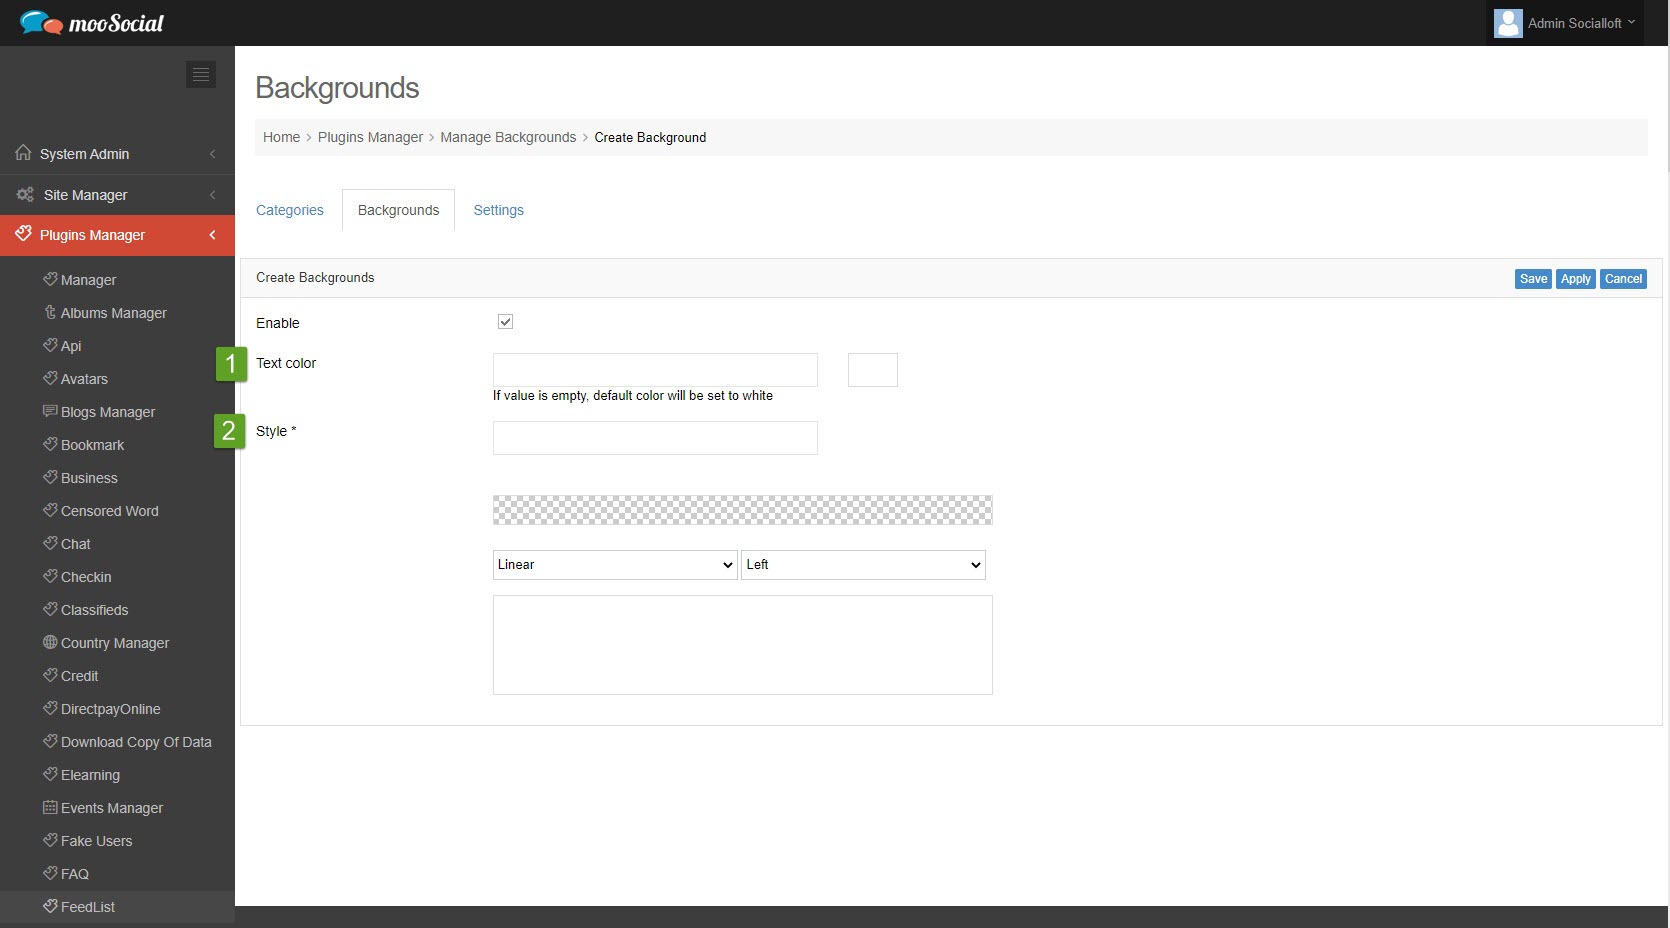
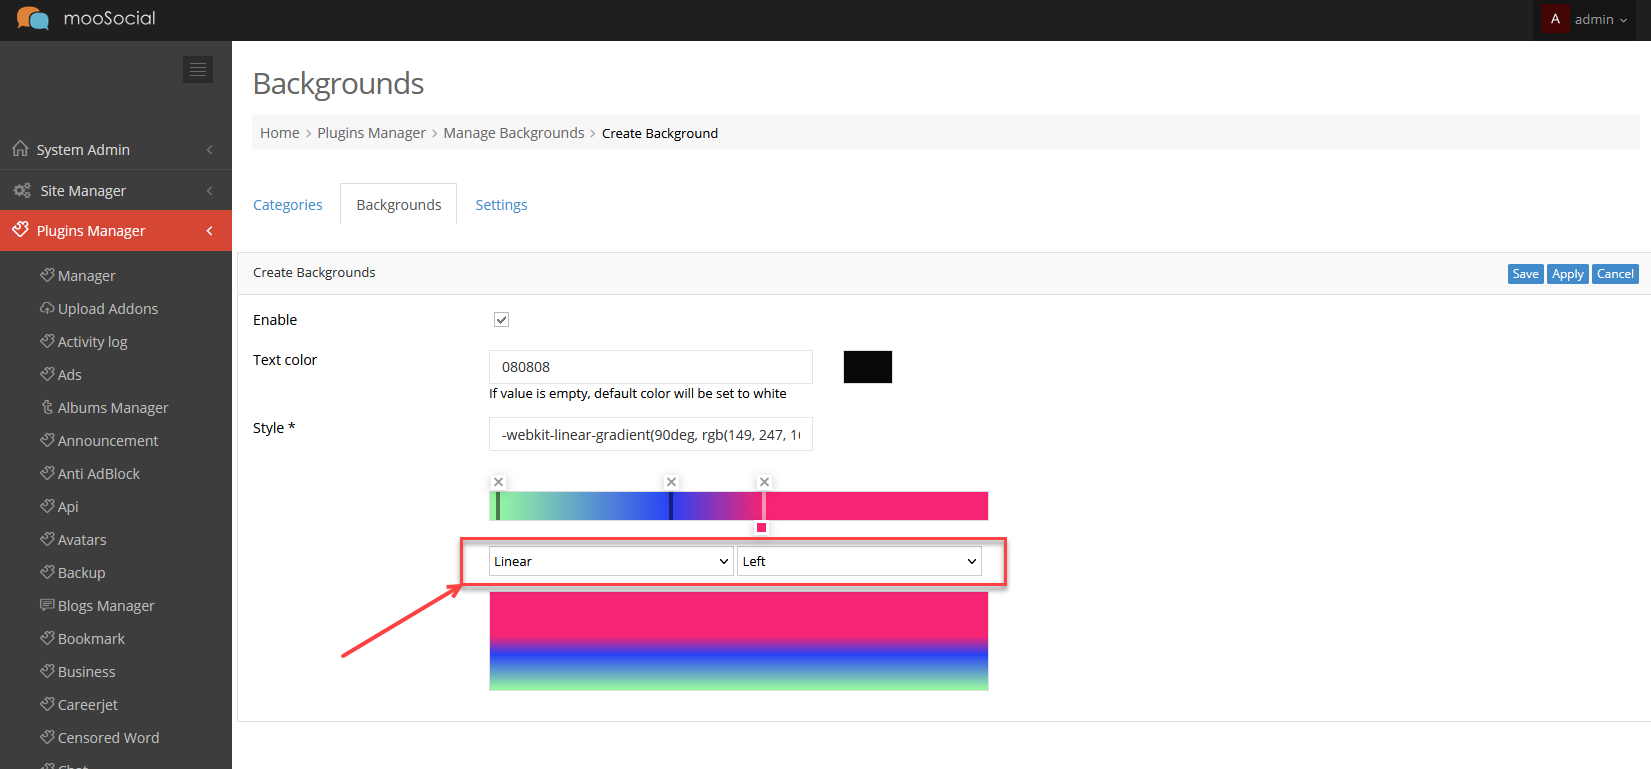
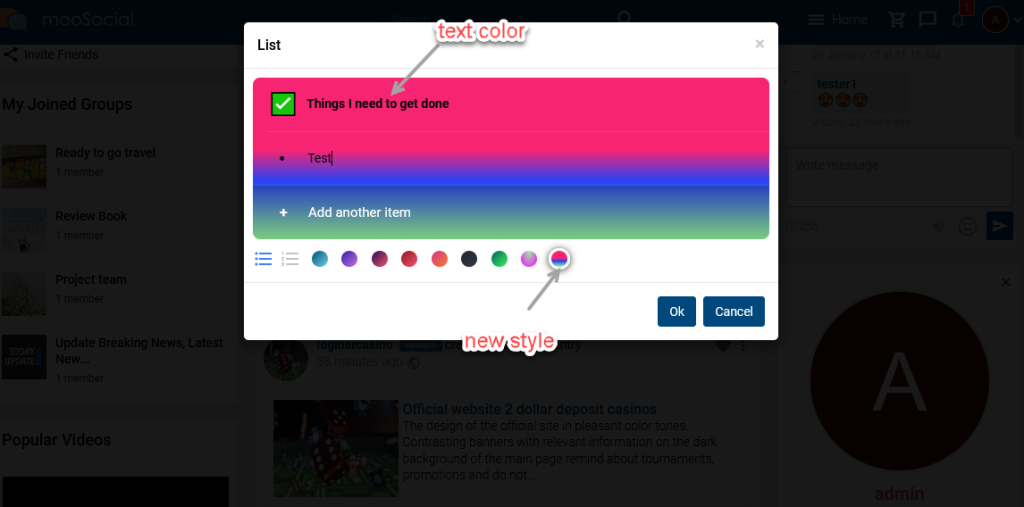
[1] Text color: set the text color by entering color hex code.
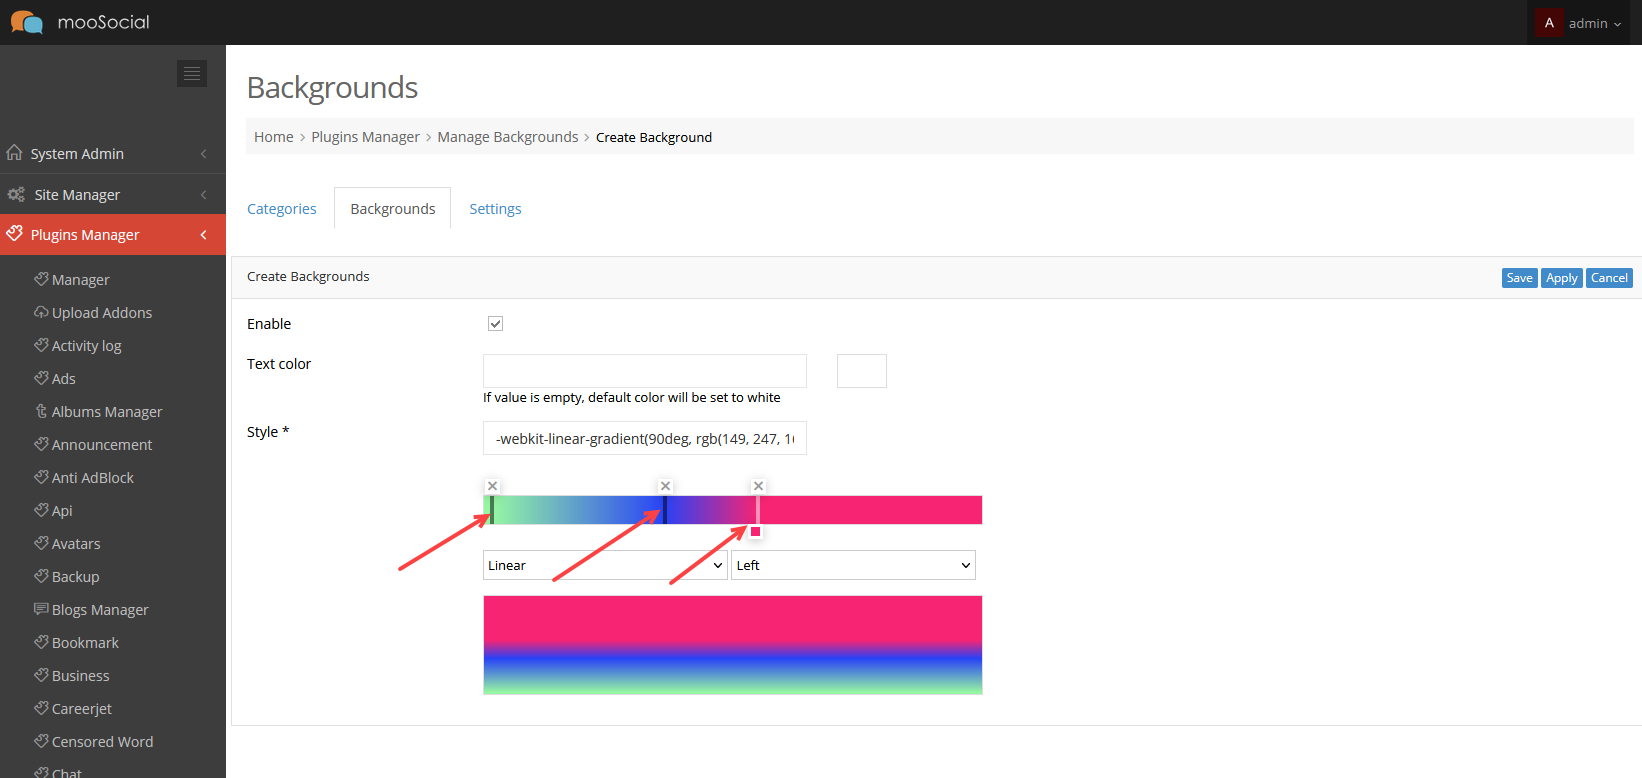
[2] Style:
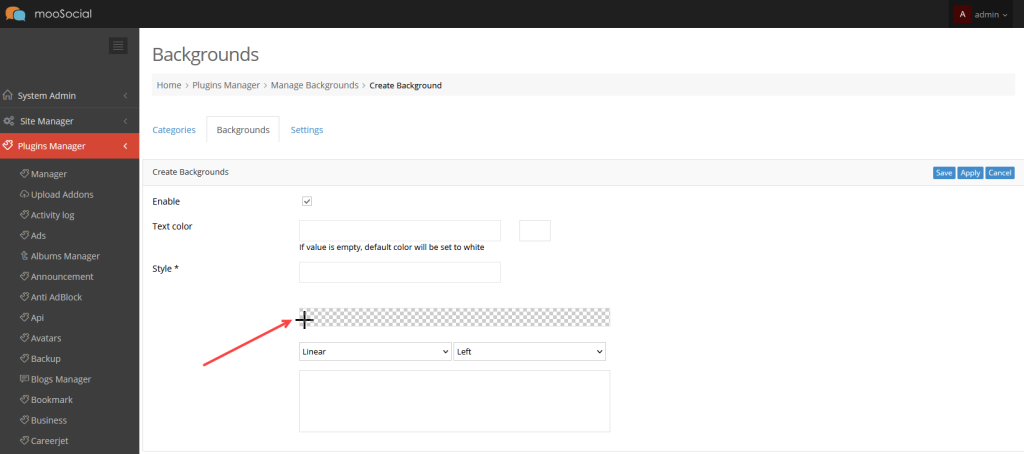
- Click on the background style bar.
– Click on the small square (*) under style bar => Show the color popup to select the one.
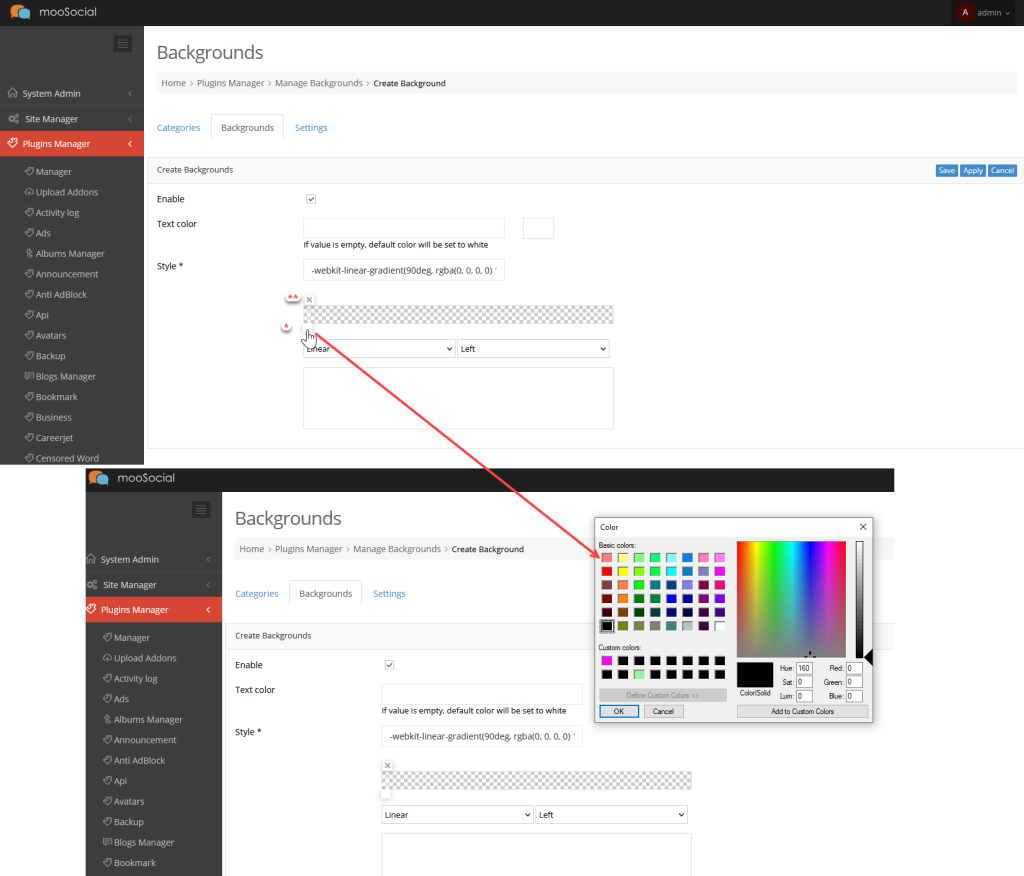
– By the way, can click on the close icon (**) to remove color.
– NOTE: you can add many colors to a background bar:

– Select display format as per your preference.

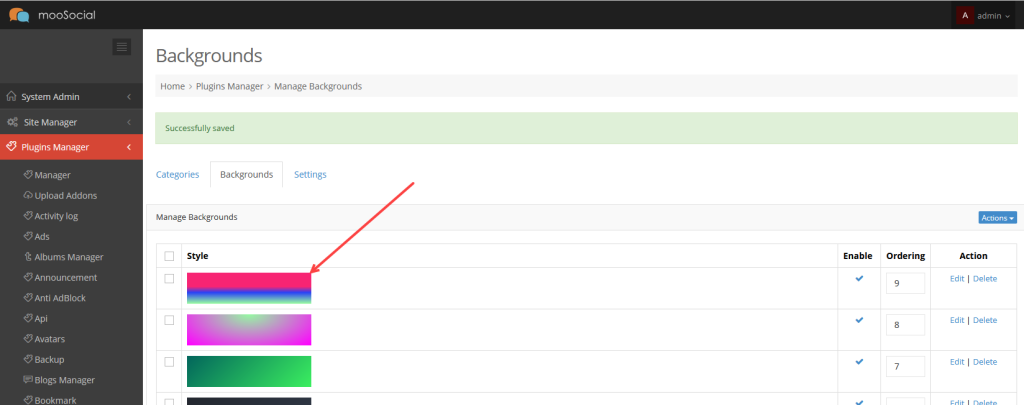
=> Click the Save button. Your new background has been saved.
(Front-end)
Members will now see the new gradient background whenever they create a new feedlist.
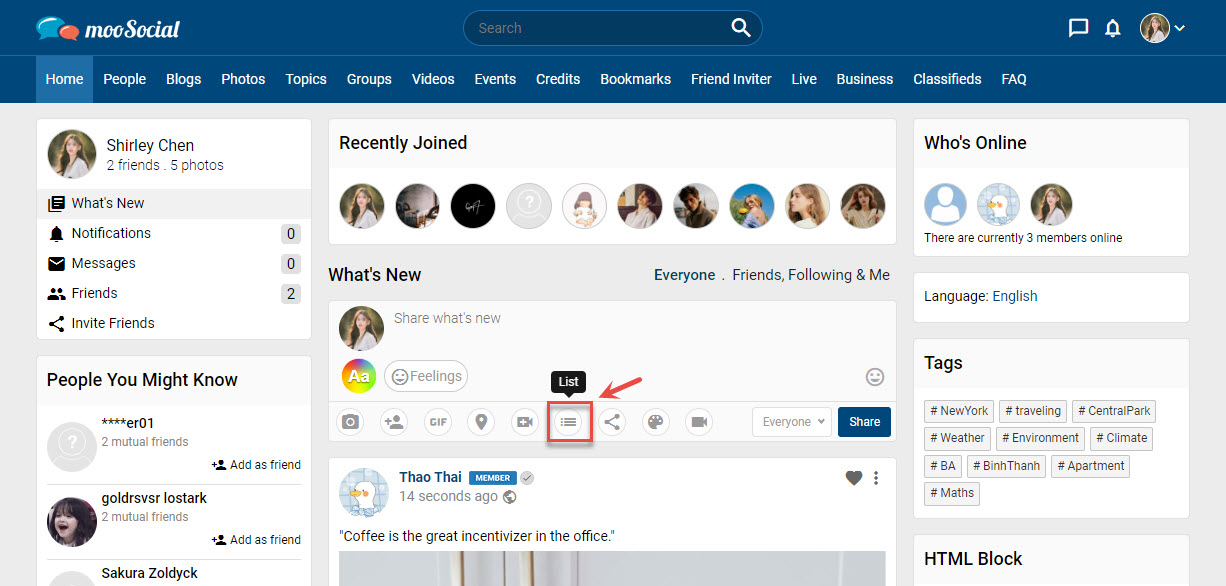
Users can create a list with their own title instead of using the pre-defined lists. Follow this guide to know how to create lists with custom titles.
Go to Home page => Click the List option on the What’s new box.
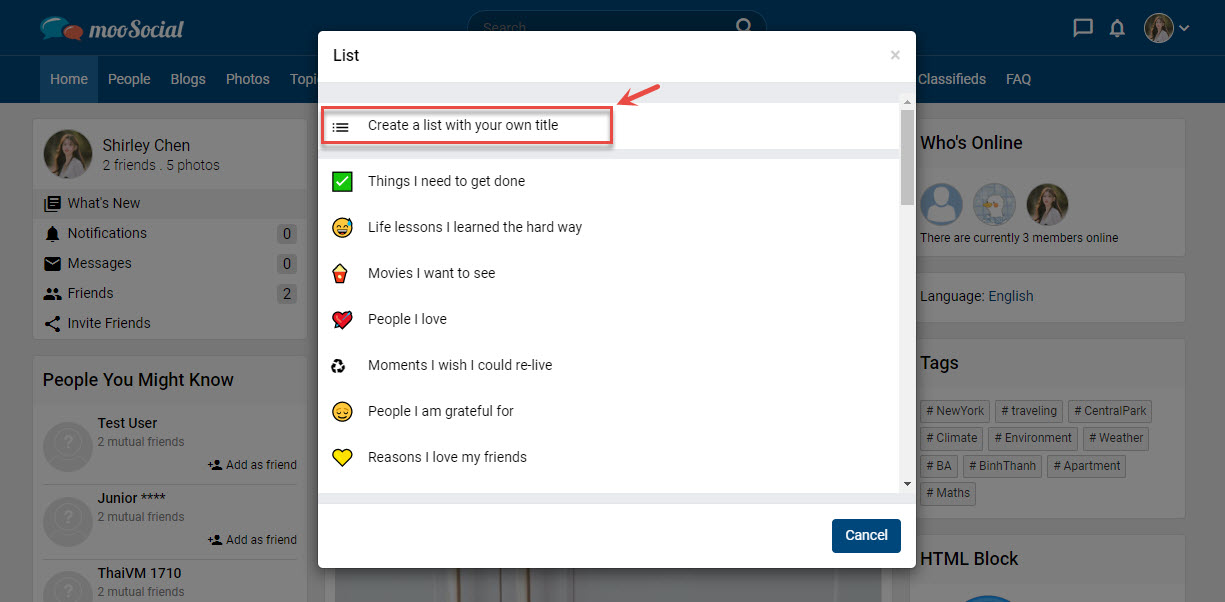
To create lists with custom titles, instead of using the pre-defined lists on the pop-up, click on “Create a list with your own title”.
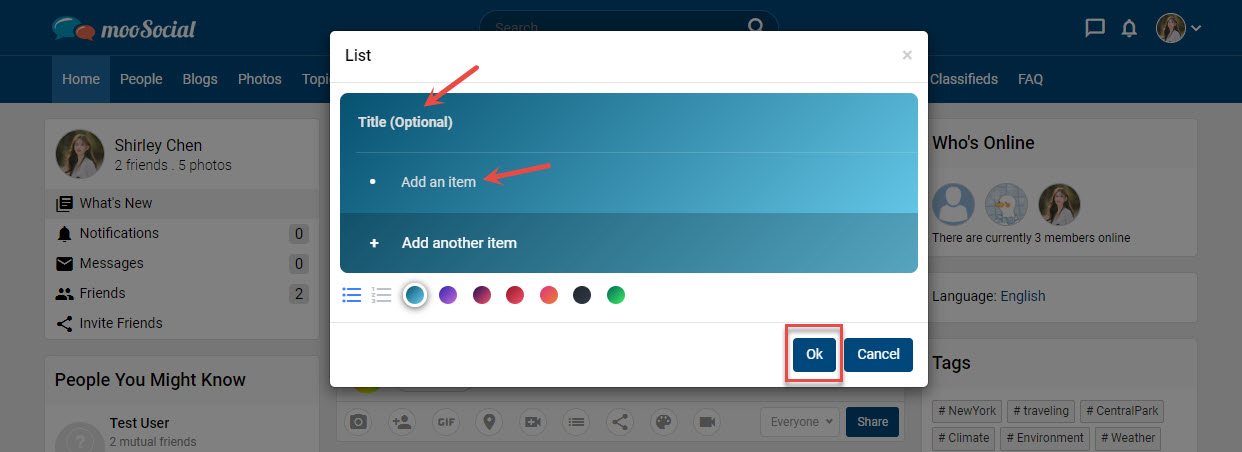
You will then be asked to enter the optional list title and the list items. You can even add emojis to them. Click the Ok button when you’re done creating your list.
Finally, click the Share button to post your status list.
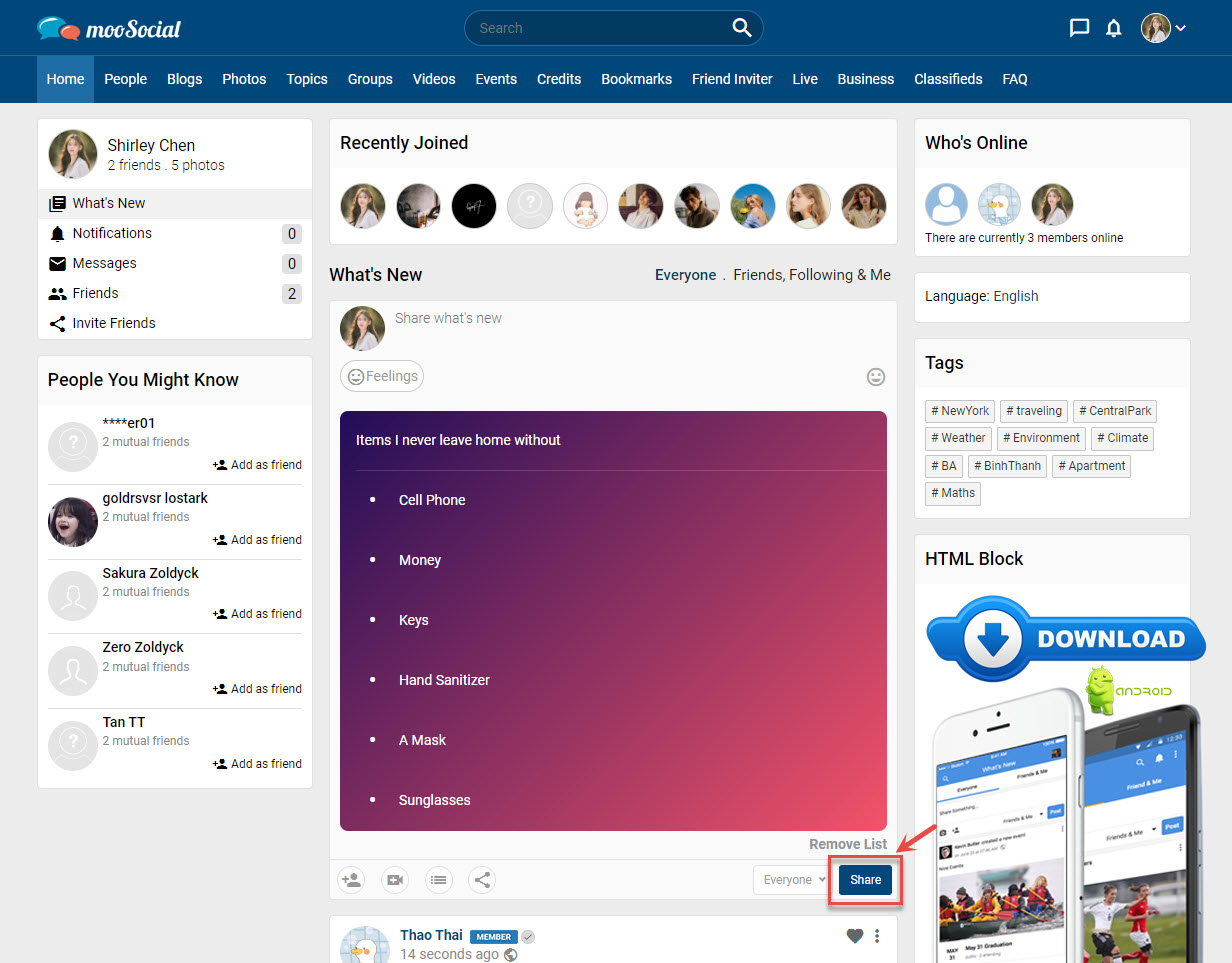
This tutorial will show you how to create a status list.
Go to Home page => Click the List option on the What’s new box => Show pop-up.
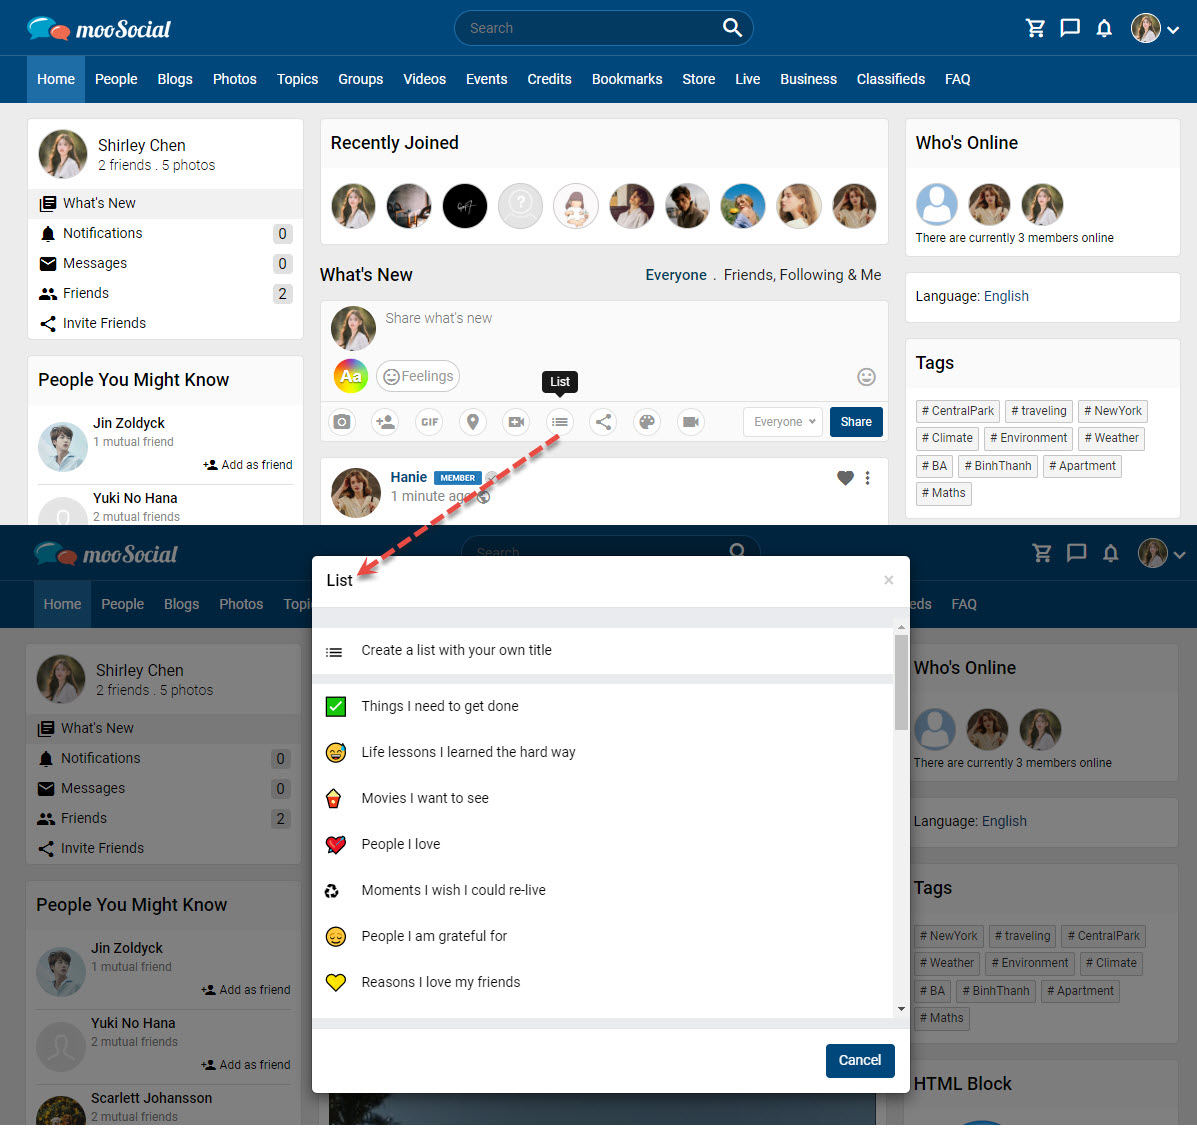
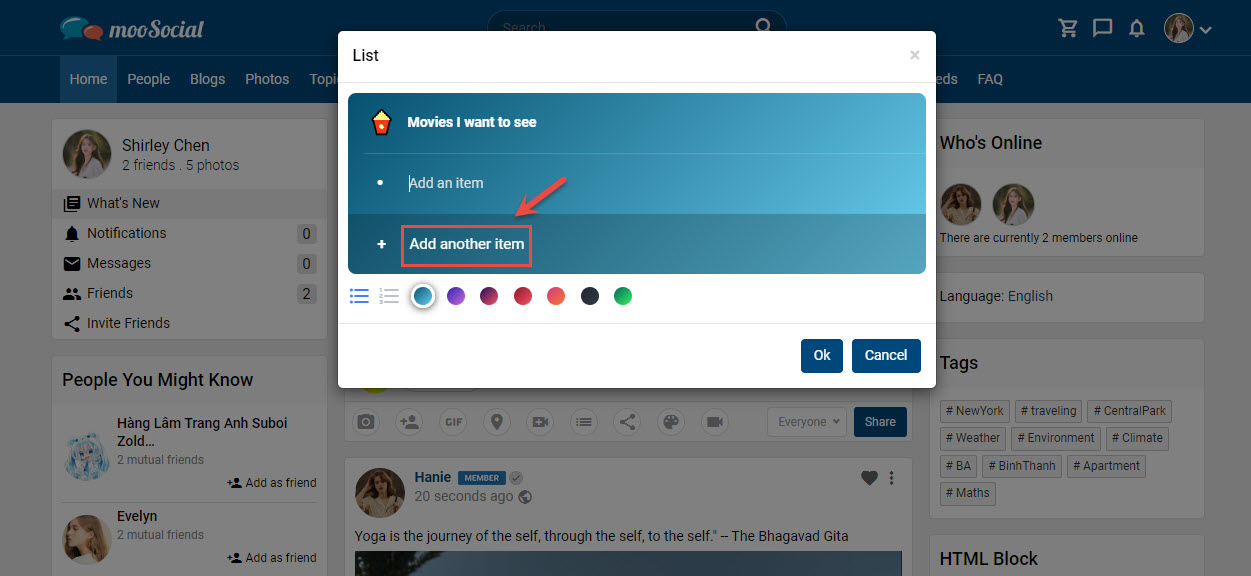
You will get multiple pre-defined lists. Click the one that suits you. You will then be asked to enter list items.
Enter the first list item then click Add another item and so on.
While creating the list, click the list format option and then select the bullets or numbering present below the list as per your preference.
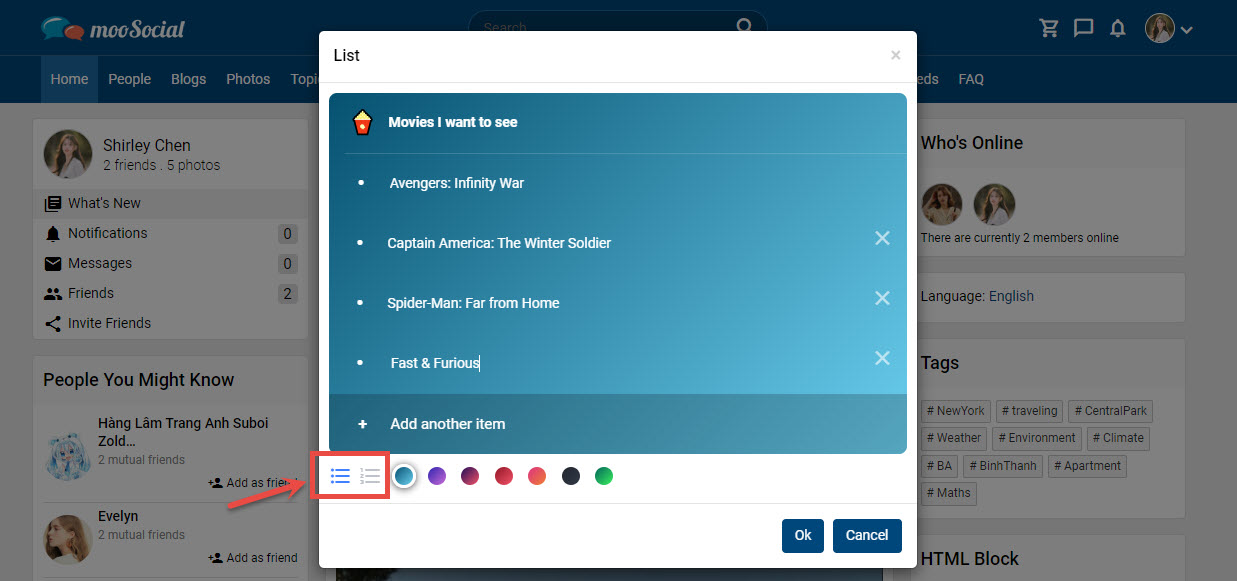
To change the color of the list background, click one of the colors listed below the lists.
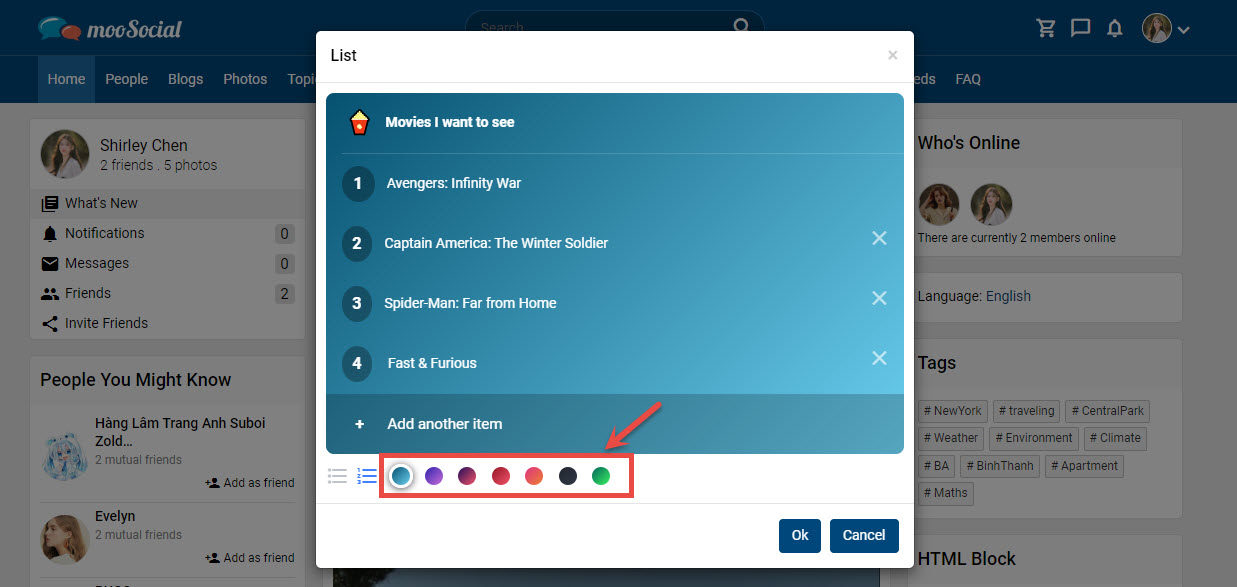
Once you are done creating your list, click the OK button.
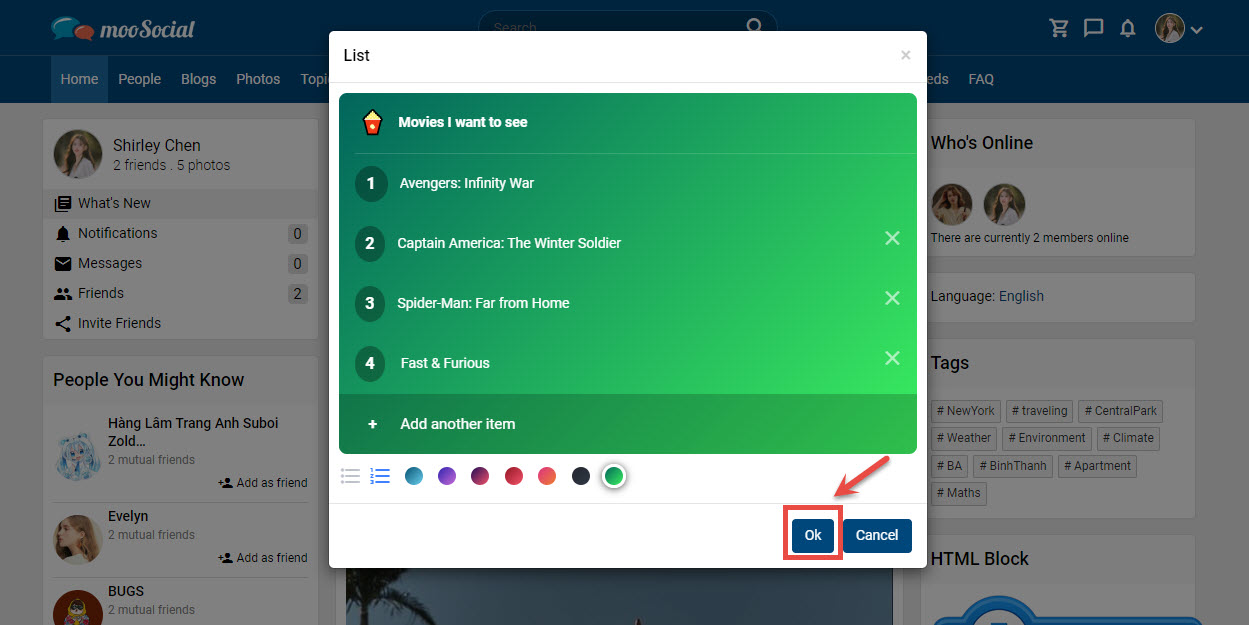
Then click the Share button to share your status list.
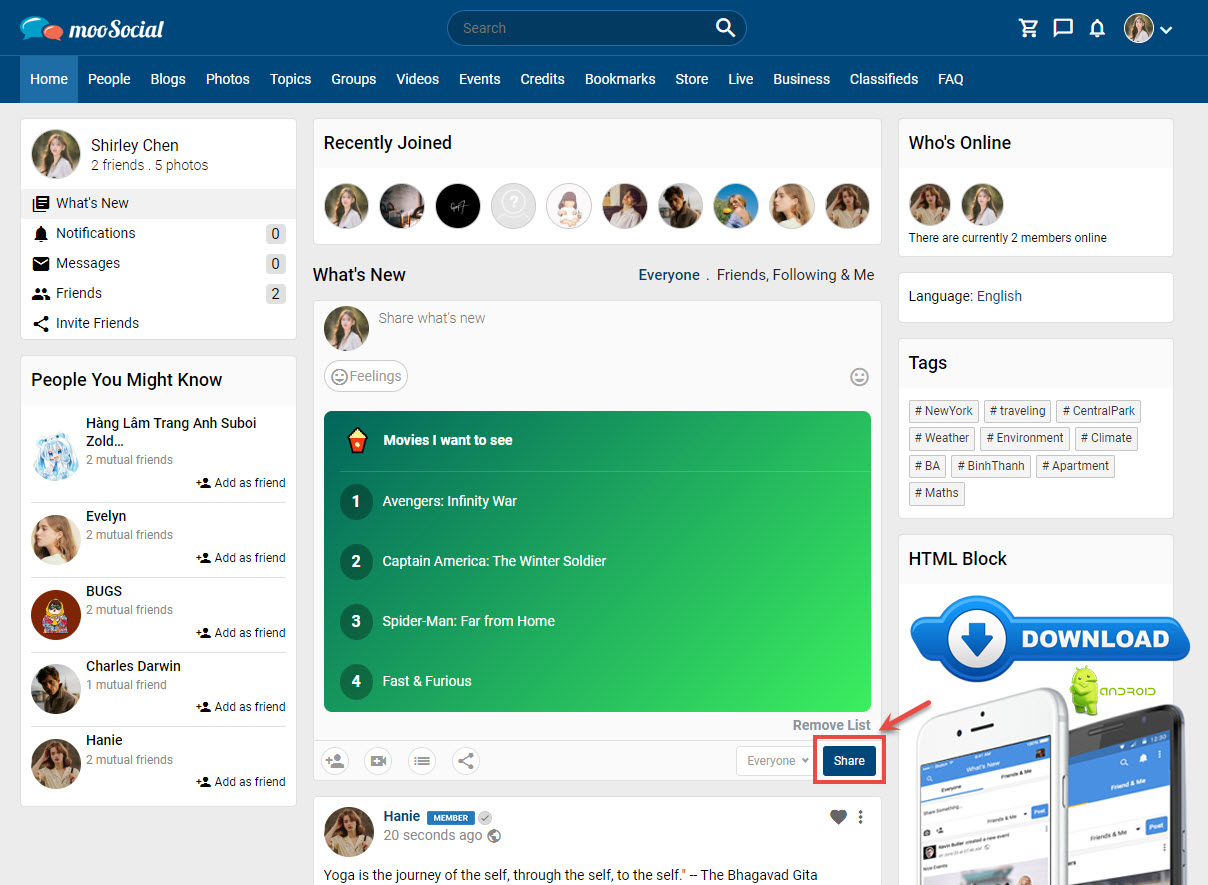
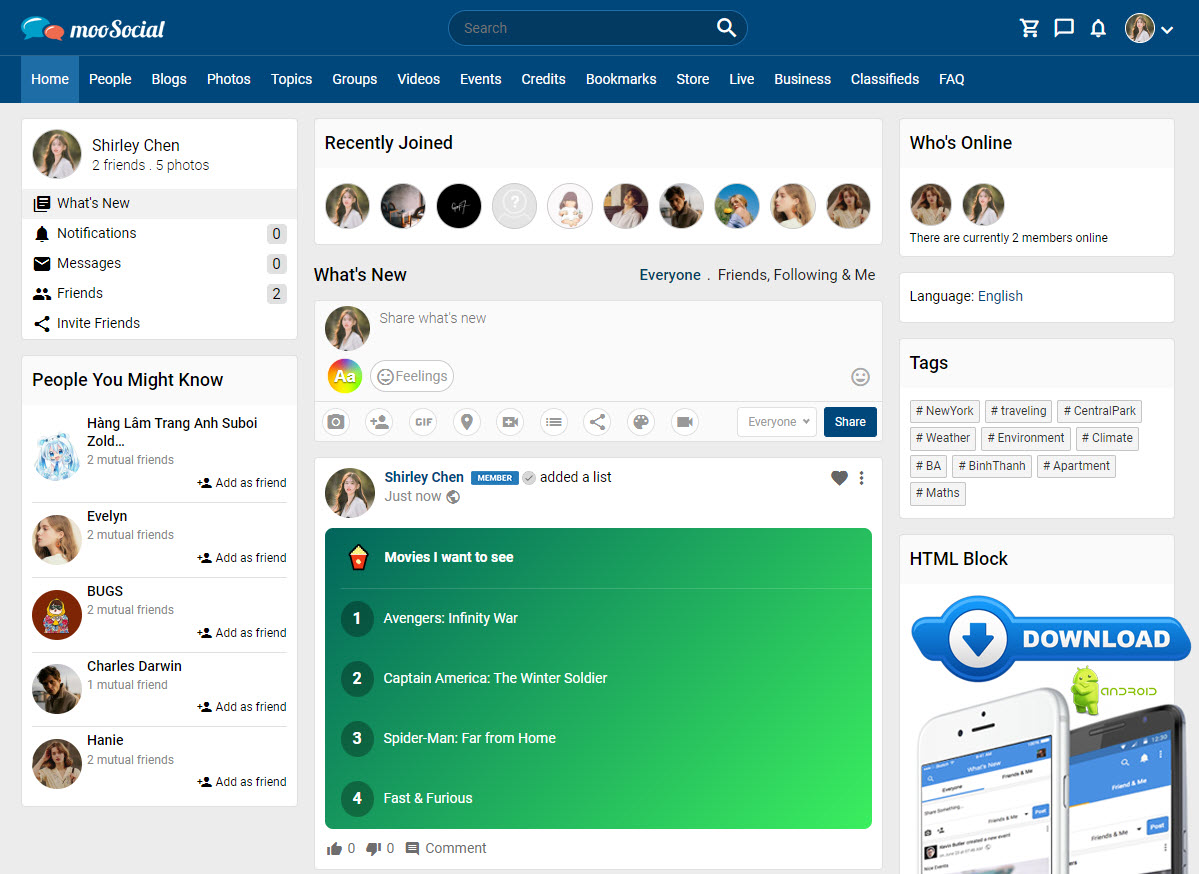
This is how the list will look after you’ve posted it.