By using OpenID Connect, your members can sign up/in using any social media account
In this article, I will show you how you can quickly config the Facebook, Twitter, Google and Linkedin application for OpenID Connect.
CONFIG FACEBOOK
1/ Go to developers.facebook.com
2/ Login & select My apps/Add a New App
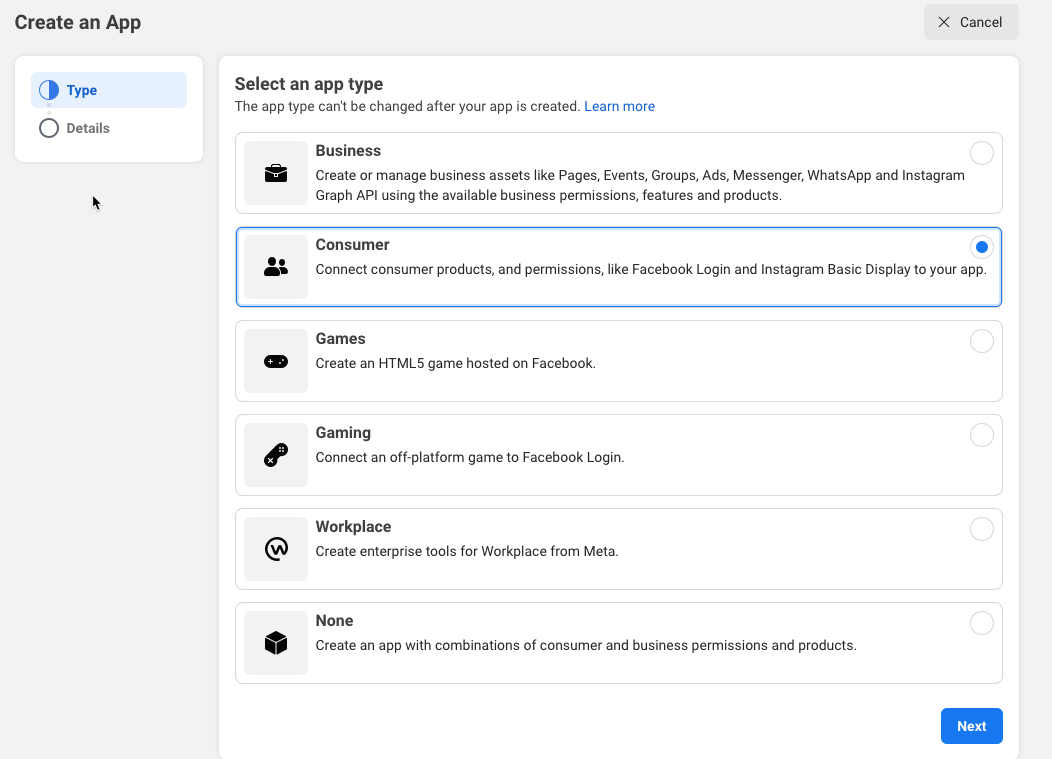
3/ Select an app type: select Consumer and click Next button
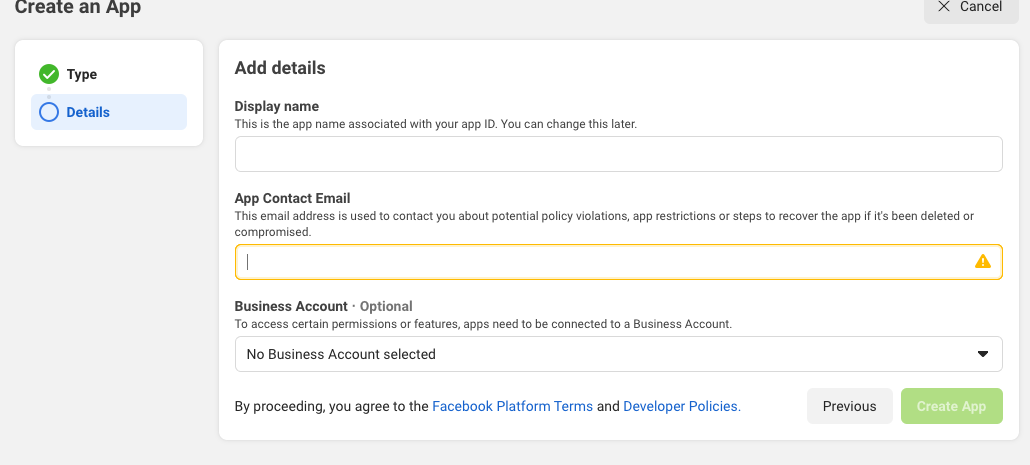
4/ Fill in your Display name and App Contact Email and click Create App button:
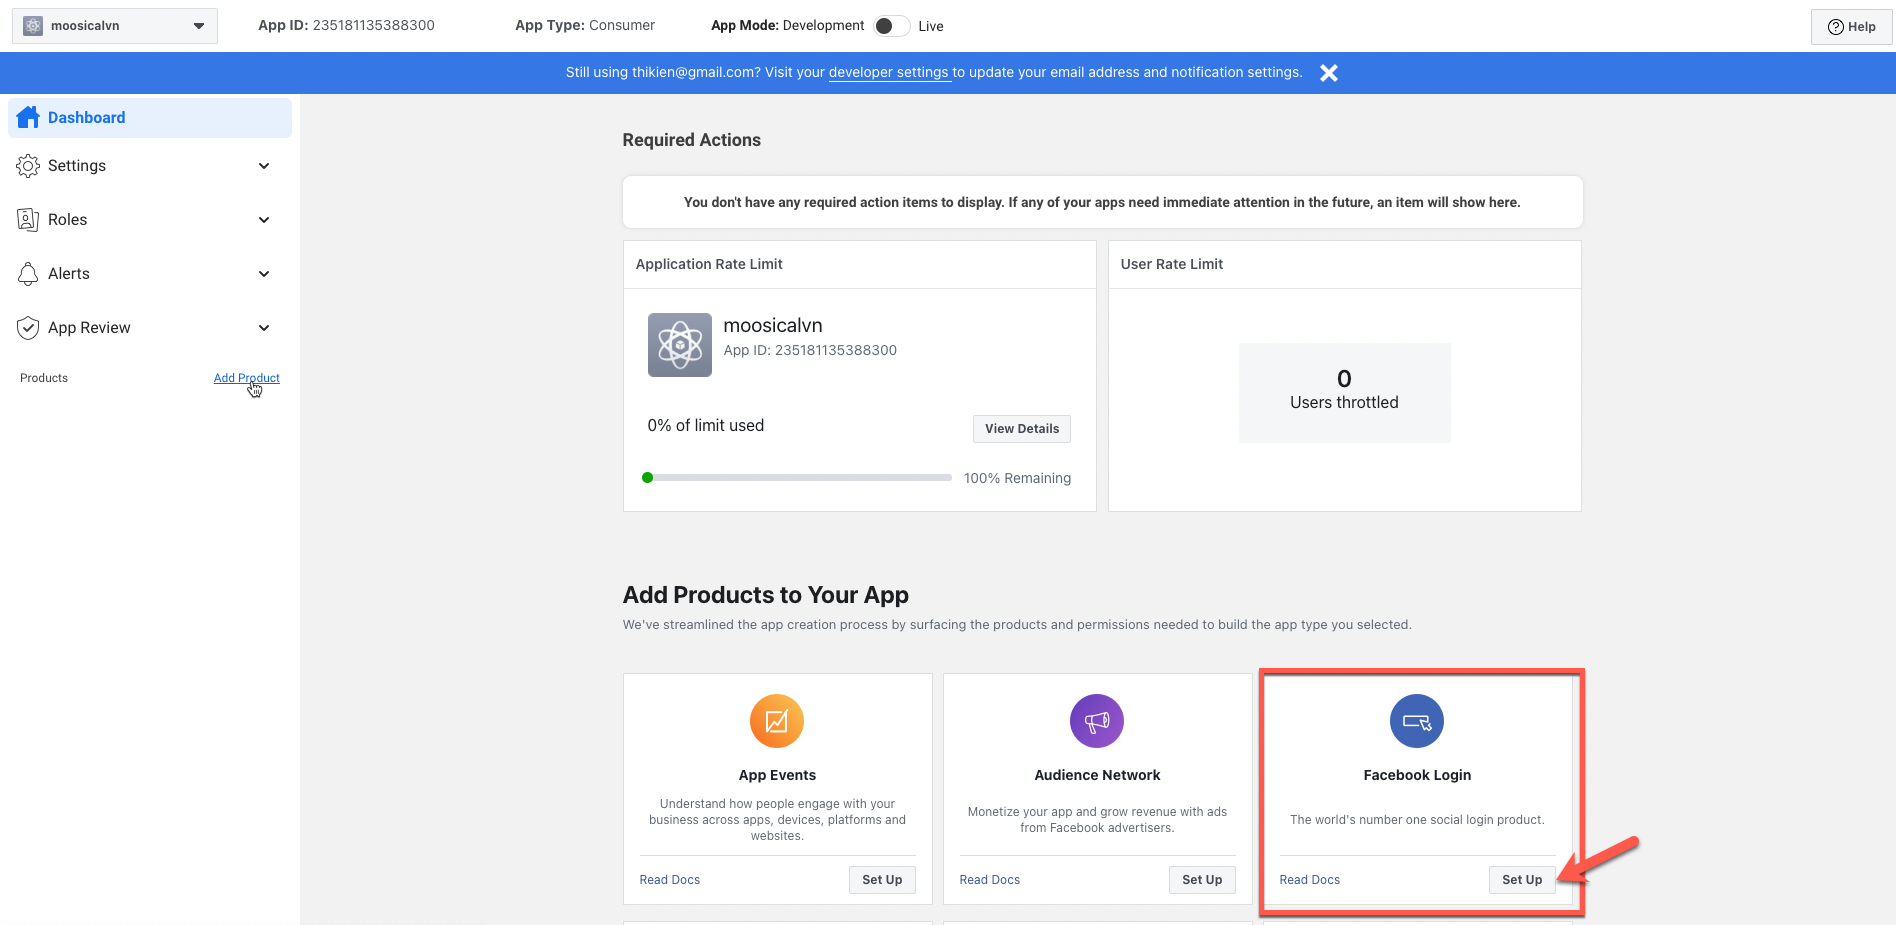
5/ After app is created, Click “Set up” button at Facebook Login from Add Products page:
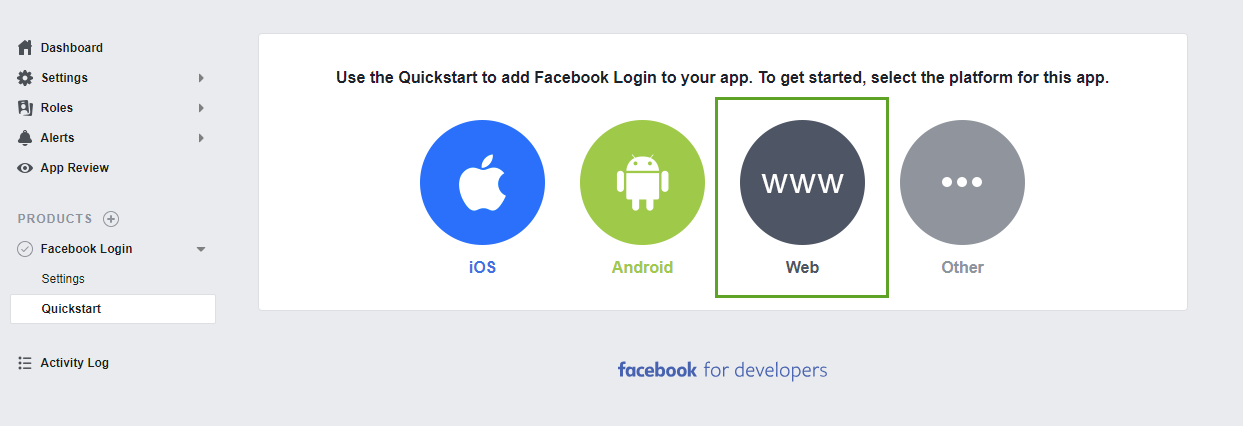
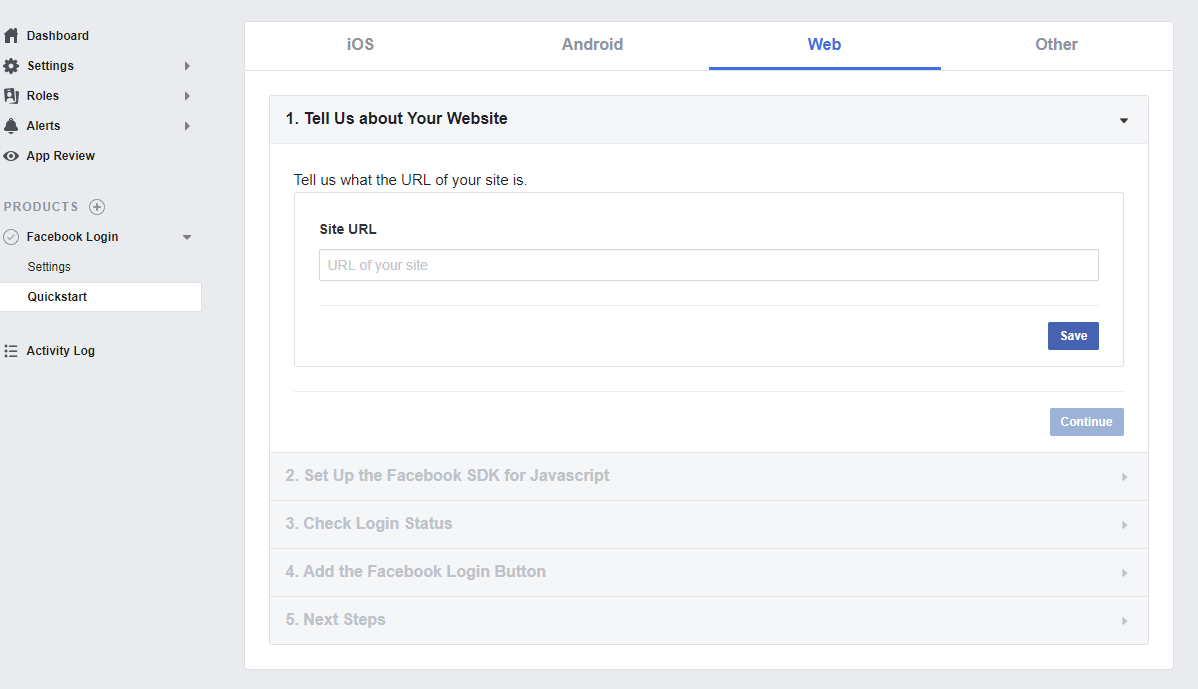
6/ Select platform for your app, select Web platform:
7/ After Select Web platform fill in your Site URL and click Save button:
8/ After click save, make sure it is activated (live):
To make your app live, go to My Apps/YourNewCreatedApps/Settings/Basic
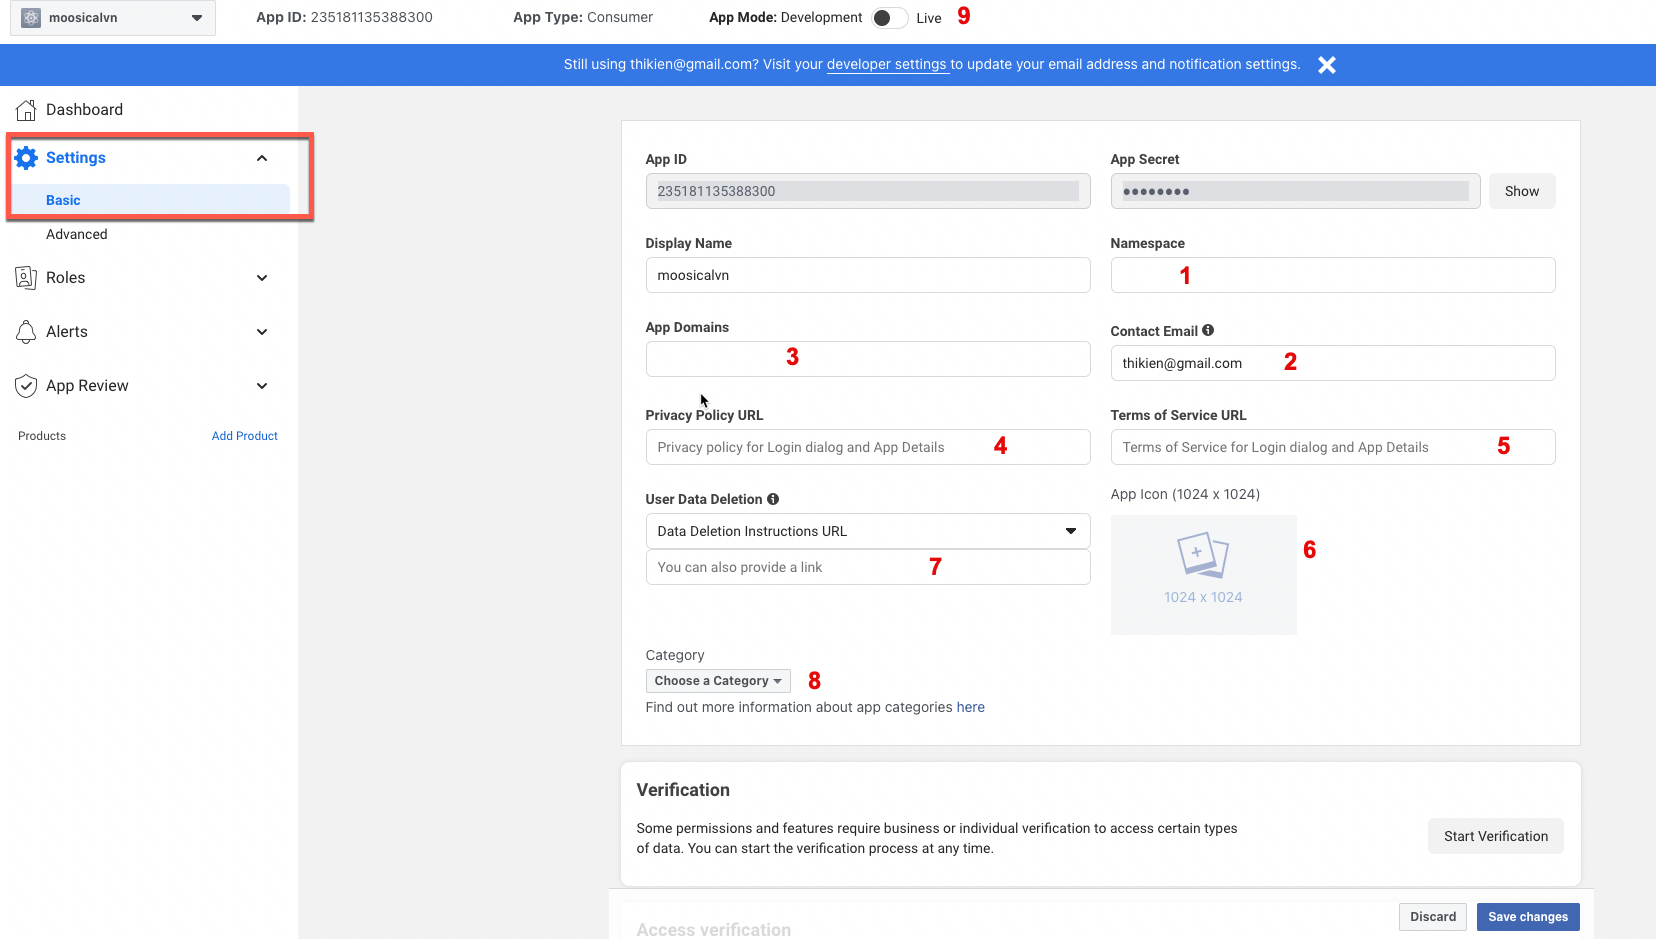
#1: Fill in your Namespace
#2: Ensure your Contact Email is correct
#3: Fill in your App Domains
#4: Fill in your Site Privacy Policy URL
#5: Fill in your Site Terms of Service URL
#6: Upload your app icon
#7: Enter yoursiteurl/social/auths/delete_app/facebook
#8: Select your app category
#9: On header of page change App Mode from Development to Live
If any of # above incorrect, your app cannot be lived.
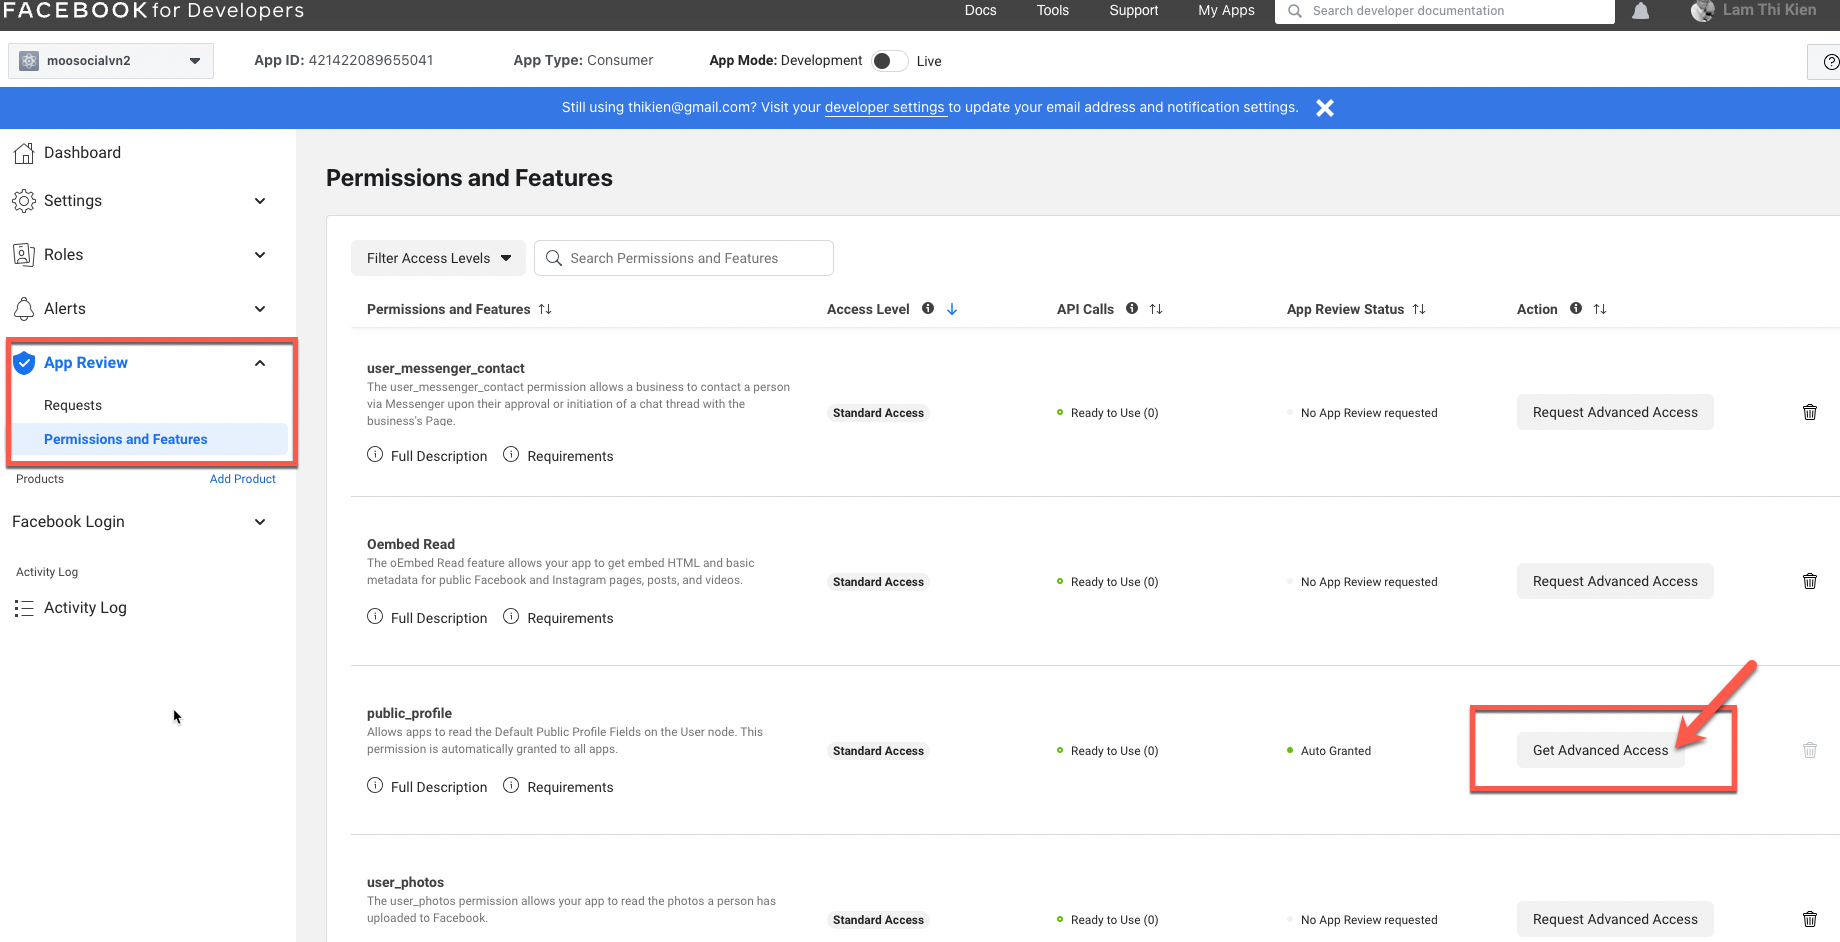
9/ Go to App Review/Permissions and Features and switch public_profile and email to Advanced Access:

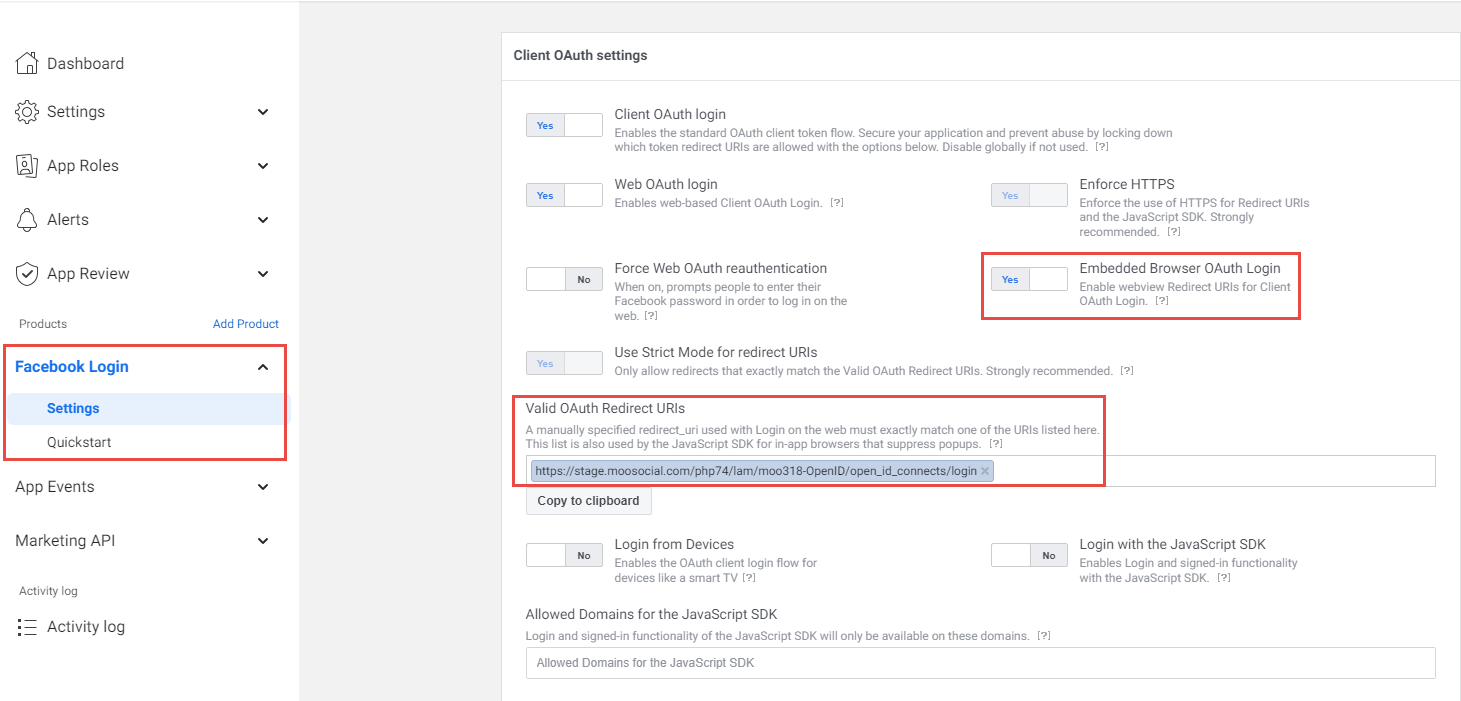
10/ How to configure your Admin Dashboard:
Go to Admin Dashboard/OpenID Connect/Facebook Login
Then:
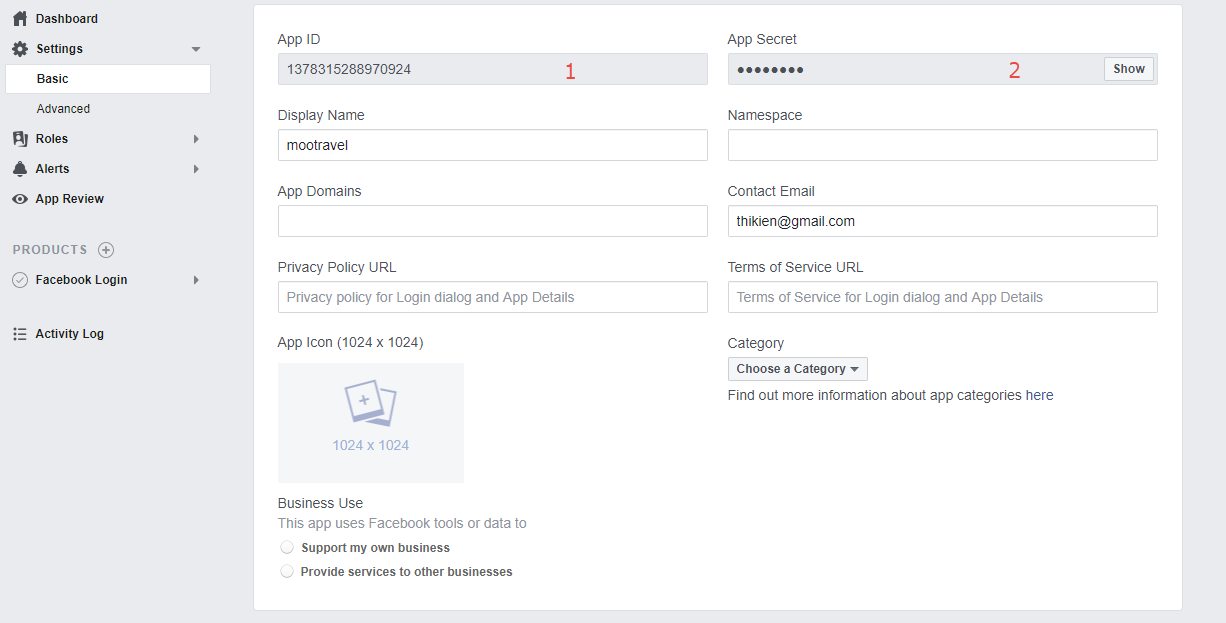
Get #1 and #2 from fb app and copy to your Admin Dashboard/OpenID Connect/Facebook Login
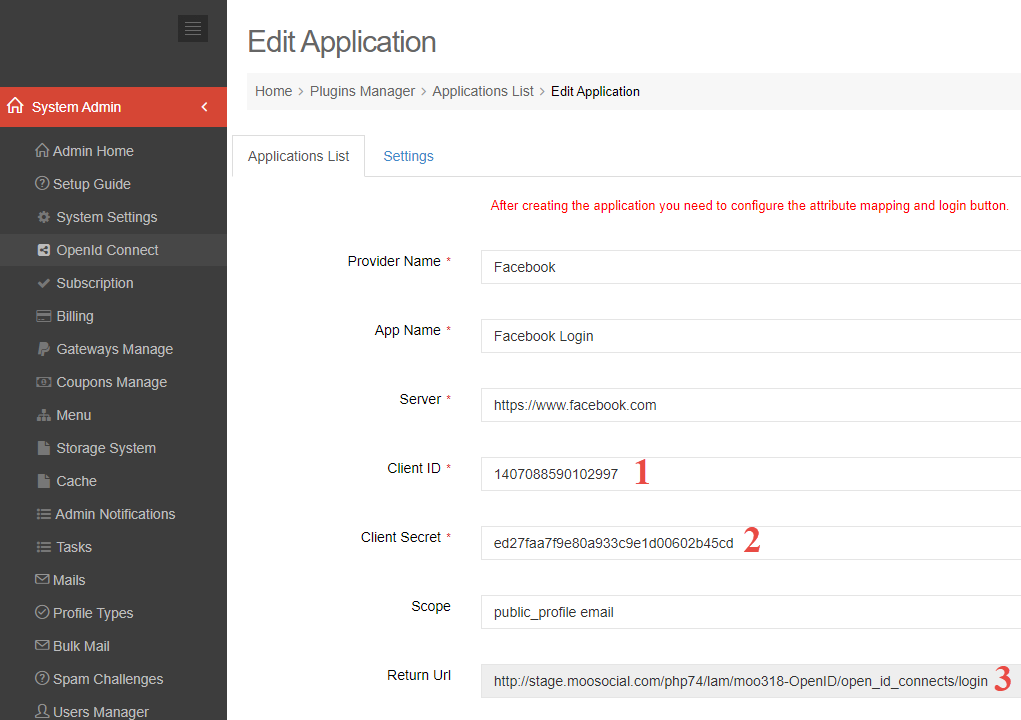
#1: Your Client ID from your FB app (in your FB app/Settings/Basic)
#2: Your Client Secret from your FB app (in your FB app/Settings/Basic, the App Secret will show after pressing Show button and re-enter your FB password
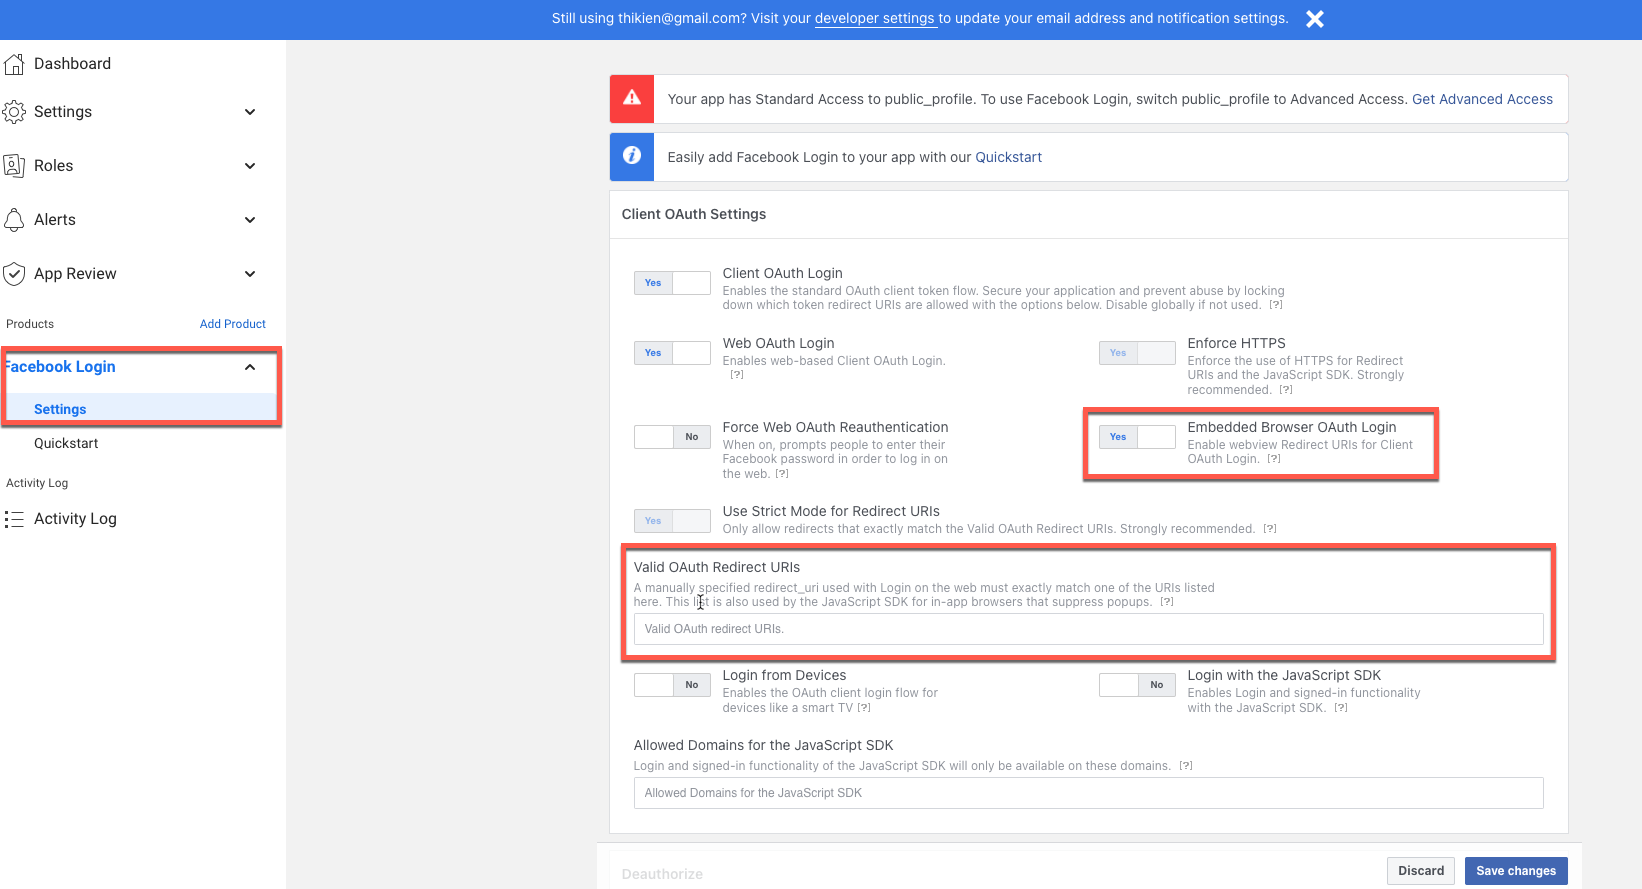
#3: Copy link Return URL field: [yoursite/open_id_connects/login/] paste to Valid OAuth Redirect Url at your facebook developer page and setEmbedded Browser OAuth Login to Yes
Save Facebook Login.
*You dont need to config SDK version used in Admin Dashboard, system will be detected automatically.
*Remember to check if any space in the fields.
*Remember your site could be [https] instead of [http], they will not recognize if site was [https] and Client ID & Admin Dashboard were [http].
CONFIG GOOGLE
1/ Go to console.developers.google.com:
2/ Login your google account & create project:
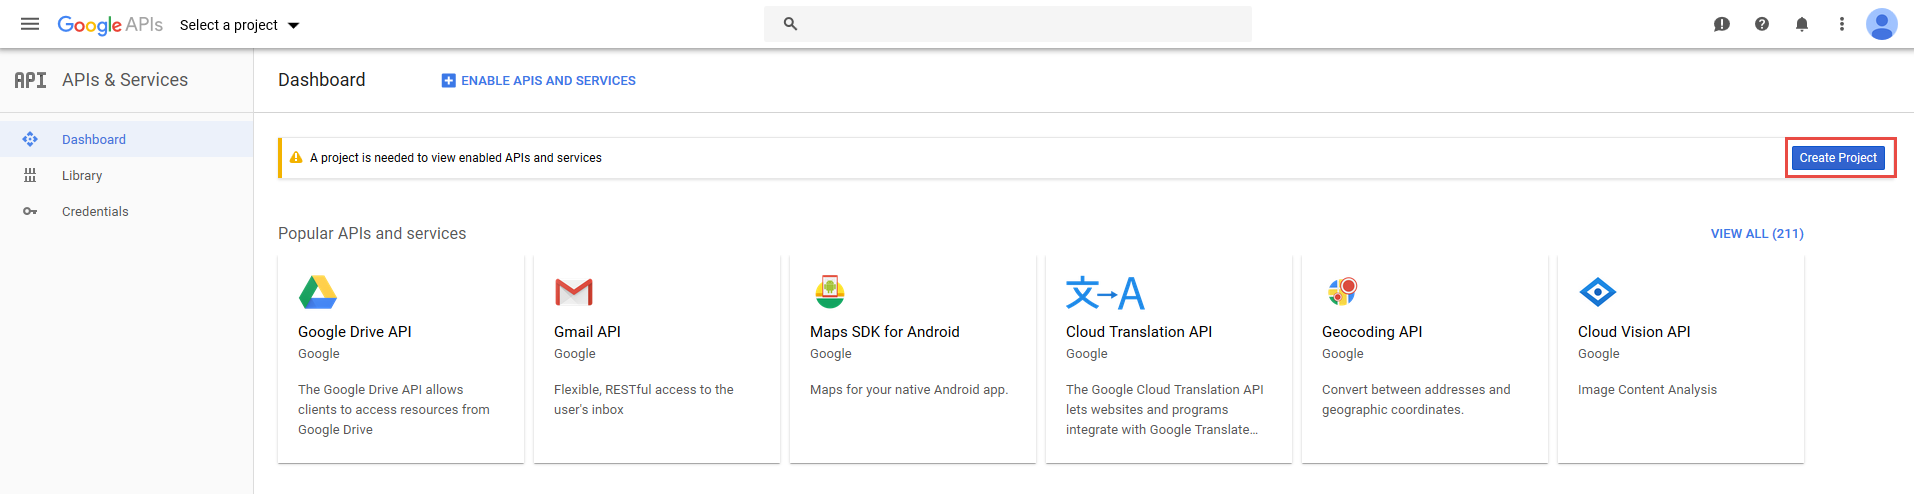
#Press on Create Project.
3/ Fill in your Project’s Name:
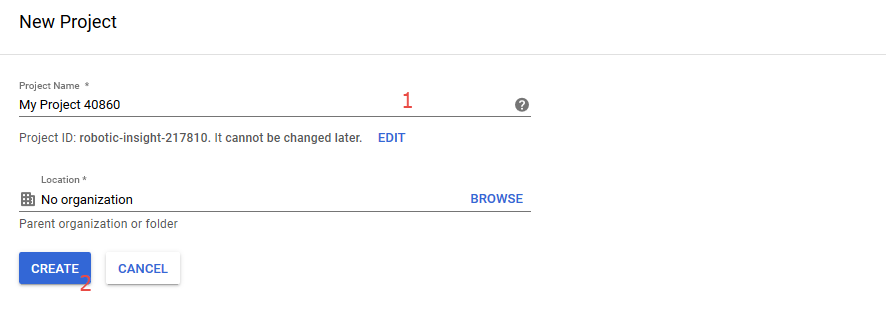
#1 Fill your project’s name
#2 Create
*Agree to Terms and Conditions if they’re showing up.
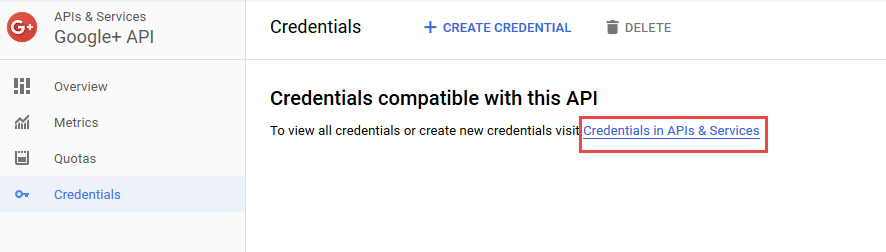
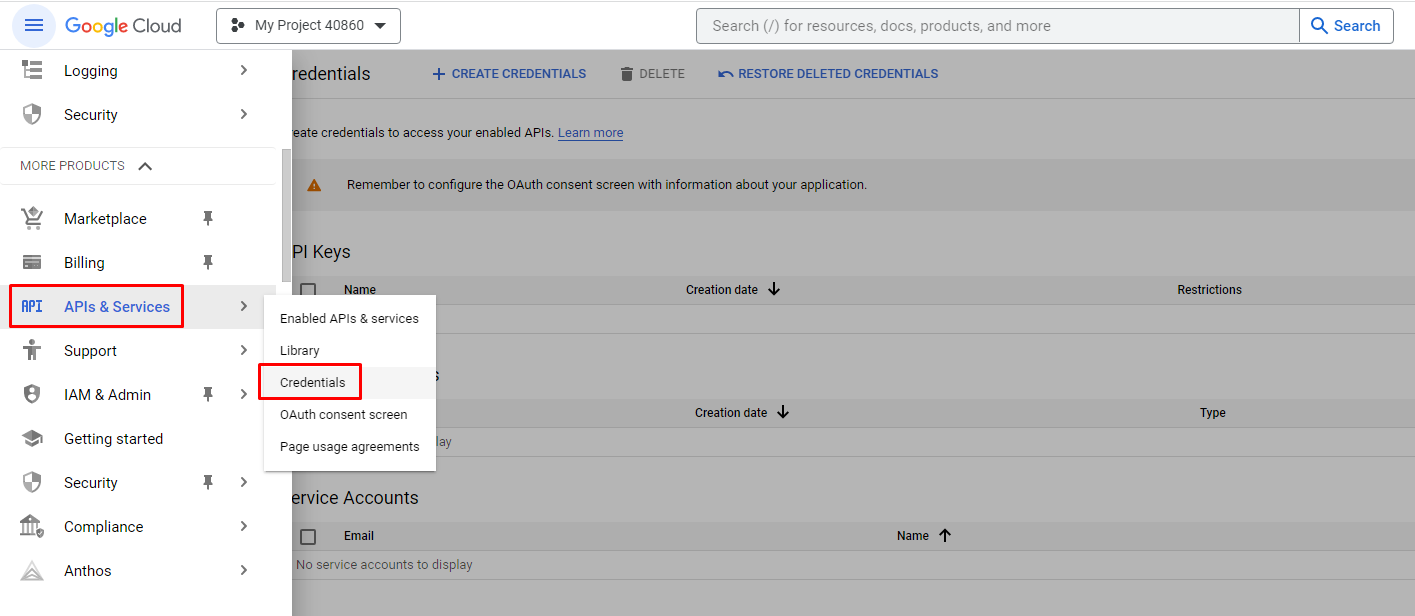
4/ After your project is done creating select your Project from select box and go to API & Services/Credentials of your project:
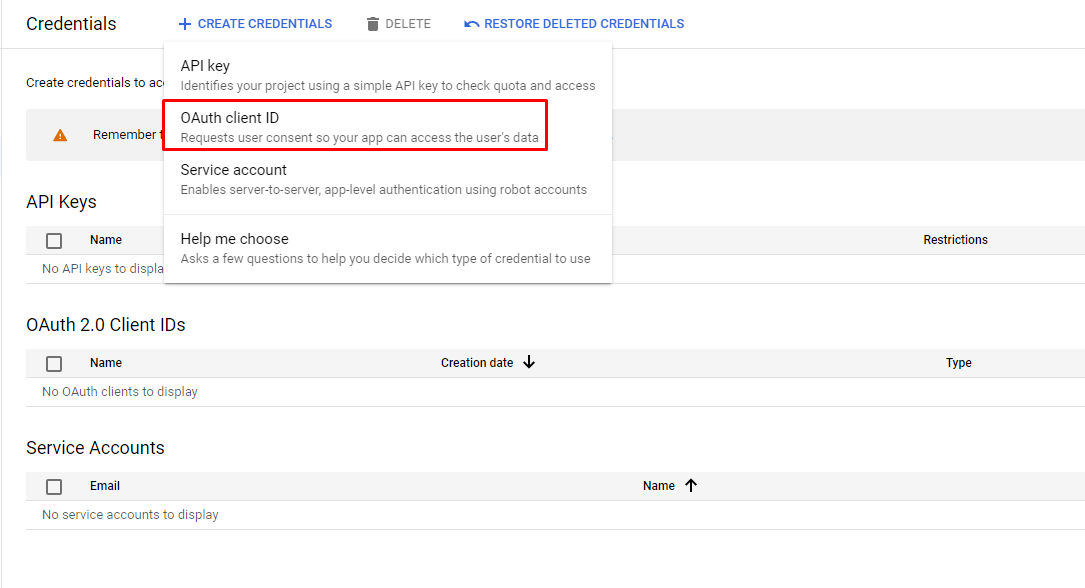
5/ Click on CREATE AREDENTIALS and choose OAuth client ID:
6/We have to configure consent screen first:

#Press on Configure consent Screen then continue.
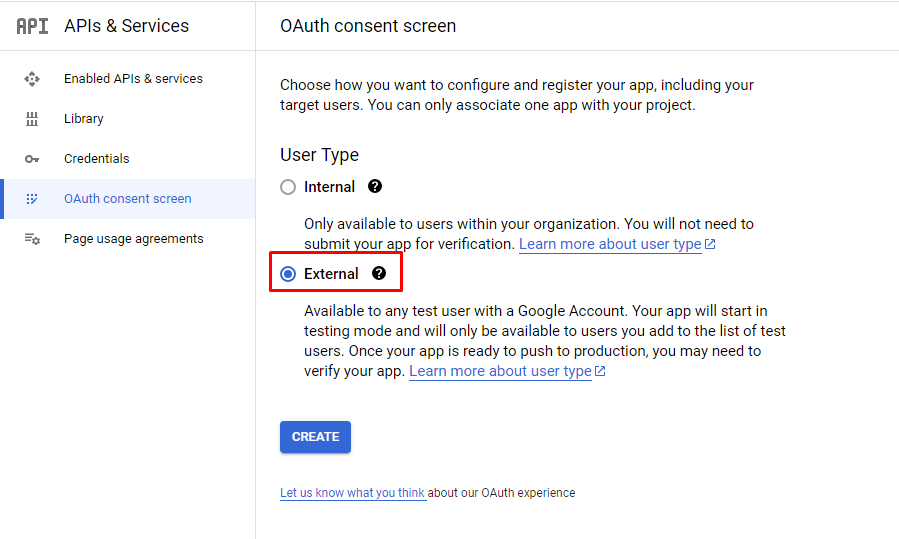
7/ Select External and click on CREATE button:
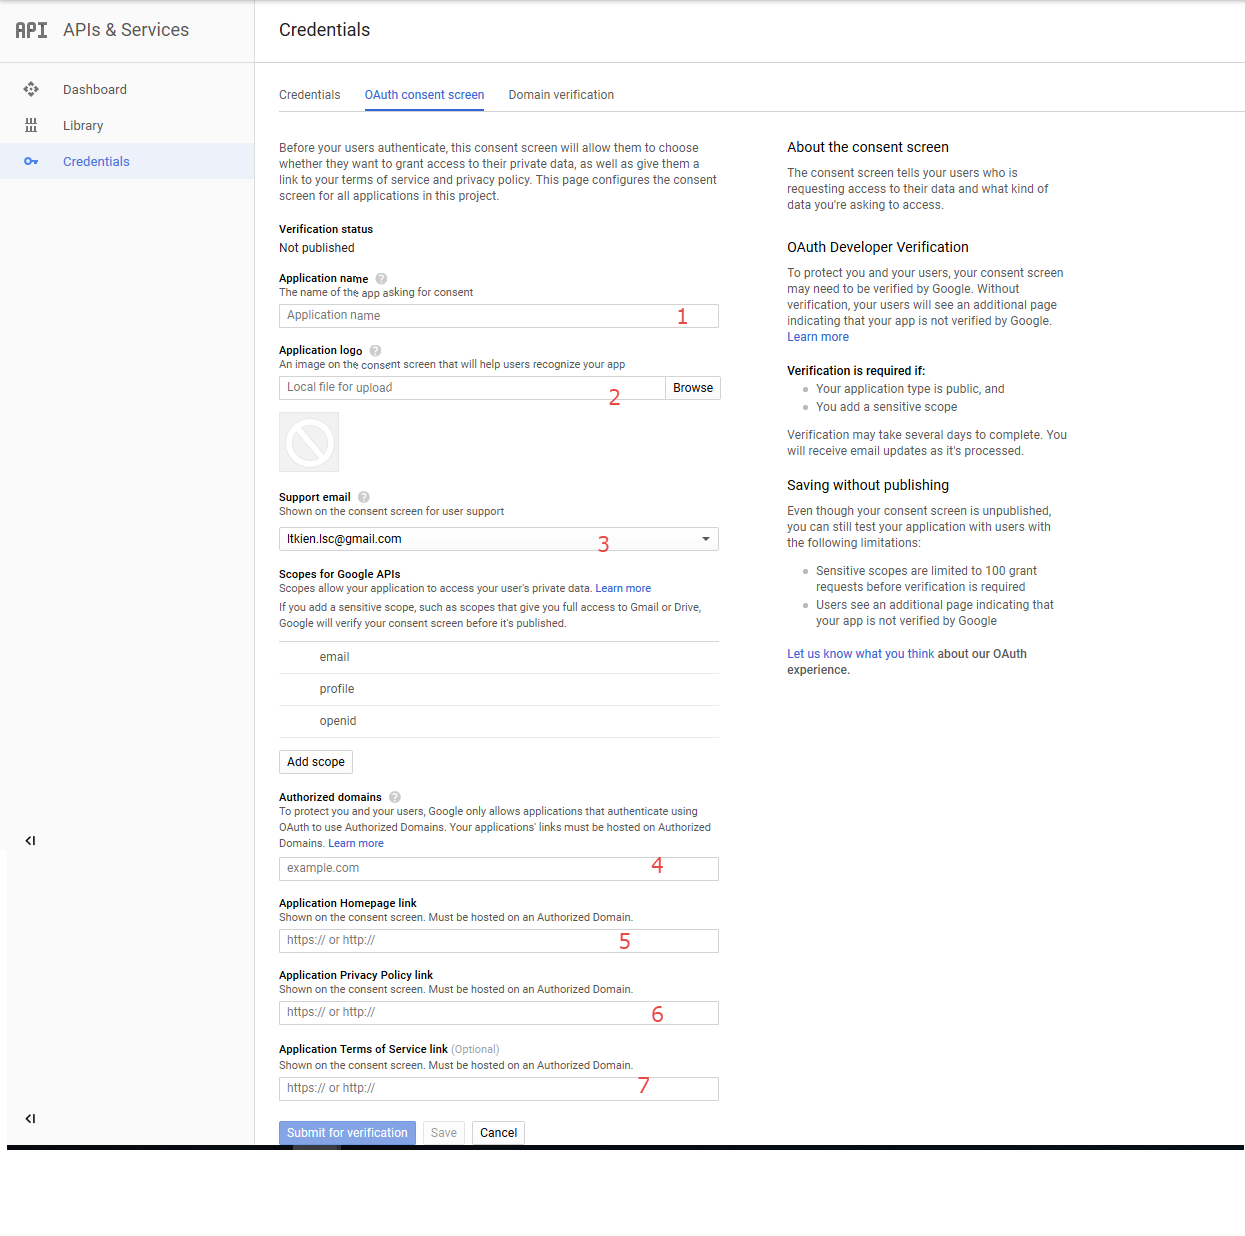
8/ Register at your OAuth Consent Screen :
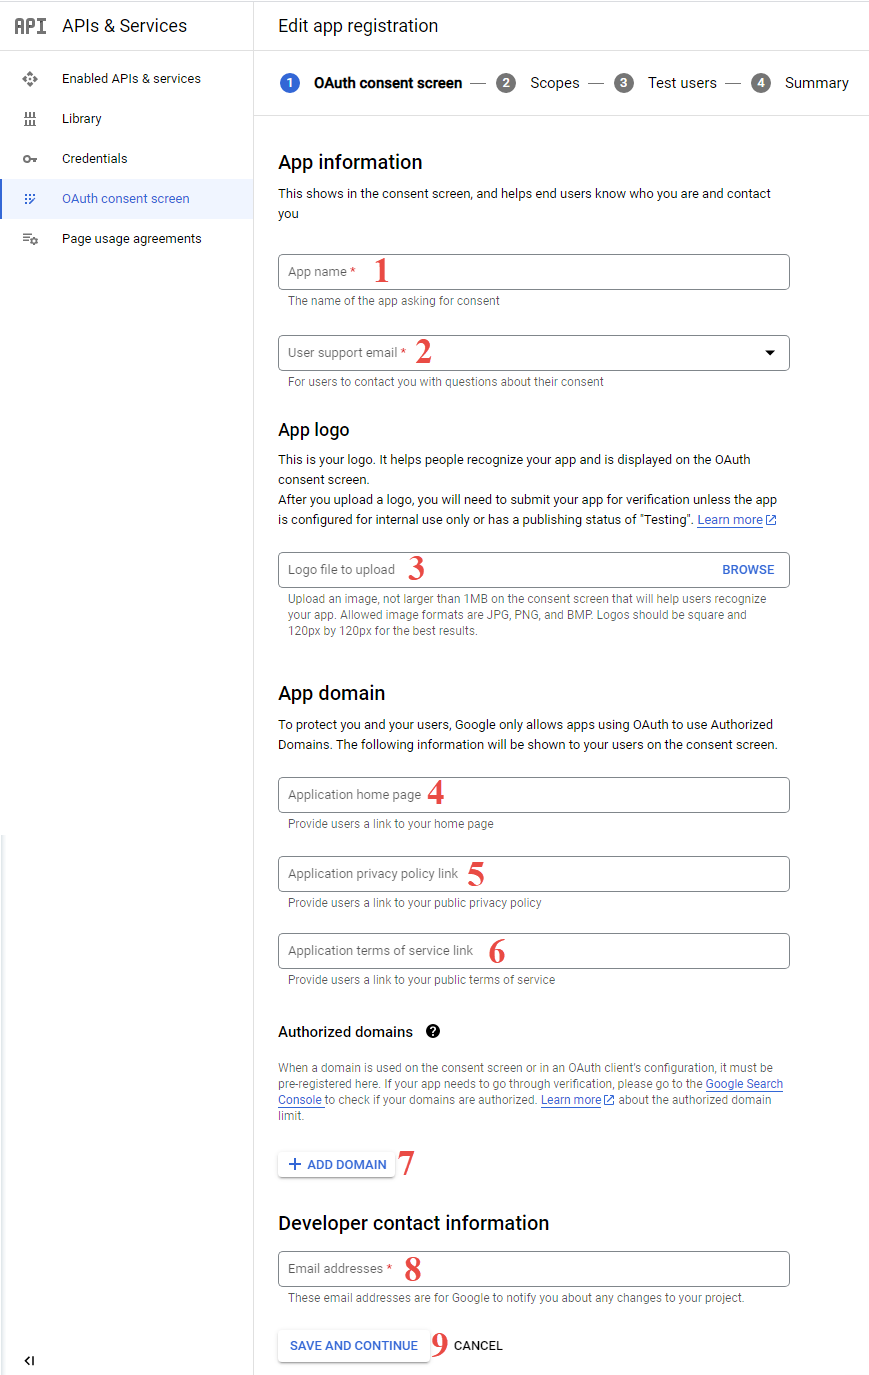
#1 Enter App name
#2 Enter User support email
#3 Upload logo
#4 Enter your home page link
#5 Enter your privacy policy page link
#6 Enter your terms of service page link
#7 Enter your domain
#8 Enter your developer contact email
#9 Save information
Do the step 4 and step 5 again to create OAuth client ID
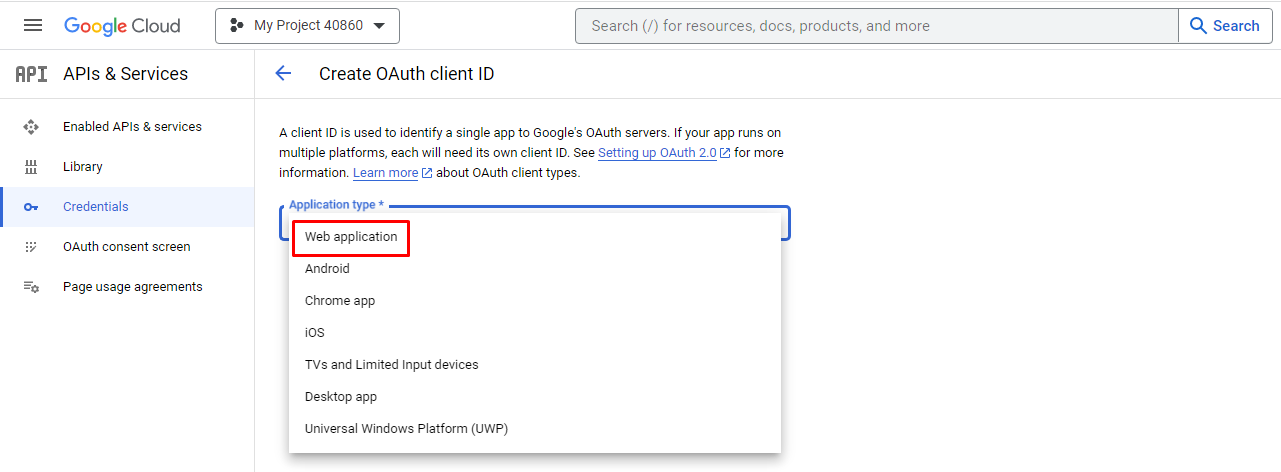
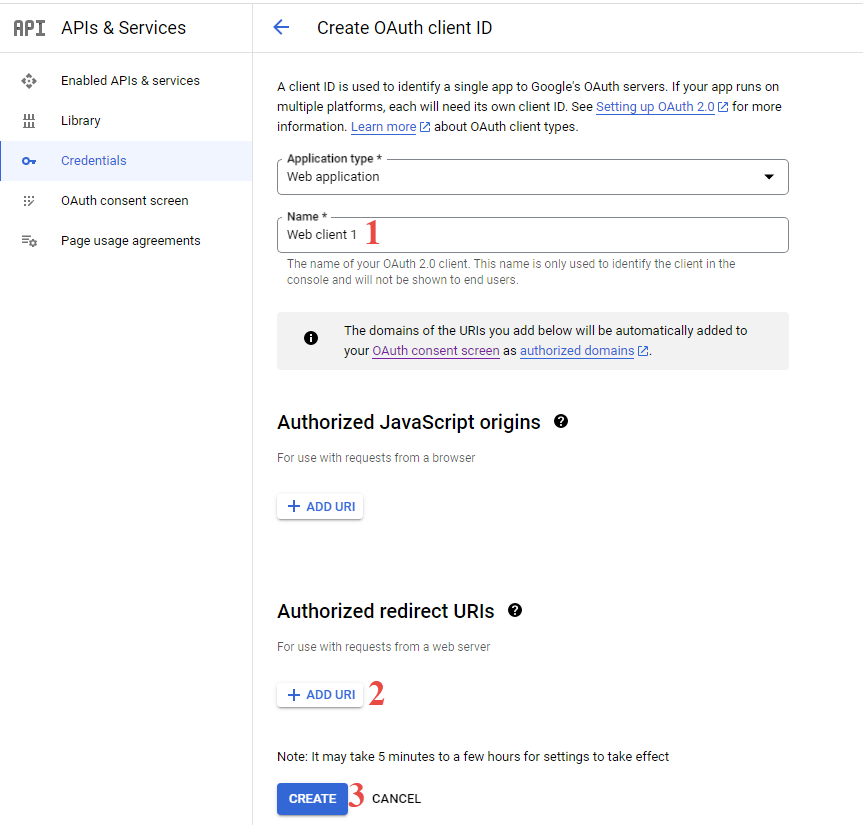
9/ Select Application type: Web application:
10/ Fill the client ID information:
#1 Enter the OAuth client name
#2 Enter redirect URls, this URL has format: [yoursite/open_id_connects/login]
#3 Create OAuth Client ID
11/ Review and save your Client ID and Client Secret:
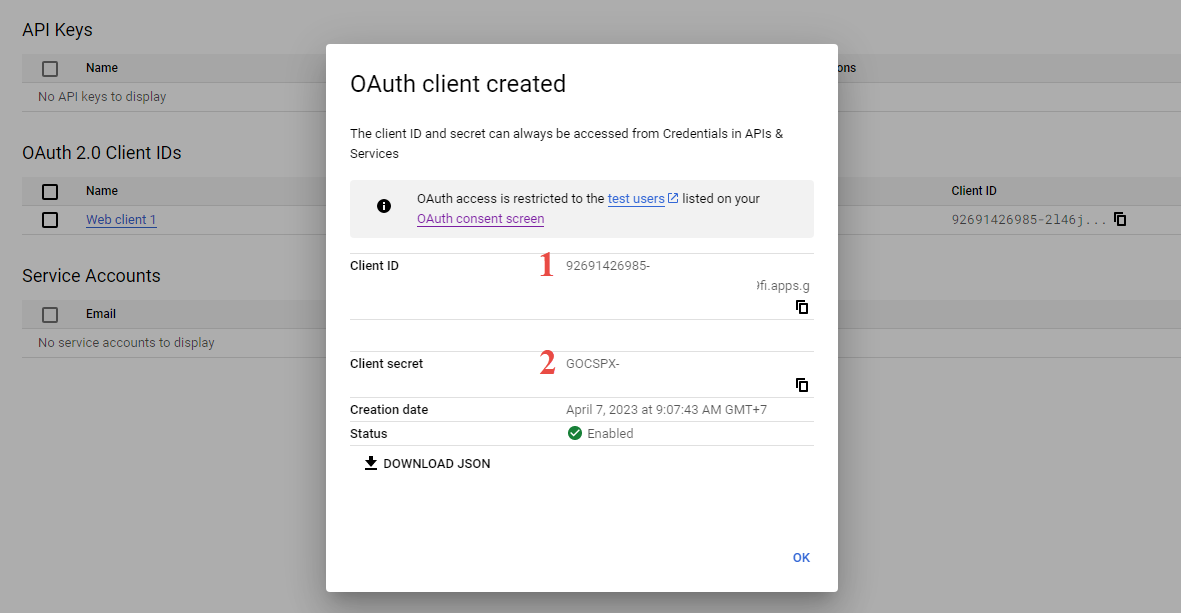
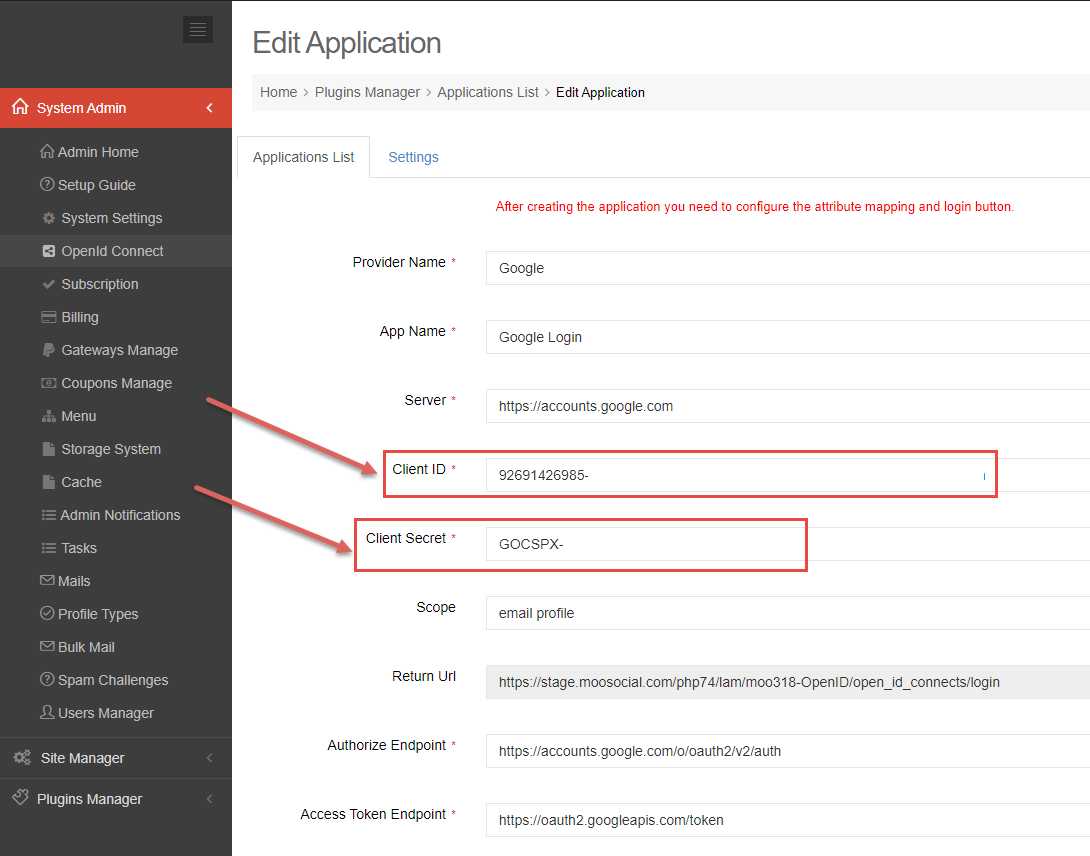
Copy (1) and (2) to your setting Admin Dashboard/OpenID Connect/Google Login:
*Remember to check if any space in the fields.
*Remember your site could be [https] instead of [http], they will not recognize if site was [https] and Client ID & Admin Dashboard were [http].
* Both sides, Admin Dashboard and Client ID must be configured synchronously for the 1, 2, they must be same to each others.
CONFIG TWITTER
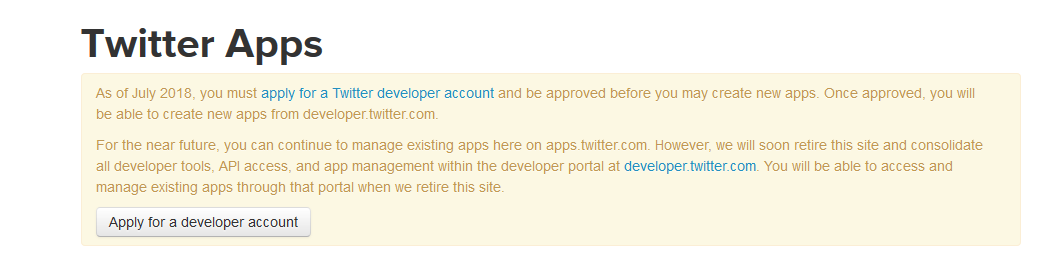
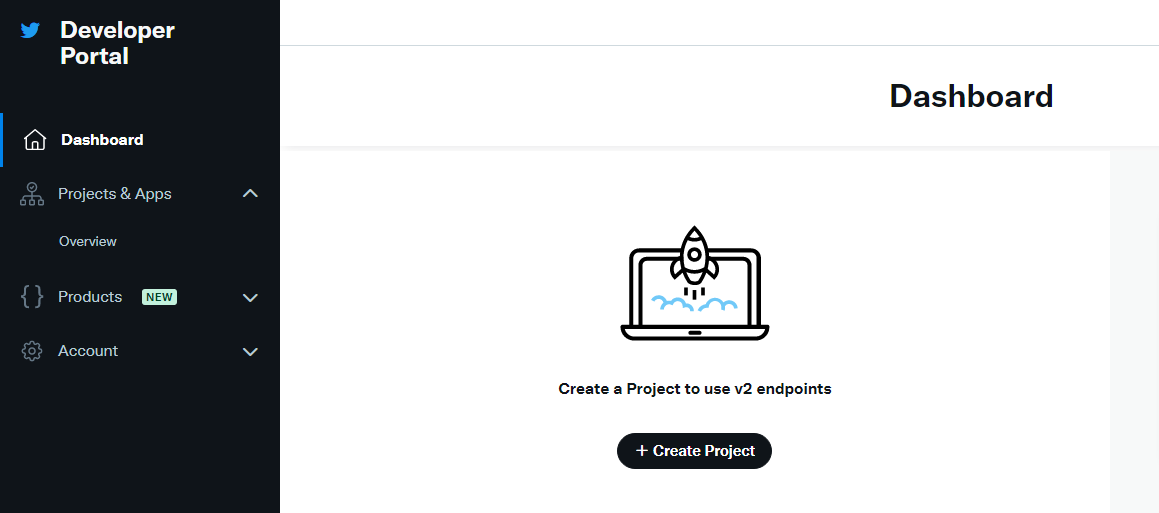
1. Go to https://developer.twitter.com/en/apps and login your Twitter developer account.
Note: if your account is not developer account, you will got a message request “Apply for a developer account”, please click “Apply for a developer account” and follow all steps to apply developer account.
2. At Dashboard tab, click on Create Project button:
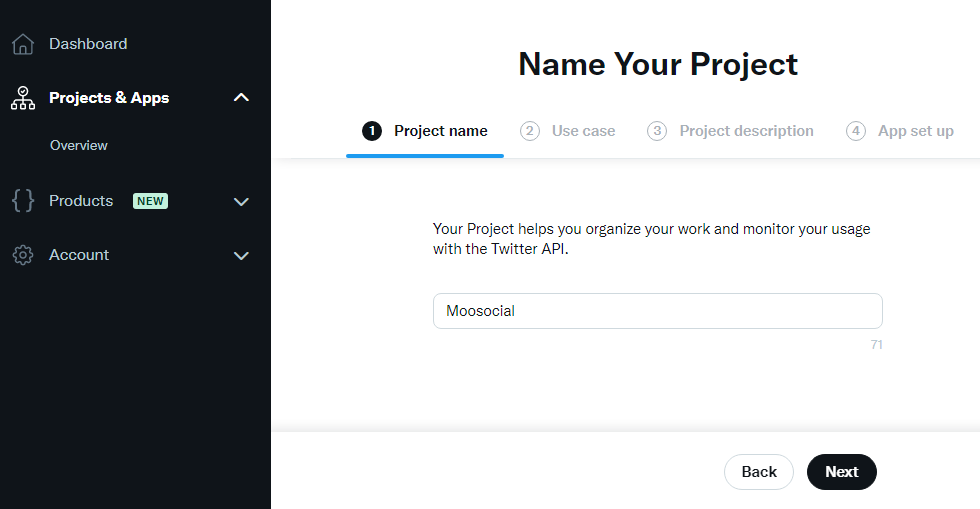
3. At Projects & Apps tab, you must fill all your project information:
3.1 Enter Project name and click on Next button.
3.2. Select a Use case and click on Next button.

3.3. Enter Project description and click on Next button.

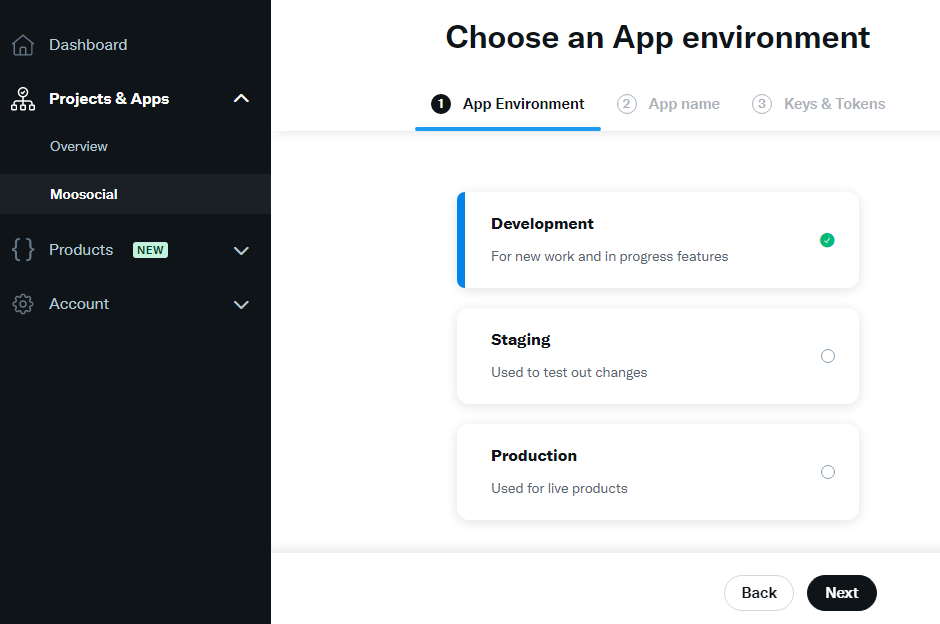
4. After create project successfully, you must fill all your application information:
4.1 Select your App environment and click on Next button.
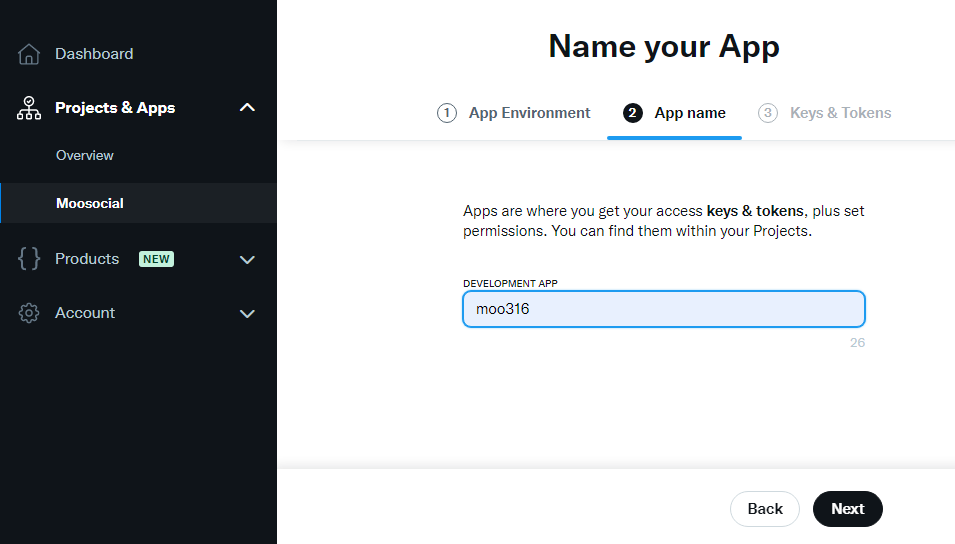
4.2. Enter your App name and click on Next button.
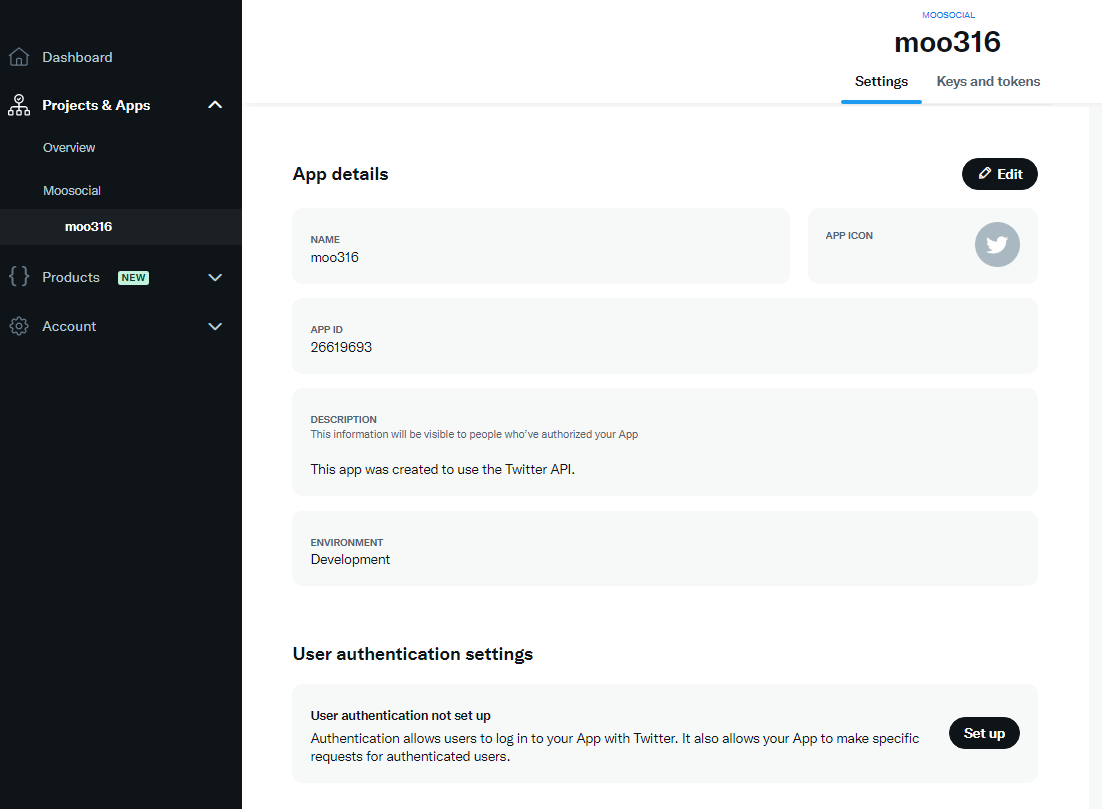
5. After create application successfully, you will see your keys and tokens.
6. Click on App settings button.
7. At App settings page, click on Set up button:
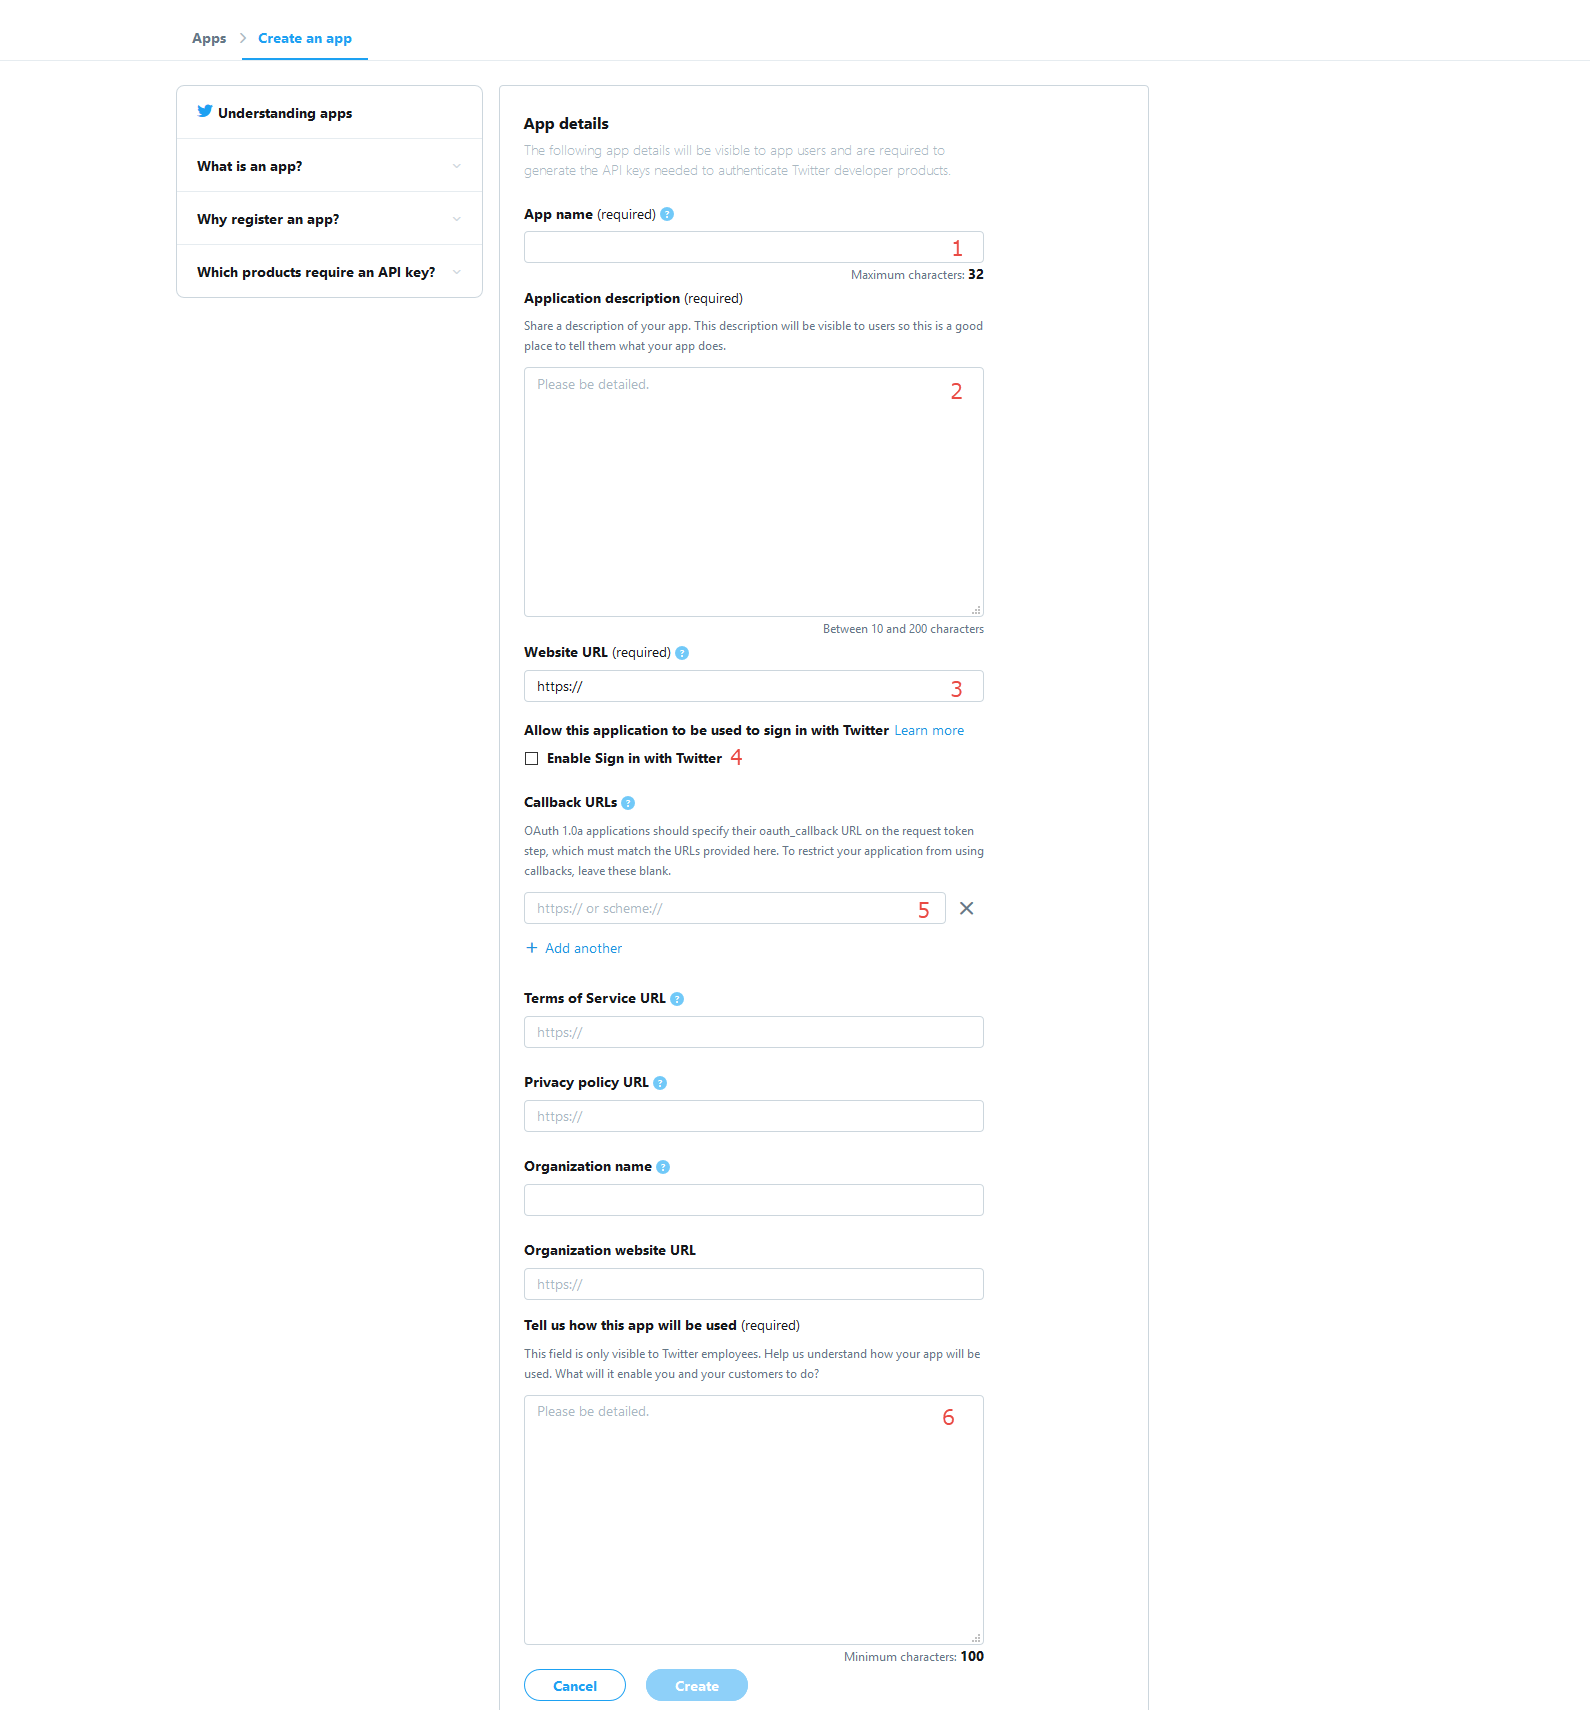
8. You have to fill all your app settings.
8.1 App permission: select Read and write and Direct message.

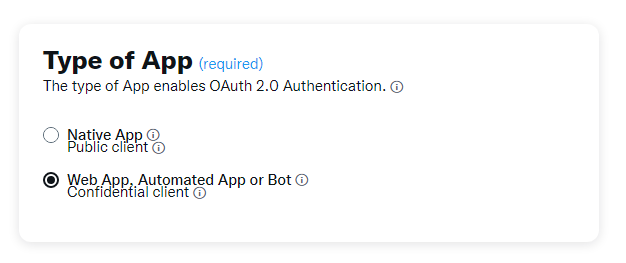
8.2. Type of App: select Web App, Automated App or Bot.
8.3 App info: enter app info and click on Save button.
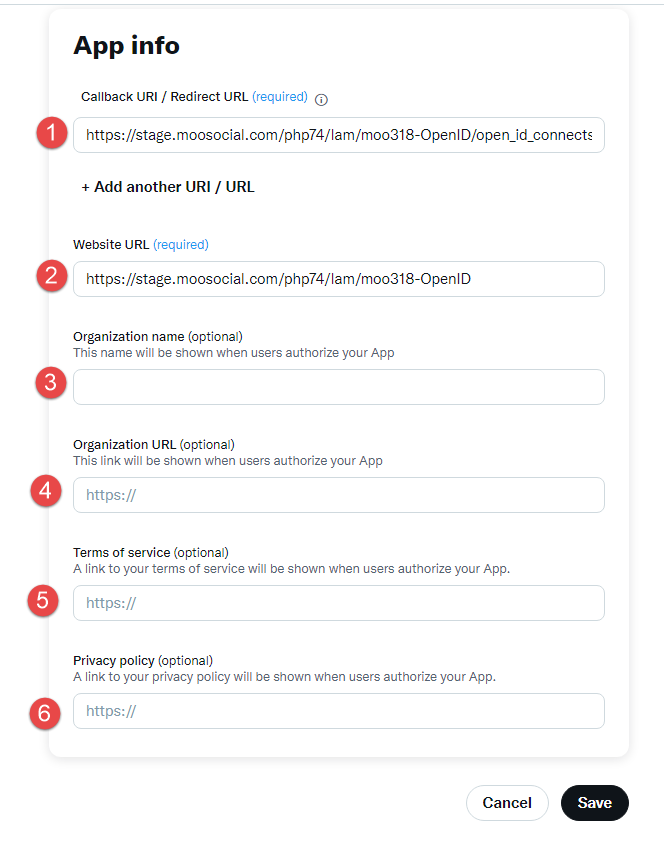
#1. Callback URl / Redirect URL:
enter [yoursite/open_id_connects/login]
Example: https://moosocial.com/open_id_connects/login
#2. Website URL: enter your website URL.
#3. Organization name (optional): enter your organization name.
#4. Organization URL (optional): enter your organization URL.
#5. Terms of service (optional): enter your Terms of service URL.
#6: Privacy policy (optional): enter your Privacy policy URL.
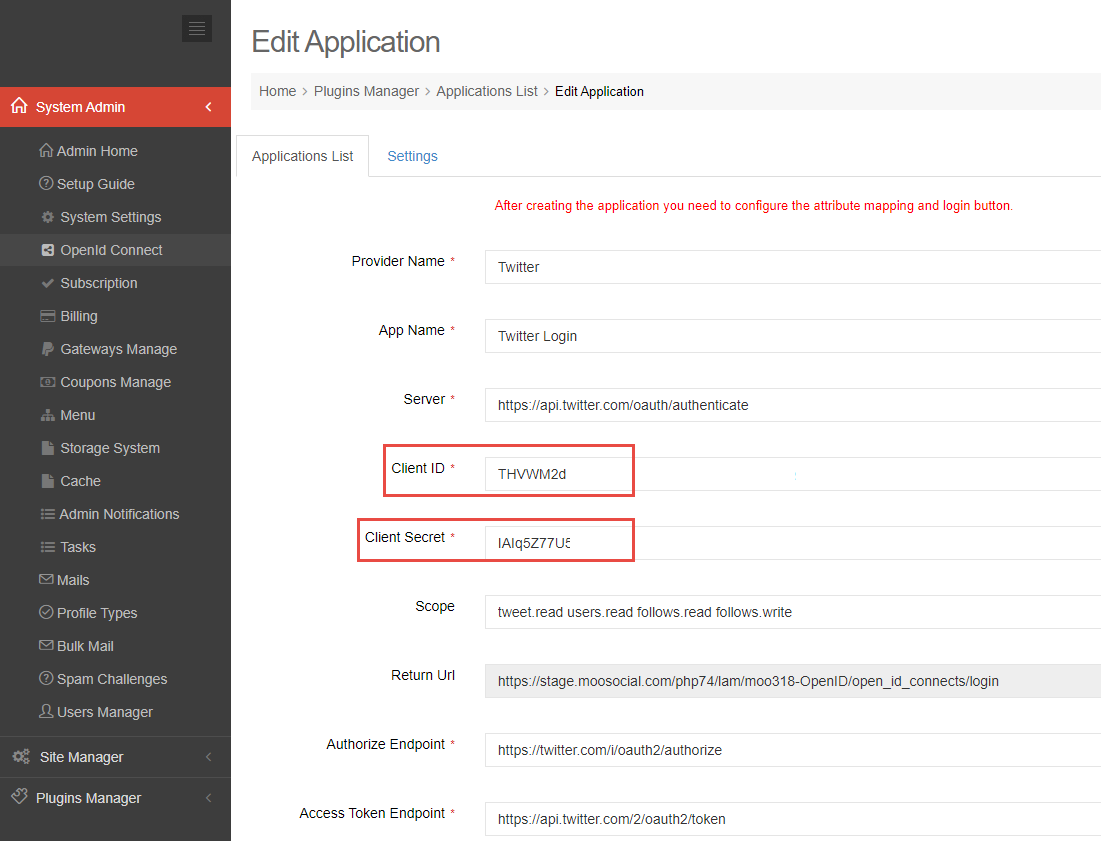
9/ Review and save your Client ID and Client Secret:
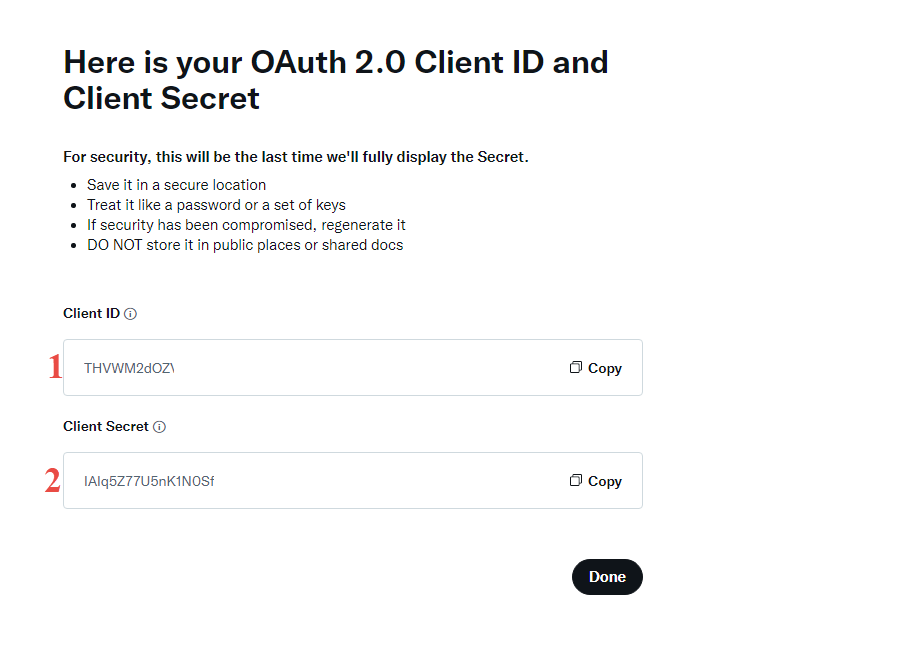
Copy (1) and (2) to your setting Admin Dashboard/OpenID Connect/Twitter Login:
CONFIG LINKEDLIN
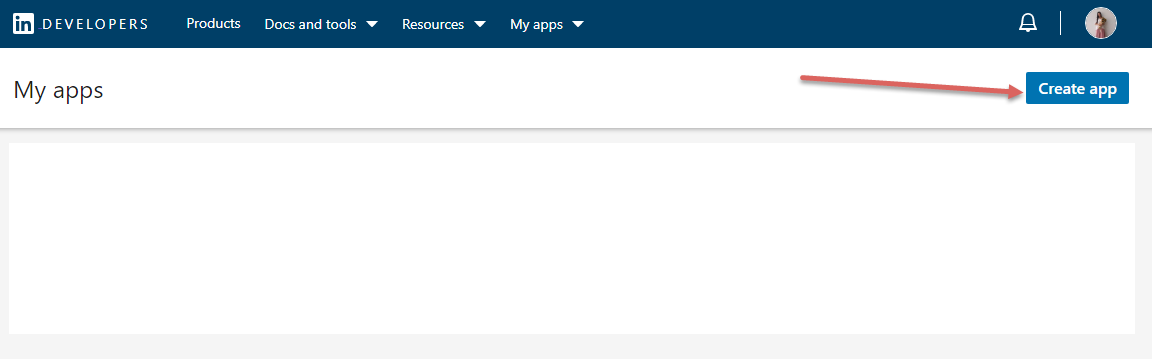
1. Go to https://www.linkedin.com/developers/
2. Login –> Create app:
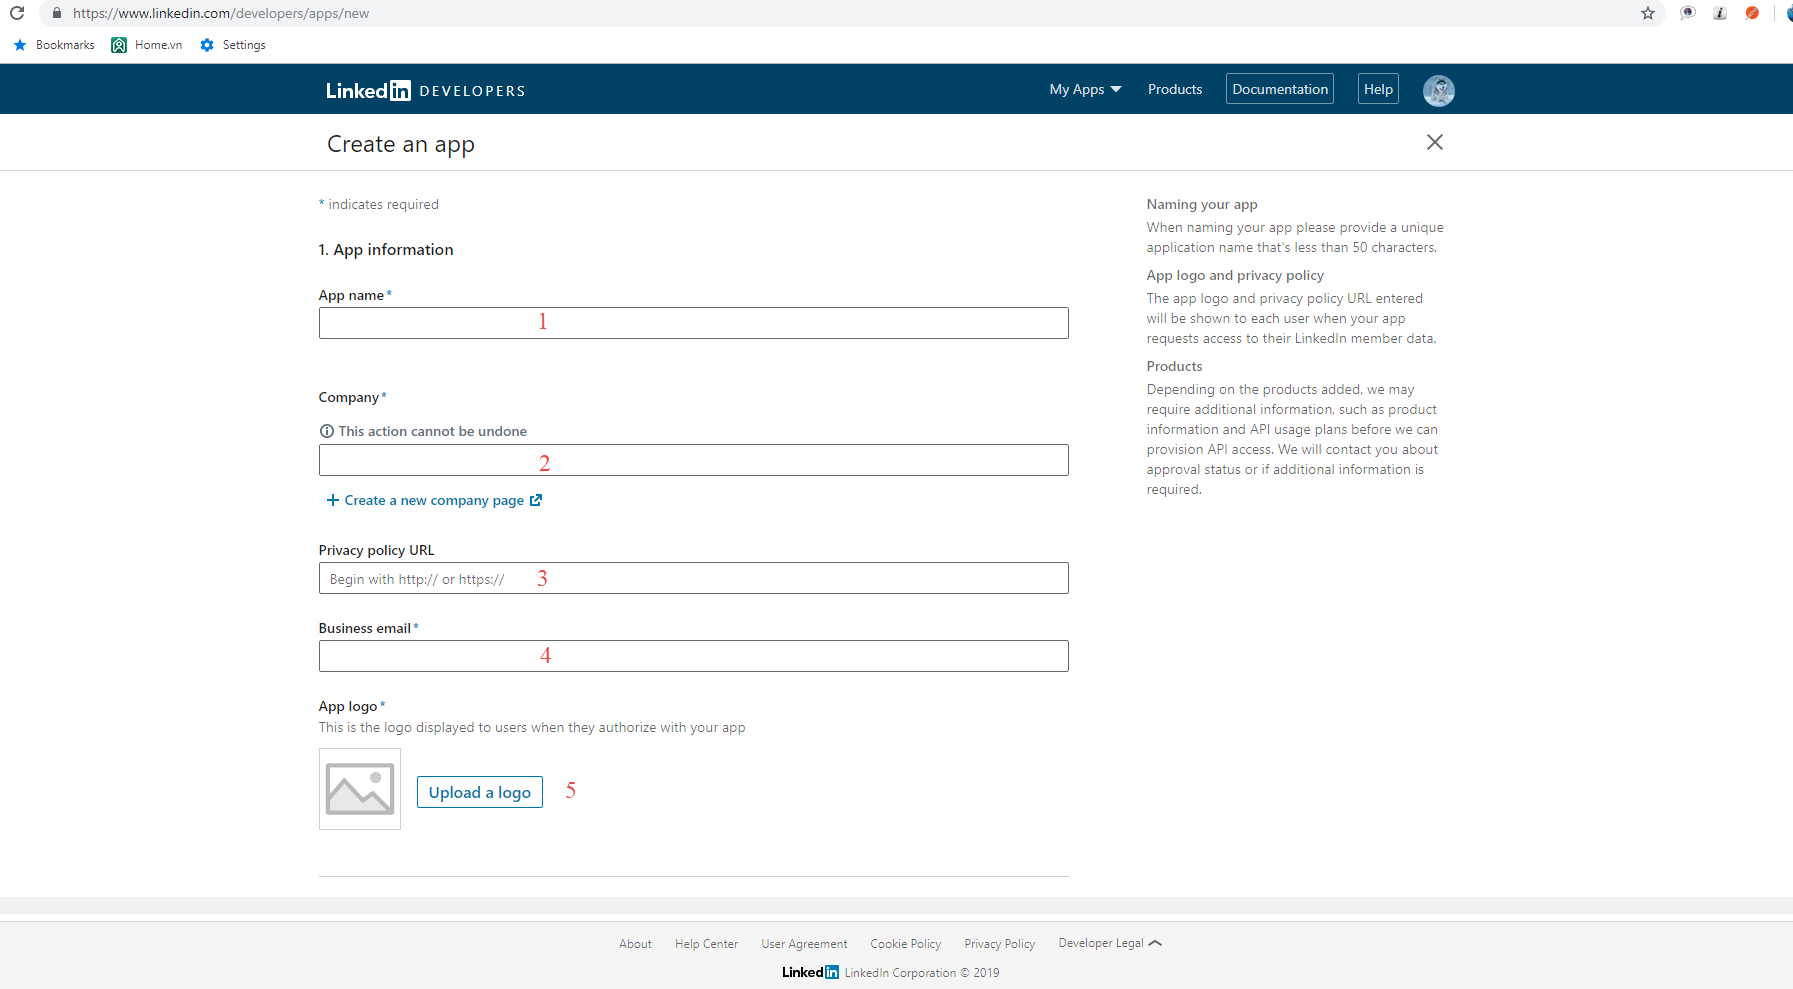
3. Complete information about your app:
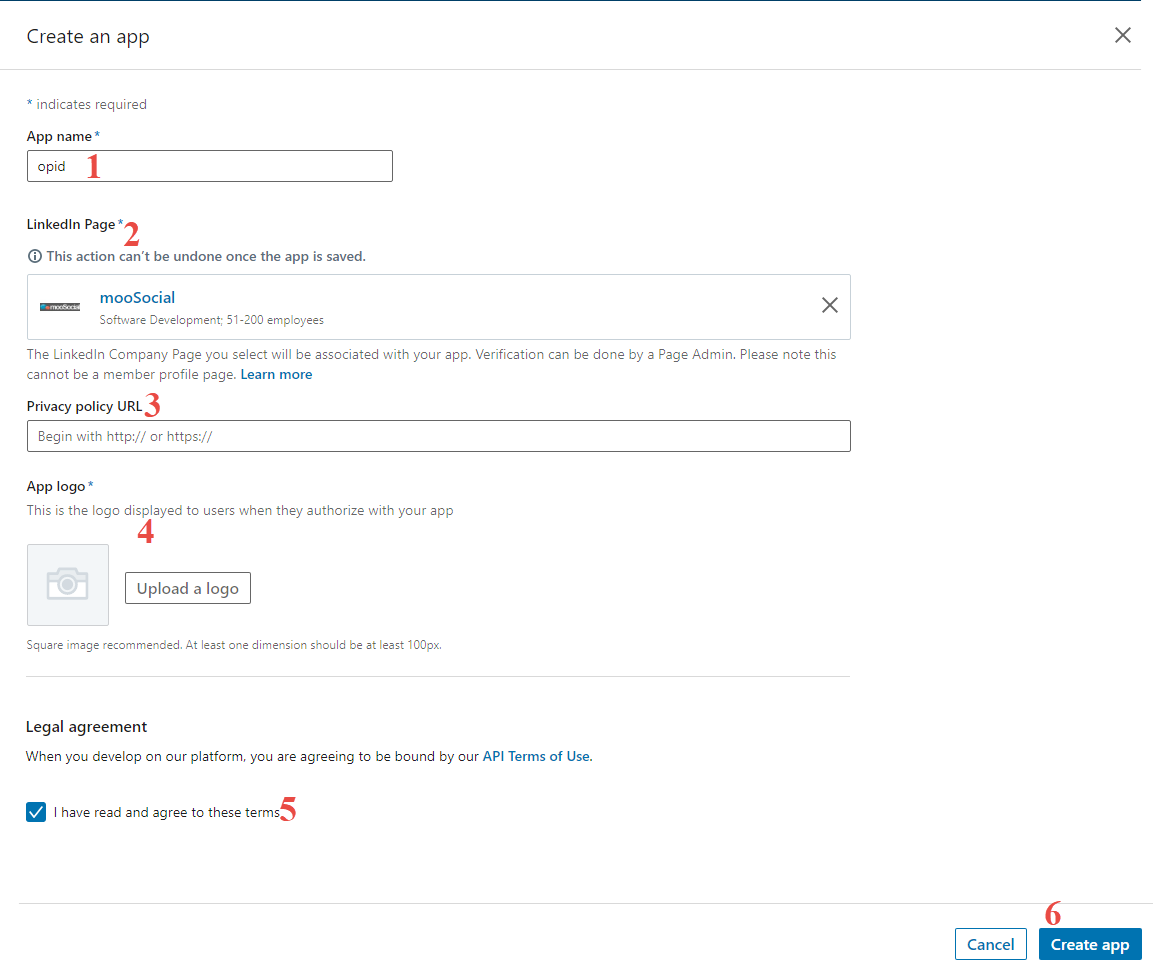
#1 Enter your app name
#2 Select your company linkedlin page
#3 Enter your privacy poicy page link
#4 Upload your logo
#5 Tick on I have read and agree to these terms check box
#6 Create app
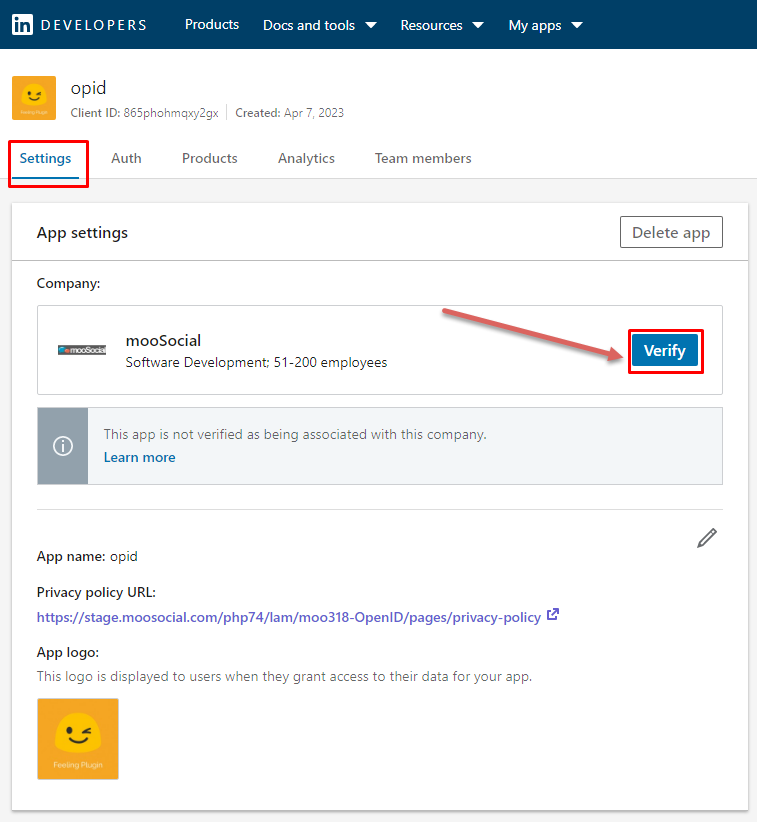
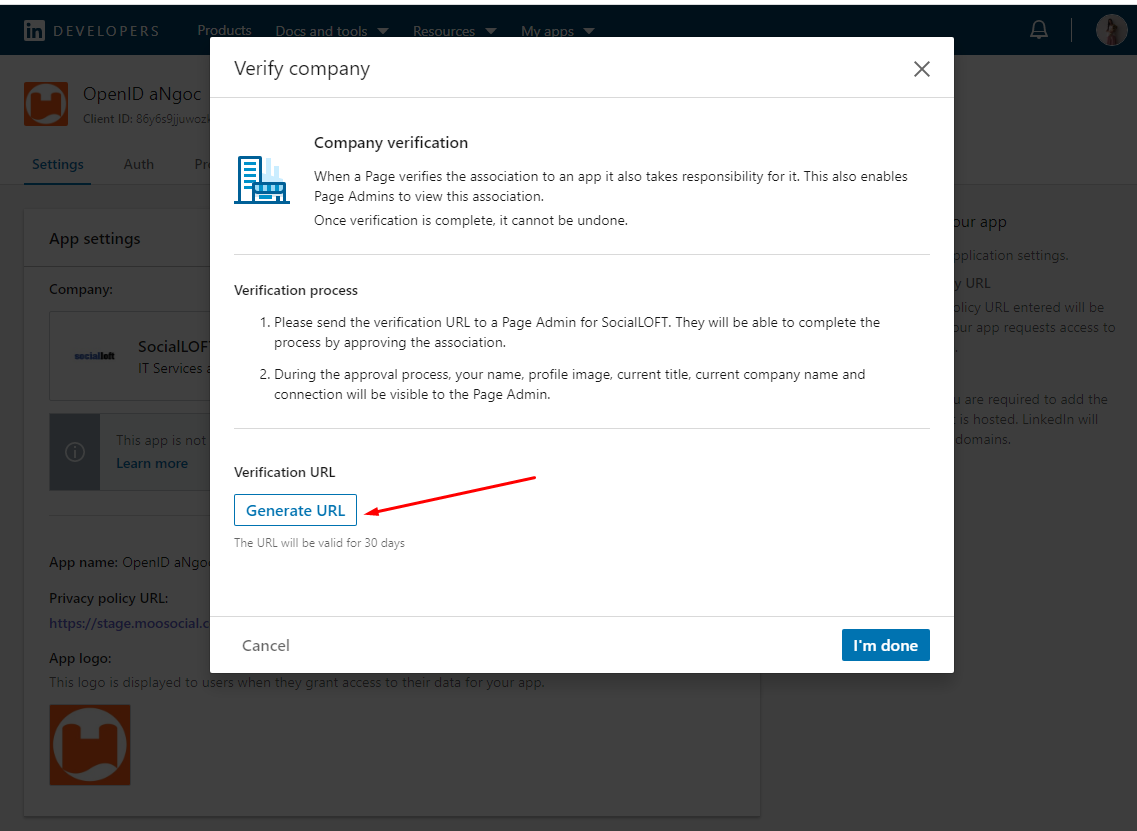
4. Verify your app:
4.1/ Go to Settings tab, click on Verify button:
4.2/ At Verify company popup, click on Generate URL to get Verification URL:
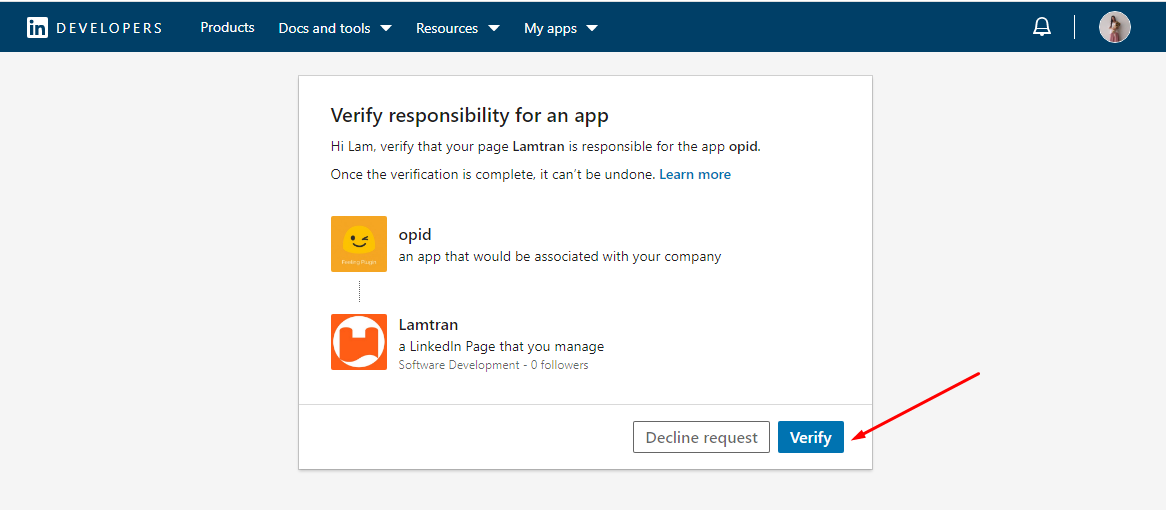
4.3/ Open Verification URL and click on Verify button:
5. After verify your app, open Products tab and click on Request access for Sign In with LinkedIn v2: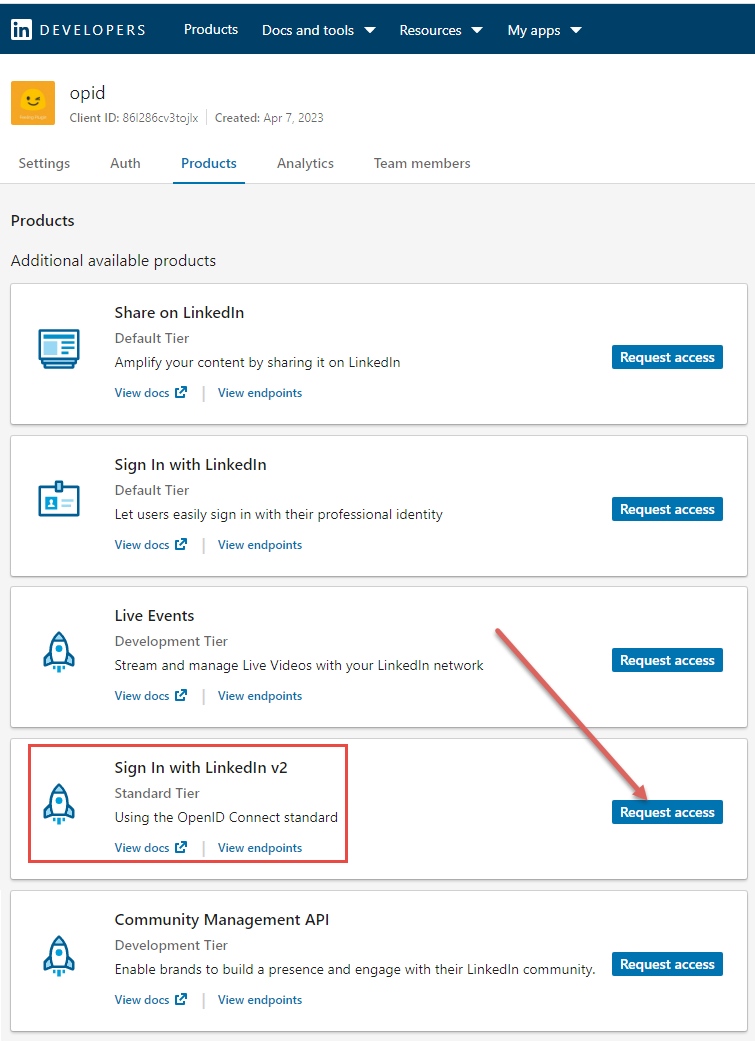
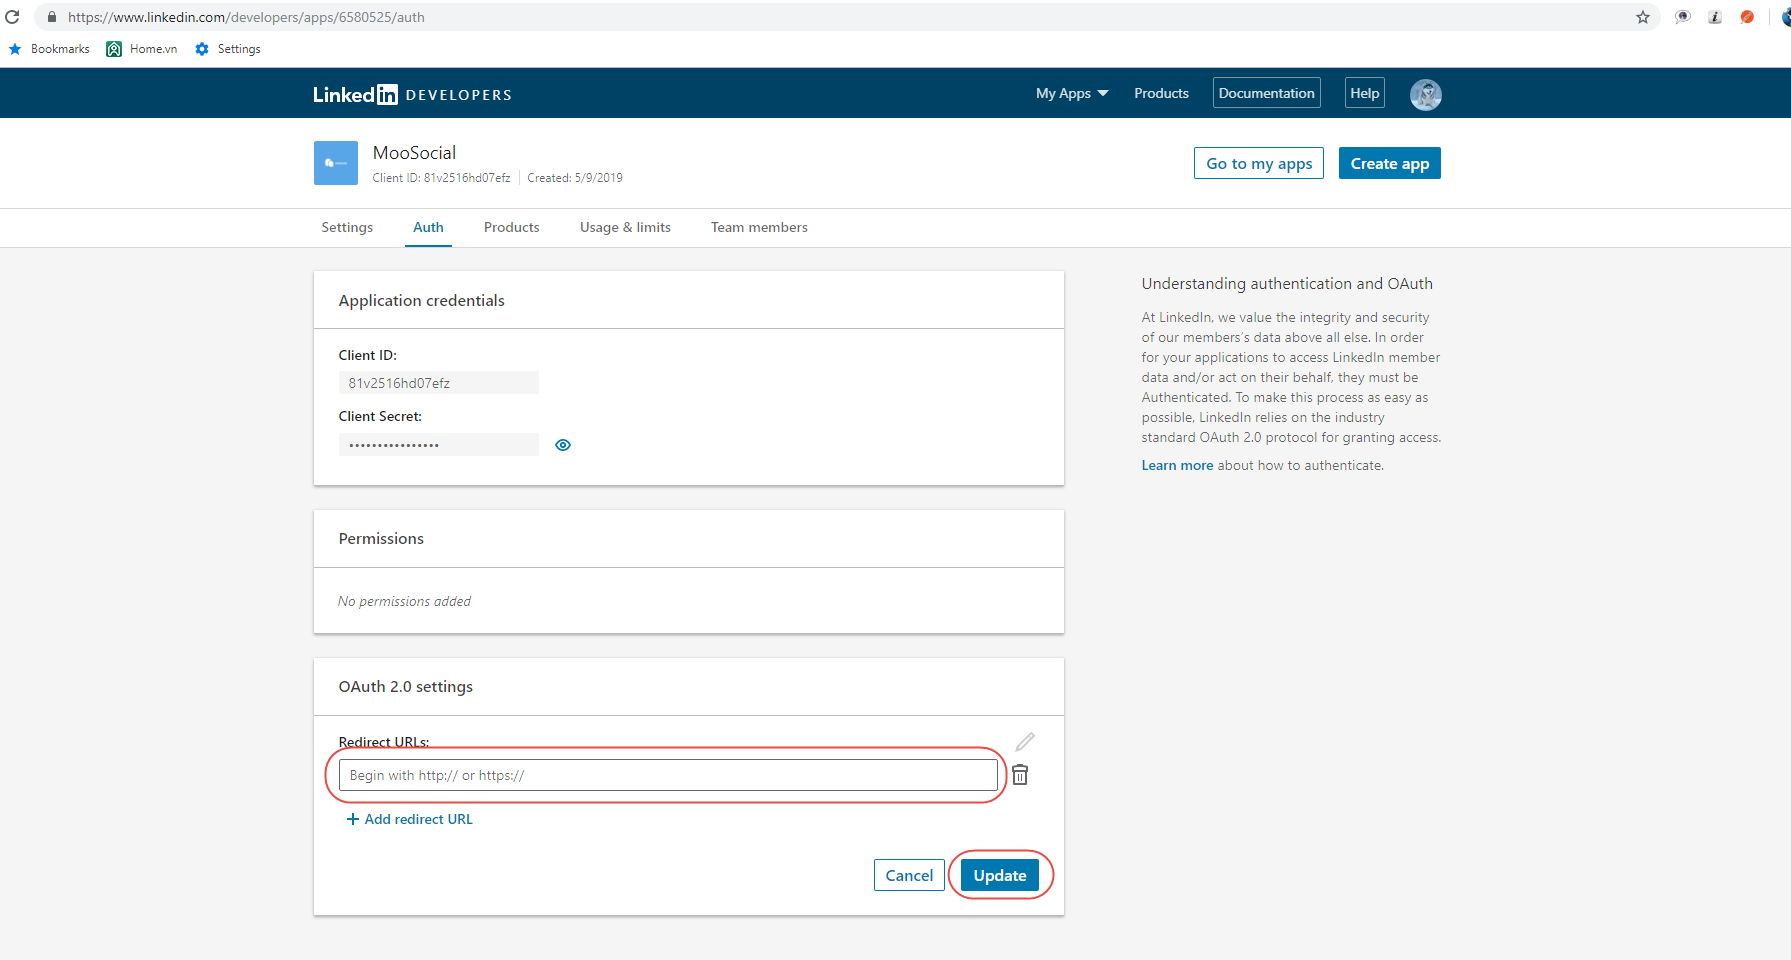
6. Open Auth tab, Add redirect URL and click on Update button:
Your redirect URL has the format: [yoursite/open_id_connects/login]
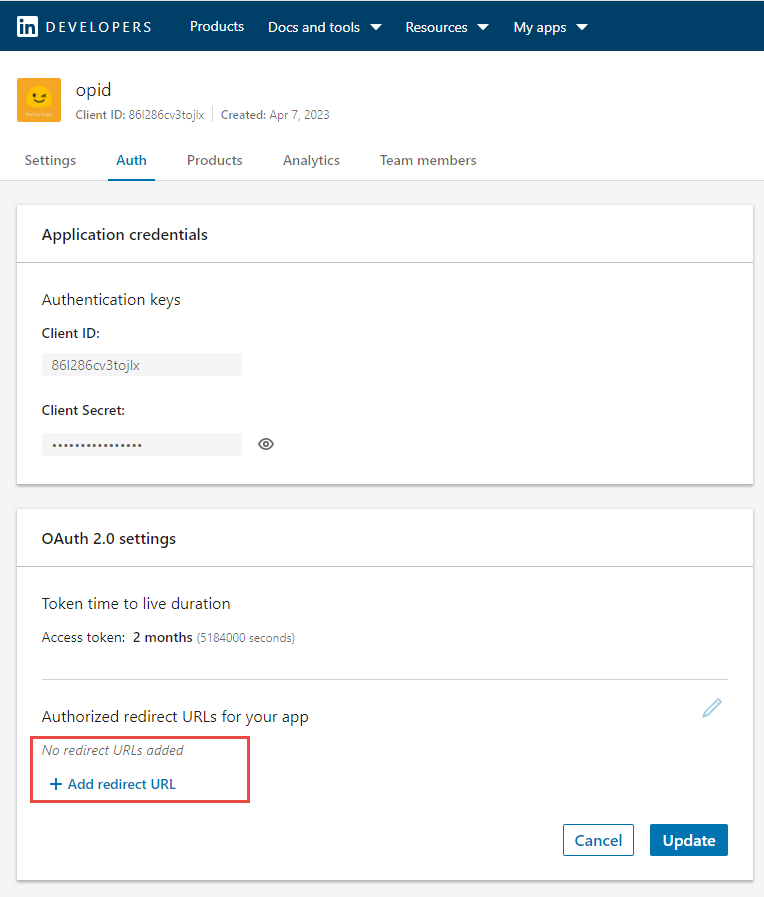
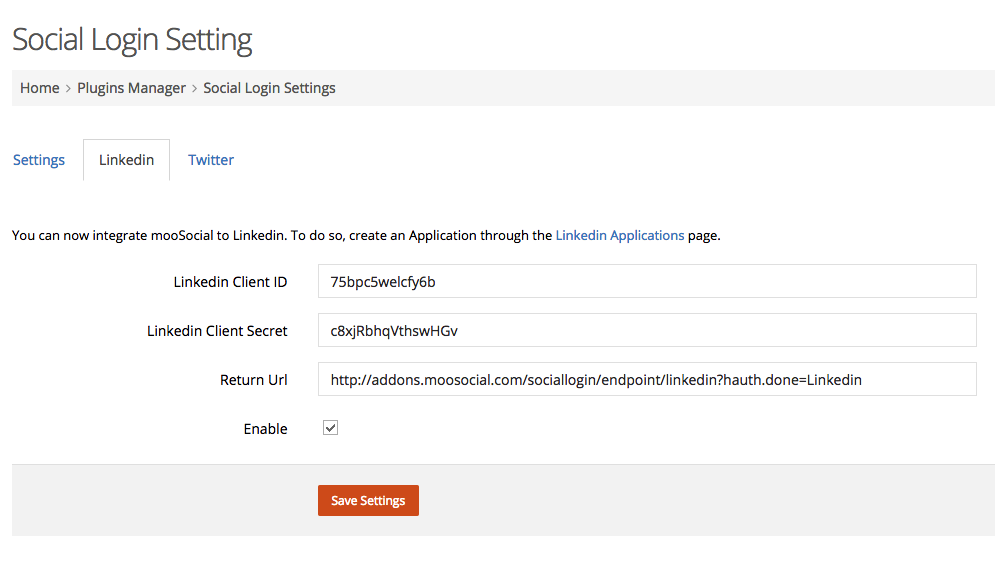
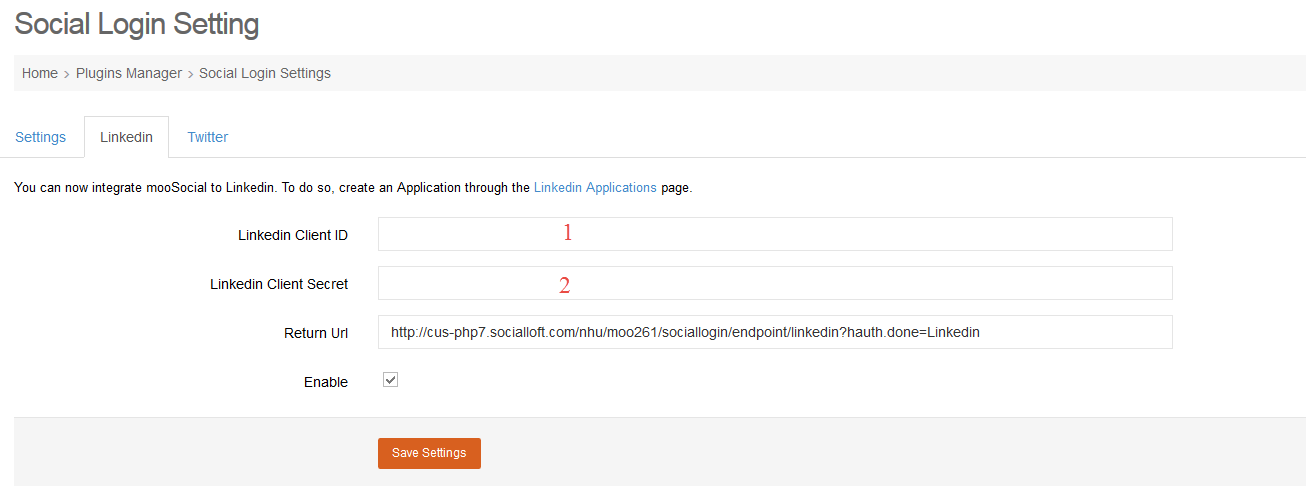
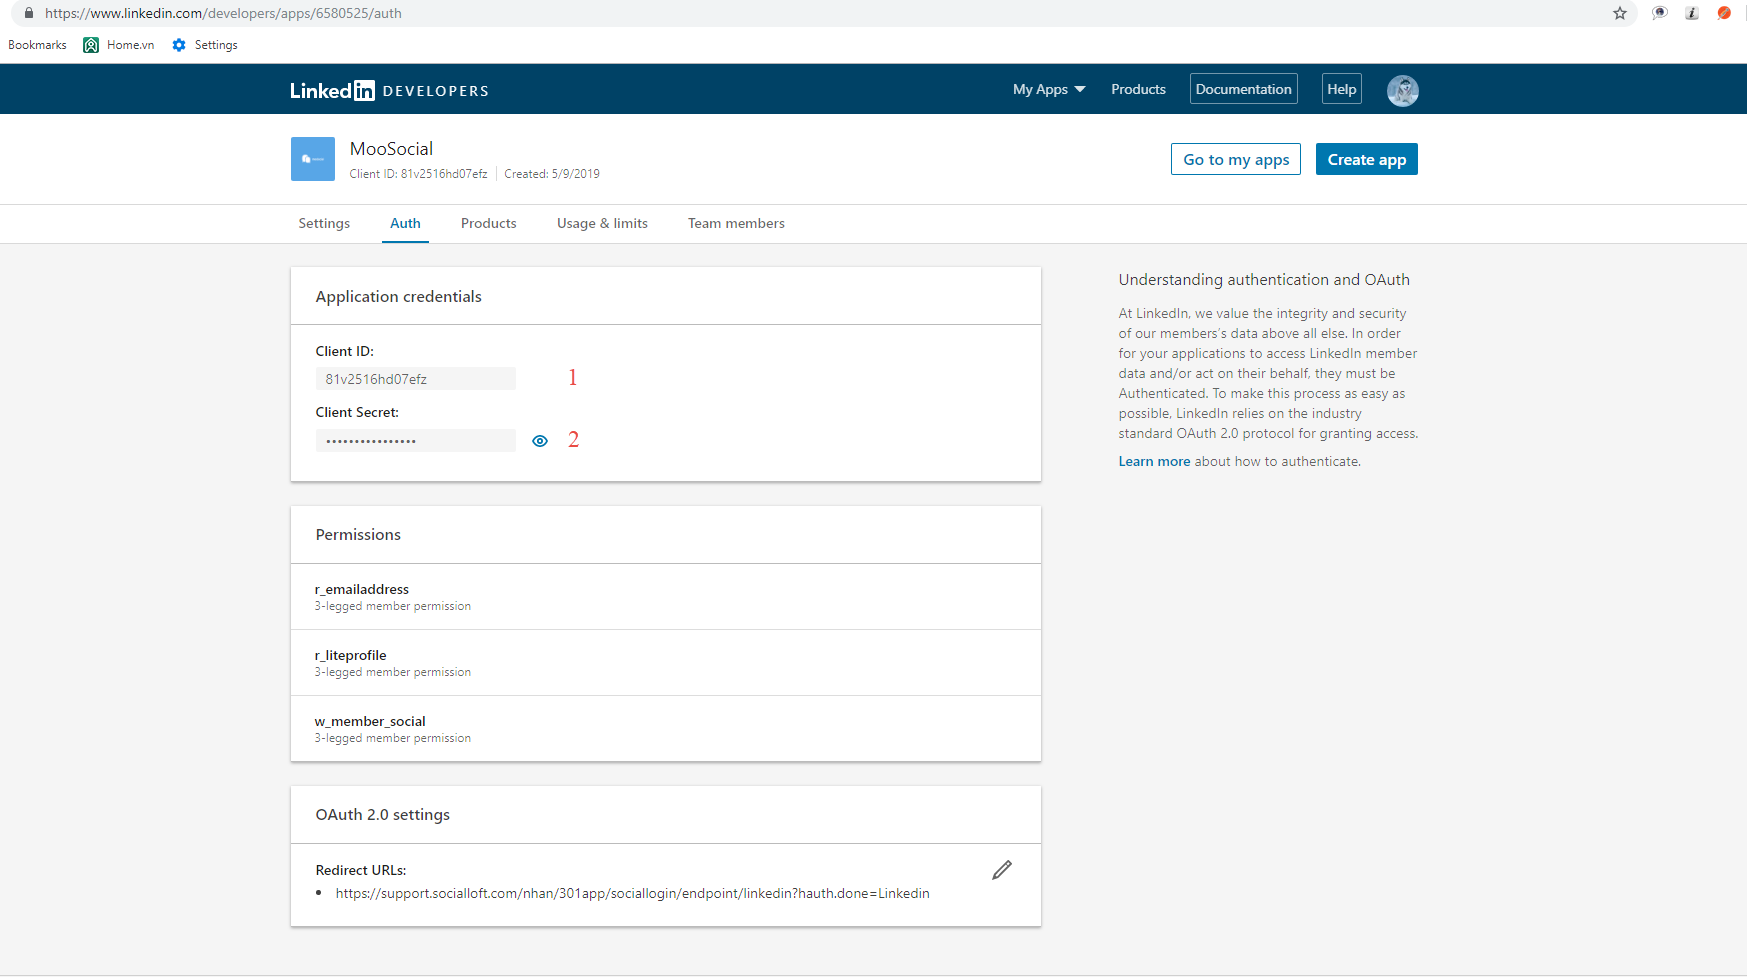
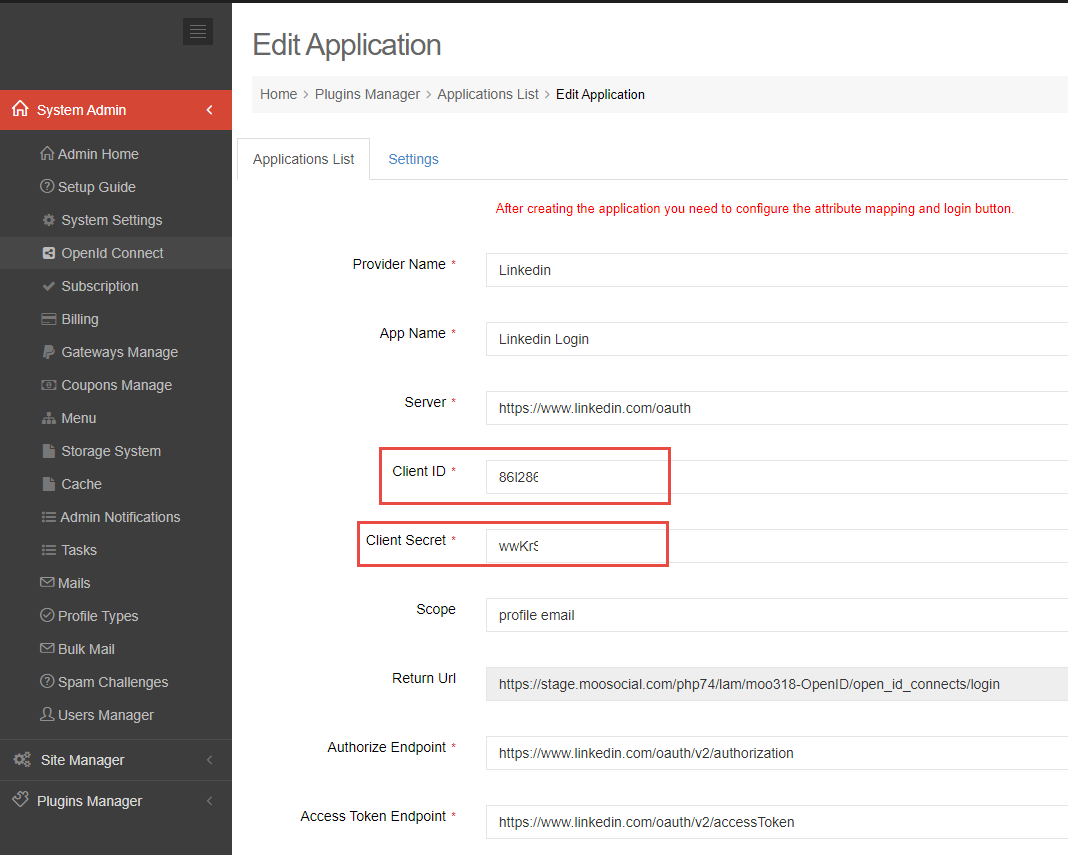
7. You can view and copy your Client ID and Client Secret:
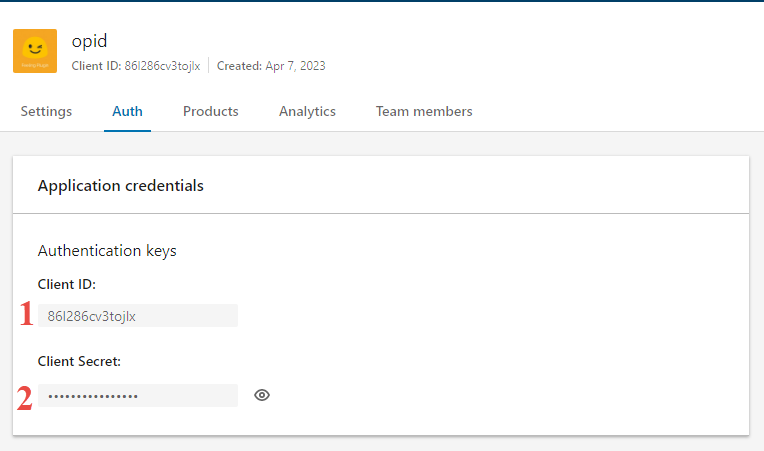
And use that Client ID and Client Secret at your setting Admin Dashboard/OpenID Connect/Linkedin Login:
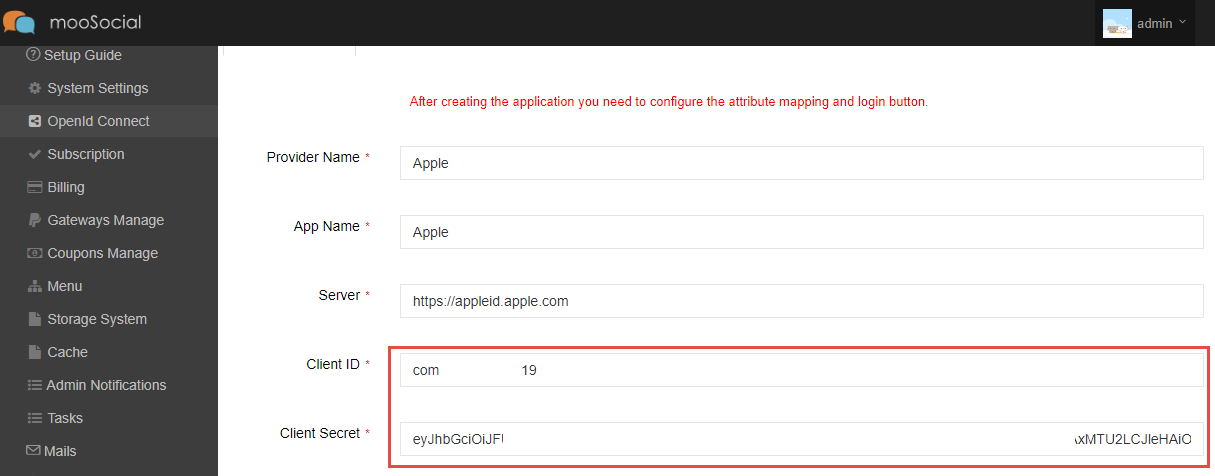
CONFIG APPLE
To set up login with Apple, we need to fill in Client ID and Client Secret information
I will guide you through it step by step.
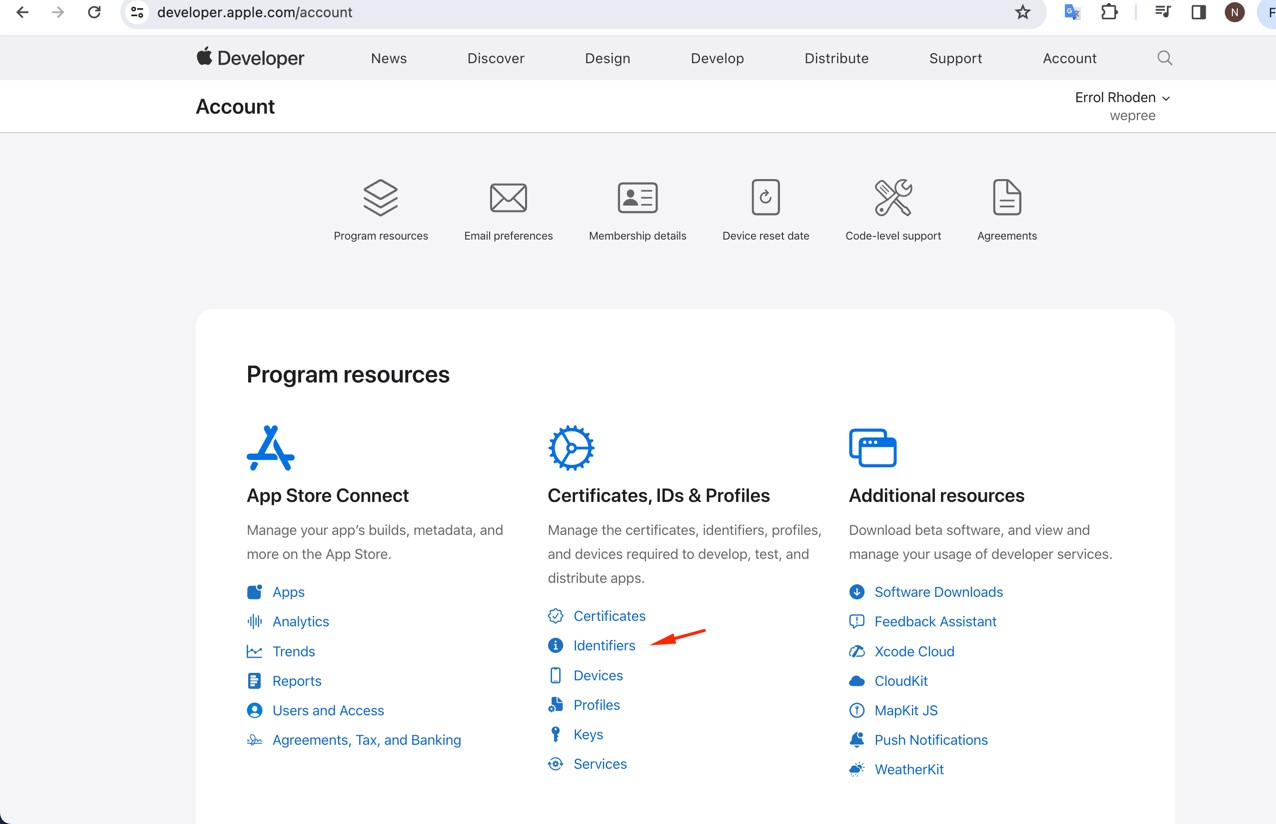
Step 1: Login https://developer.apple.com/account
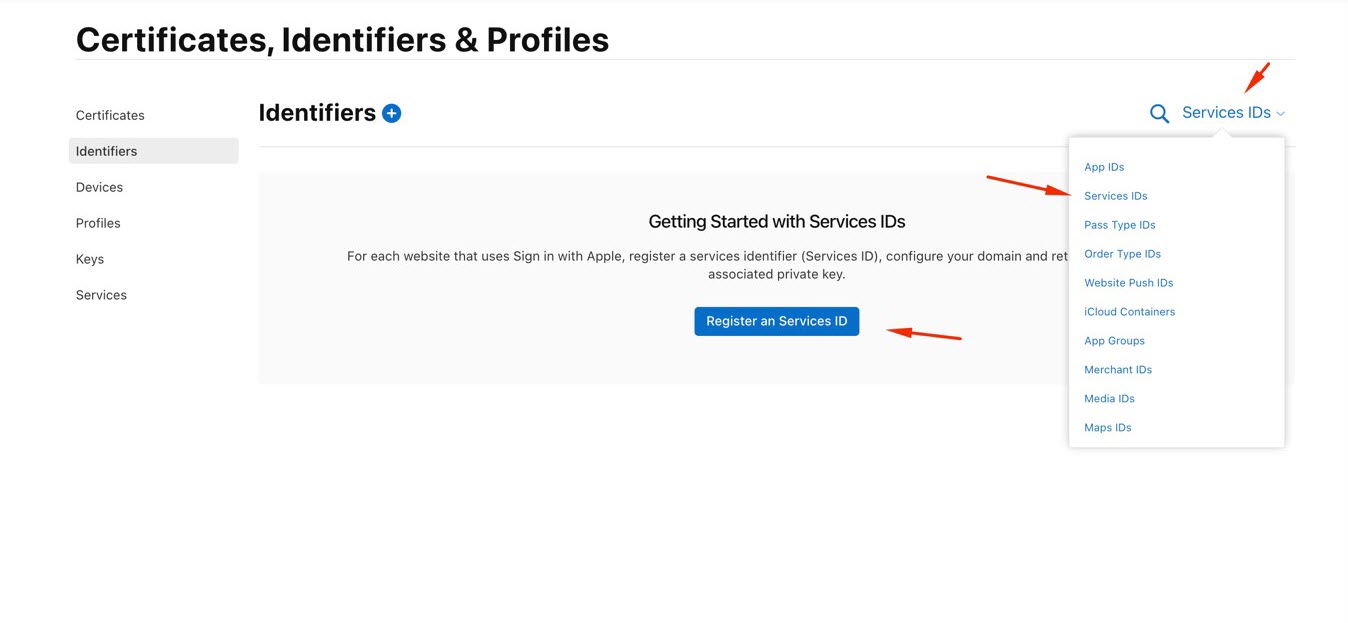
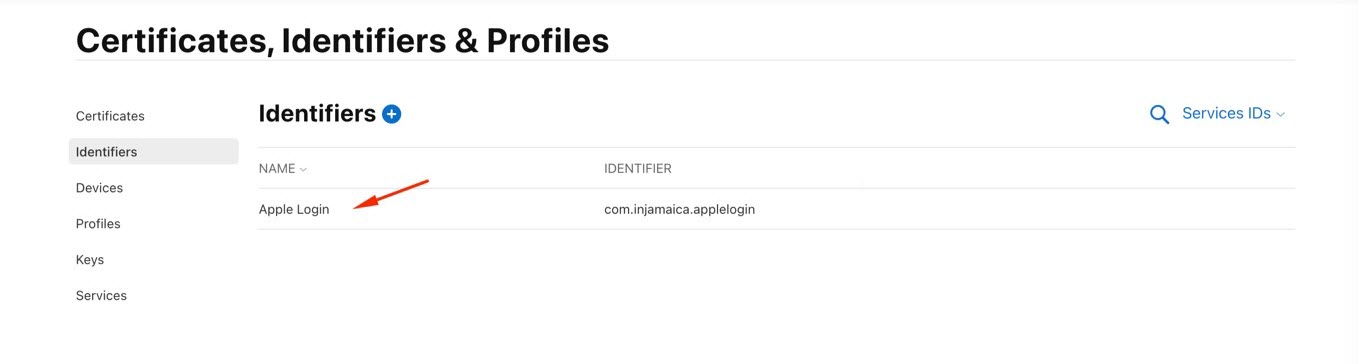
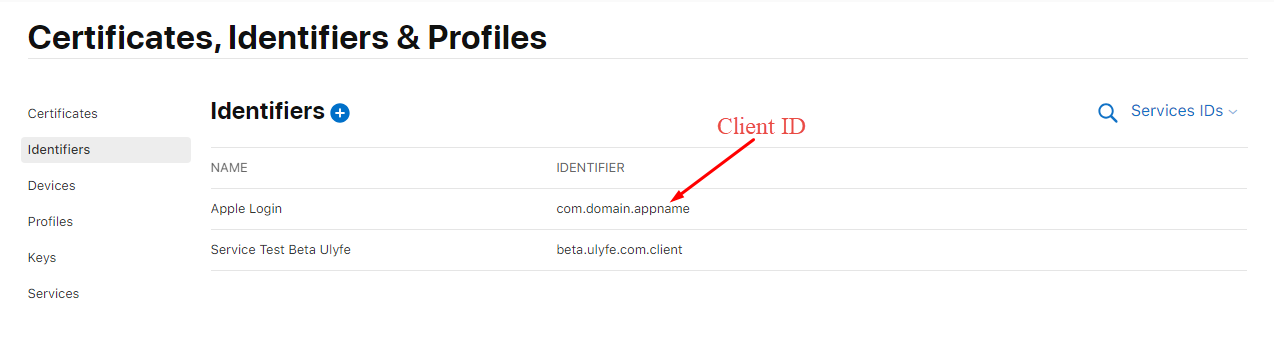
In the Certificates, IDs & Profiles section -> Click Identifiers
https://developer.apple.com/account/resources/identifiers/list
Identifiers: These are unique strings used to identify your app, software package, and services across Apple’s platforms. Each app or service needs its own identifier to be verified and connected with features like Push Notifications or In-App Purchases.
Step 2: Select Services IDs and click Register an Services ID
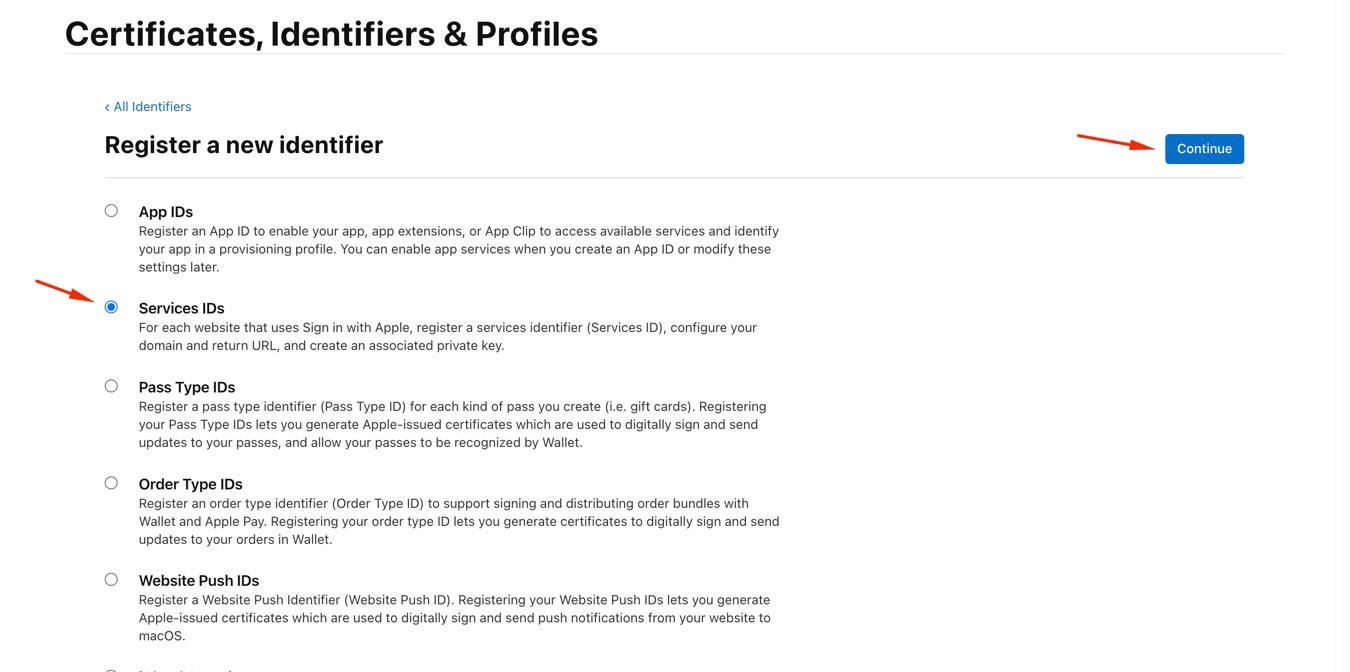
Step 3: Select Services IDs and click Continue
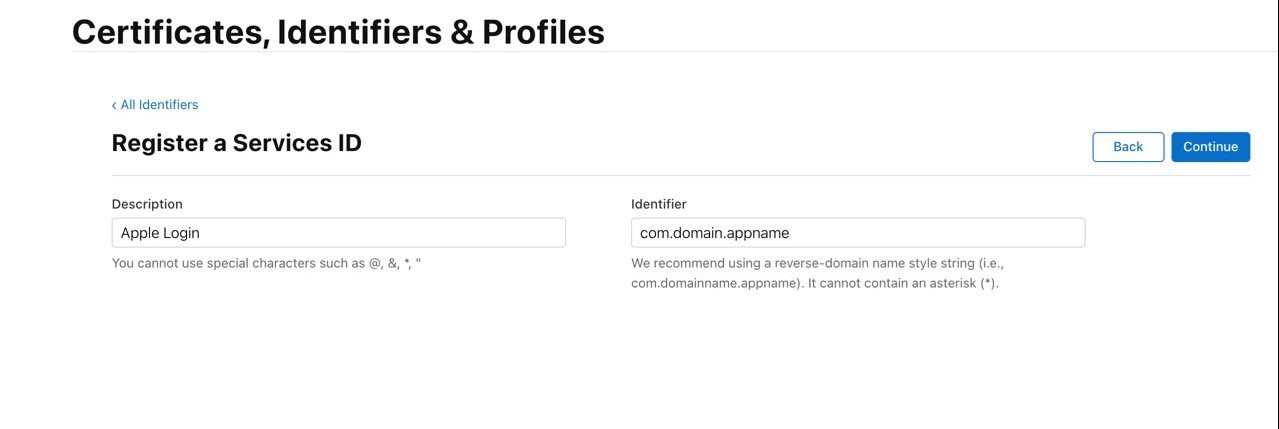
Step 4: Enter Description and Identifier, click Continue
Description: You cannot use special characters such as @, &, *, “
Identifier: We recommend using a reverse-domain name style string (i.e., com.domainname.appname). It cannot contain an asterisk (*).
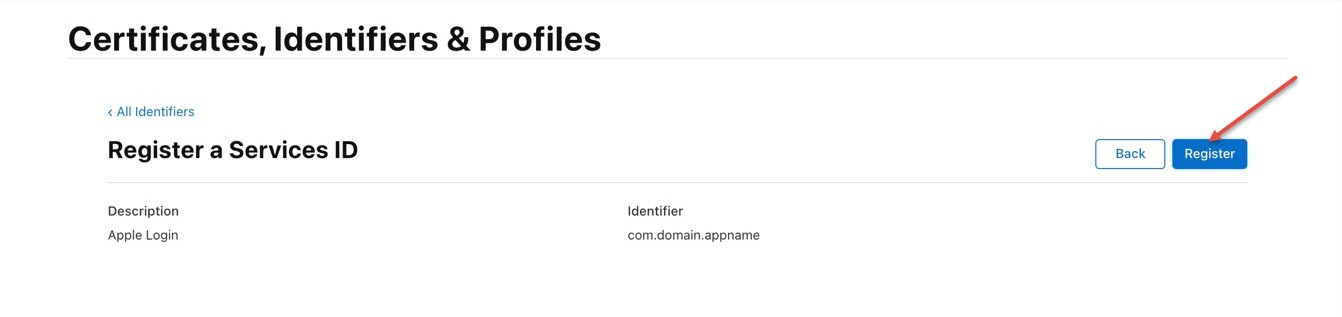
Step 5. Click Register button
Step 6. Click on the Identifier name you just created
Step 7. Enable Sign In with Apple services and click Configure
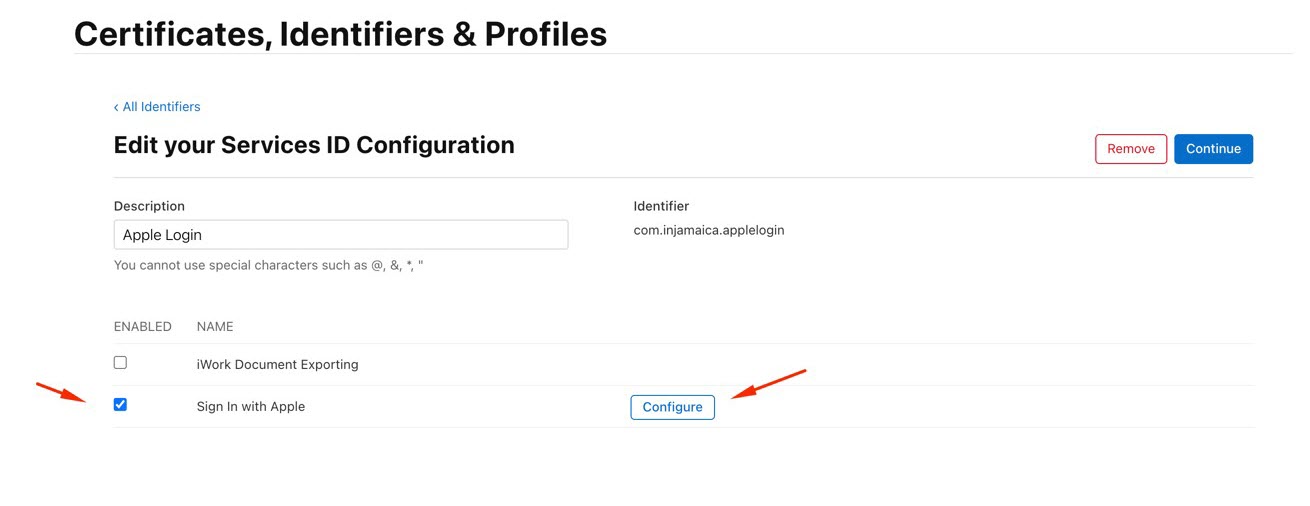
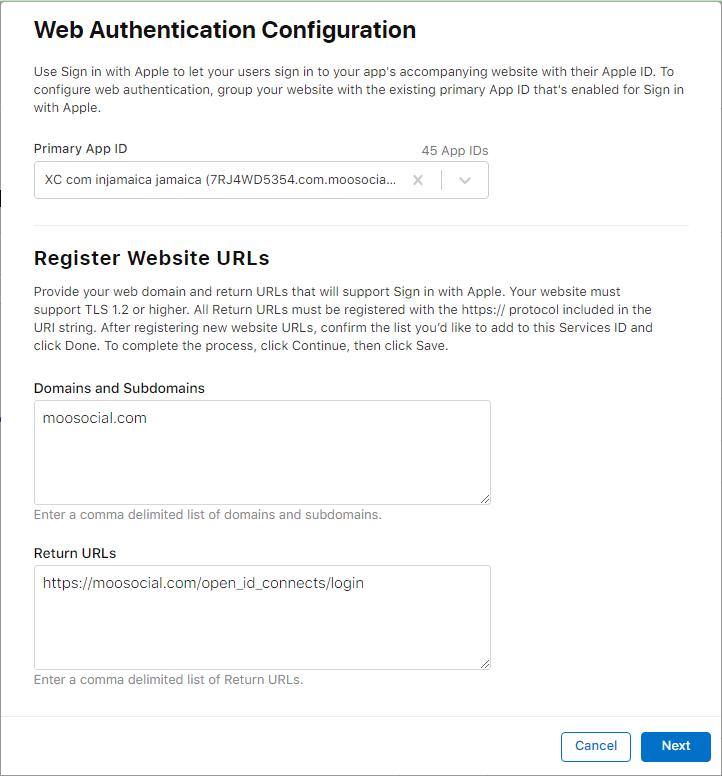
Step 8: Config Web Authentication

1. Primary App ID: Select the identifier of your application
2. Domains and Subdomains: Enter your domain. Please do not enter https
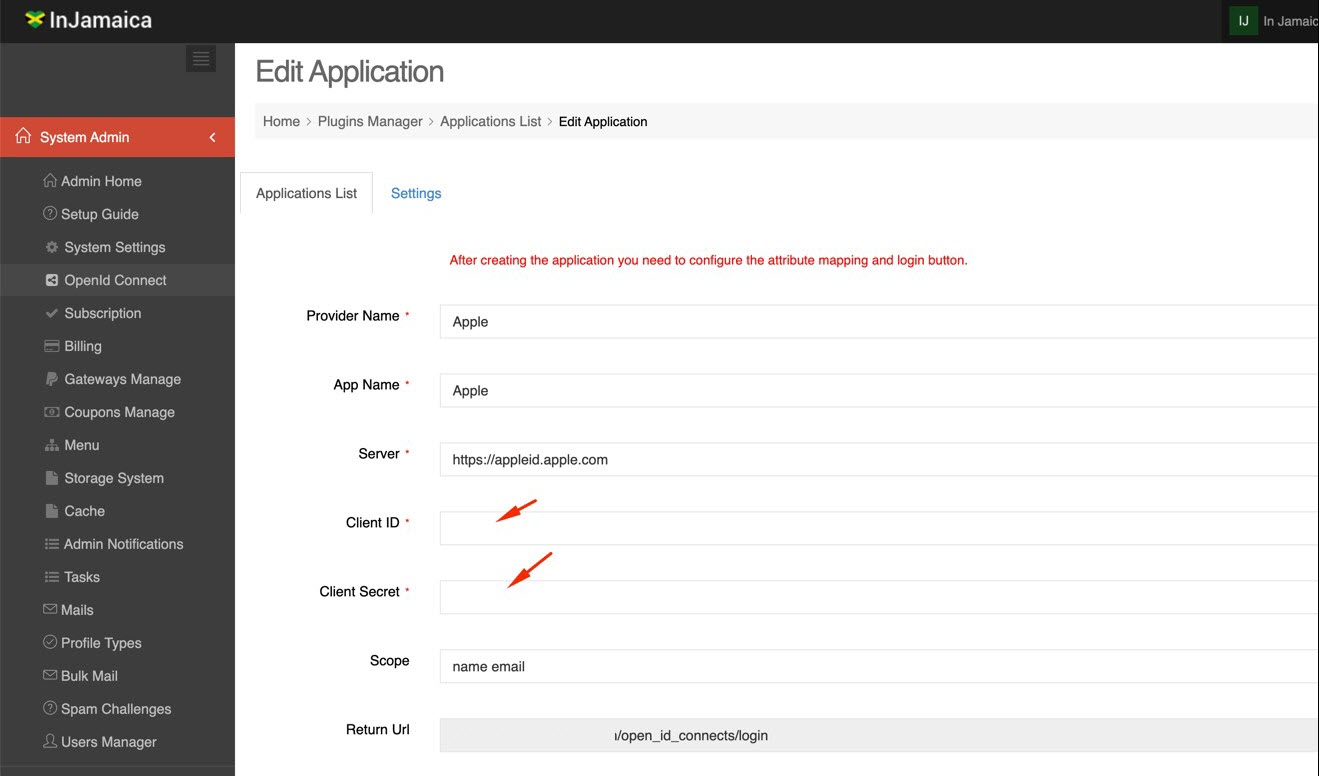
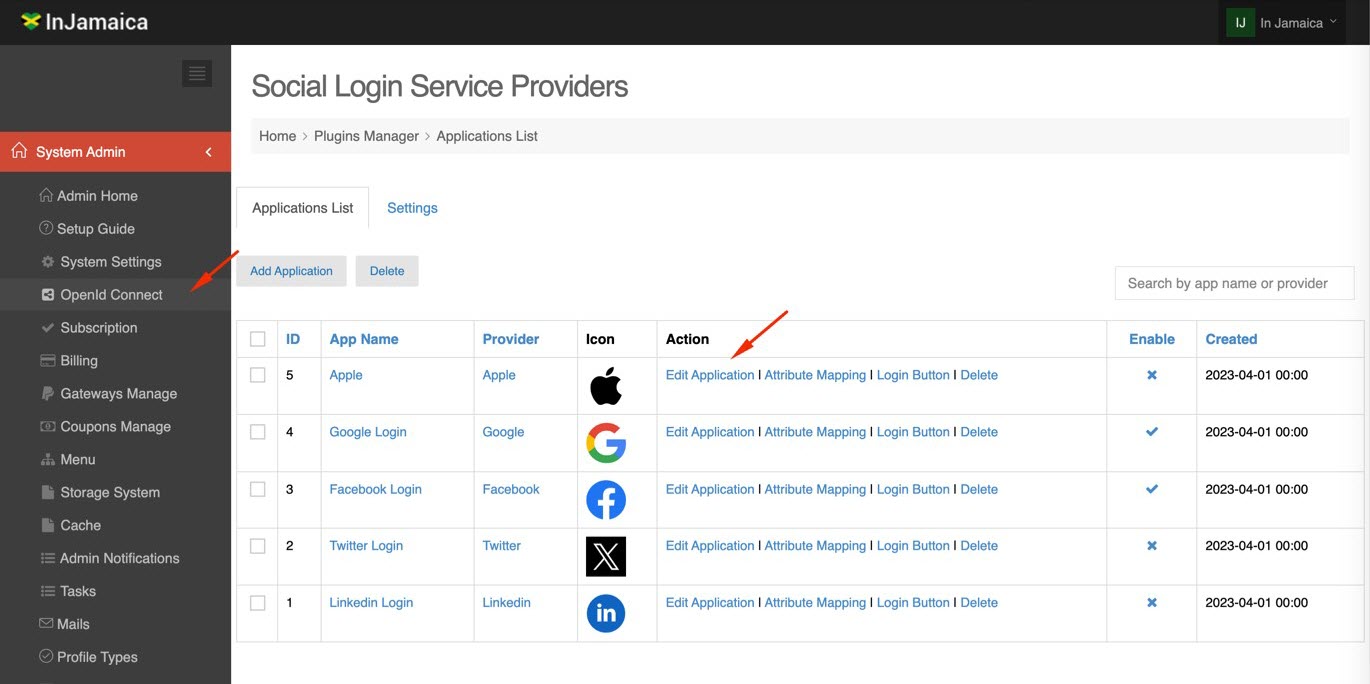
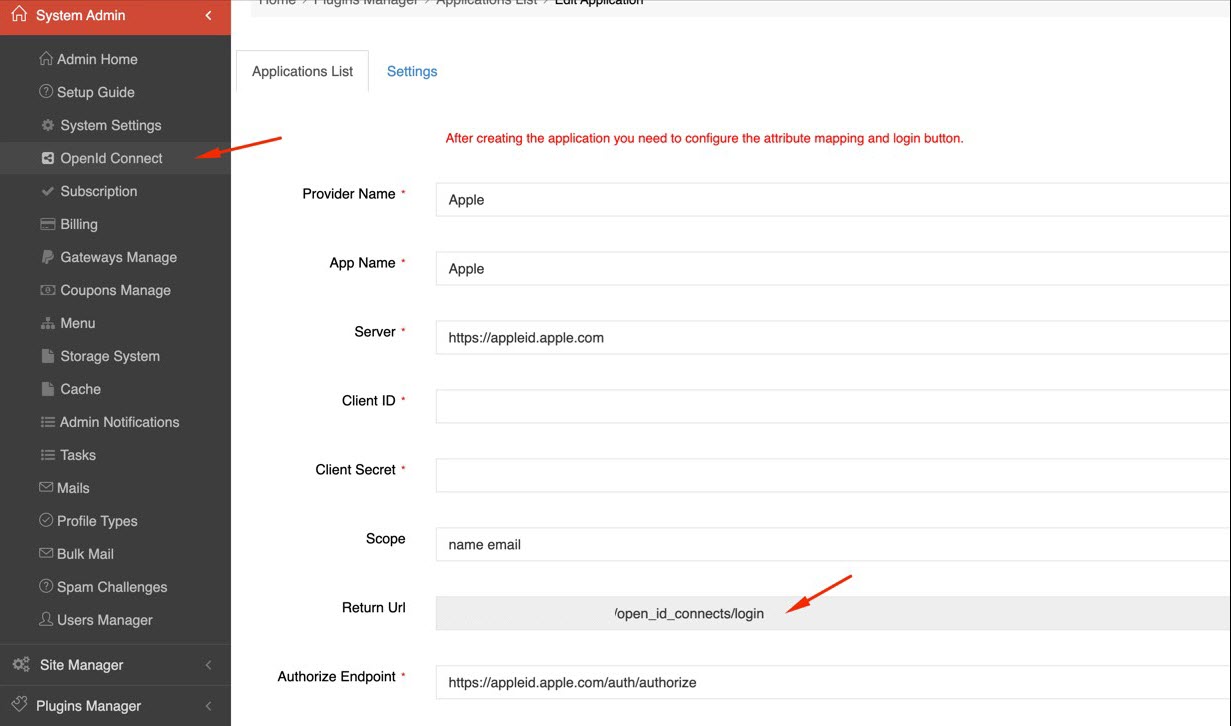
3. Return URLs: Go to the your site and open OpenId Connect menu, click on Edit Application (Apple)
There is a Return URL that you need to enter:
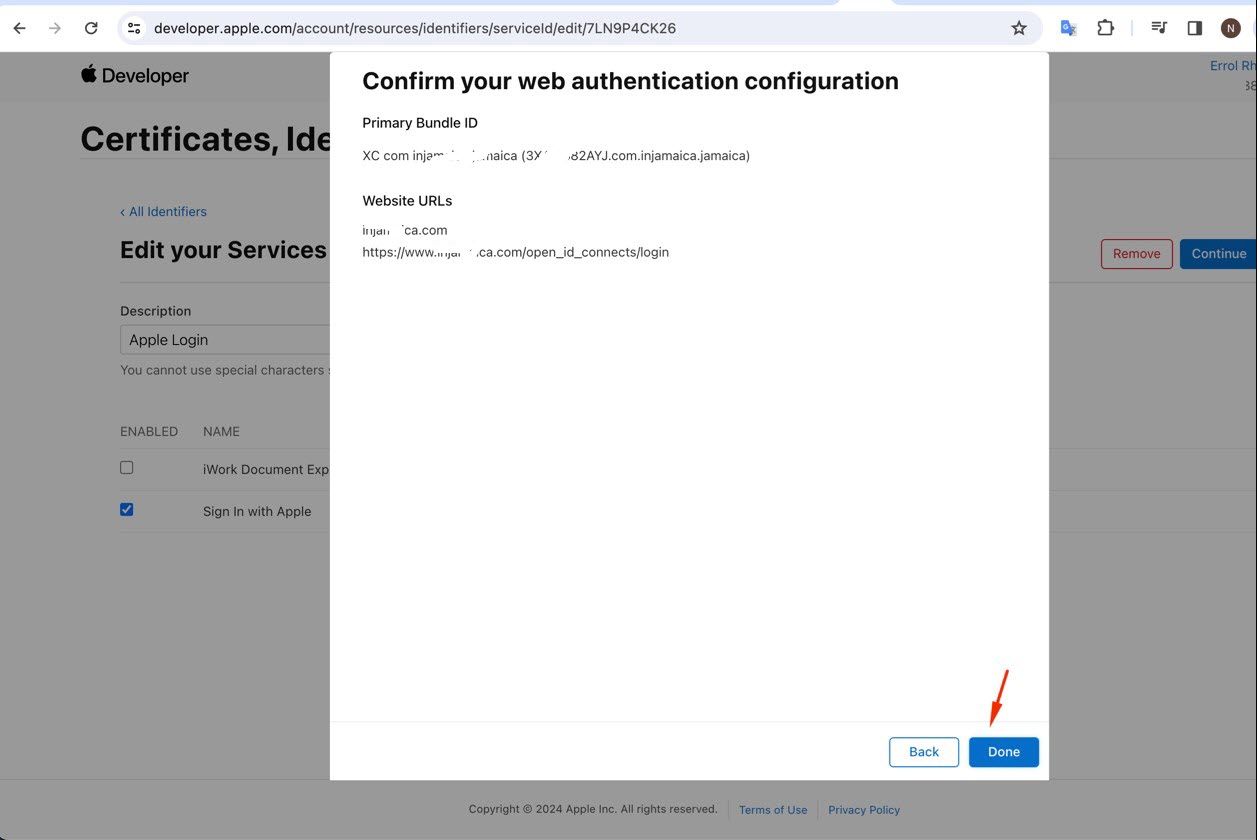
The result will look like this. Then click Next
Click Done
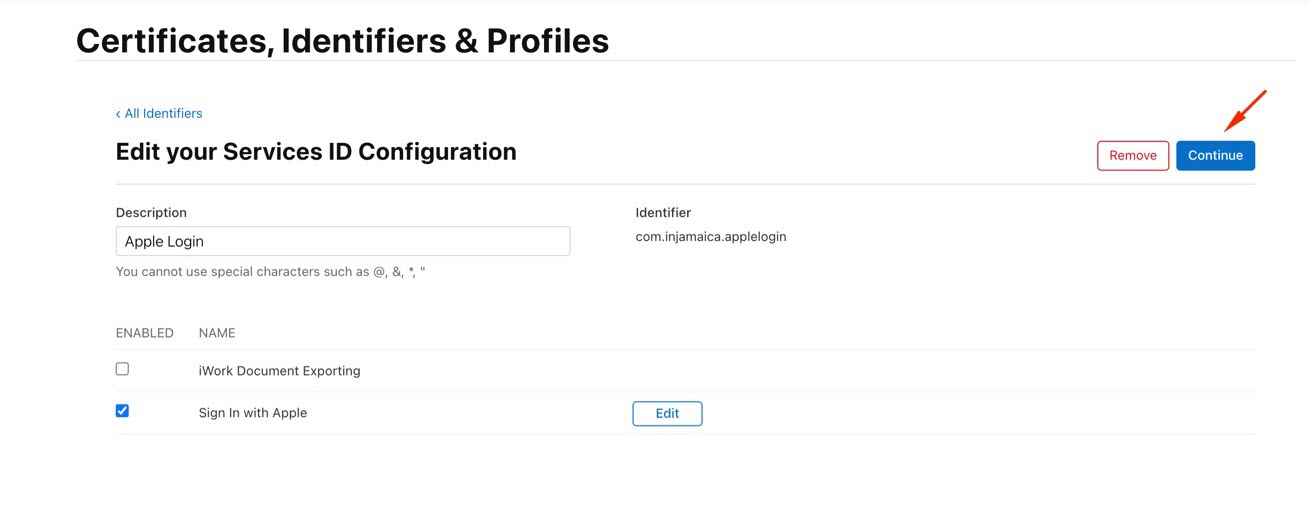
Click Continue
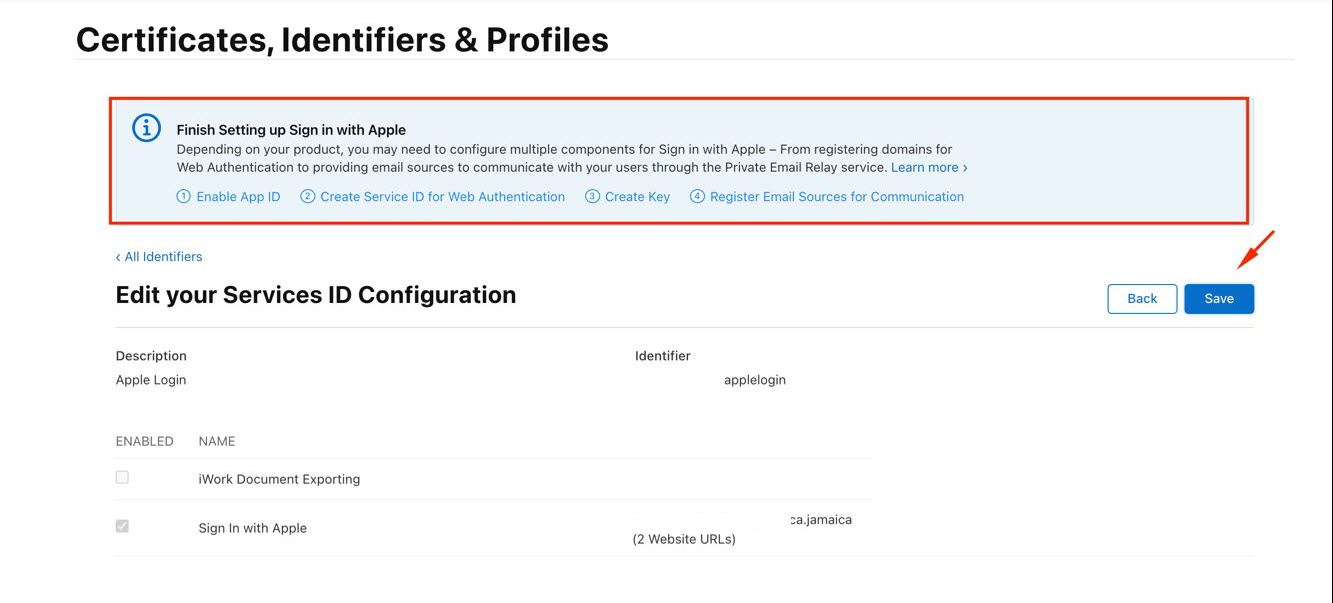
Click Save
Step 9: Create key
In Certificates, Identifiers & Profiles (CIP) by Apple, “Key” typically refers to the pairs of public and private keys used for encryption and decryption. The private key is kept secret and used for signing applications, ensuring source code integrity. The public key, shared openly, verifies digital signatures. These keys are essential for certificate management and developer/app identity authentication across Apple’s platforms.
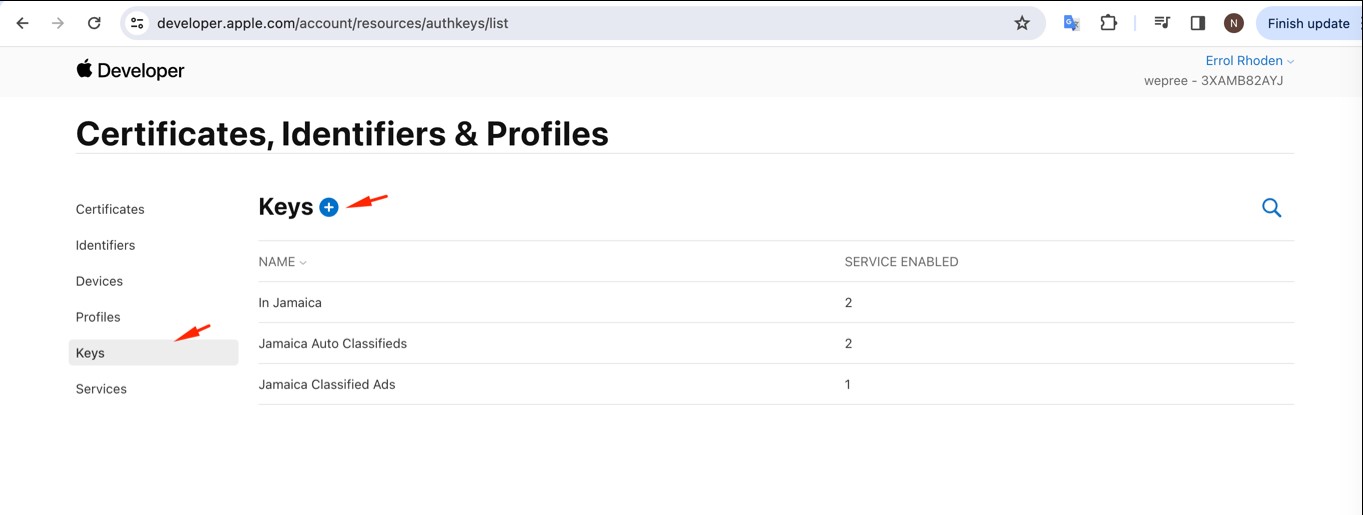
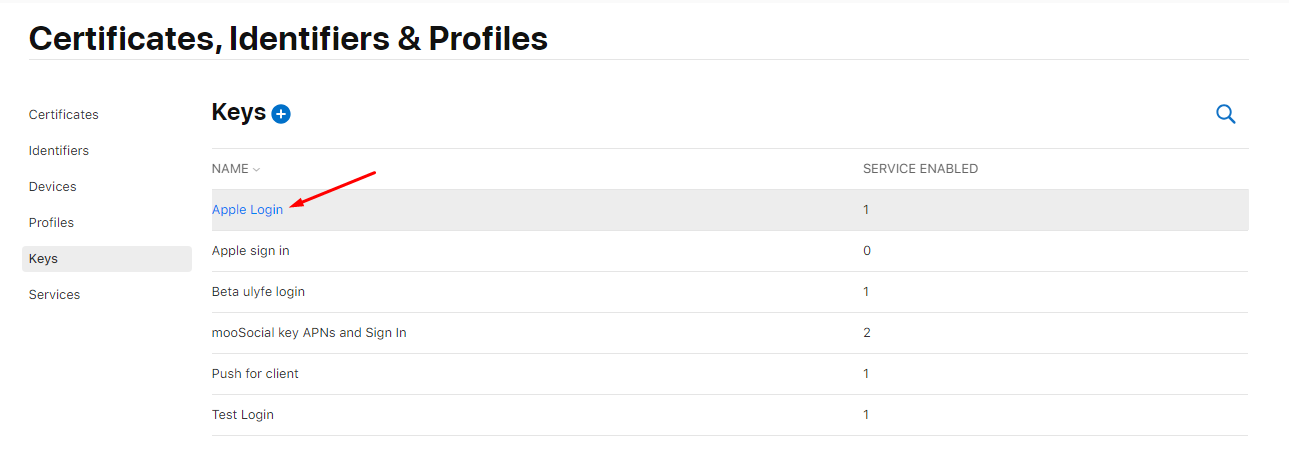
Select Keys menu and click on + button
Register key
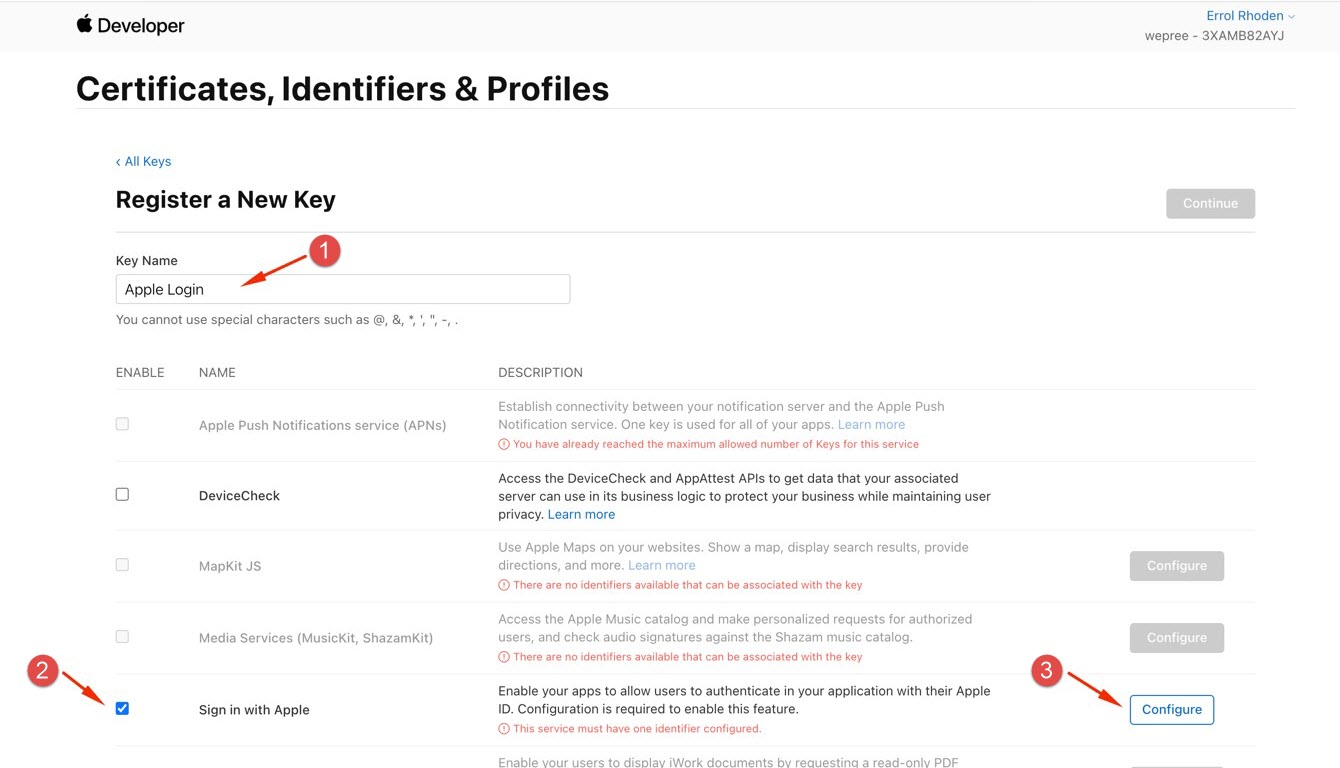
1. Enter name for your key
2. Enable Sign in with Apple
3. Click on Configure button
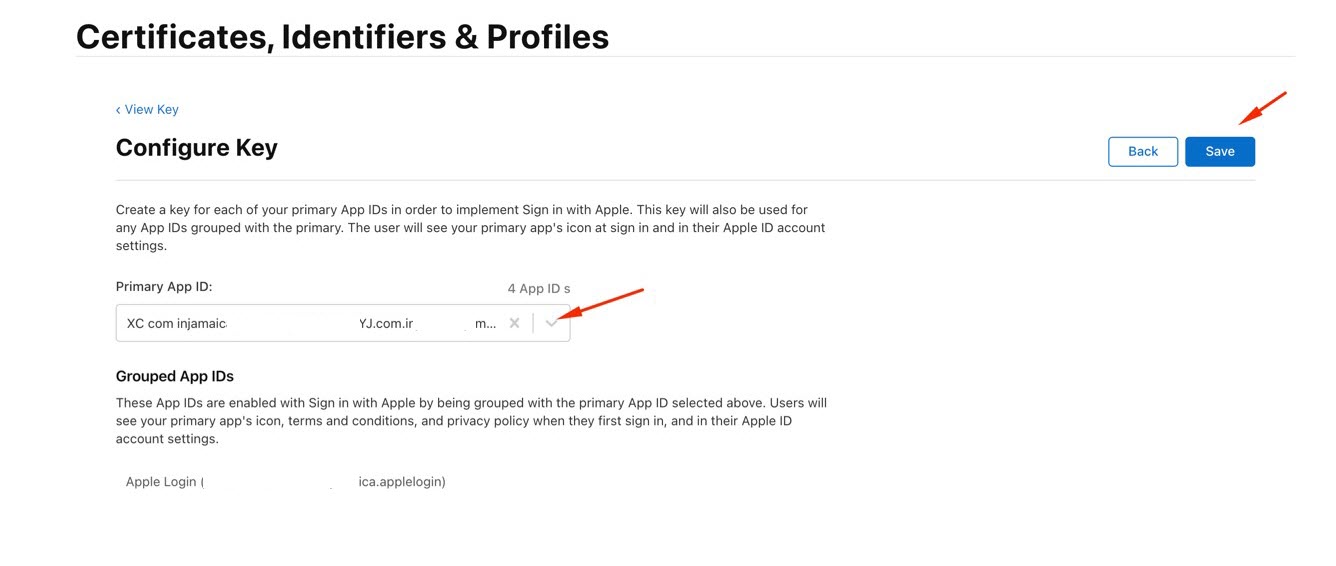
Select your Primary App ID and click Save
Click Continue

Click Register
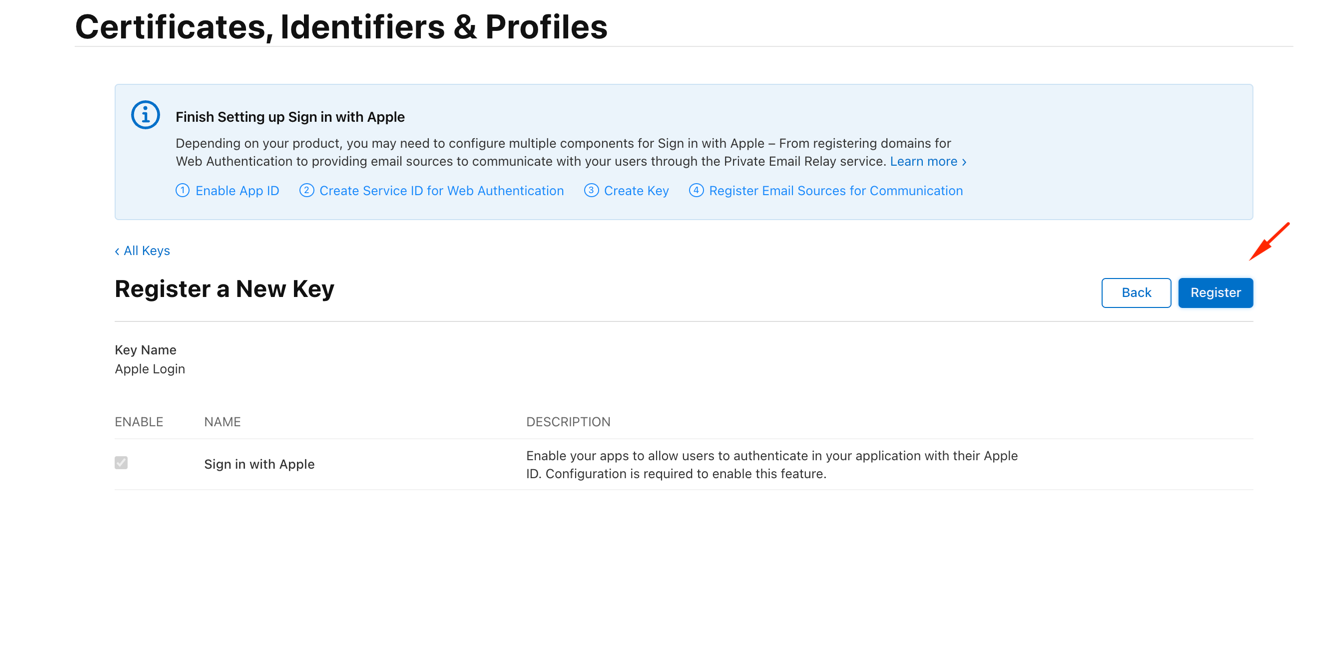
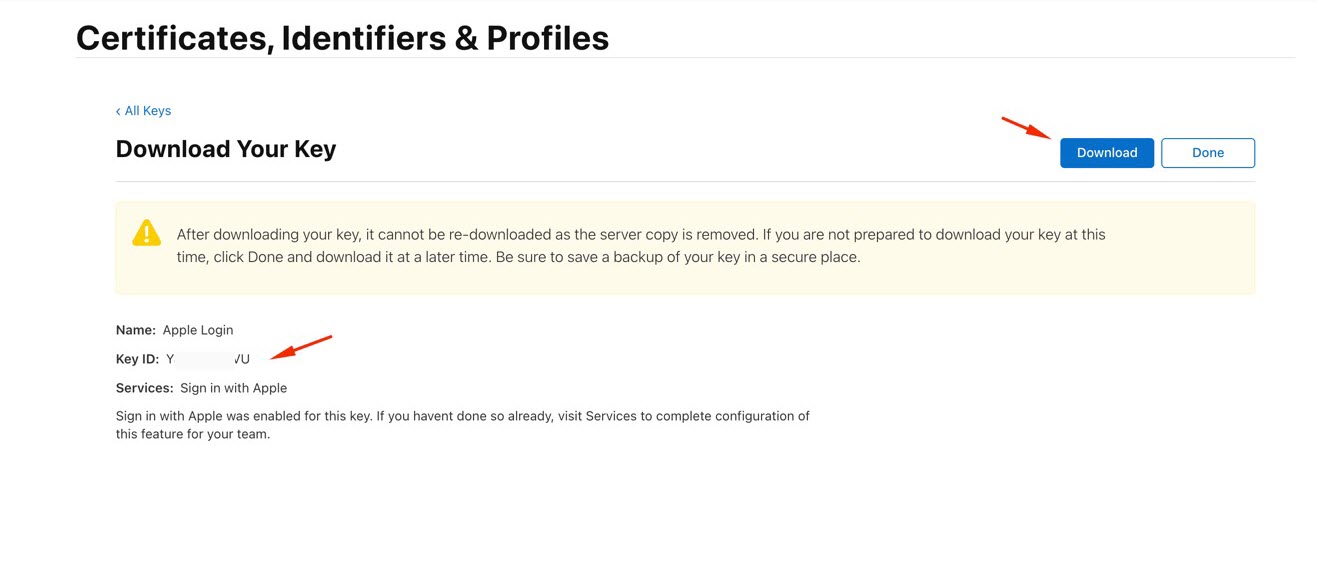
Click Download button to download the key.
Notice: Apple only allows you to download it once.
After download click done.
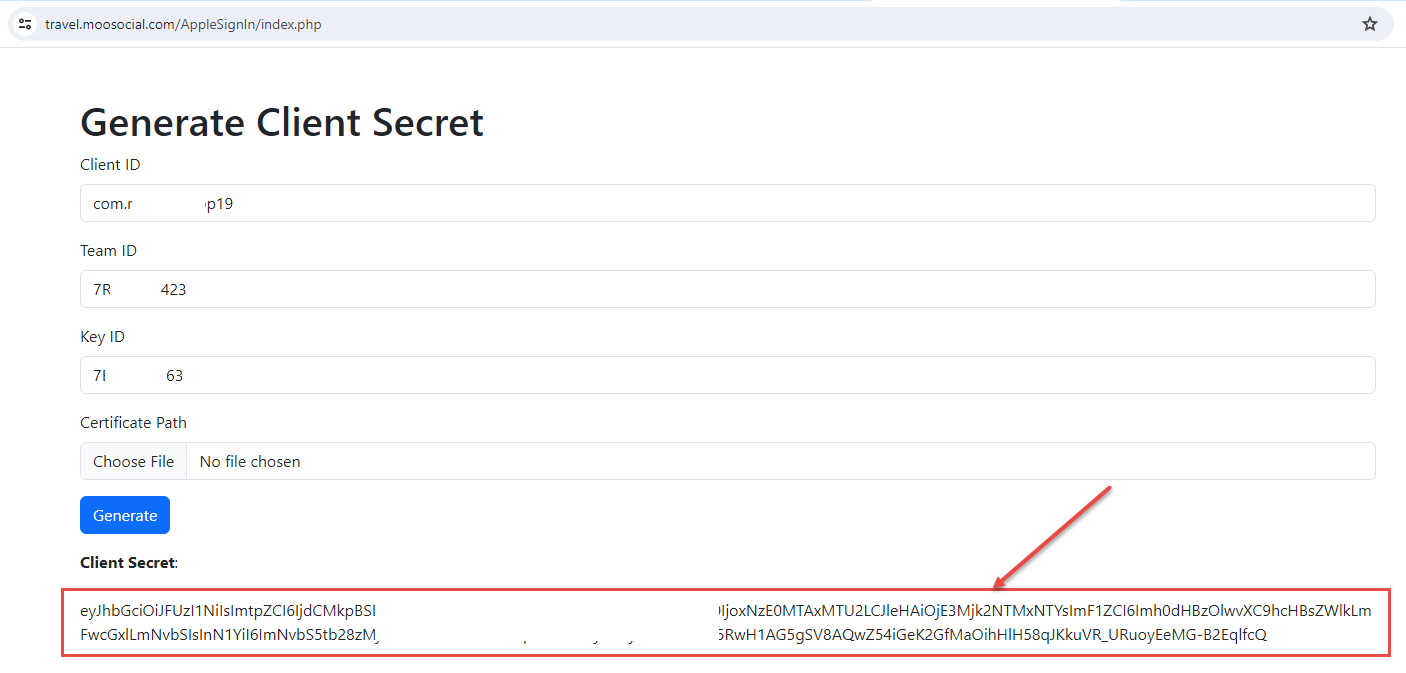
Step 10: Go to https://travel.moosocial.com/AppleSignIn to get Client Secret
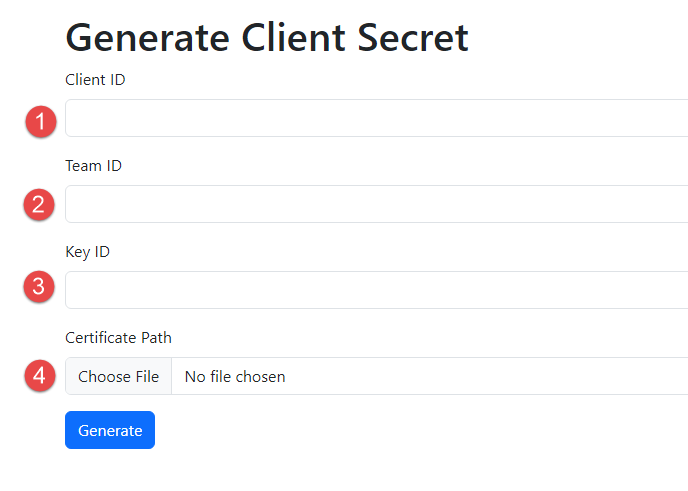
1. Client ID: It is the Identifier of Services ID
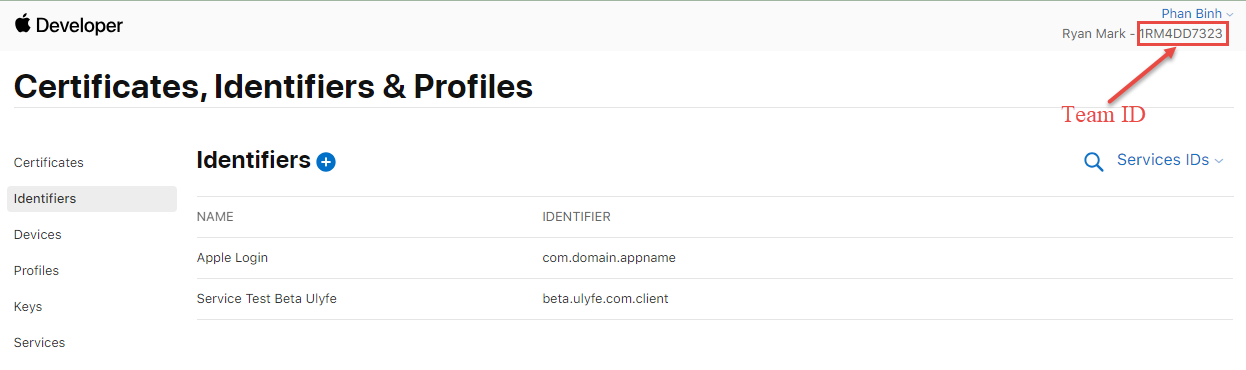
2. Team ID:
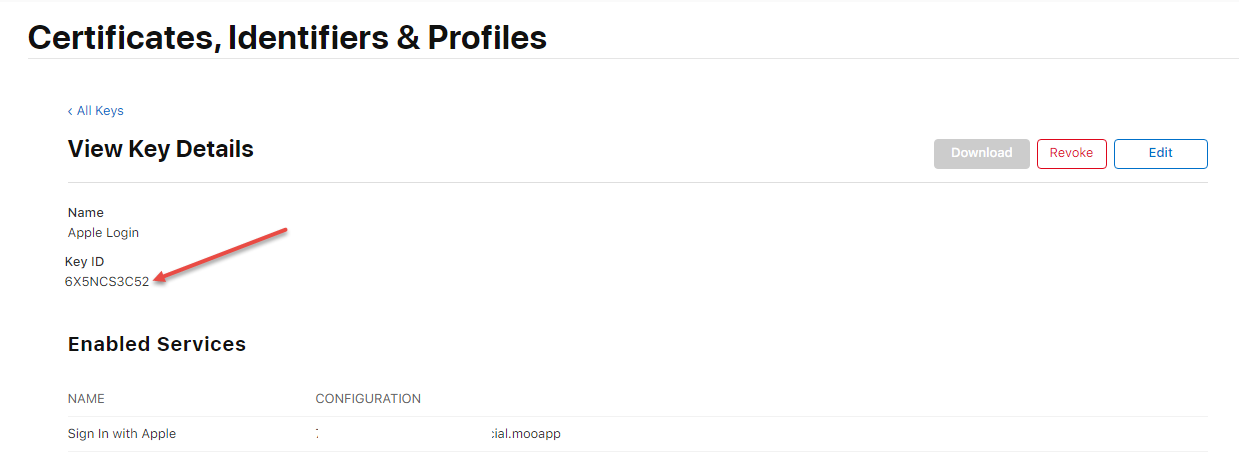
3. Key ID: Go to https://developer.apple.com/account/resources/authkeys/list
and select the key you just created
You will see your Key ID
4. Certificate Path: It is the file you downloaded when created the key
After fill all fields and click Generate button, you can get Client Secret
Step 11. Go to the your site and open OpenId Connect menu, click on Edit Application (Apple).
Enter Client ID and Client Secret you just get. After saving, users can login your site by using Apple account.