1. How to configure subscription
– Access Admin Dashboard –> System Admin –> Subscription –>Manage Packages tab
* How to Create New Package
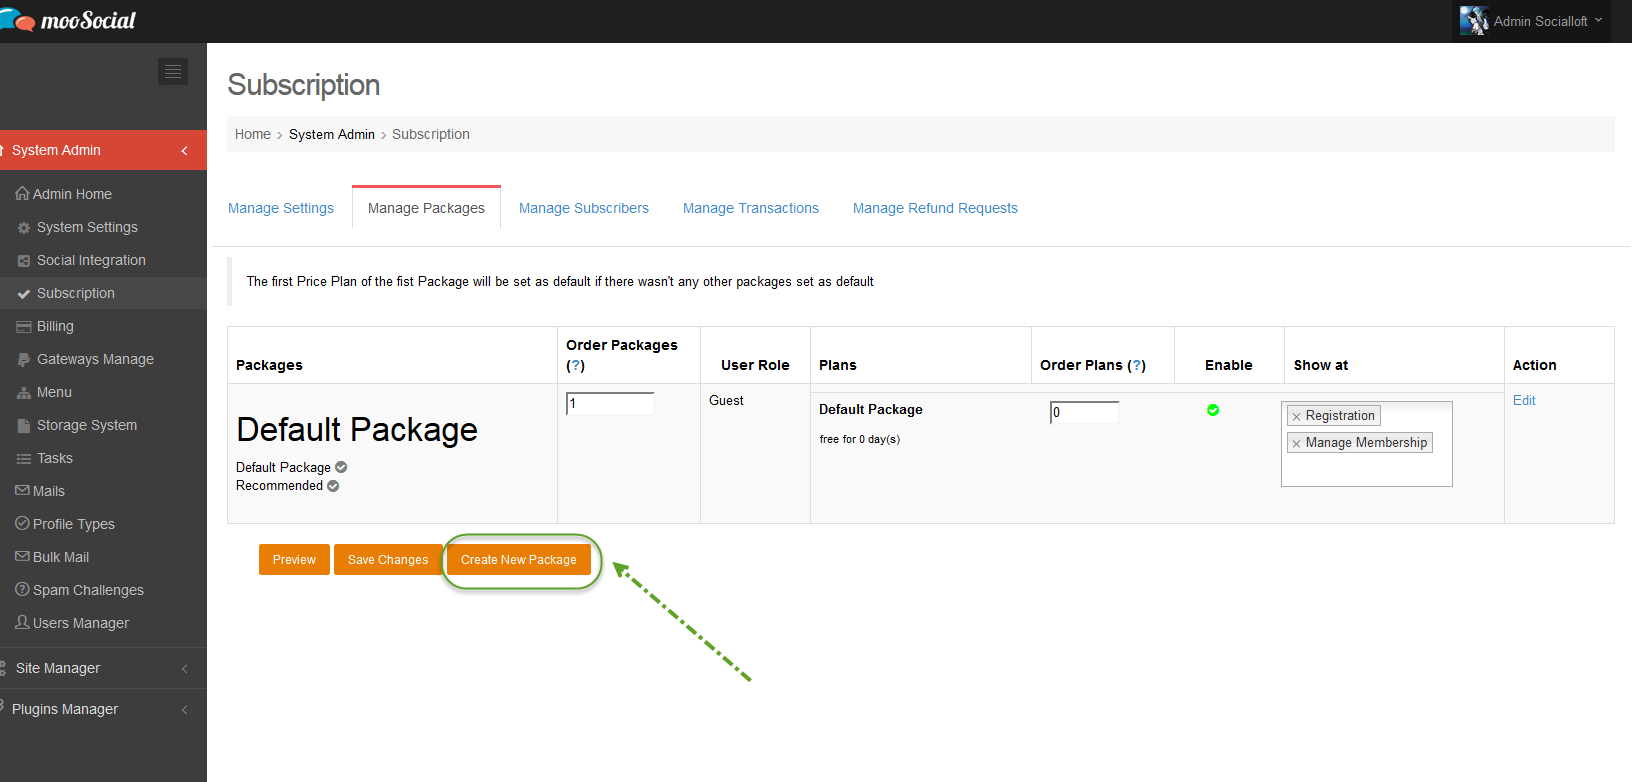
– Click on Create New Package button, you will see create new package form as below screenshot
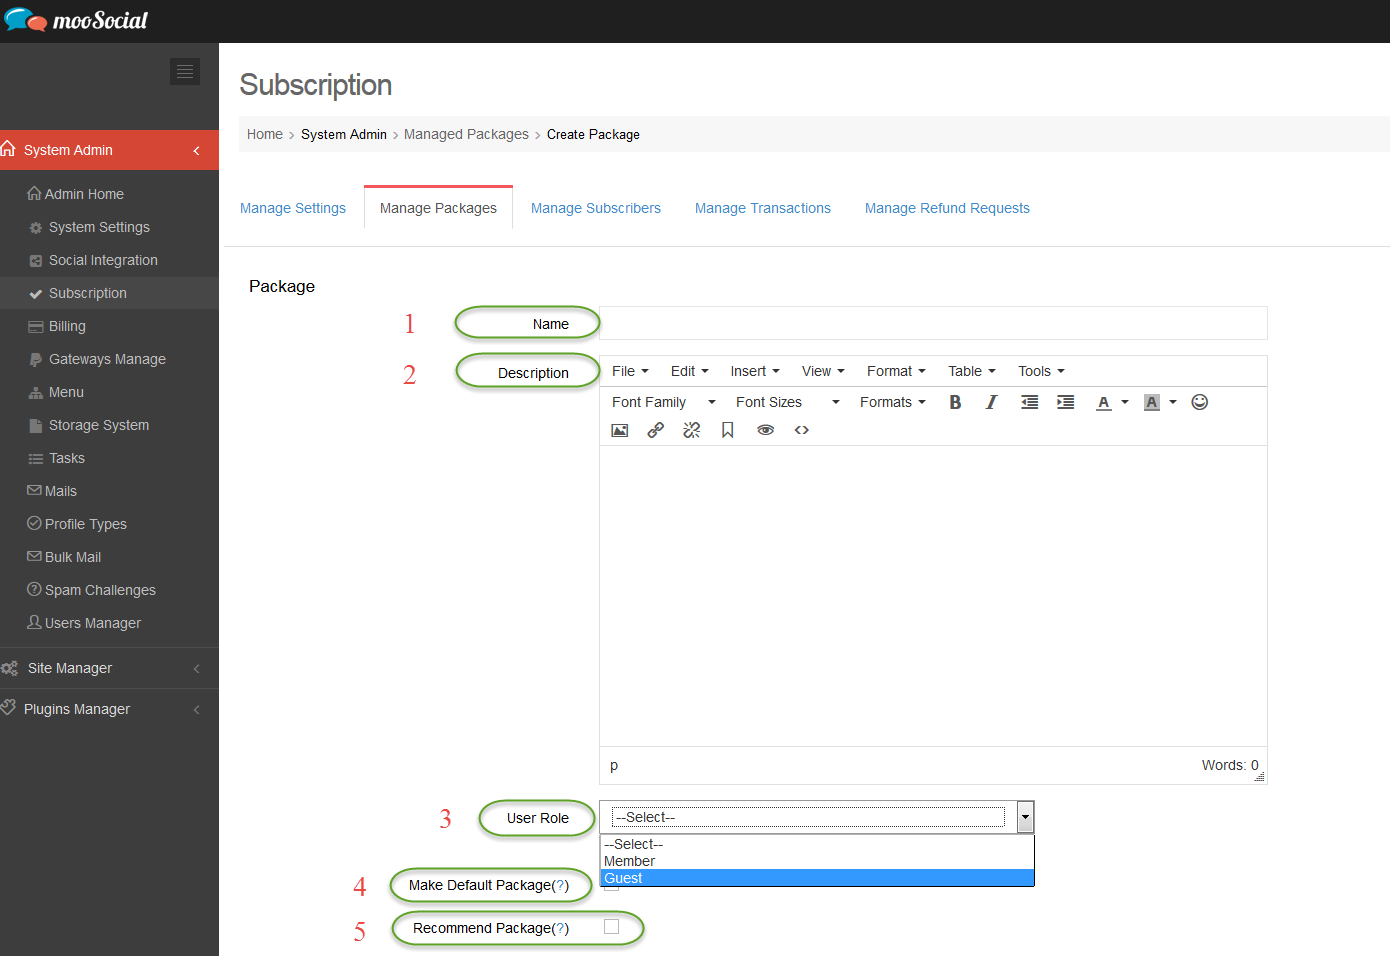
#1: Name of the Package, anything you want and just type in
#2: Description for the Package
#3: Mapping user role: which role member will auto assign if they purchased this package
#4: If it is checked, this package will default selected in the list of available packages for member to select to buy.
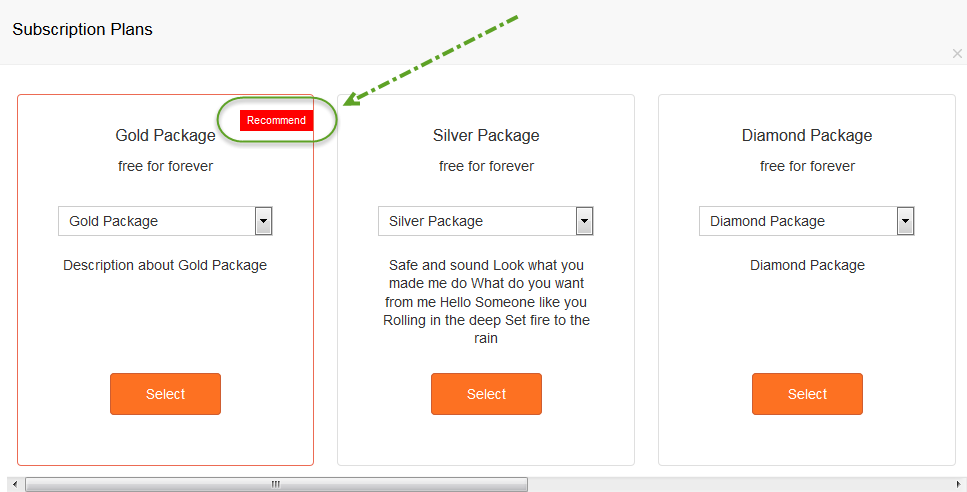
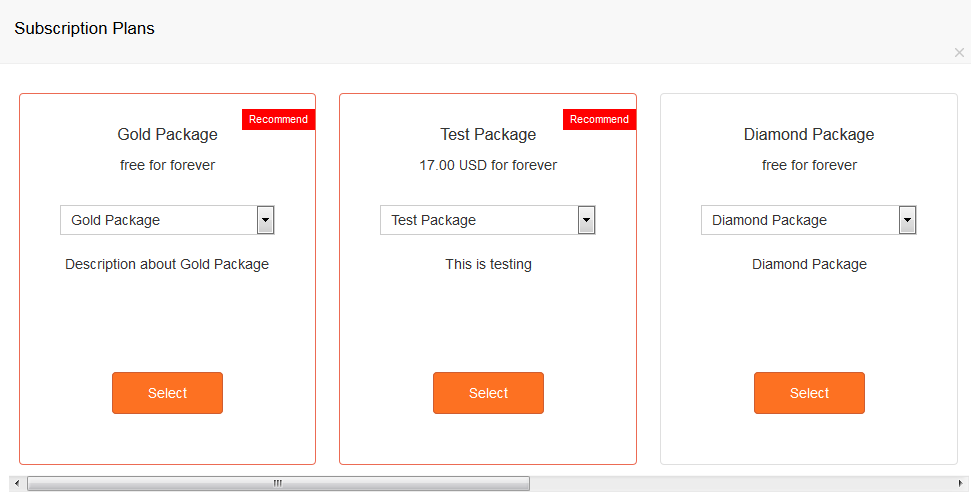
#5: If it is checked, Sticker “Recommended” will be shown for this package. Like image below
– Set Plan for the Package
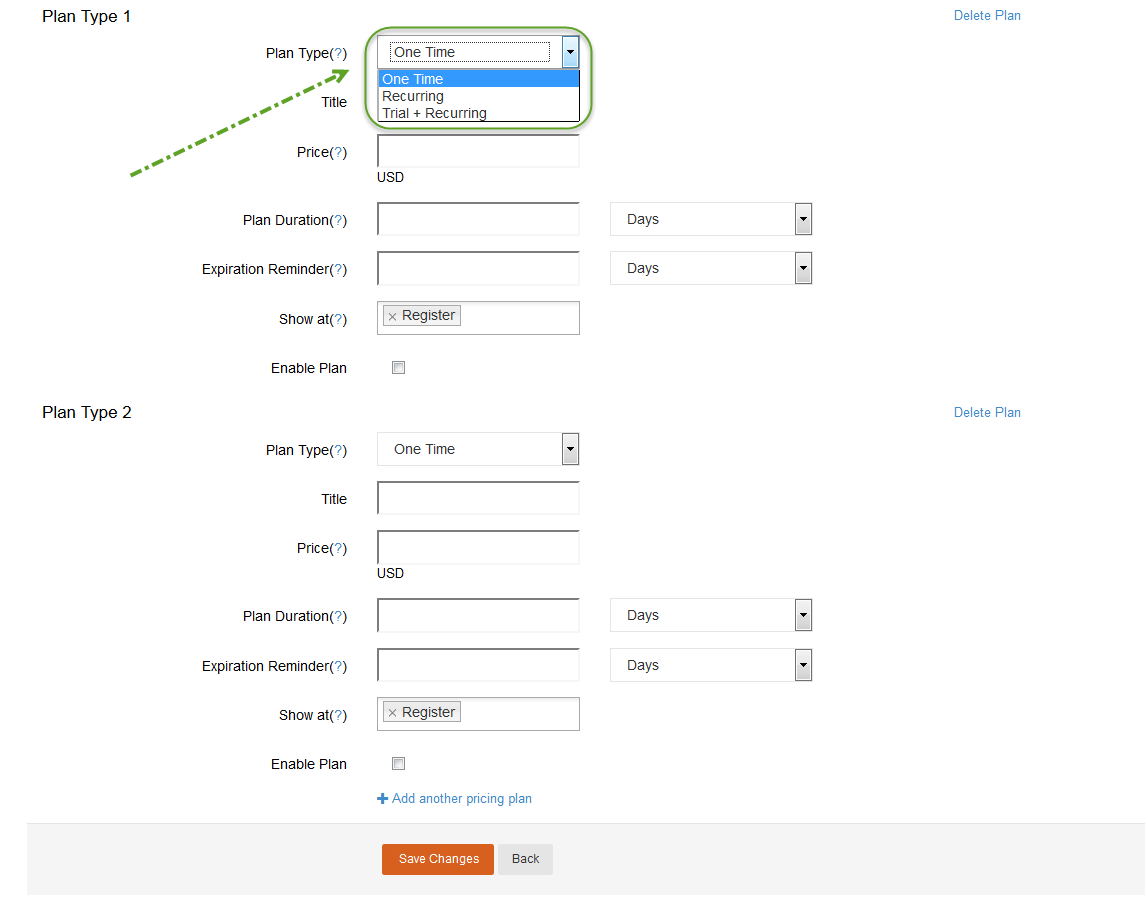
– Set Plan for the Package with plan type is “One Time”

#1: Set title for plan
#2: Set price for this plan
#3: Maximum duration for the plan, will be expired in the period of time set here, x Days, x Week, x Month, x Year and Forever
#4: x Days, x Week, x Month, x Year until expired to send renewal notification
#5: Input page you want to display
#6: If it is checked, this plan will be enable.
– Set Plan for the Package with plan type is “Recurring”
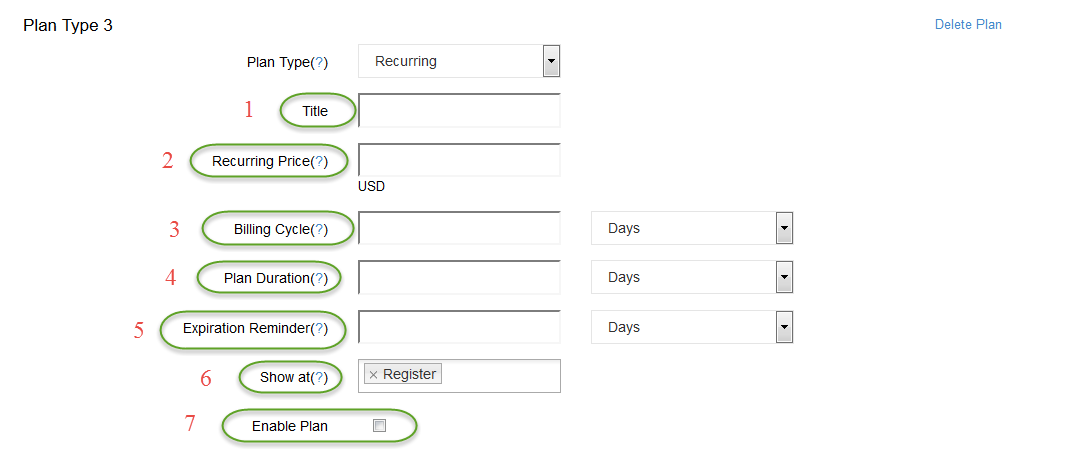
#1: Set title for plan
#2: Set price for this plan
#3: Set duration for Billing Cycle, for Days, Week, Month, Year user will be billed for the period of the time specified in this field
#4: Maximum duration for the plan, will be expired in the period of time set here, x Days, x Week, x Month, x Year and Forever
#5: x Days, x Week, x Month, x Year until expired to send renewal notification
#6: Input page you want to display
#7: If it is checked, this plan will be enable.
– Set Plan for the Package with plan type is “Trial + Recurring“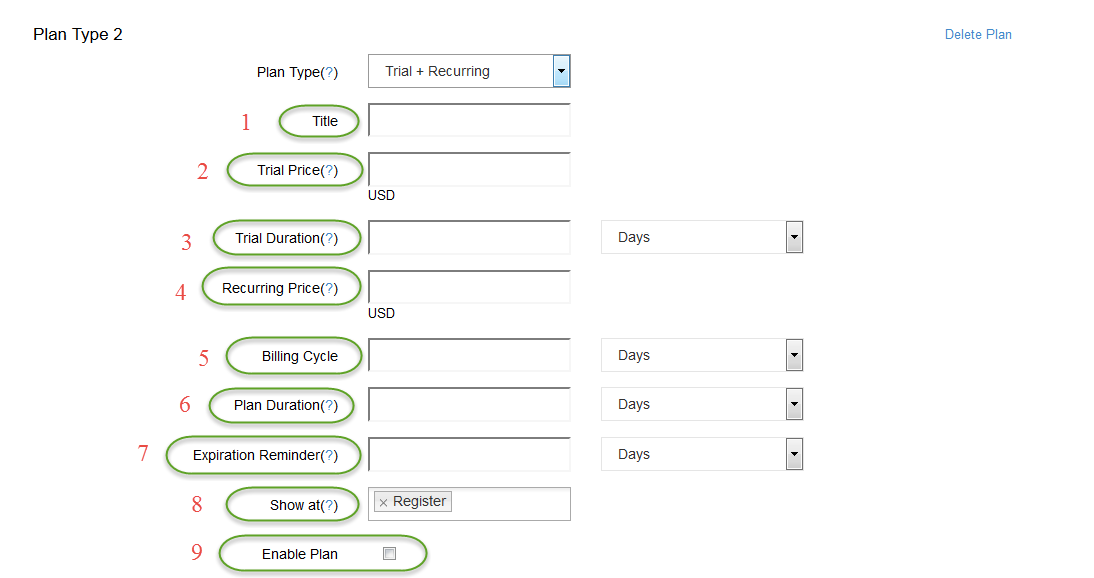
#1: Set title for plan
#2: Charge users on Trial duration, set this =0 will make this a free trial
#3: Set maximum duration users can try for the plan
#4: Set price for this plan
#5: Set duration for Billing Cycle, for Days, Week, Month, Year user will be billed for the period of the time specified in this field
#6: Maximum duration for the plan, will be expired in the period of time set here, x Days, x Week, x Month, x Year and Forever
#7: x Days, x Week, x Month, x Year until expired to send renewal notification
#8: Input page you want to display
#9: If it is checked, this plan will be enable.
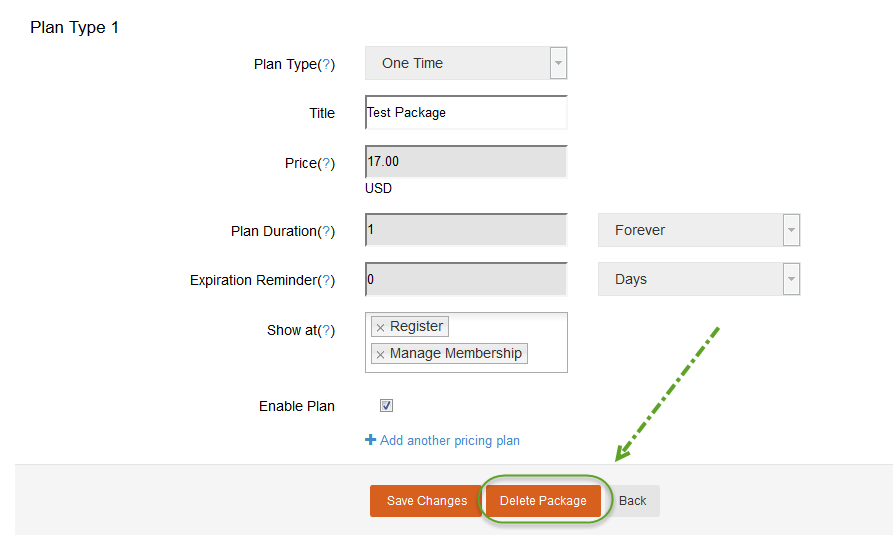
* How to Delete a Package
Access Admin Dashboard –> System Admin –> Subscription –>Manager Package tab
– Select on a package you want to delete and click on Edit
– Scroll down and click on Delete Package button to delete this package
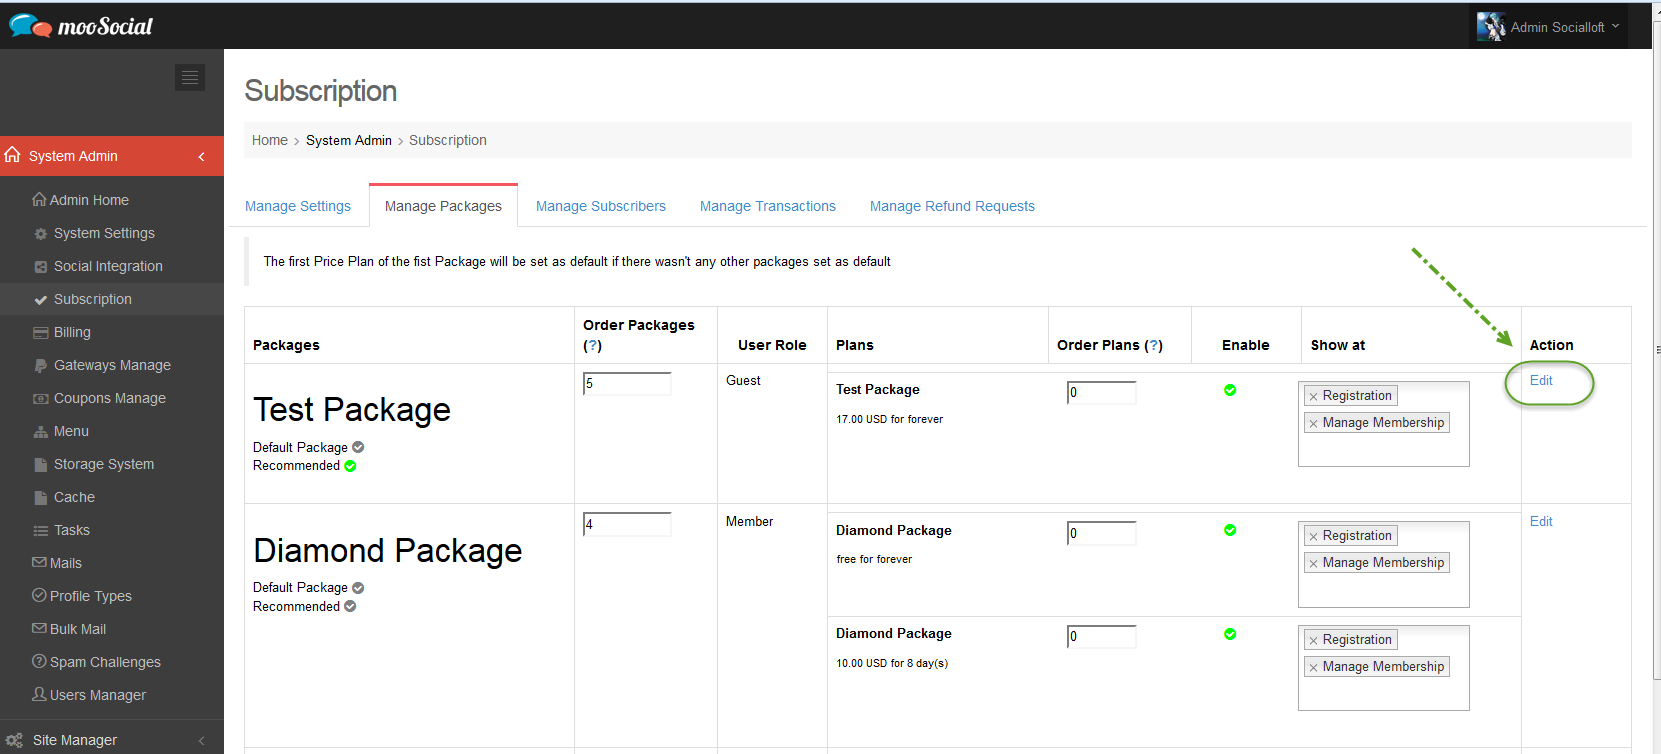
* How to Edit a Package
– How to set order: While at Manager Package page, you can set order for the packages, by entering numeric value at the Order Package Column
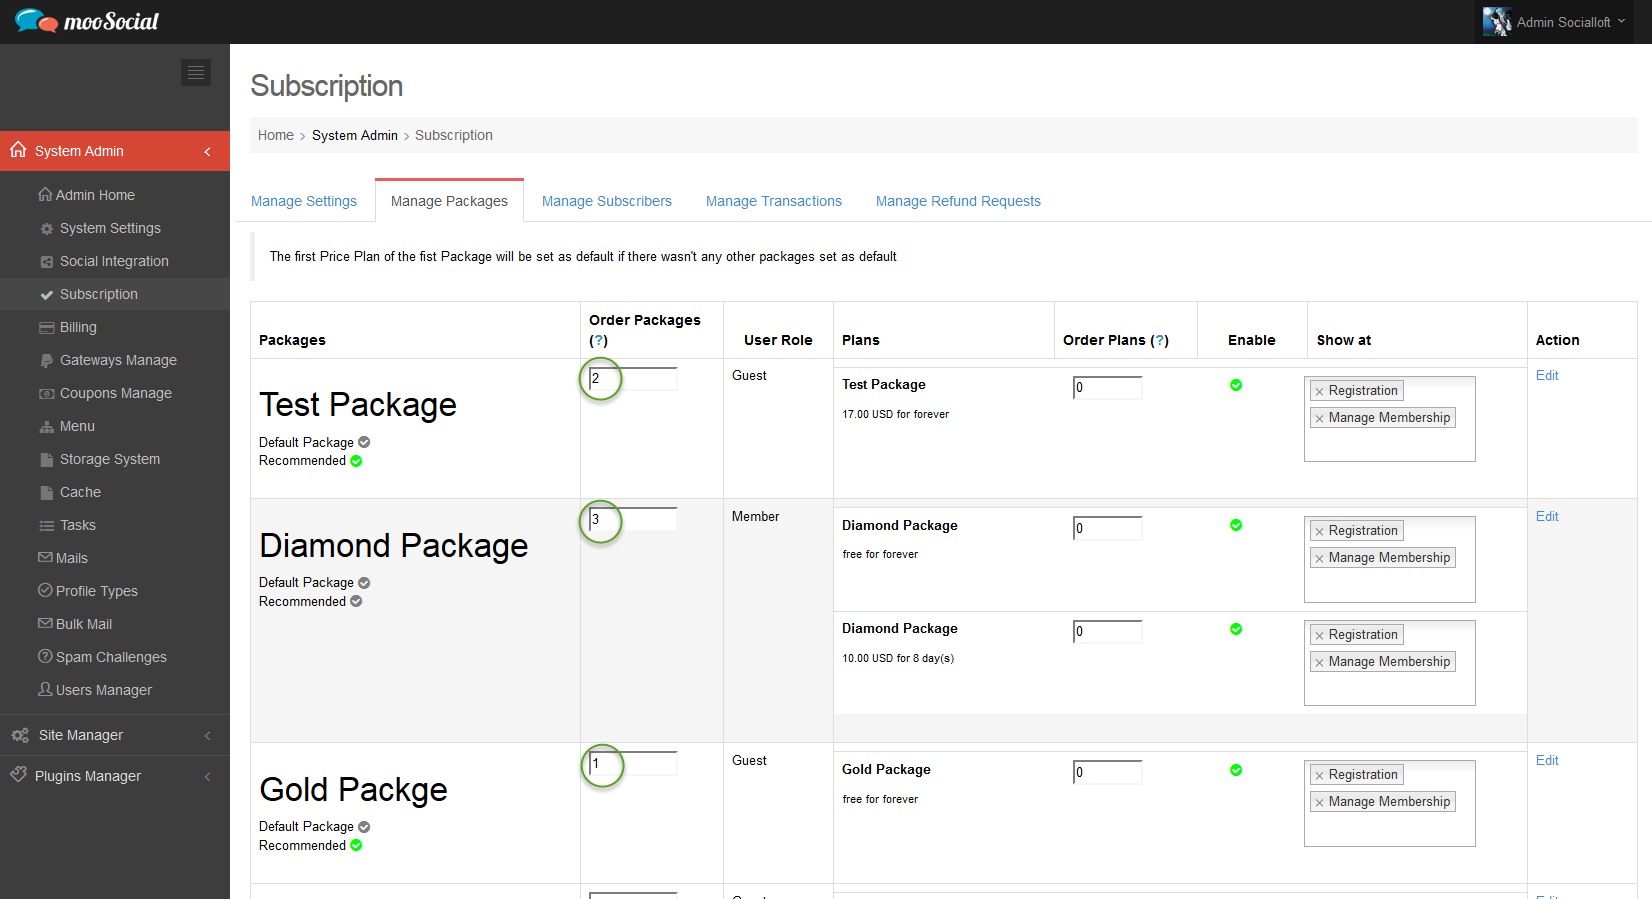
Example on Packages Order setting like image above, then we have
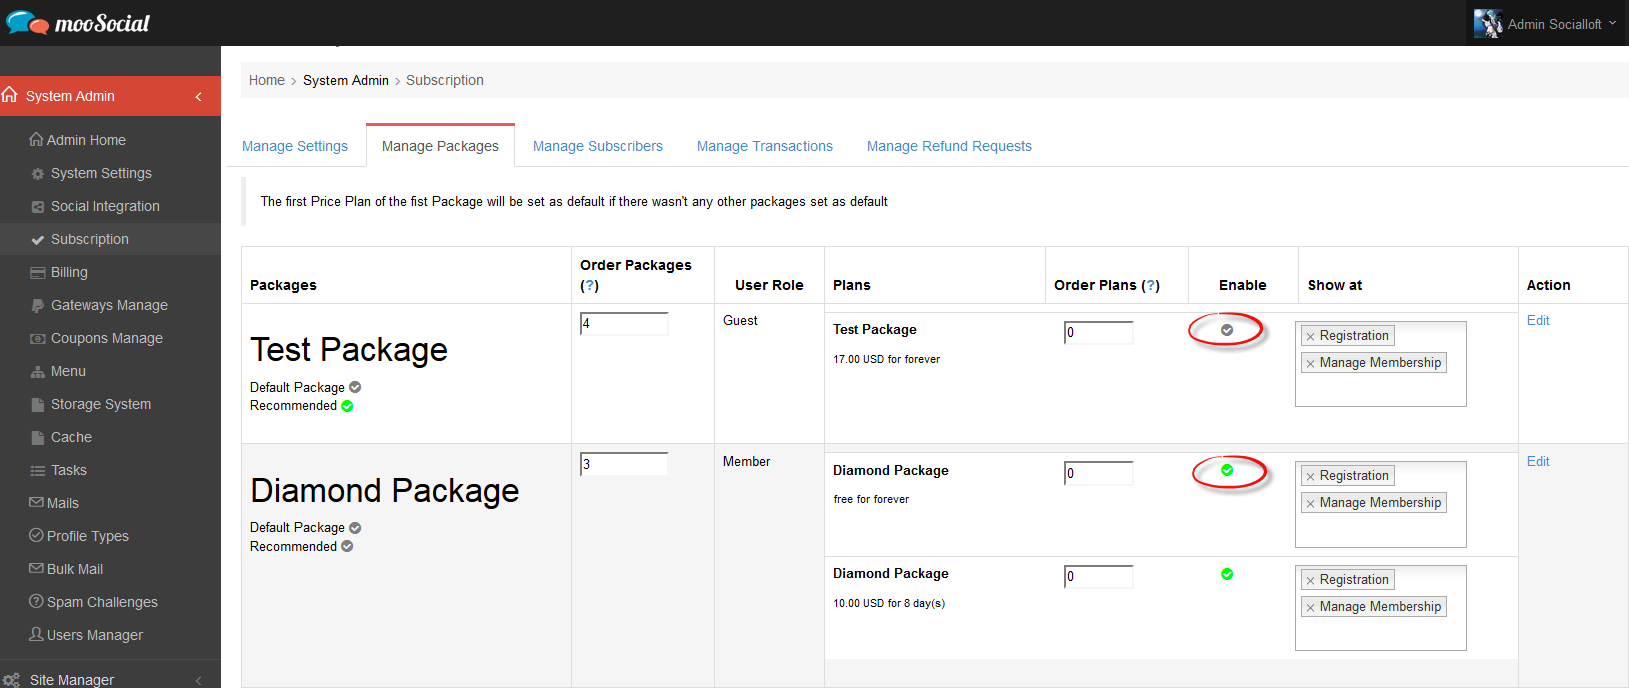
– How to Enable/Disable: While at Manager Package page, you can enable/ disable packages, take a look at Enable Column
* How to Manage Subscribers
Access Admin Dashboard –> System Admin –> Subscription –>Manage Subscription tab
– With Status Column, this is the status of member’s subscription will be displayed
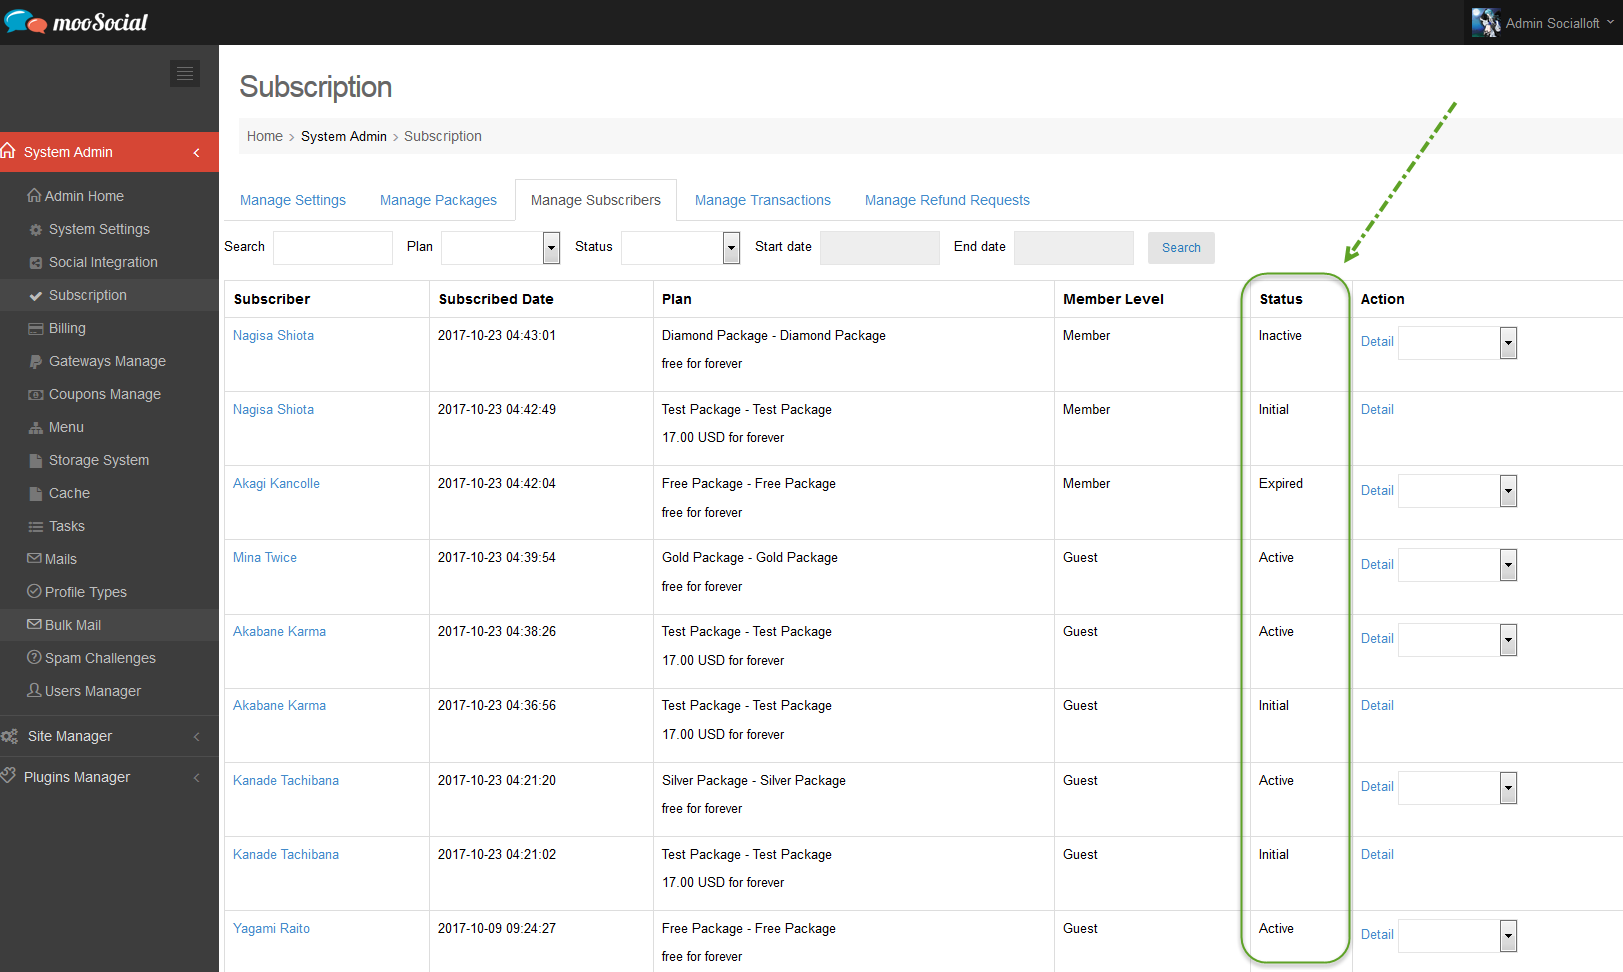
– With many status, admin can easily making decision for users
– Click on Detail button at Action Column to view User Detail
– With Action column, Admin can set users subscription status.
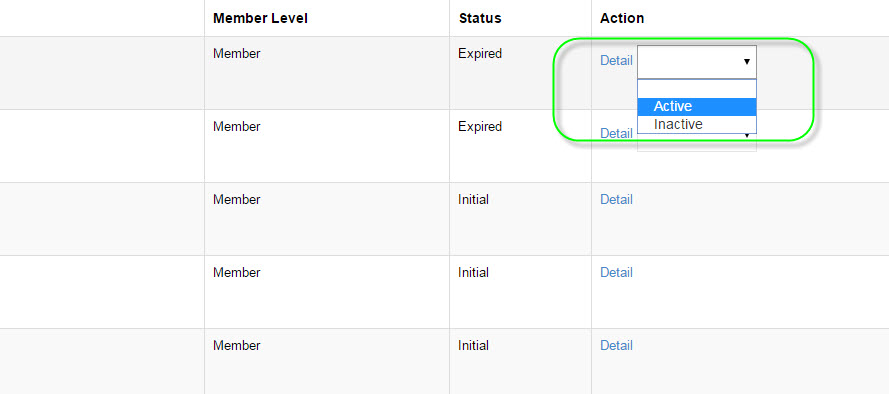
==> Note: Users with Initial status cannot be changed, Initial status reflects users are not subscribed to any package/plan, Admin cannot select package/plan for user
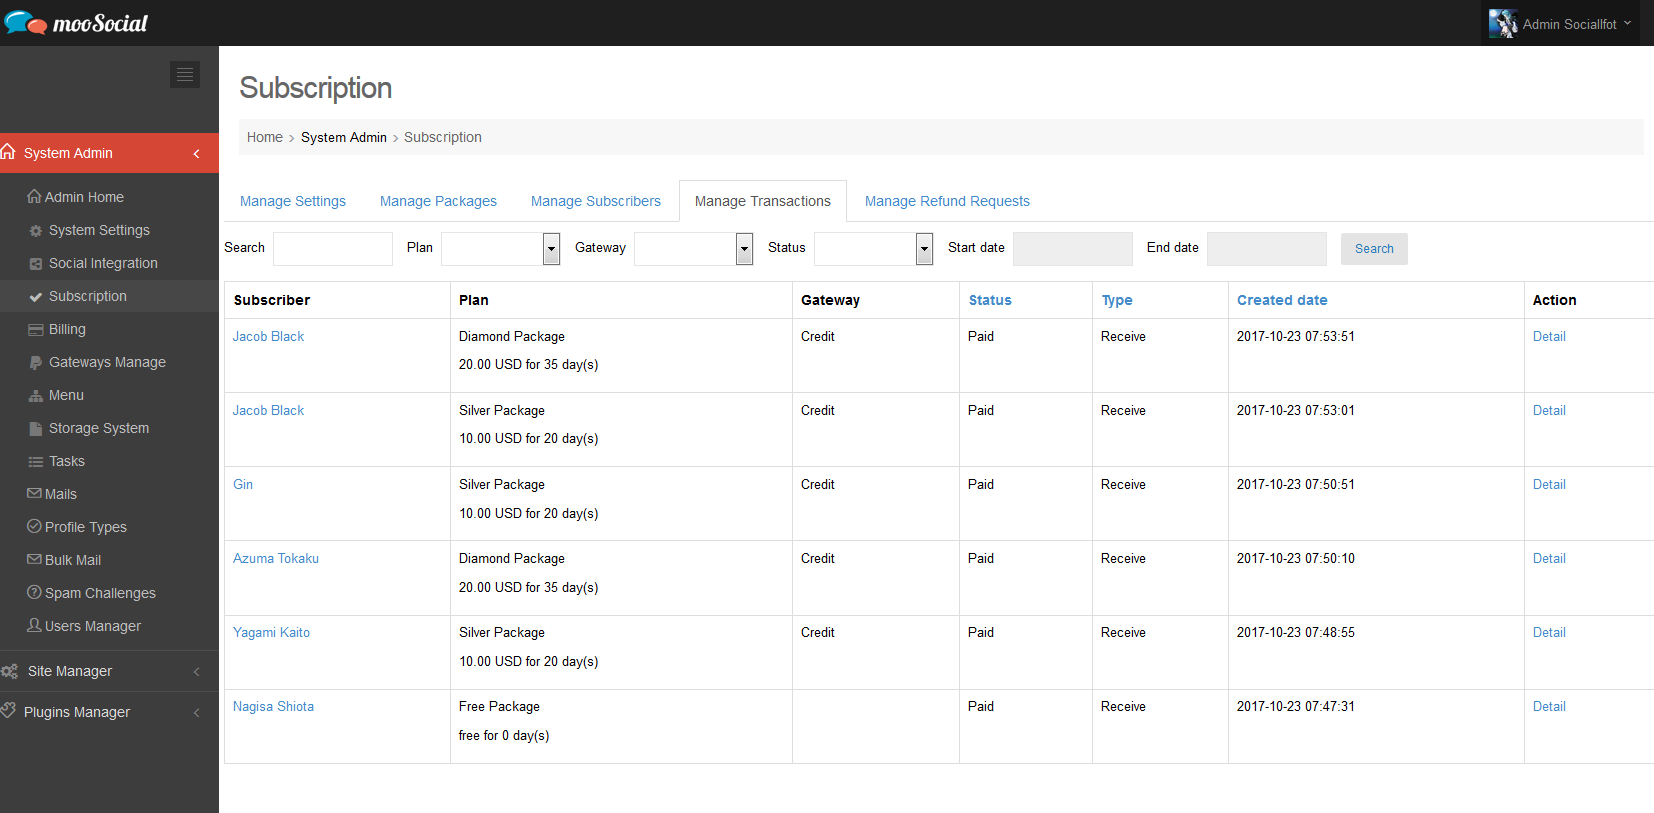
* How to Manage Transactions
Access Admin Dashboard –> System Admin –> Subscription –>Manage Transactions tab
At this page, Admin can manage, view transactions status. Which can view:
– Username
– Plan: Plan user purchased
– Gateway: Gateway used
– Status: Reflects status, Paid…ect
– Type: Shows Receive from users or Refunded to users
– Created Date: Date transaction were made
– Action: can view detail of the transaction
* How to Manage Refund Requests
Access Admin Dashboard –> System Admin –> Subscription –>Manage Refund Requests tab
This page used for managing Users Refund Requests that sent to Admin
– Request Date: Date of the request user sent Refund Request
– Plan: Plan that user purchased and want refund
– Account: Account (paypal) user want to refund
– Status: status of the Refund Request
– Action: Accept and Deny request can be made here
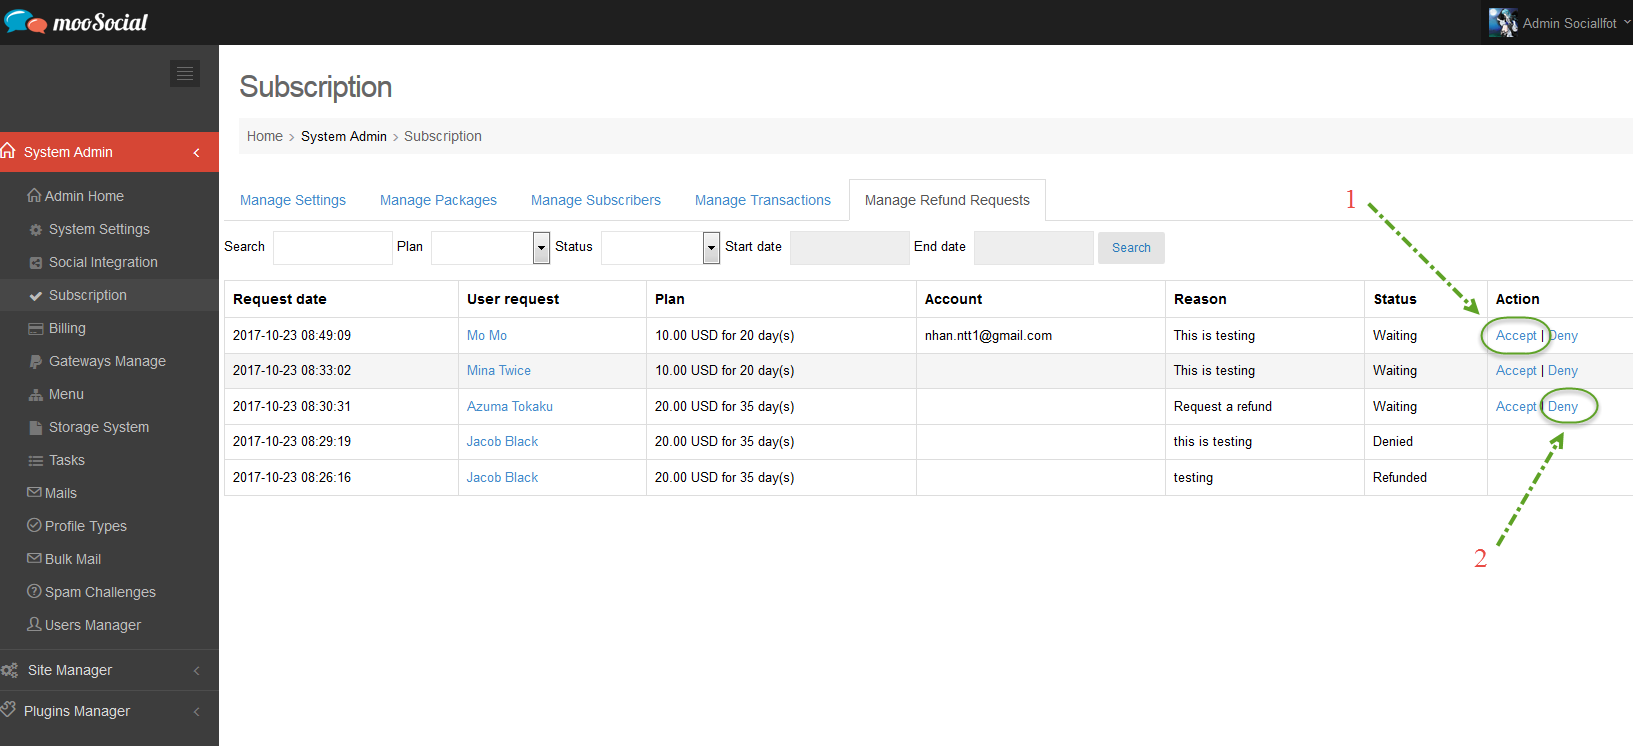
#1: Click on Accept button to accept refund request
#2: Click on Deny button to deny refund request. And you must provide reasons, type your reason and press OK to send to user
2. How to enable subscription
Access Admin Dashboard –> System Admin –> Subscription –>Manage Settings tab
* Make sure to enable gateway and create plan before enabling Subscription plugin
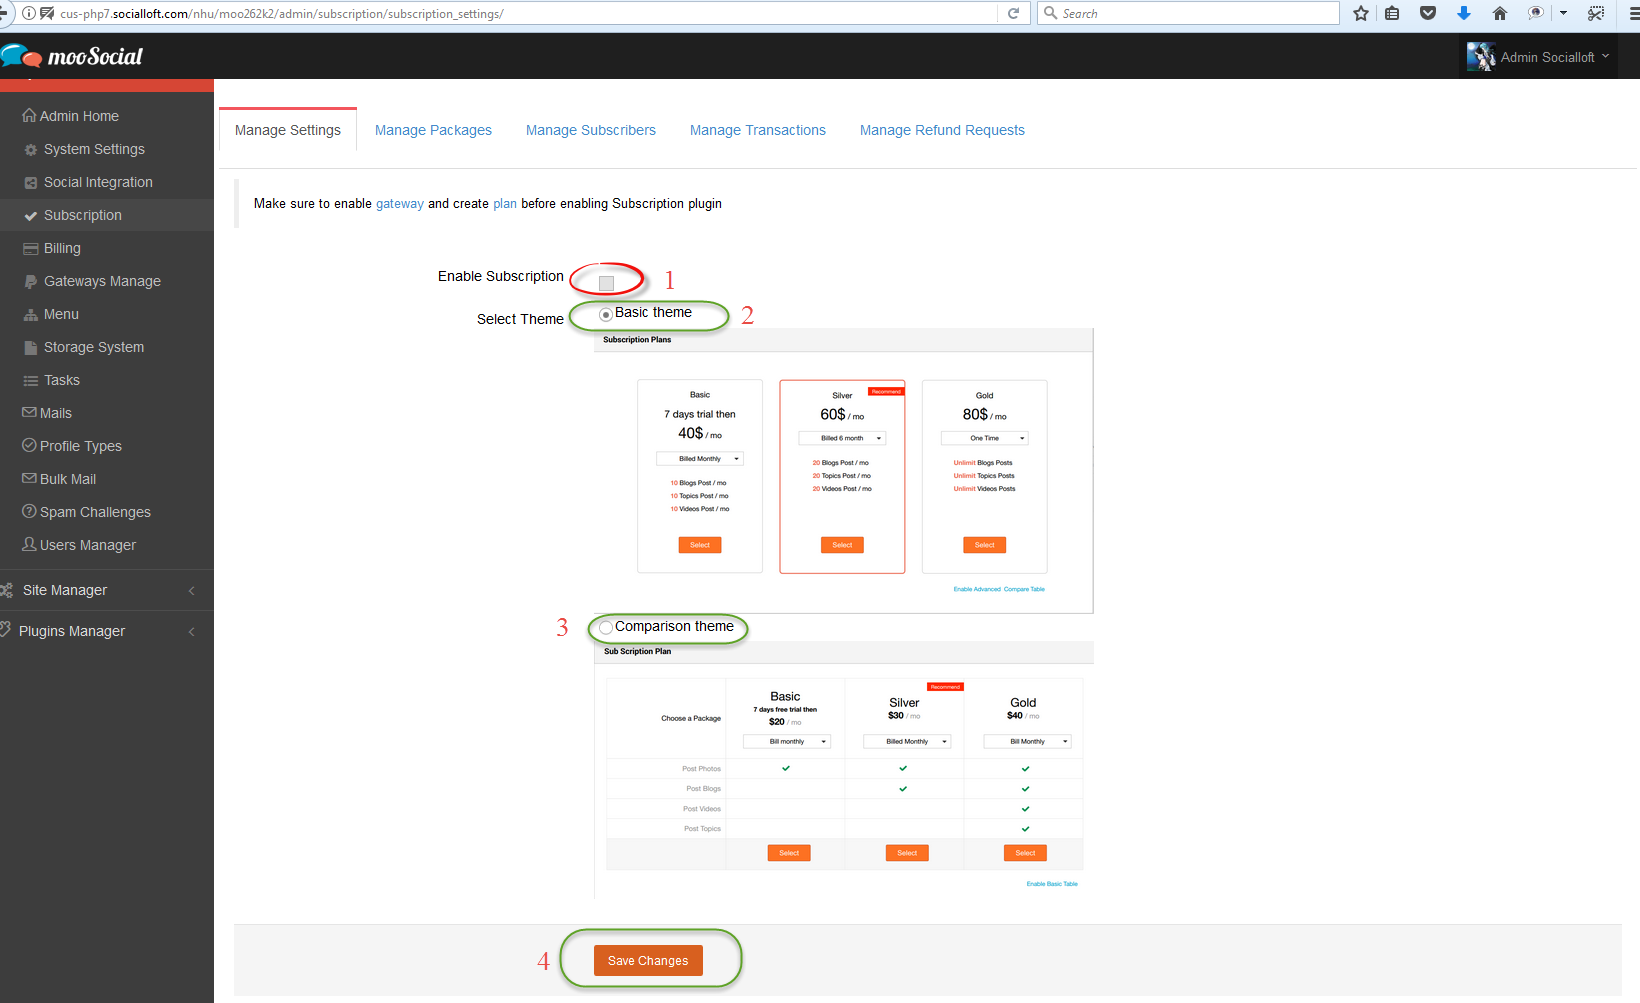
#1: Enable Subscription:
– If it is checked, subscription will work at fontend
– If it is unchecked, subcription will not work at fontend
#2: Check to select Basic Theme to display subscription with this format
#3: Check to select Comparison Theme to display subscription with this format
#4: Click on Save Changes button to save setting