1. How to configure the subscription
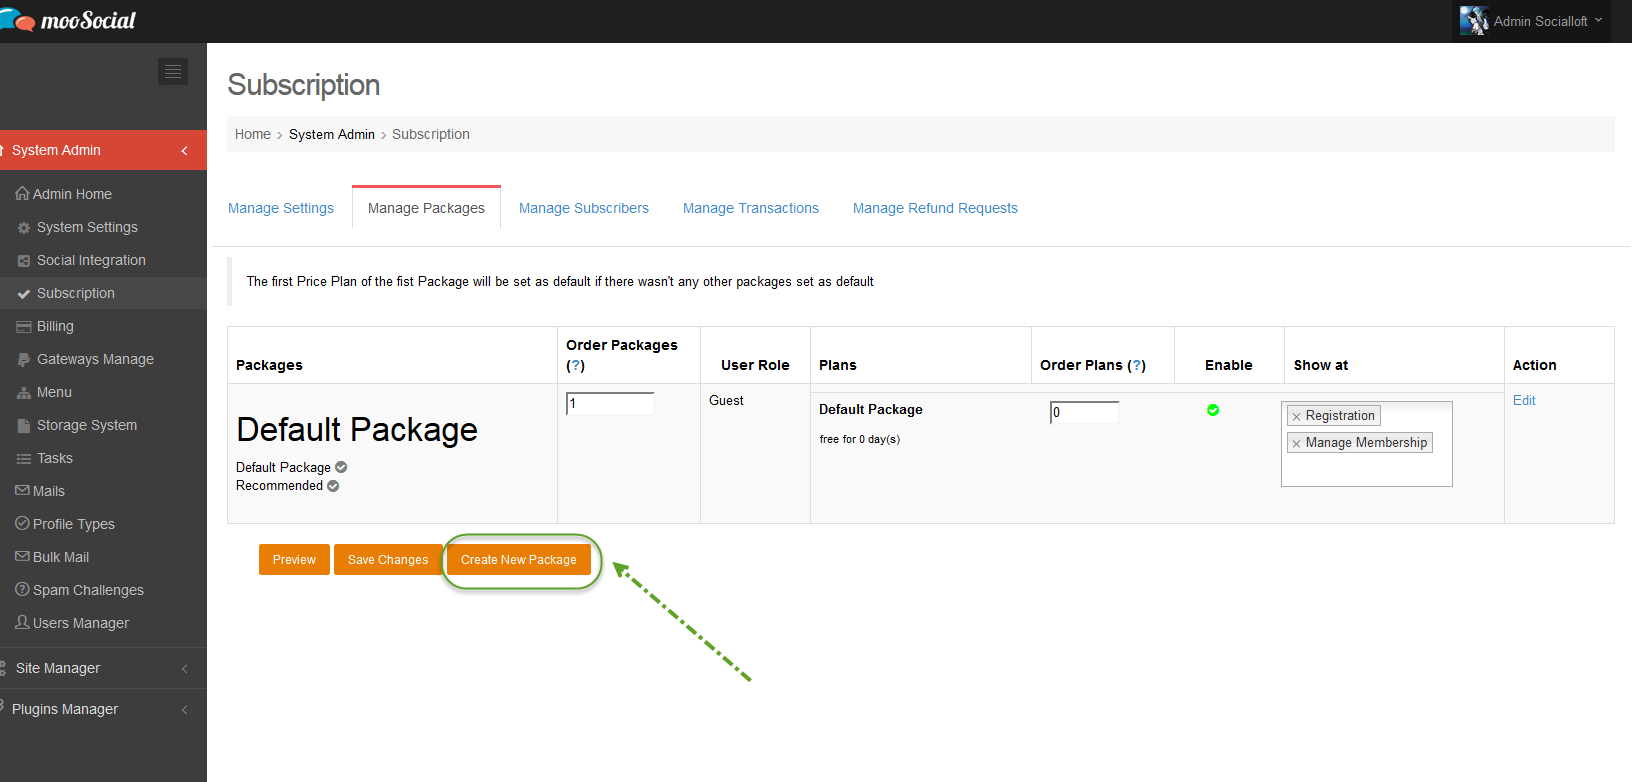
– Access Admin Dashboard –> System Admin –> Subscription –>Manage Packages tab
* How to Create New Package

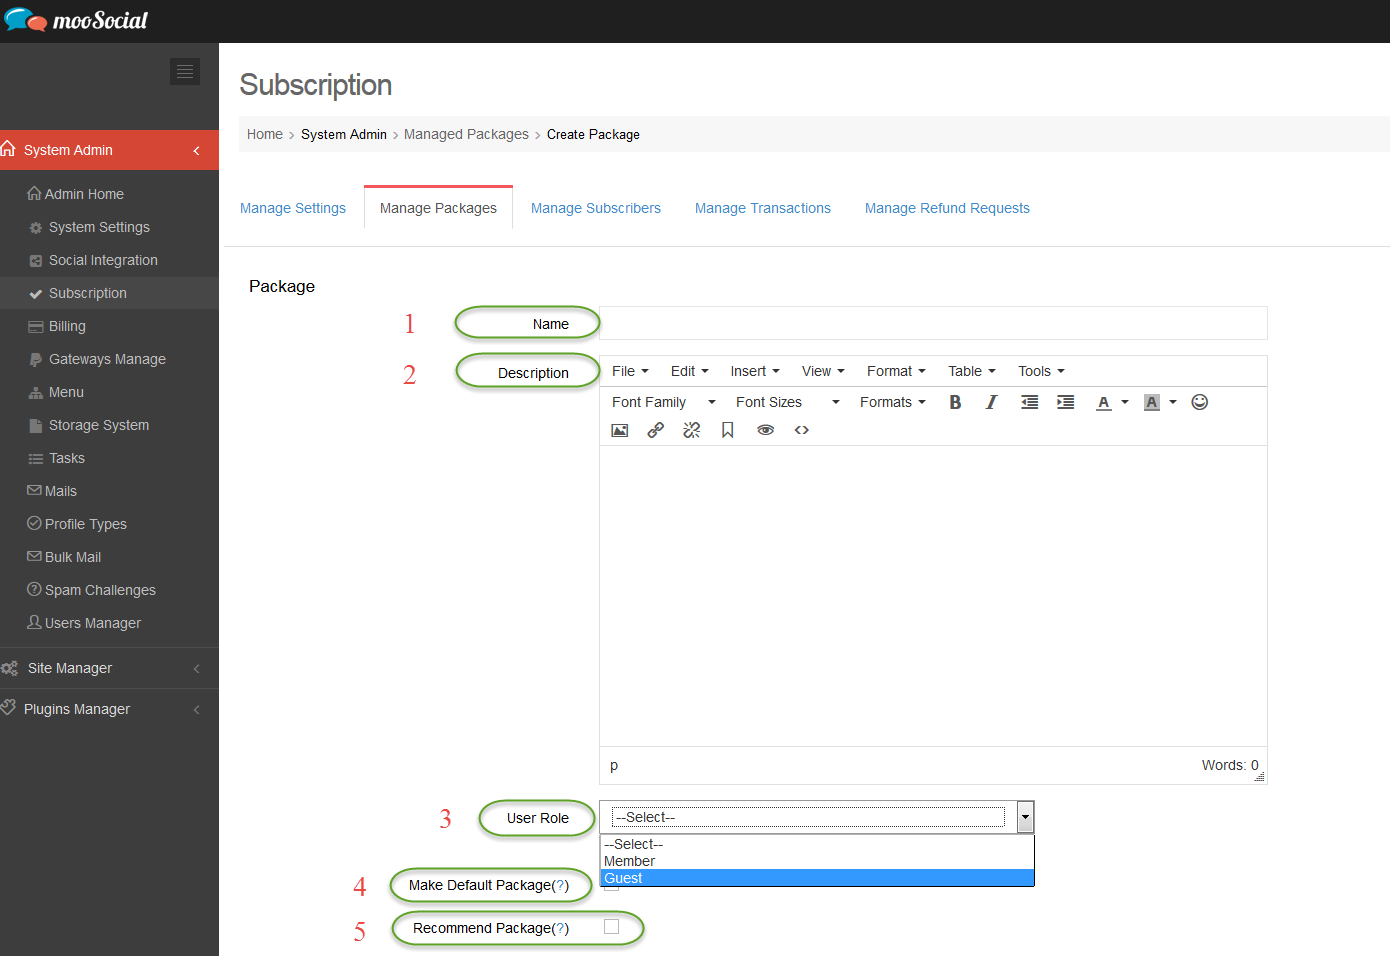
– Click on Create New Package button, you will see create new package form as below screenshot

#1: Name of the Package, anything you want and just type in
#2: Description for the Package
#3: Mapping user role: which role member will auto assign if they purchased this package
#4: If it is checked, this package will default selected in the list of available packages for a member to select to buy.
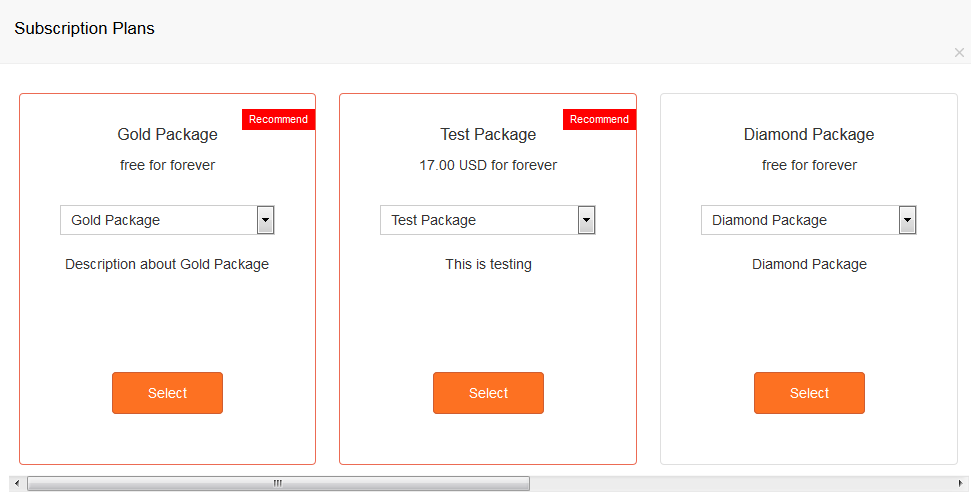
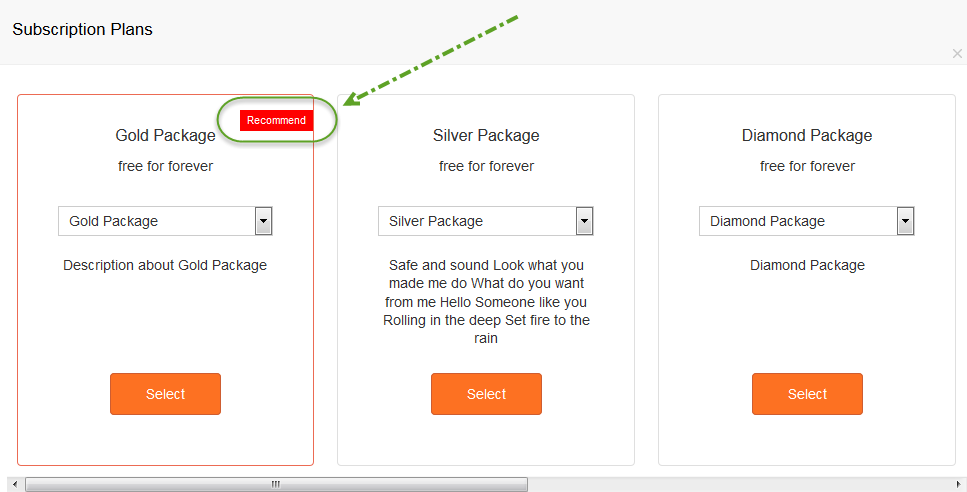
#5: If it is checked, Sticker “Recommended” will be shown for this package. Like image below
– Set Plan for the Package
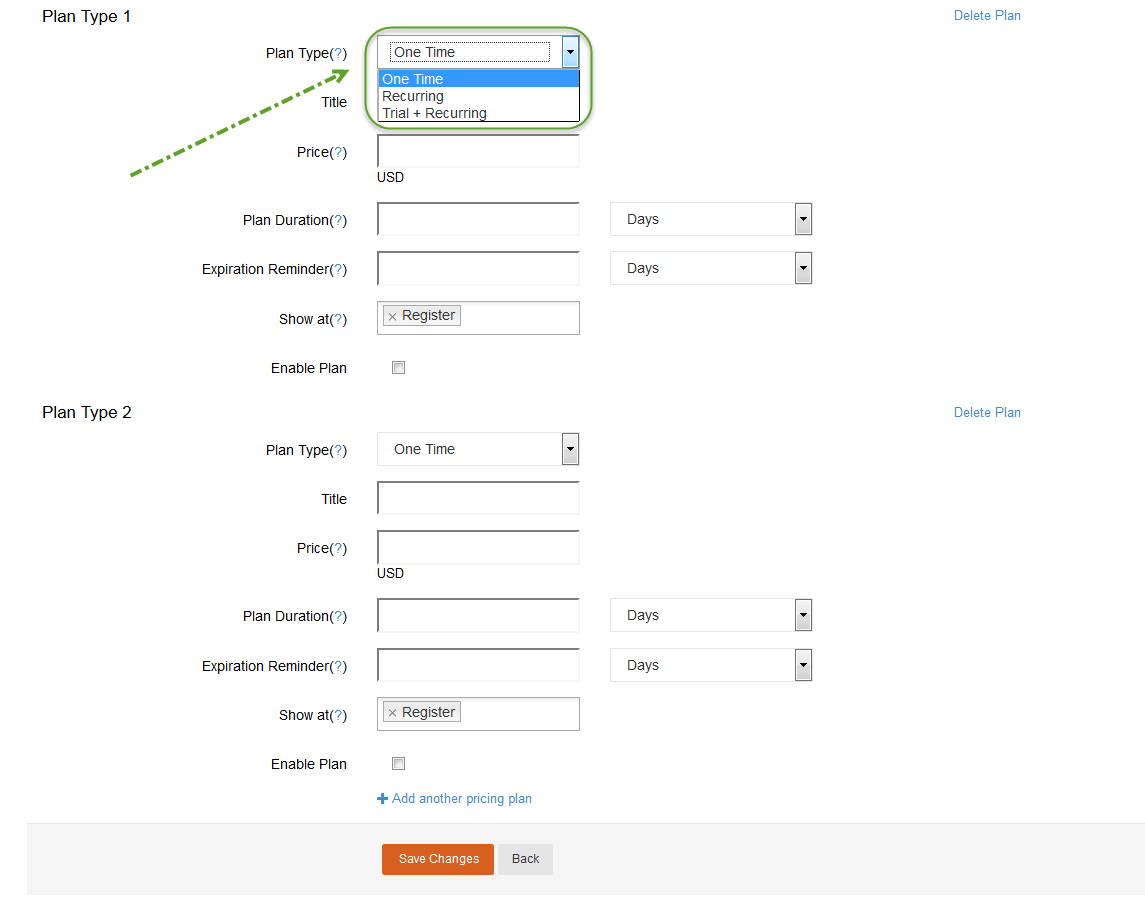
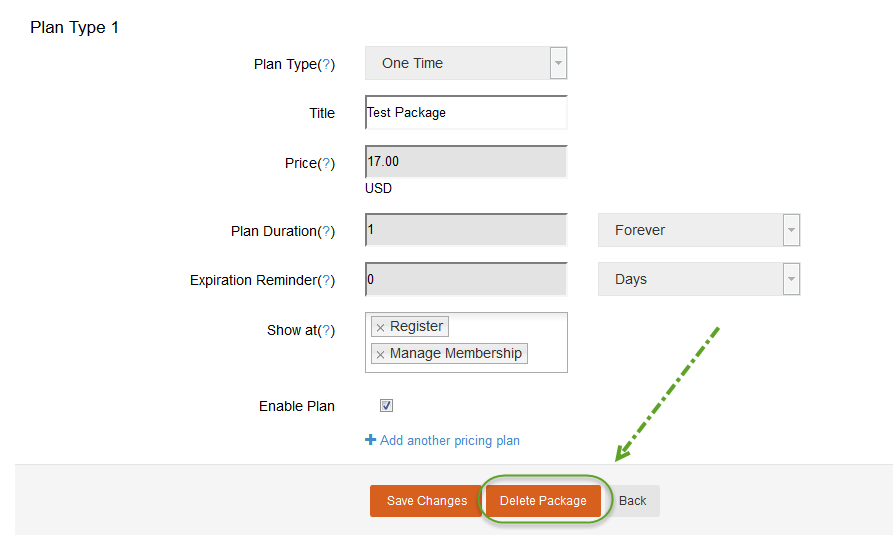
– Set Plan for the Package with plan type is “One Time”
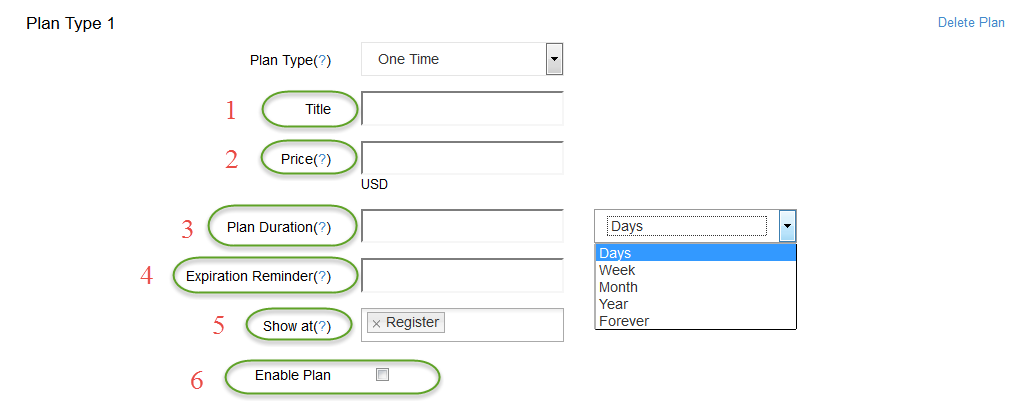
#1: Set title for the plan
#2: Set price for this plan
#3: Maximum duration for the plan, will be expired in the period of time set here, x Days, x Week, x Month, x Year and Forever
#4: x Days, x Week, x Month, x Year until expired to send a renewal notification
#5: Input page you want to display
#6: If it is checked, this plan will be enabled.
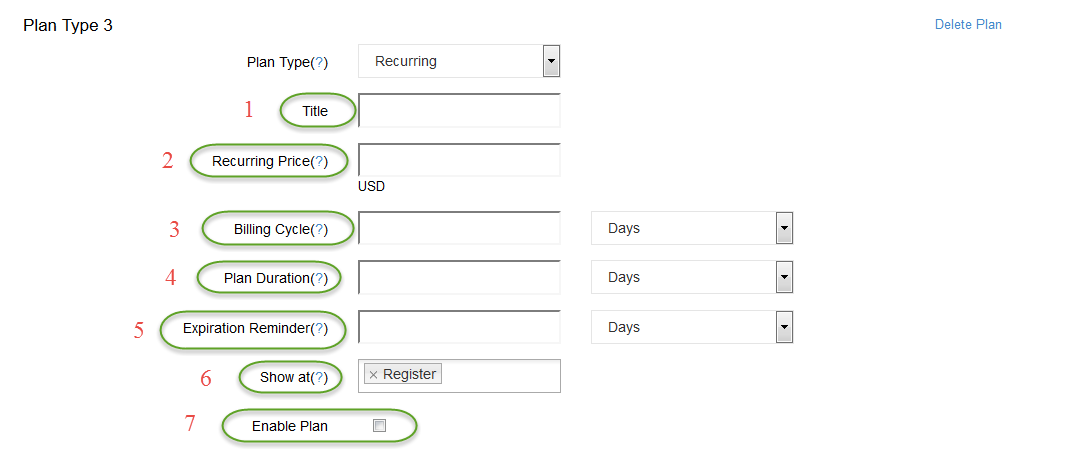
– Set Plan for the Package with plan type is “Recurring”

#1: Set title for the plan
#2: Set price for this plan
#3: Set duration for Billing Cycle, for Days, Week, Month, Year user will be billed for the period of the time specified in this field
#4: Maximum duration for the plan, will be expired in the period of time set here, x Days, x Week, x Month, x Year and Forever
#5: x Days, x Week, x Month, x Year until expired to send a renewal notification
#6: Input page you want to display
#7: If it is checked, this plan will be enabled.
– Set Plan for the Package with plan type is “Trial + Recurring”
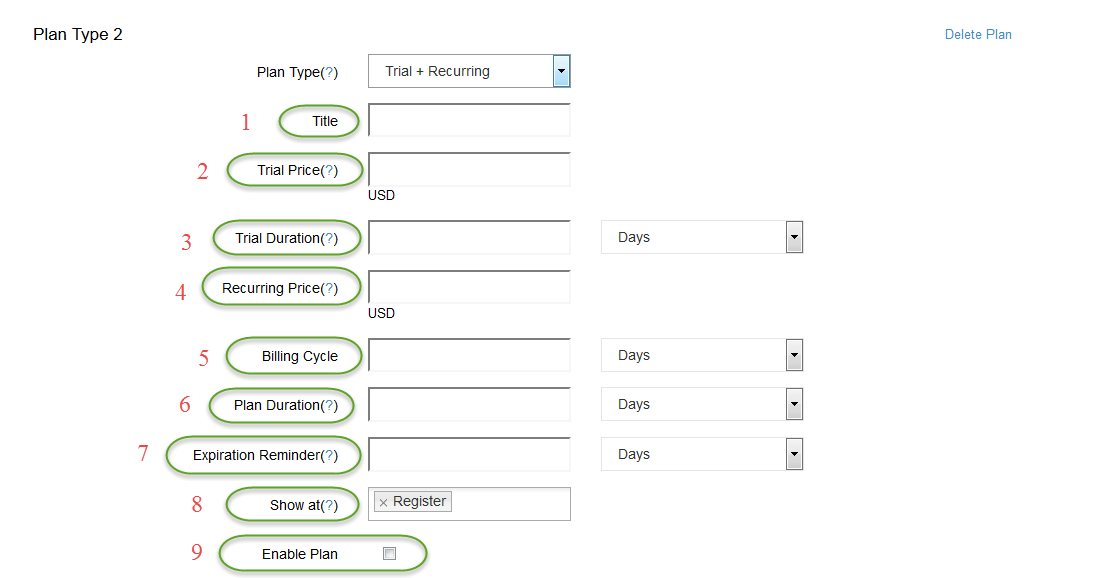
#1: Set title for the plan
#2: Charge users on Trial duration, set this =0 will make this a free trial
#3: Set maximum duration users can try for the plan
#4: Set price for this plan
#5: Set duration for Billing Cycle, for Days, Week, Month, Year user will be billed for the period of the time specified in this field
#6: Maximum duration for the plan, will be expired in the period of time set here, x Days, x Week, x Month, x Year and Forever
#7: x Days, x Week, x Month, x Year until expired to send a renewal notification
#8: Input page you want to display
#9: If it is checked, this plan will be enabled.
* How to Delete a Package
Access Admin Dashboard –> System Admin –> Subscription –>Manager Package tab
– Select on a package you want to delete and click on Edit
– Scroll down and click on Delete Package button to delete this package

* How to Edit a Package
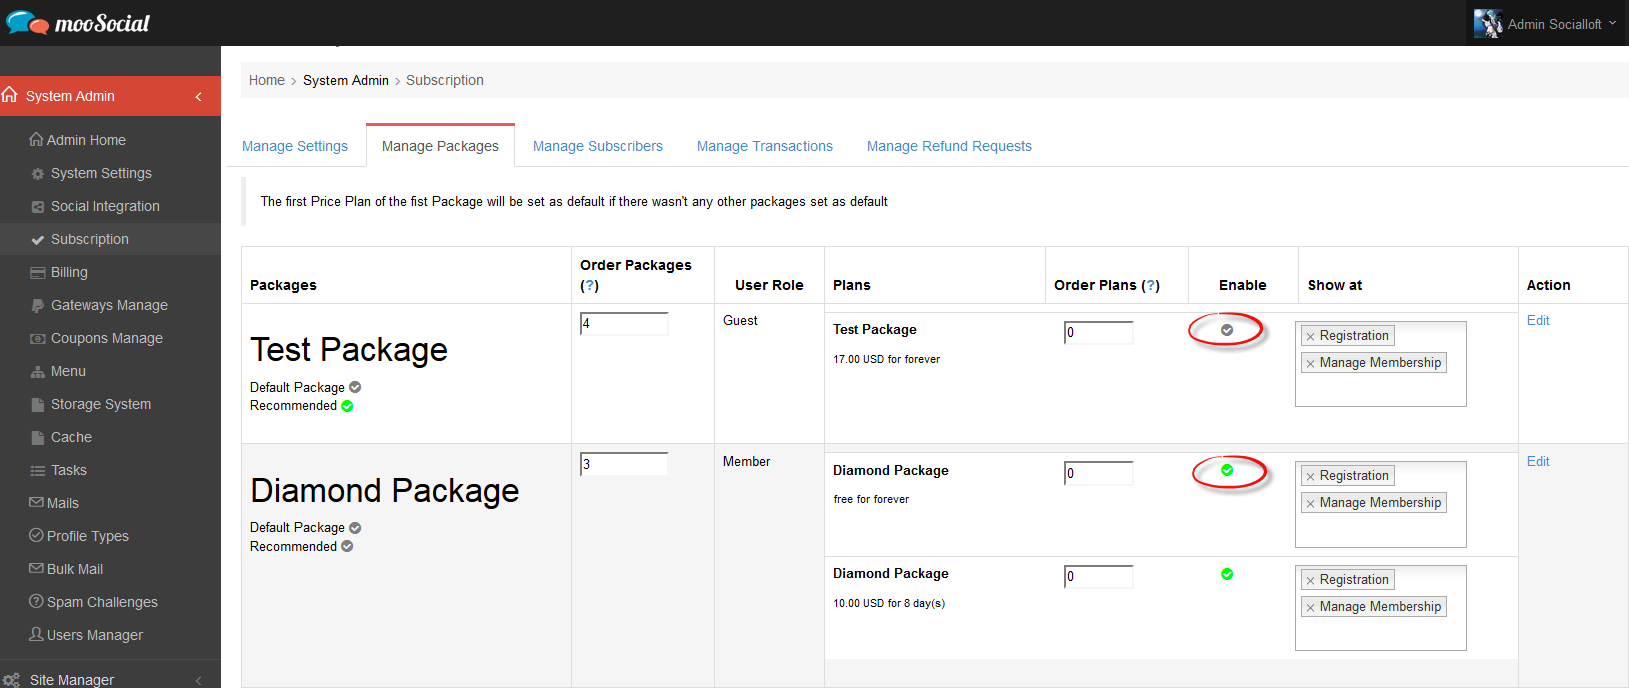
– How to set order: While at Manager Package page, you can set order for the packages, by entering a numeric value at the Order Package Column
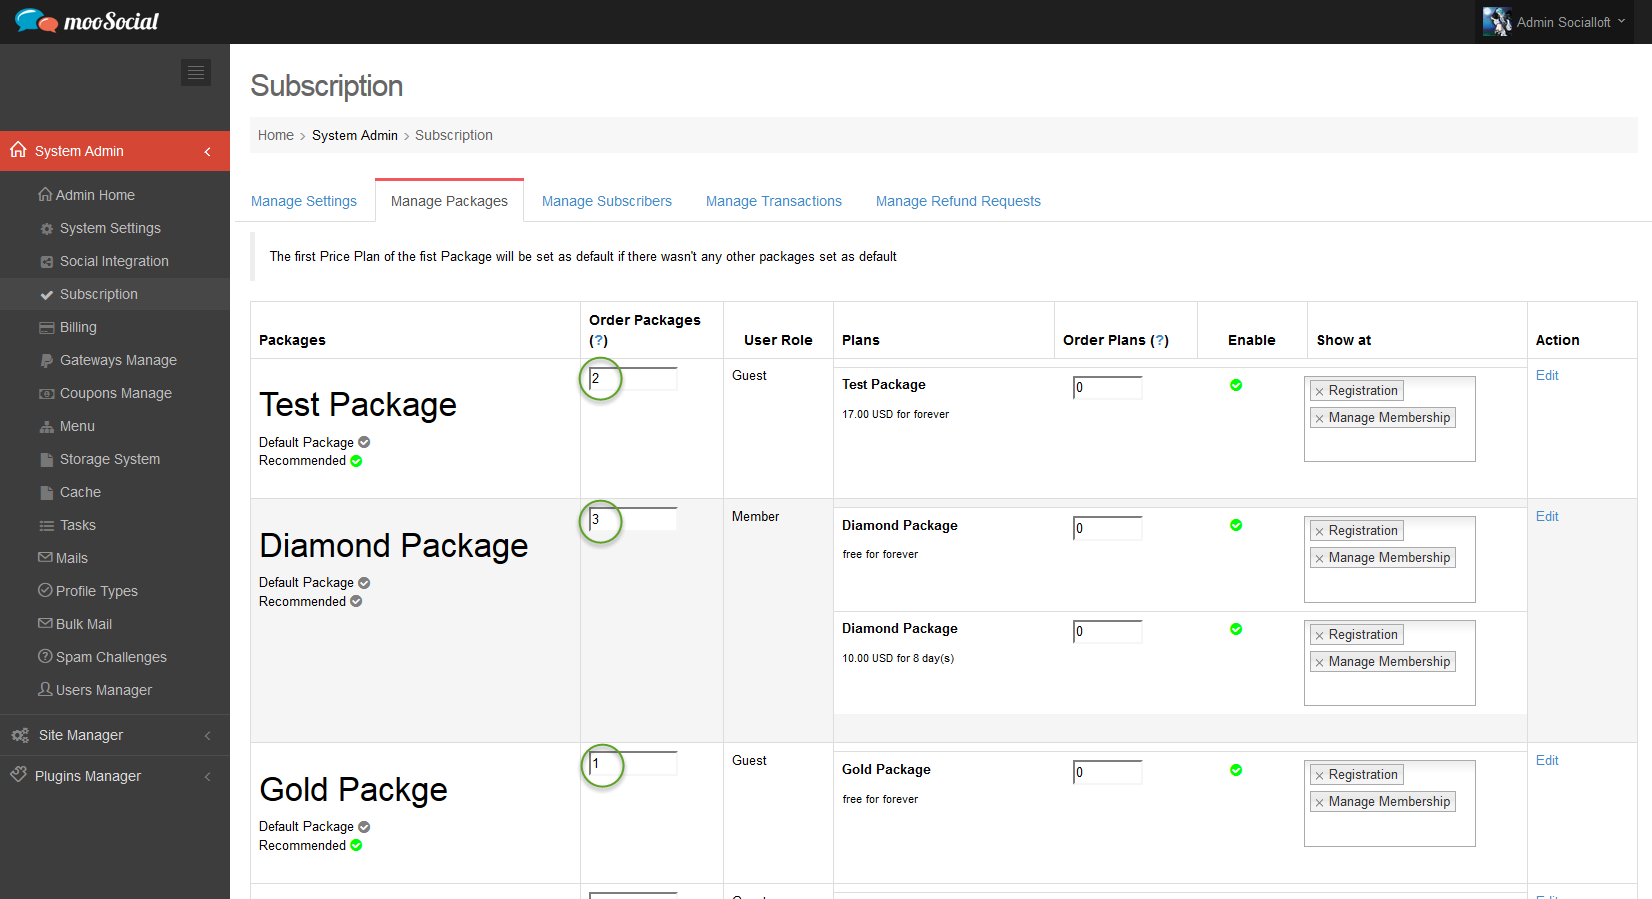
Example on Packages Order setting like the image above, then we have

– How to Enable/Disable: While at Manager Package page, you can enable/ disable packages, take a look at Enable Column

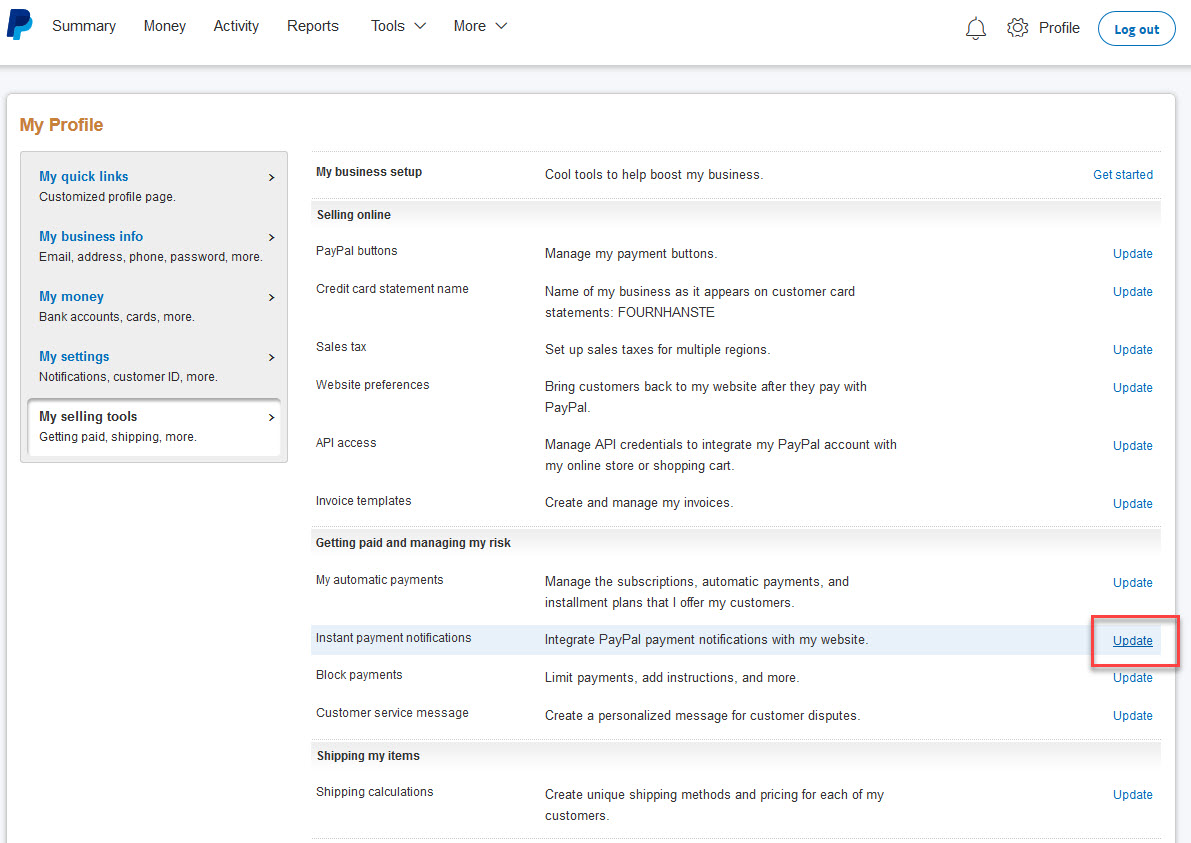
* How to Manage Subscribers
Access Admin Dashboard –> System Admin –> Subscription –>Manage Subscription tab
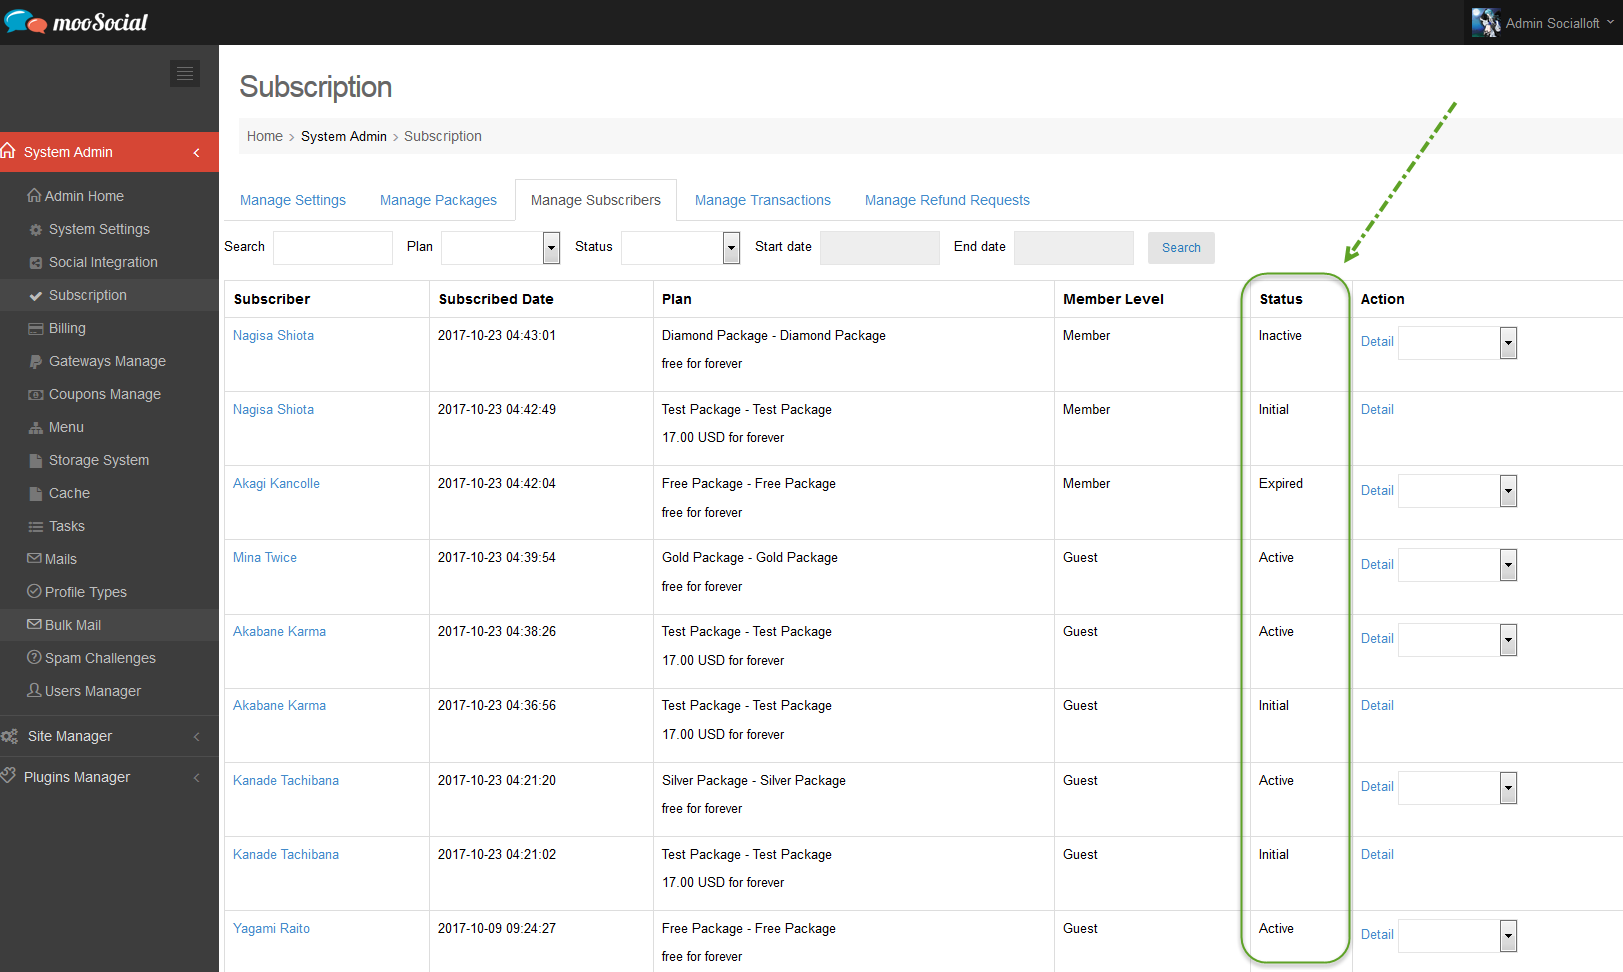
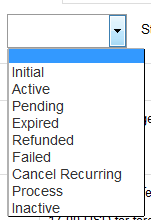
– With Status Column, this is where the status of member’s subscription will be displayed

– With many statuses, admin can easily make a decision for users
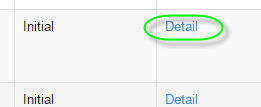
– Click on Detail button at Action Column to view User Detail
– With Action column, Admin can set users subscription status.
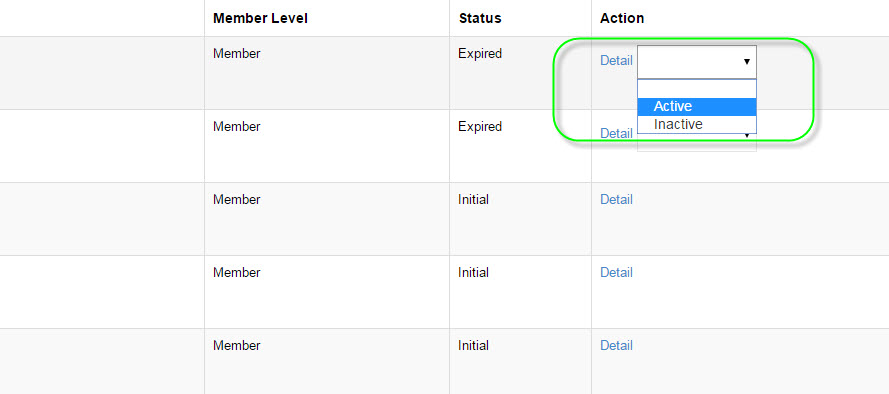
==> Note: Users with Initial status cannot be changed, Initial status reflects users are not subscribed to any package/plan, Admin cannot select package/plan for user
* How to Manage Transactions
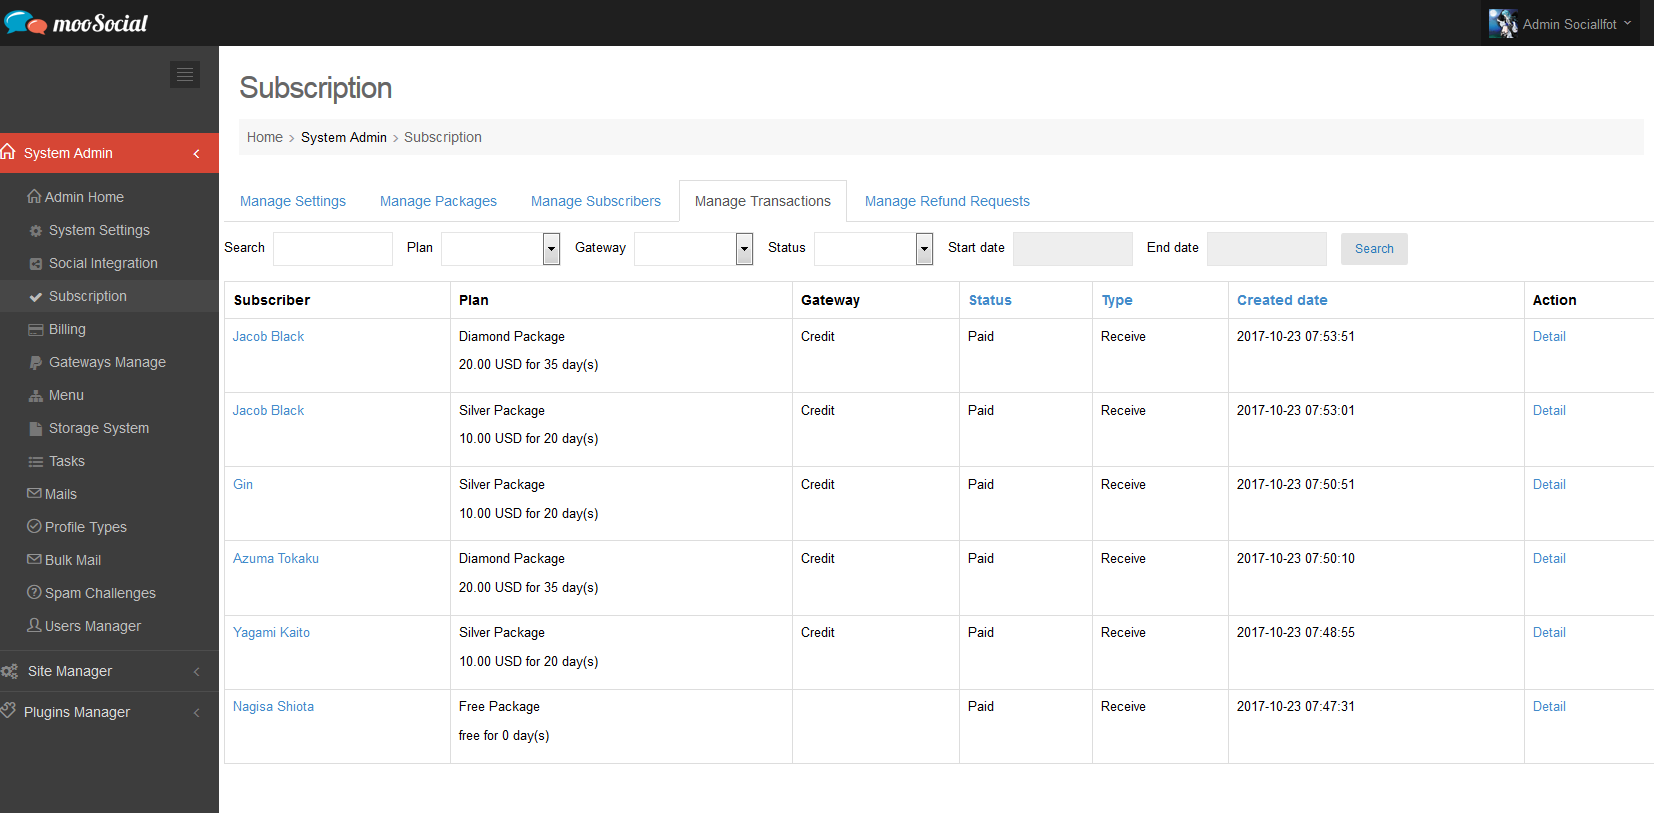
Access Admin Dashboard –> System Admin –> Subscription –>Manage Transactions tab
At this page, Admin can manage, view transactions status. Which can view:
– Username
– Plan: Plan user purchased
– Gateway: Gateway used
– Status: Reflects status, Paid…etc
– Type: Shows Receive from users or Refunded to users
– Created Date: Date transaction were made
– Action: can view detail of the transaction
* How to Manage Refund Requests
Access Admin Dashboard –> System Admin –> Subscription –>Manage Refund Requests tab
This page used for managing Users Refund Requests that sent to Admin
– Request Date: Date of the requesting user sent Refund Request
– Plan: Plan that user purchased and want a refund
– Account: Account (PayPal) user want to refund
– Status: status of the Refund Request
– Action: Accept and Deny request can be made here
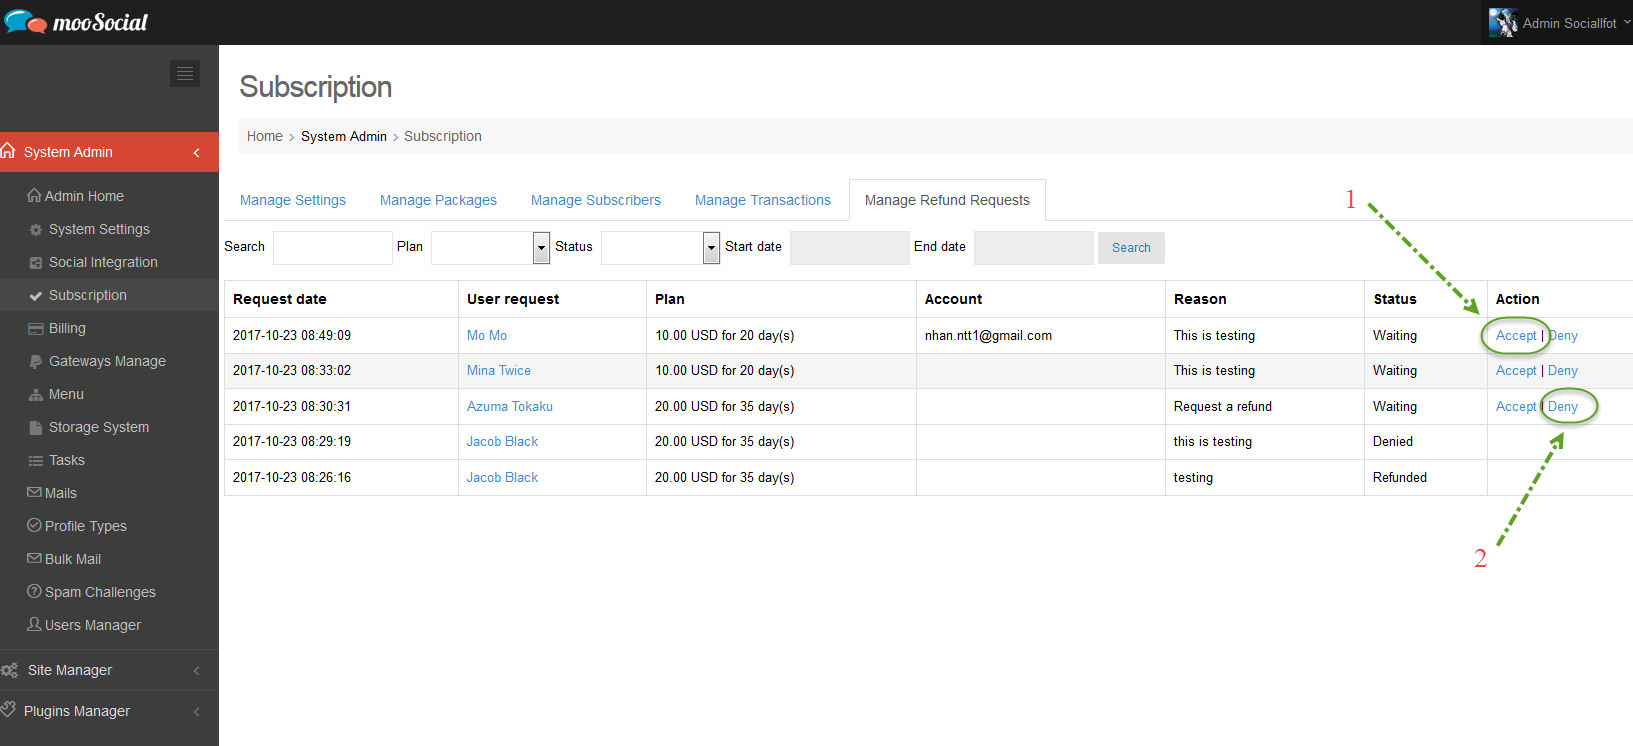
#1: Click on Accept button to accept refund request
#2: Click on Deny button to deny refund request. And you must provide reasons, type your reason and press OK to send to a user
2. How to enable subscription
Access Admin Dashboard –> System Admin –> Subscription –>Manage Settings tab
* Make sure to enable gateway and create a plan before enabling Subscription plugin
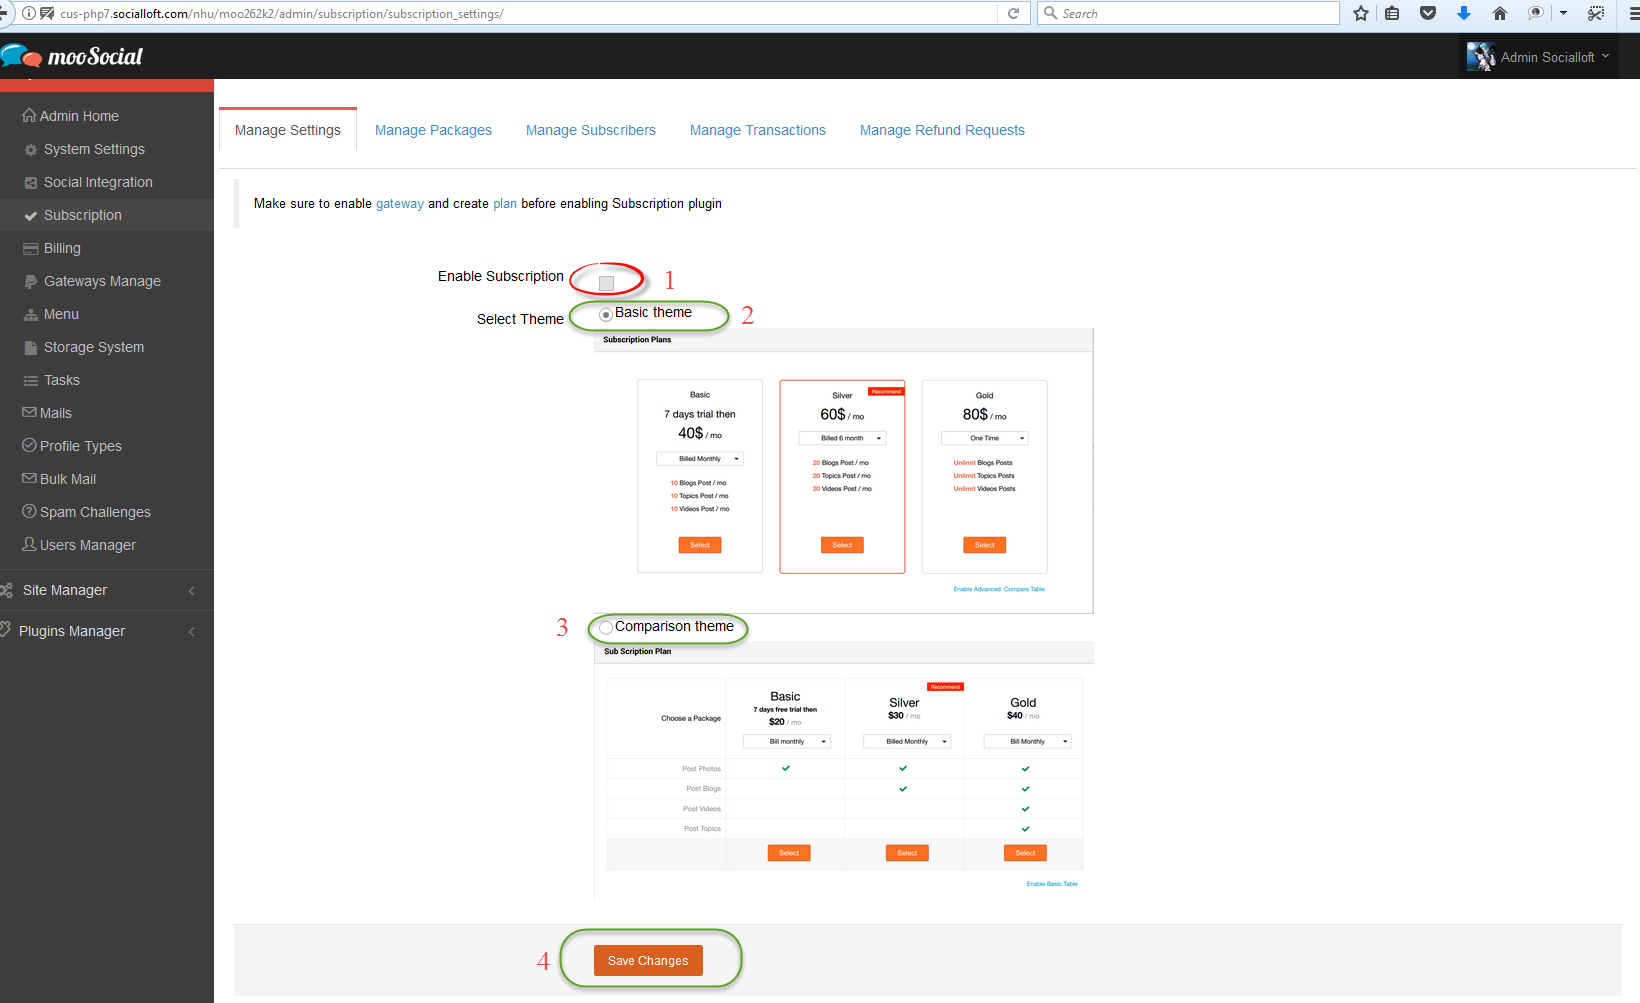
#1: Enable Subscription:
– If it is checked, a subscription will work at the frontend
– If it is unchecked, a subscription will not work at the frontend
#2: Check to select Basic Theme to display subscription with this format
#3: Check to select Comparison Theme to display subscription with this format
#4: Click on Save Changes button to save a setting