This tutorial will show you how to add a product, and what information you need to include to help make sales.
The first condition: “You are a seller”
Create new product:
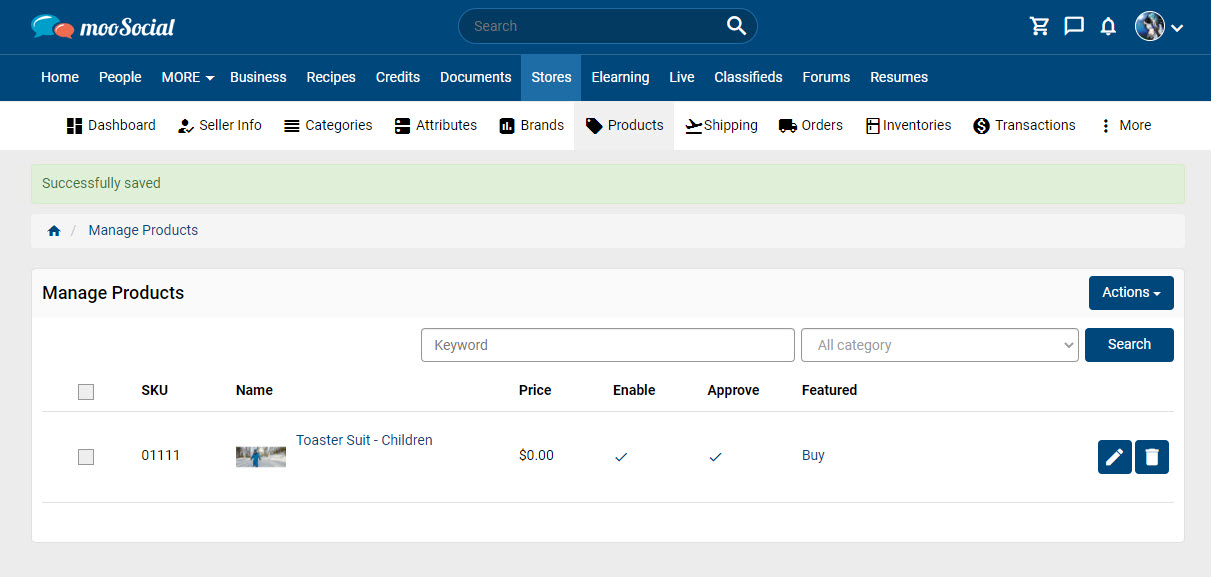
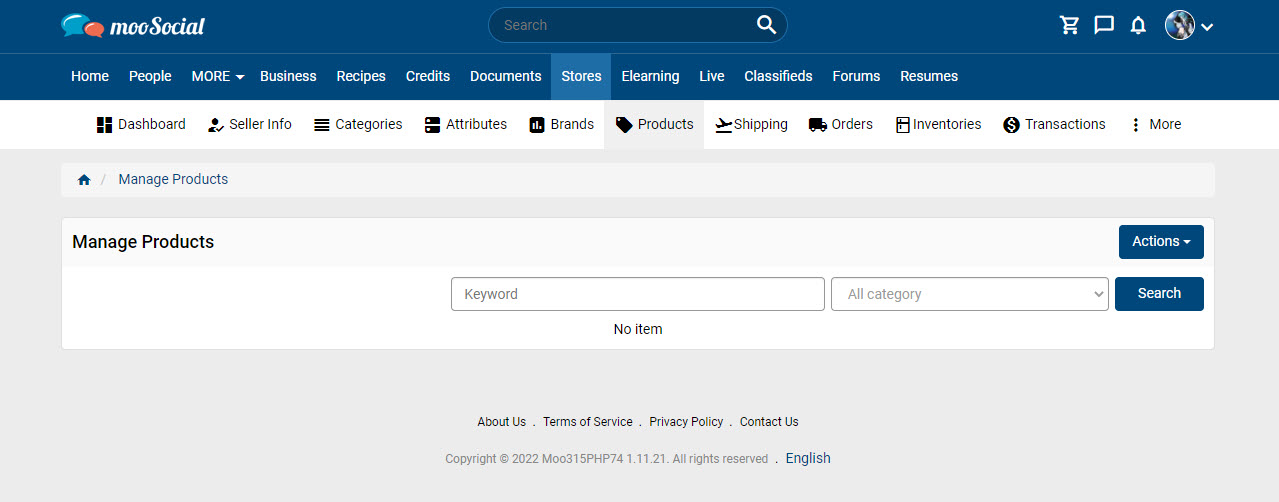
Go to Store => Seller Dashboard => Products
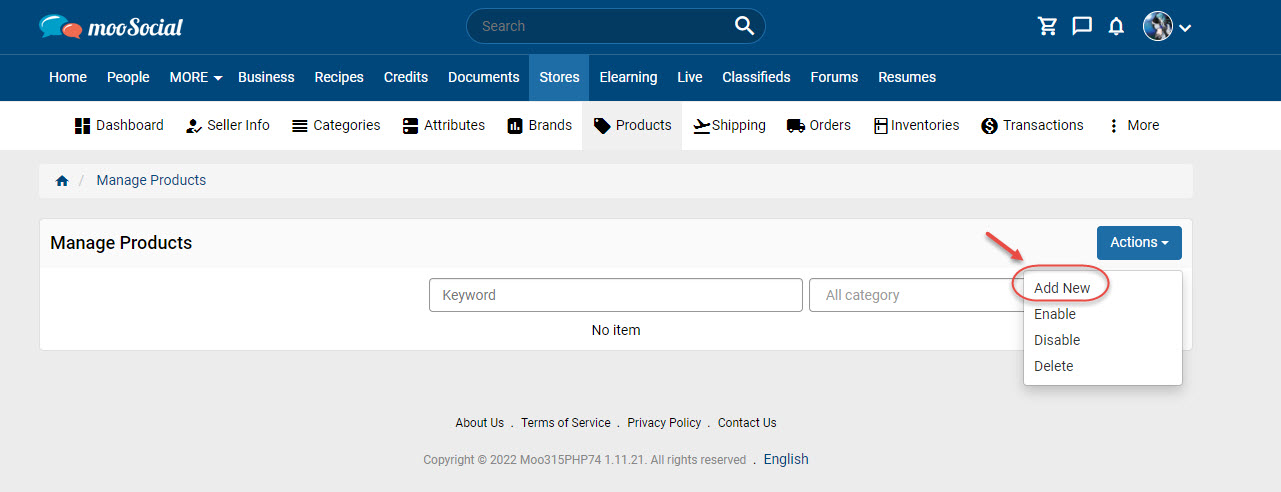
Click on the Actions button => Select Add New to create a new product.
Go to Create Product page:
1. General tab
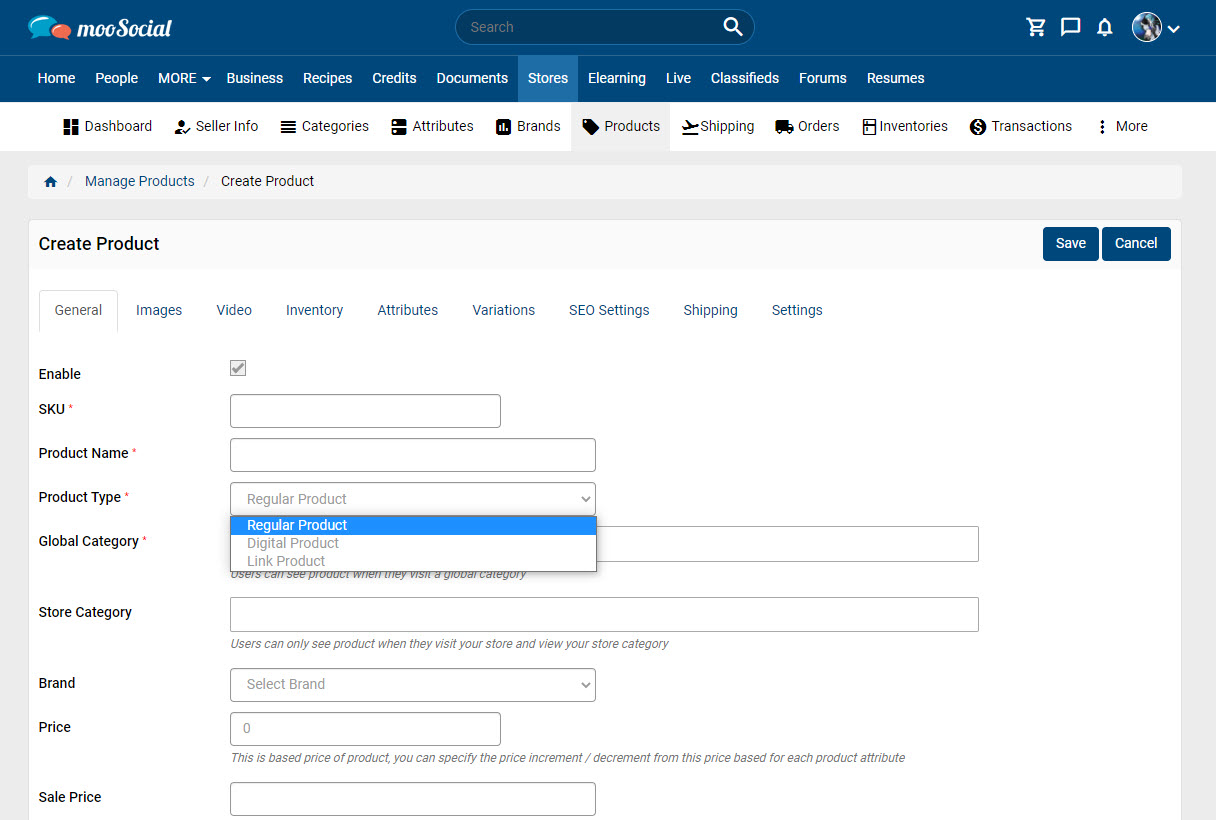
– Check on “Enable” to publish the product on the Products page.
– Input data to all required fields (*)
– SKU is not duplicated with other products on site.
– Have 3 product types:
- Regular Product.
- Digital Product: The seller can upload a file that the buyer can download. Allow extensions are managed by the site’s admin.
- Link Product: The seller can input a URL that the buyer can view.
– Optional fields are not required.
2. Images tab
– The seller can upload many product images.
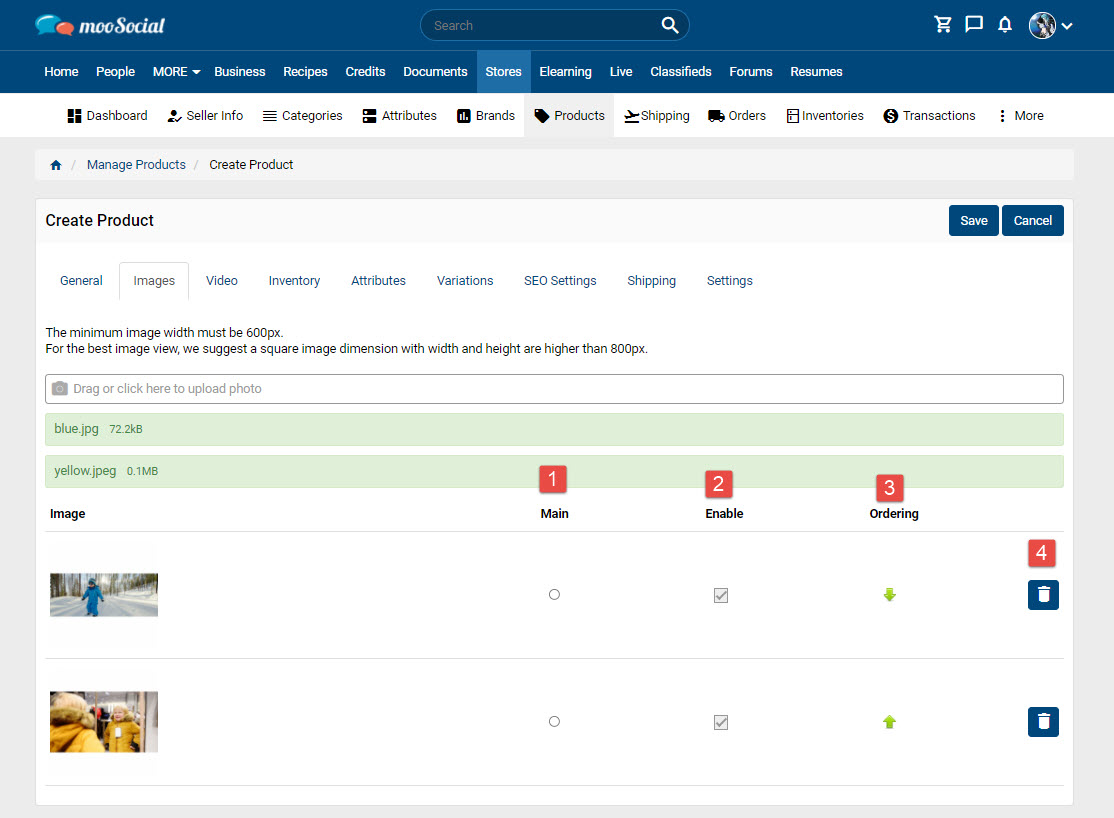
(1) Choose an image to make the main product image.
(2) Enable/ Disable the product images.
(3) Order the product images.
(4) Delete the product images.
3. Video tab
– The seller can upload many videos to the product.
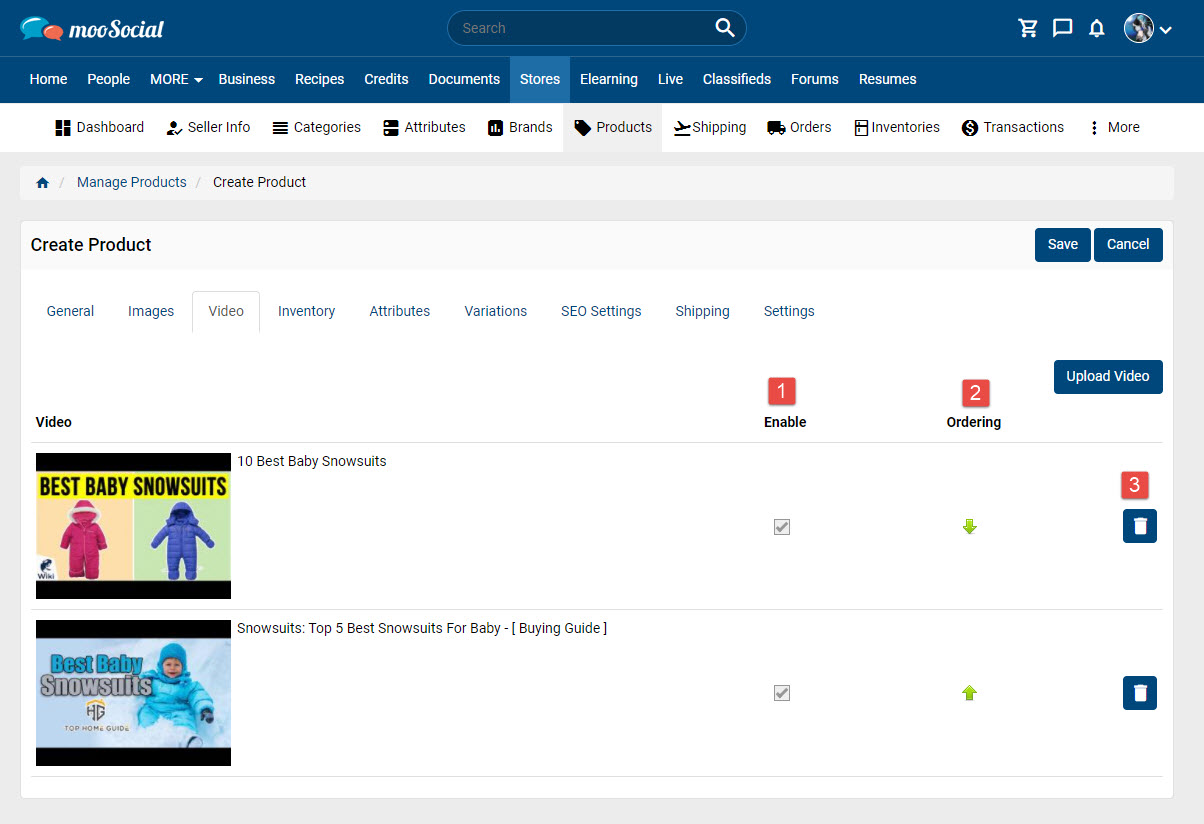
(1) Enable/ Disable the product videos.
(2) Order the product videos.
(3) Delete the product videos.
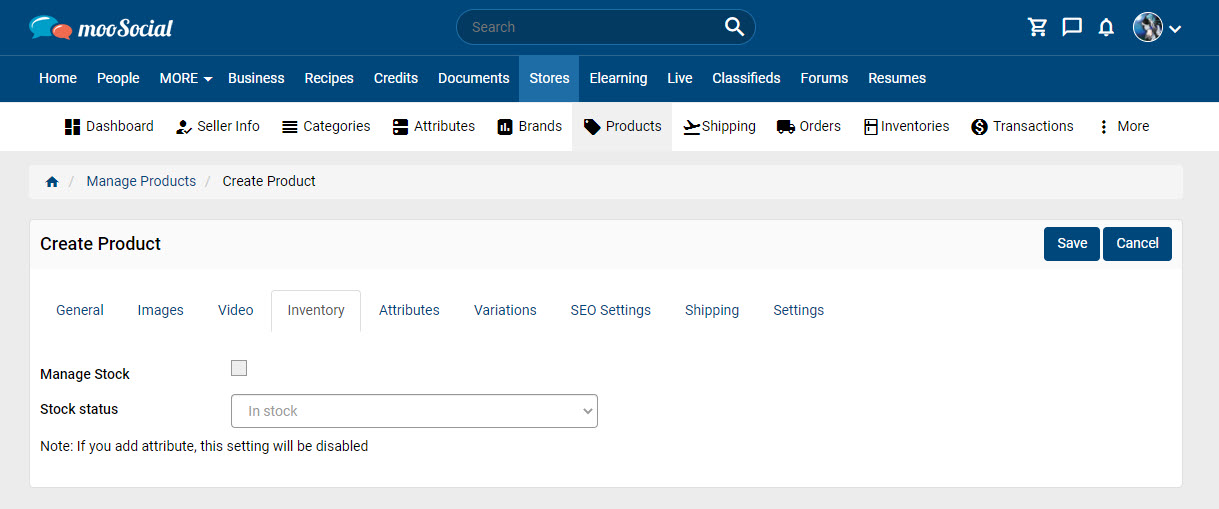
4. Inventory tab
+ Manage Stock checkbox is checked:
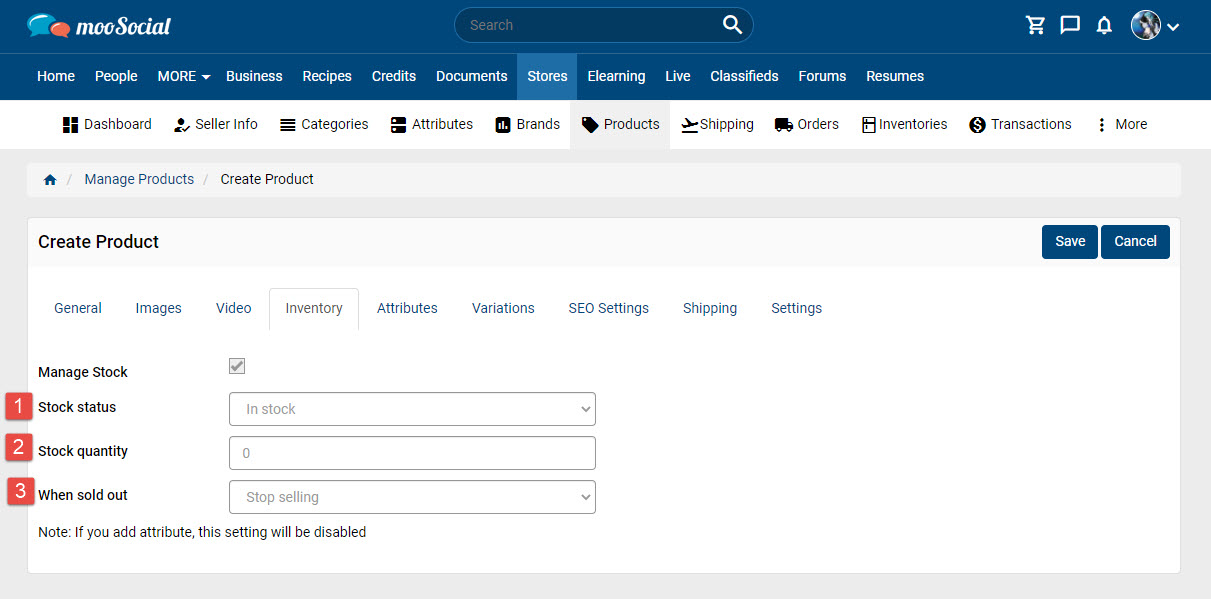
(1) Stock Status: have 2 options
+ In stock
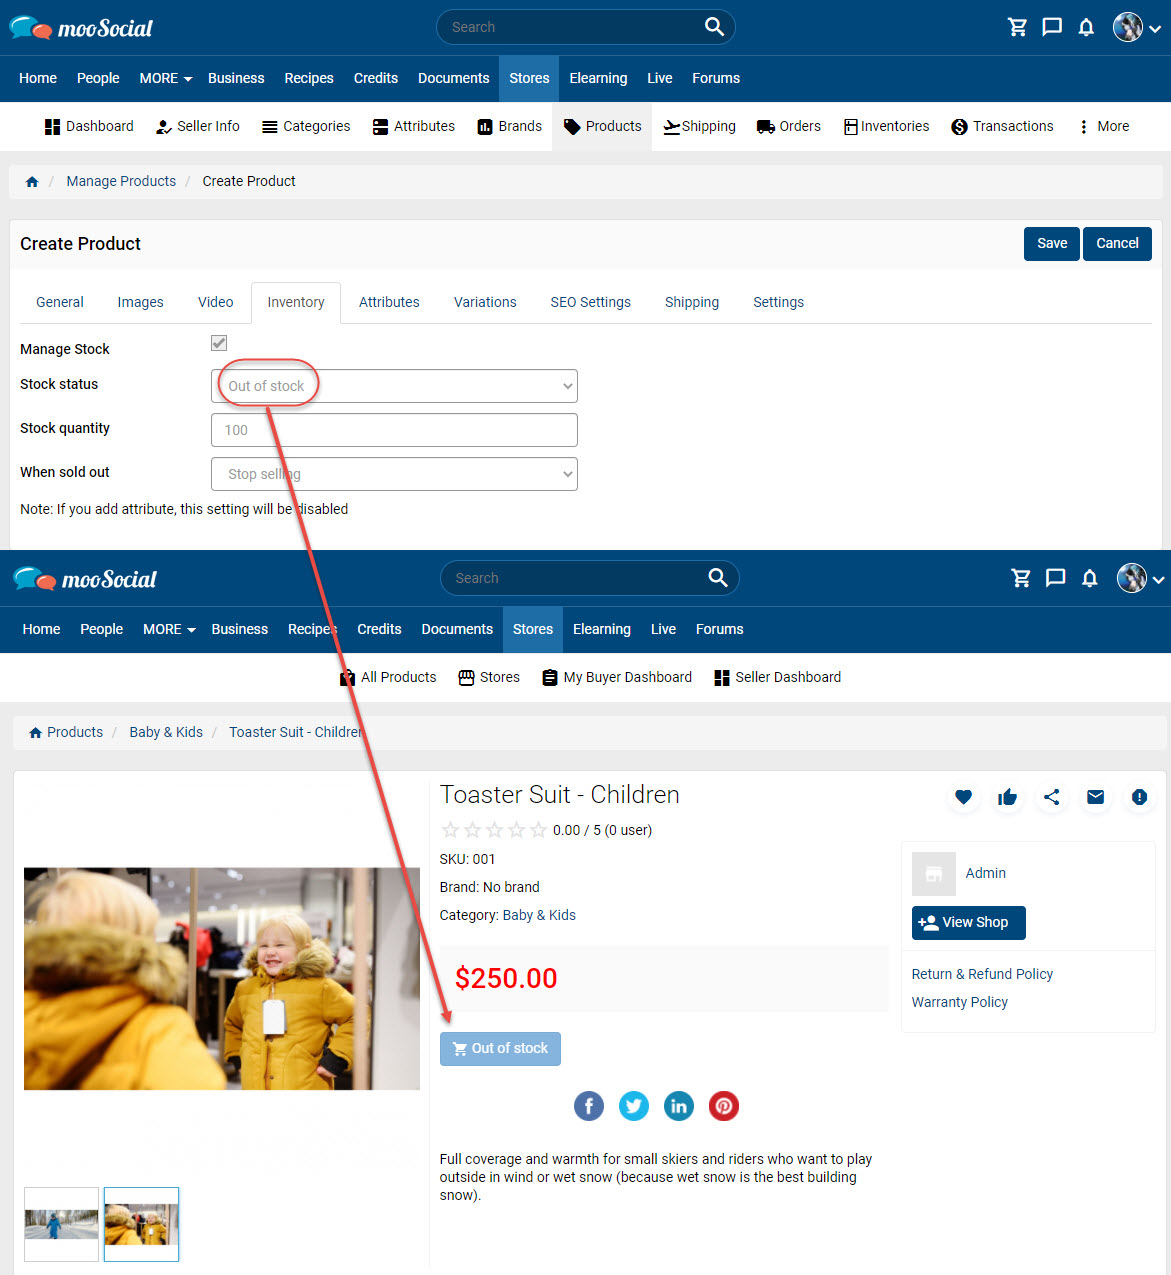
+ Out of stock: can’t add to cart with the “out of stock” product.
(2) Stock quantity:
+ 0 is unlimited.
+ The seller can enter a quantity for the product.
(3) When the product is sold out, there are 2 options: “Stop selling” or “Continue selling”
+ Manage Stock checkbox is un-checked: The seller selects Stock status for the product.
5. Attributes tab
The seller can Select or Create New Attribute for the product.
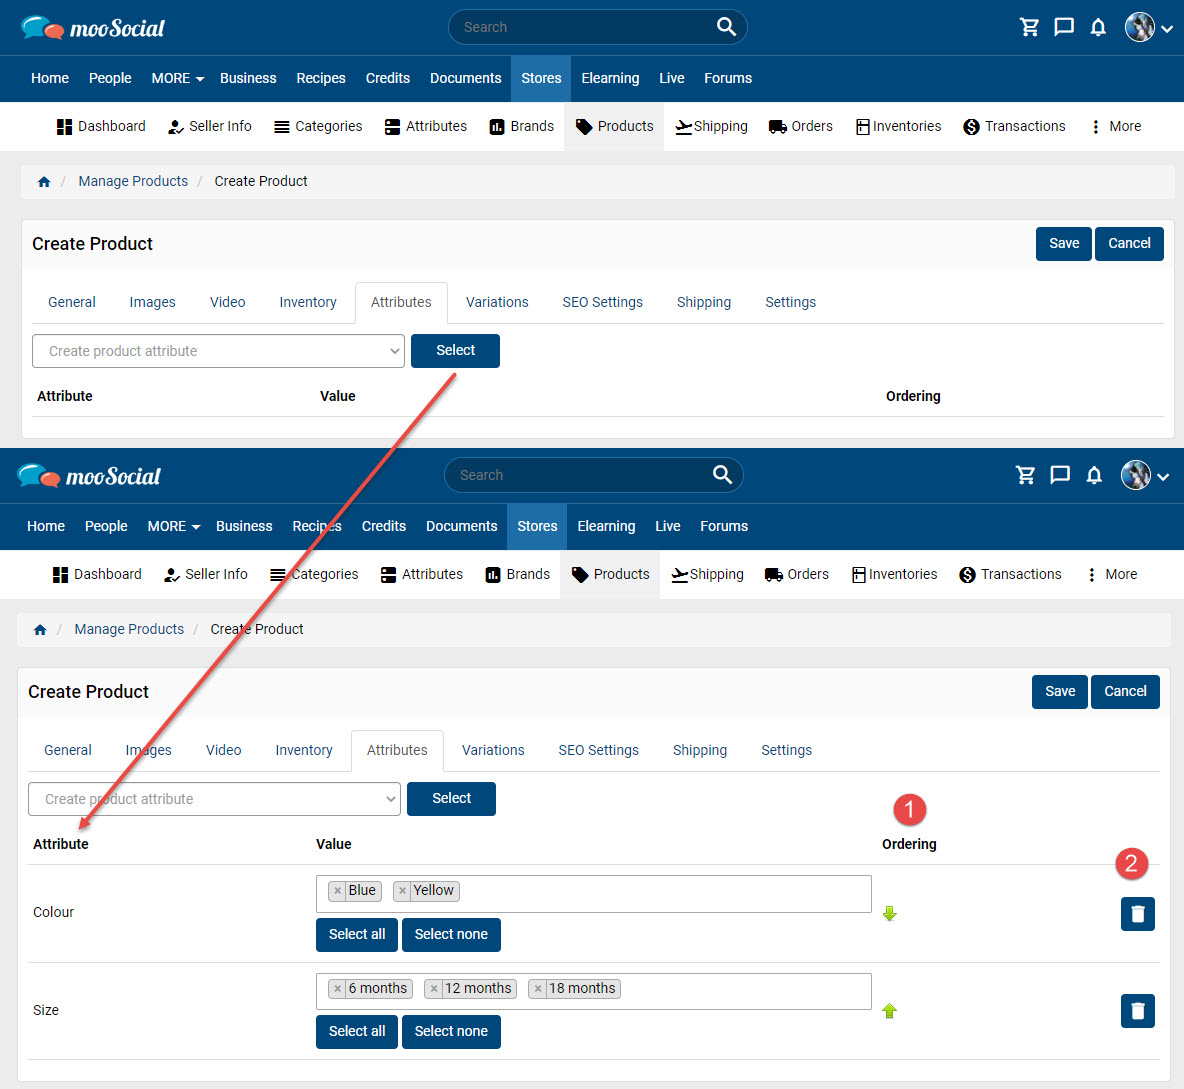
(1) Order the product attributes field.
(2) Delete the product attributes field.
6. Variations tab
– The seller needs to add attributes before creating variations.
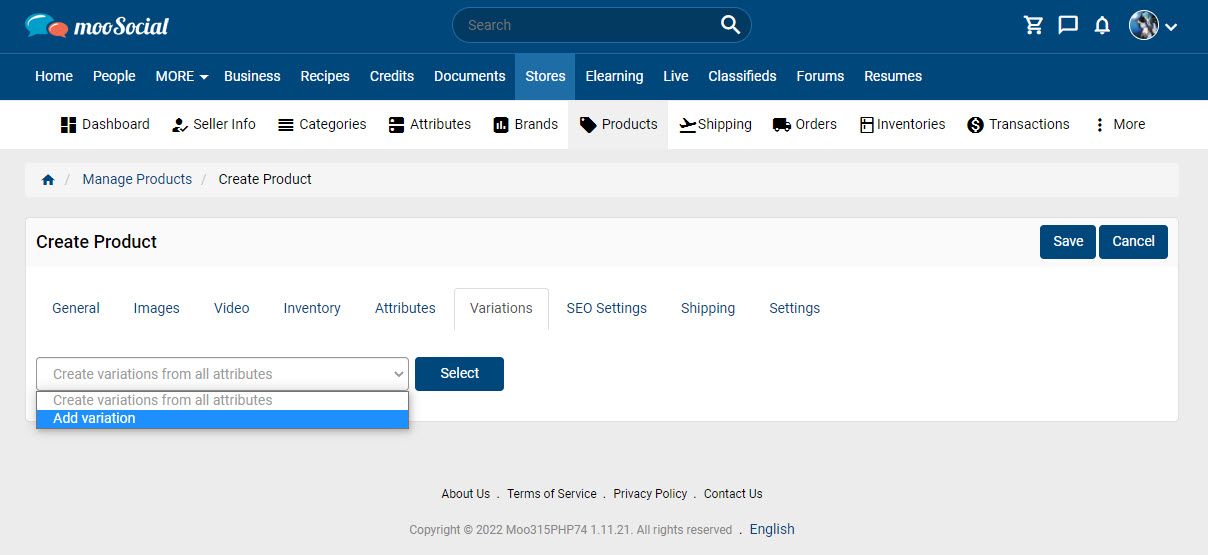
* Create variations from all attributes: Create every possible combination of variations from attributes and values.
* Add variation: The sellers add variations manually.
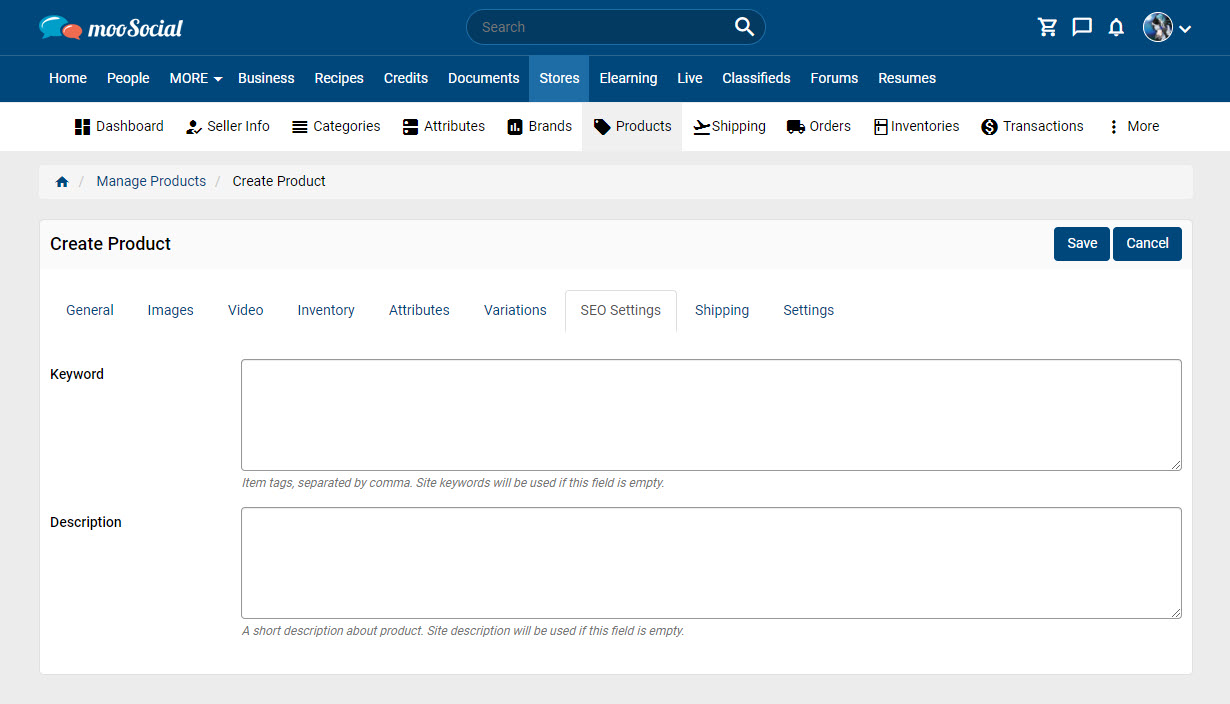
7. SEO Settings tab
The seller enters the Keyword and Description for the product.
8. Shipping tab
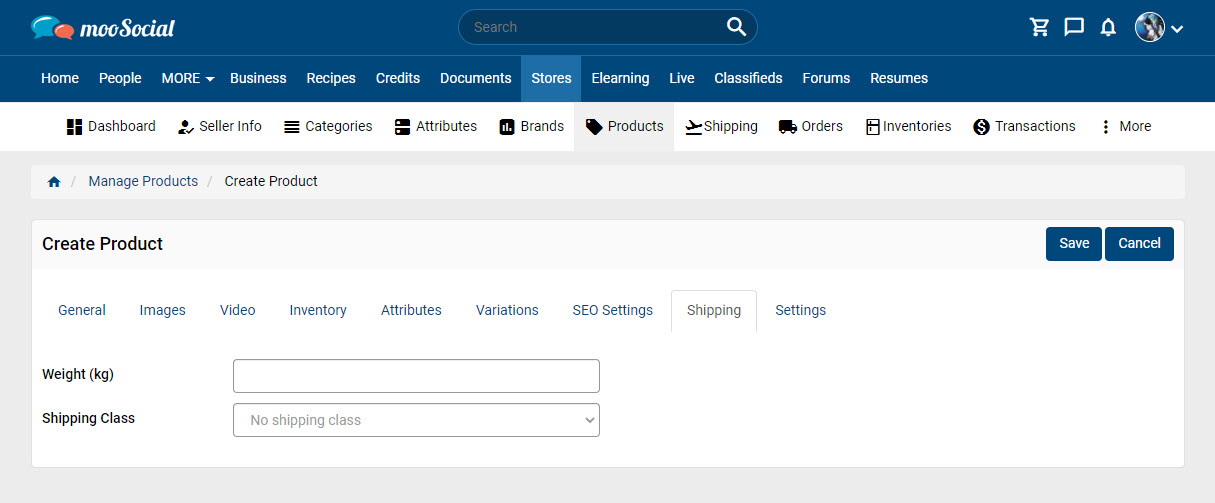
– Weight (kg): info of product and this info will affect to ‘Weight Based Shipping’ on Manage Shipping page.
– Shipping Class: select shipping class for the product.
9. Settings tab
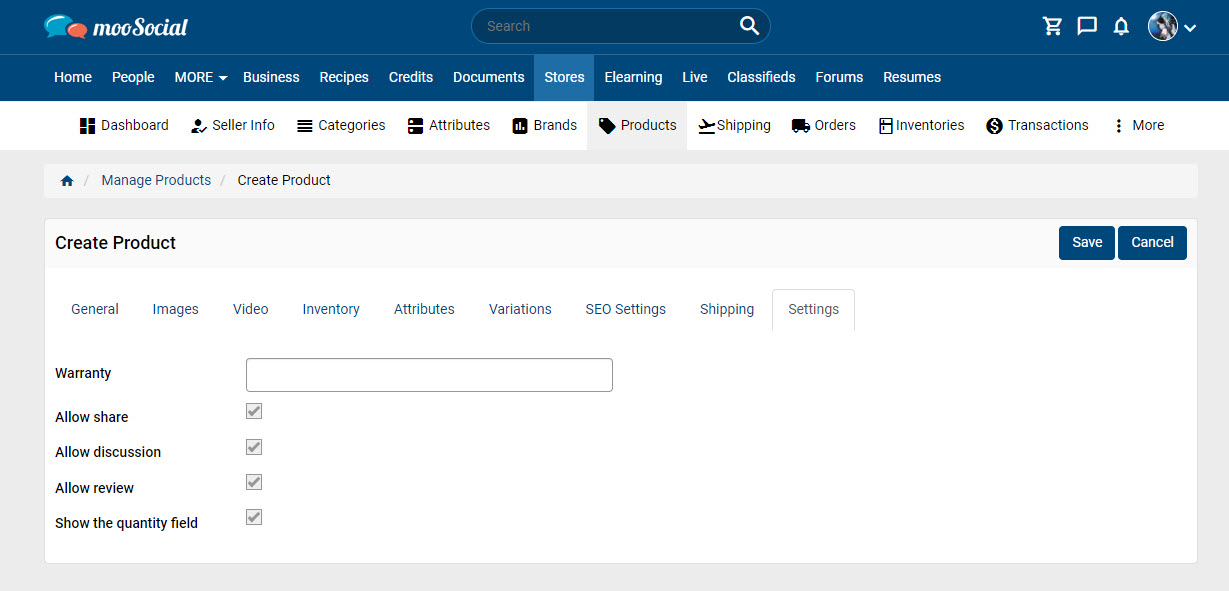
– Check on ‘Allow share’, ‘Allow discussion’, ‘Allow review’ to allow users to share, comment, review this product.
– Check on ‘Show the quantity field’: users can view the quantity of the product.
Click on Save button to complete the creation product process.