Archives

Dashboard for Seller

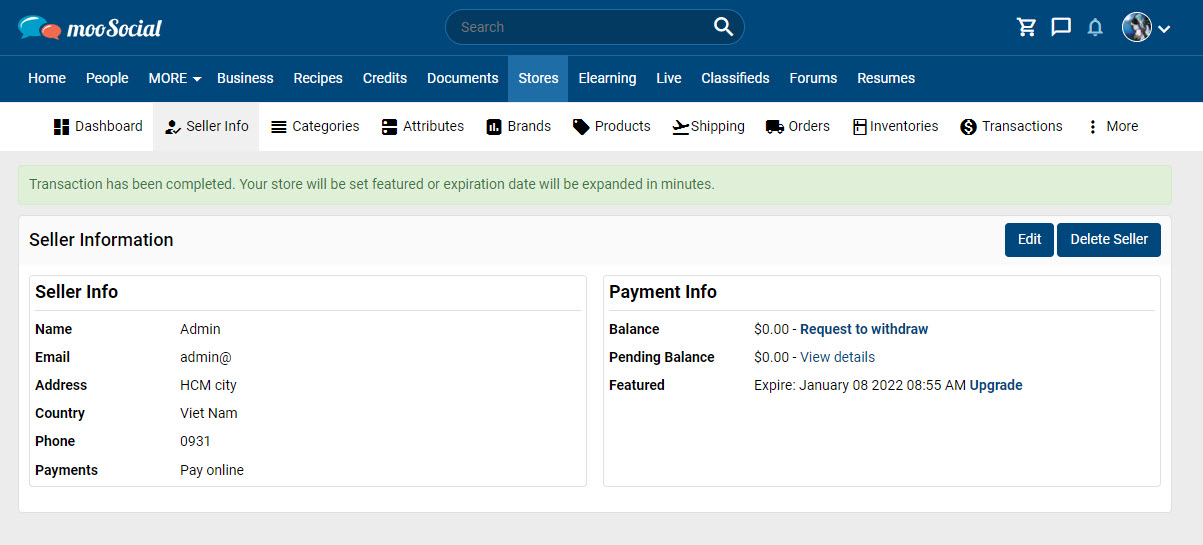
When you become a seller, you can go to your Seller Dashboard to view stats and insights.

Dashboard page includes a bunch of graphs and data to show you total buyers, the number of orders that you received today and total orders, today revenue and total revenue, how many products that you sell, and much more.

This guide explains how to read and understand your store’s stats and insights.

001_Dashboard_seller

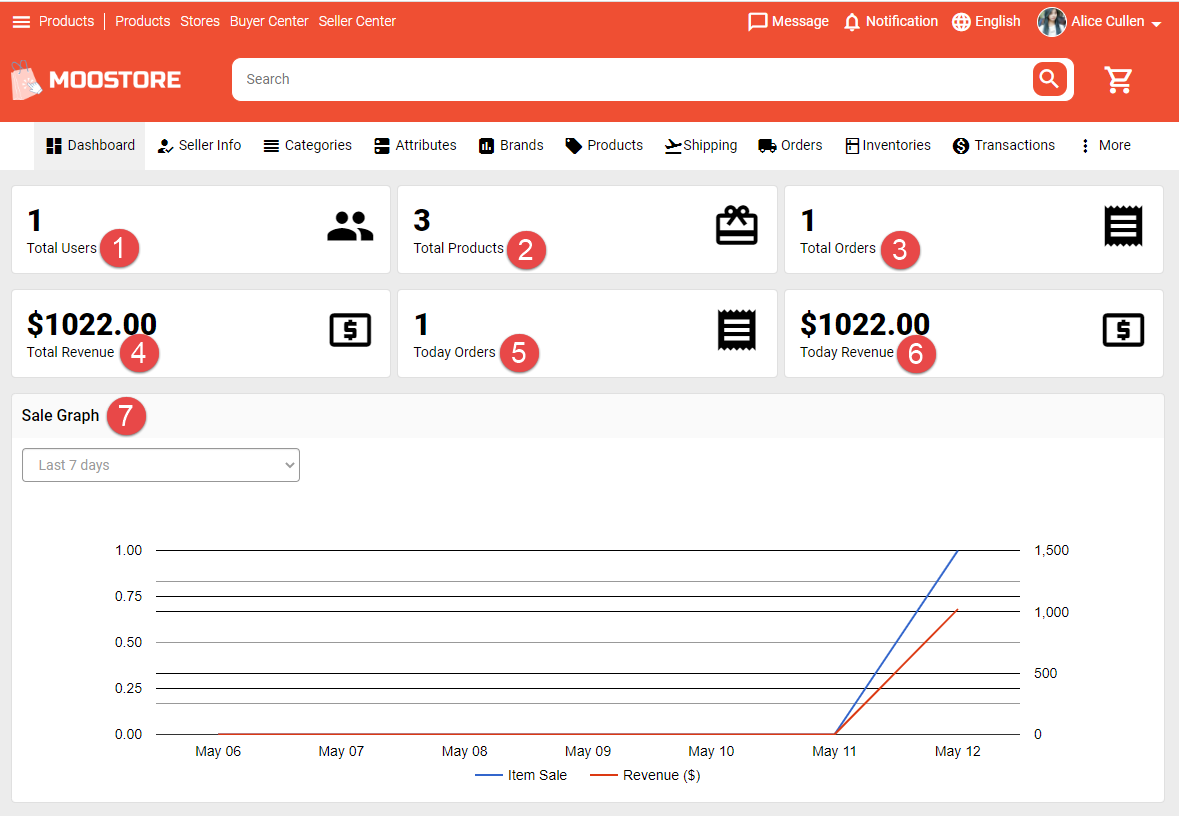
1. Total users: This section of stats counts the number of users buy product in your store.

2. Total products: This section of stats counts the number of products of your store.

3. Total orders: This section of stats shows the total orders that you receive.

4. Total revenue: This section of stats shows the total revenue.

5. Today orders: This section of stats shows  the number of orders that you receive today.

6. Today revenue: This section of stats shows your today revenue.

7. Sale graph: There are two main units of sale measurement are Item Sale and Revenue.

– An item sale is counted when an order is fulfilled successfully.

Revenue is calculated from completed orders.

In the graph, the horizontal axis depict a continuous progression by time, and the vertical axis reports value for a metric. When you click on the line, it will show the stats value.

You can filter to view graph by Last 7 days,  this month, last month, last 3 months, last 6 months and this year.


How to integrate Store plugin with Business plugin

Store plugin can be integrated with Business page plugin. If “Business plugin” is integrated, members need to open a business page before creating a new store. Buyers can see list of products inside “products” tab of business profile, write a review for business profile and check to see if the business profile is verified or not.

Note: Install the Business plugin first to use the Store Integration functionality.

At Back-end:

Go to Store  => Settings => Integration

6

Check on “Yes”  => click on the Save Settings button to enable integrating the Store plugin with the Business plugin. 

7

At Front-end:

User must create a business page first to be able to open a seller account

Go to Store => Become a Seller => show pop-up

8

Click on the “Open business page now” button => go to Add new Business page

9

After creating the business and store, the information will be displayed here

002

How to integrate Store plugin with Credit plugin

Store plugin can be integrated with Credits plugin. If “Credit plugin” is integrated, members can buy product using credits inside eWallet.

Note: Install the Credits plugin first to use the Store Integration functionality.

  • At Back-endGo to Stores  => Settings => Integration

1

Check on “Yes”  => click on the Save Settings button to enable integrating the Store plugin with the Credit plugin

2

  • At Front-end: The credit price will be displayed next to the product price.

001

Buyers can select a Credit payment method on the Billing & Payment page to buy products use credit

5

Add a Product – Store version 2.9 or above

This tutorial will show you how to add a product, and what information you need to include to help make sales.

The first condition: You are a seller”

Create new product:

Go to Store => Seller Dashboard  => Products

1

Click on the Actions button => Select Add New to create a new product.

2

Go to Create Product page:

1. General tab

3

– Check on “Enable” to publish the product on the Products page.

– Input data to all required fields (*)

– SKU is not duplicated with other products on site.

– Have 3 product types:

  • Regular Product.
  • Digital Product: The seller can upload a file that the buyer can download. Allow extensions are managed by the site’s admin.
  • Link Product: The seller can input a URL that the buyer can view.

– Optional fields are not required.

2. Images tab

– The seller can upload many product images.

4

(1) Choose an image to make the main product image.

(2) Enable/ Disable the product images.

(3) Order the product images. 

(4) Delete the product images.

3. Video tab

– The seller can upload many videos to the product.

5

(1) Enable/ Disable the product videos.

(2) Order the product videos.

(3) Delete the product videos.

4. Inventory tab

+ Manage Stock checkbox is checked:

6

(1) Stock Status: have 2 options

+ In stock

+ Out of stock: can’t add to cart with the “out of stock” product.

7

(2) Stock quantity:

    + 0 is unlimited.

    + The seller can enter a quantity for the product.

(3) When the product is sold out, there are 2 options: “Stop selling” or “Continue selling”

+ Manage Stock checkbox is un-checked: The seller selects Stock status for the product.
8

5. Attributes tab

The seller can Select or Create New Attribute for the product.

9

(1) Order the product attributes field.

(2) Delete the product attributes field.

6. Variations tab

– The seller needs to add attributes before creating variations.

10

* Create variations from all attributes: Create every possible combination of variations from attributes and values.

* Add variation: The sellers add variations manually.

7. SEO Settings tab

The seller enters the Keyword and Description for the product.

11

8. Shipping tab

12

– Weight (kg): info of product and this info will affect to ‘Weight Based Shipping’ on Manage Shipping page.

– Shipping Class: select shipping class for the product.

9. Settings tab

13

– Check on ‘Allow share’, ‘Allow discussion’, ‘Allow review’ to allow users to share, comment, review this product.

– Check on ‘Show the quantity field’: users can view the quantity of the product.


Click on Save button to complete the creation product process.

14

Buy Featured Seller

Go to Store => Seller Dashboard  => Seller Info

1

Click on Buy Now => go to Payment Gateway page.

2

Select gateway to make the payment process.

Complete the payment process, return to the site.

3