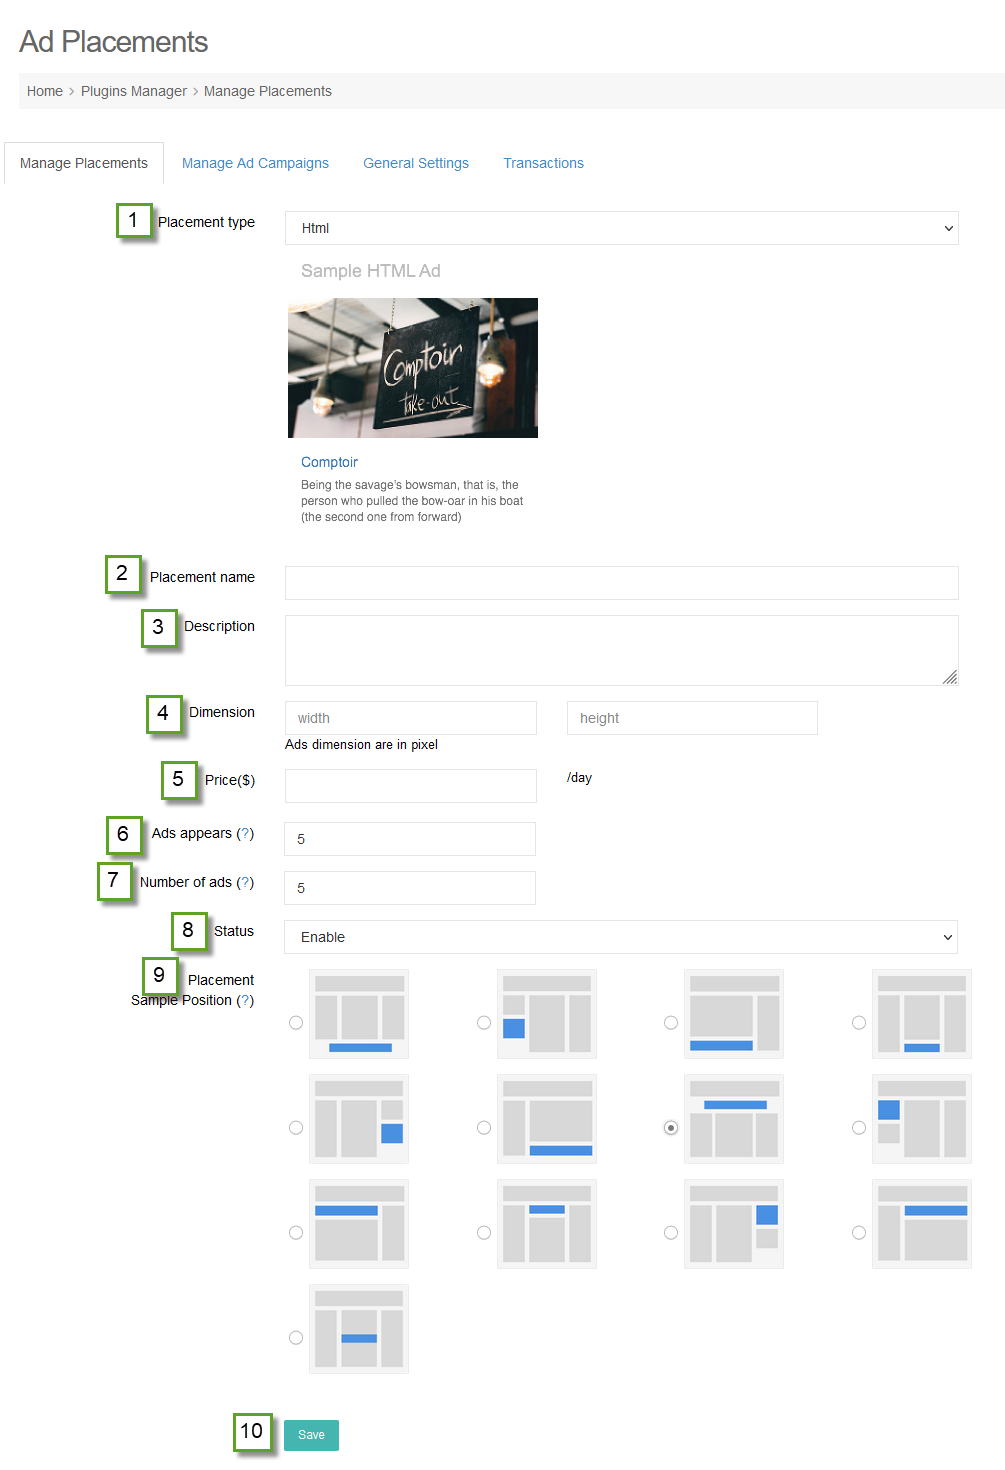
Before creating a campaign, make sure placement already existing.
This tutorial wild show you how to create campaign.
1. How to create ads?
Method 1: Backend.
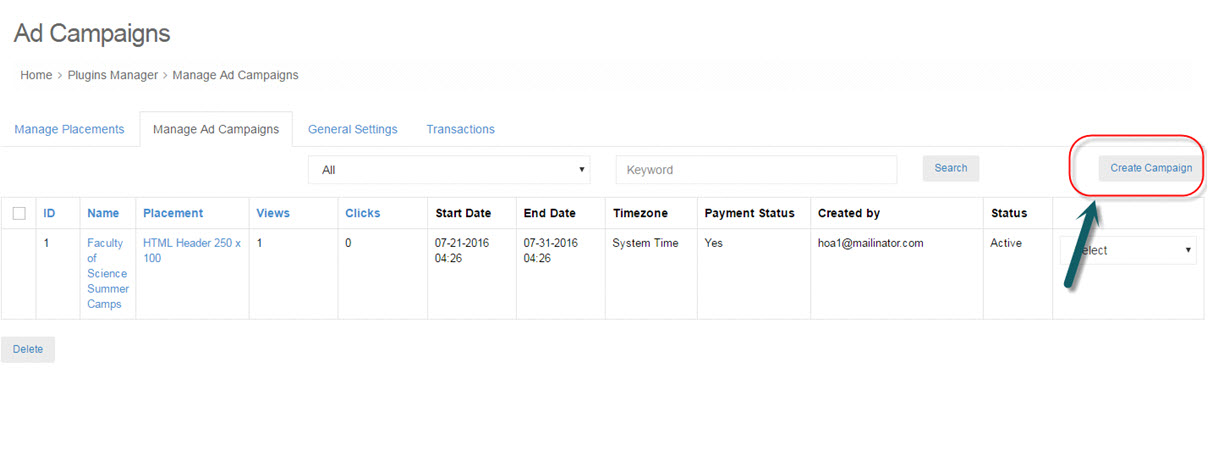
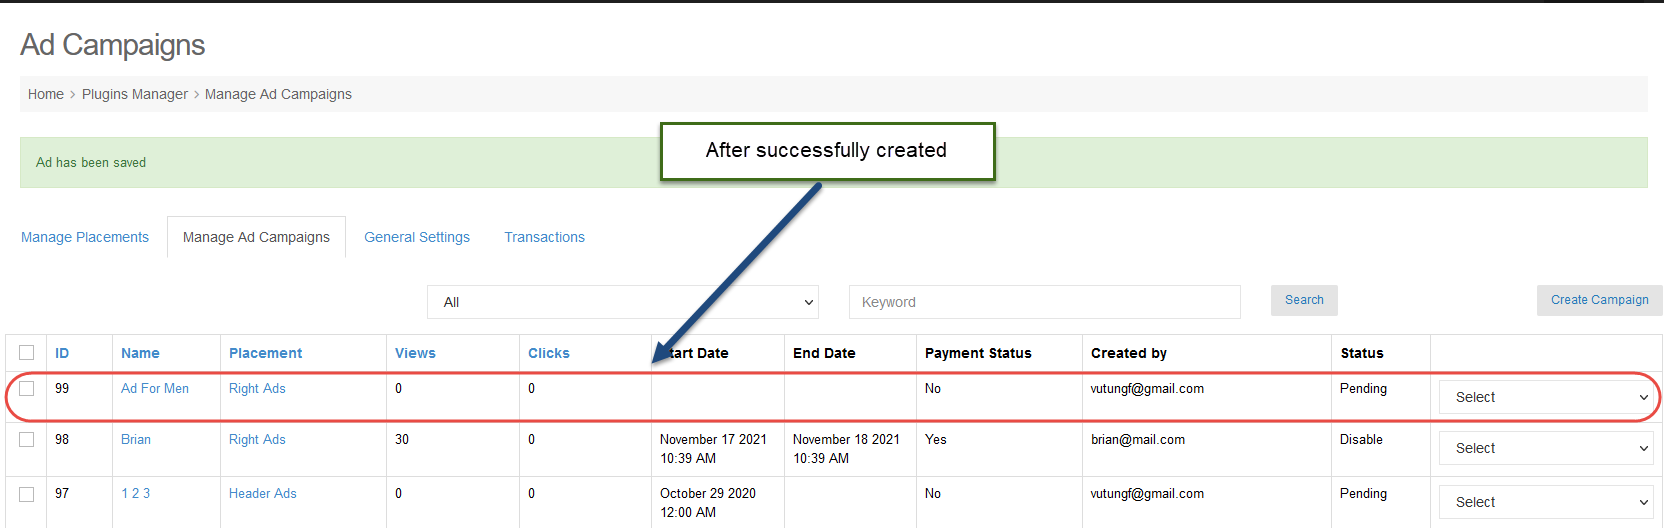
Step 1: Go to: Admin Dashboard -> Plugins Manager -> Ads -> Manage Ad Campaigns.
Step 2: Click “Create Campaign” button.
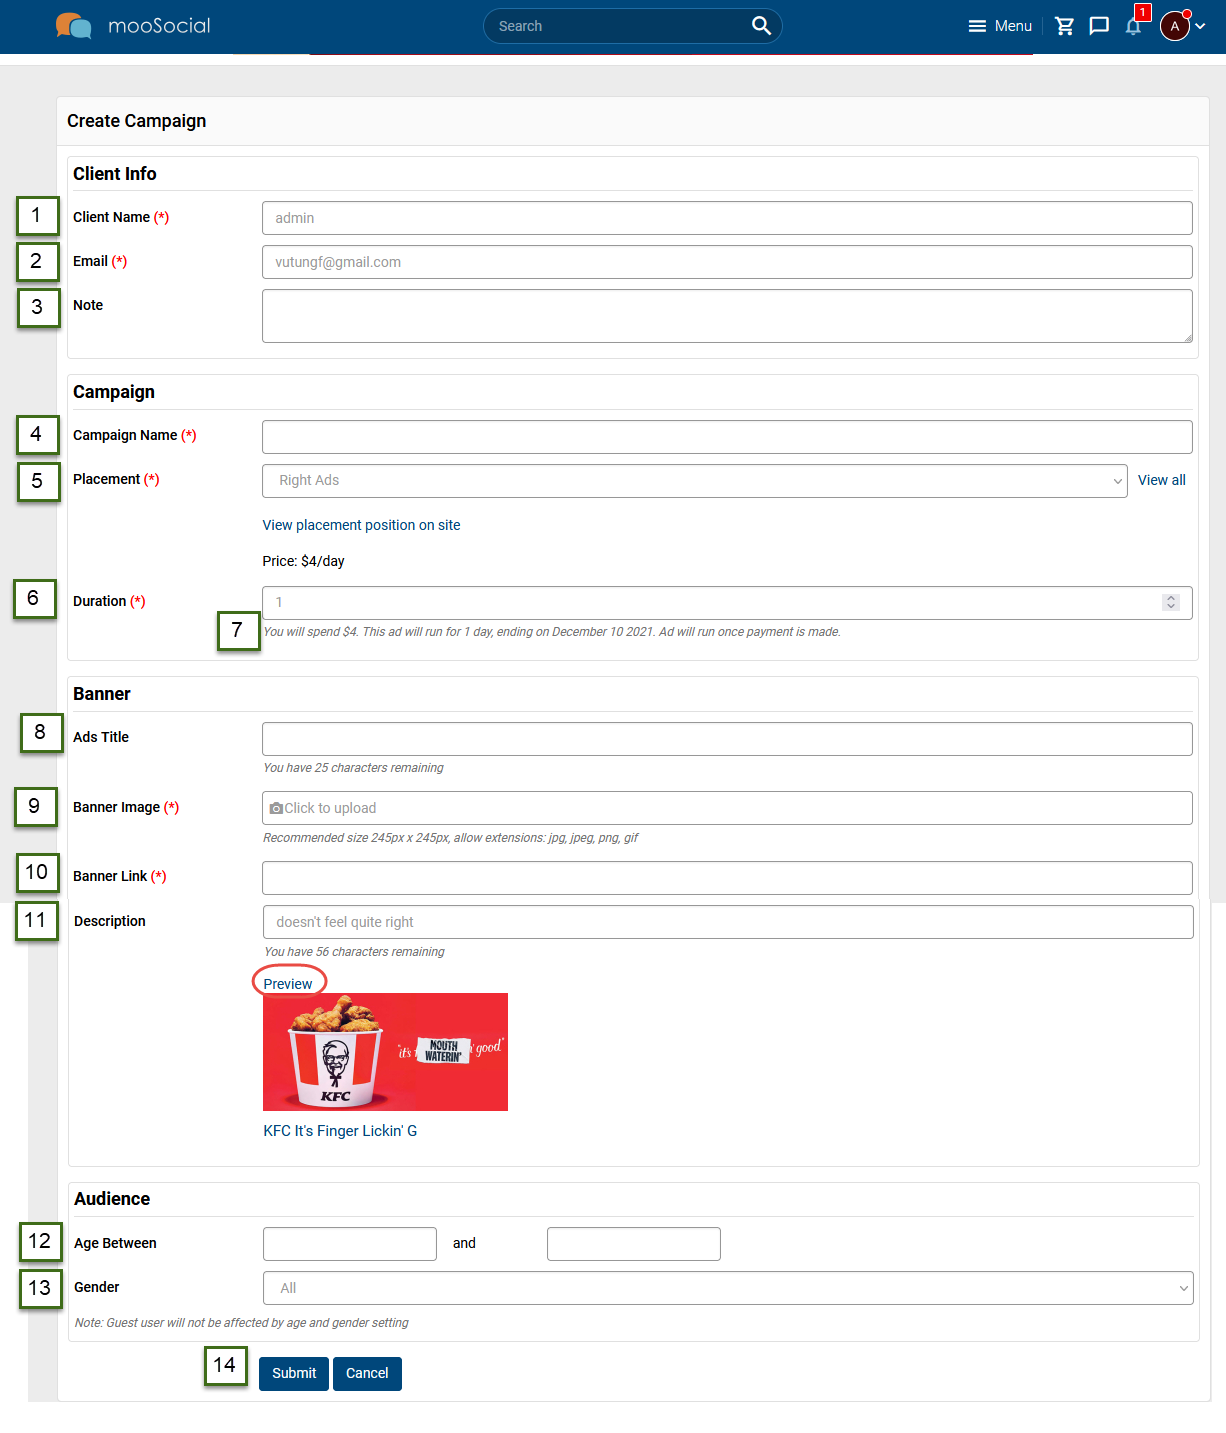
Step 3: Create Campaign
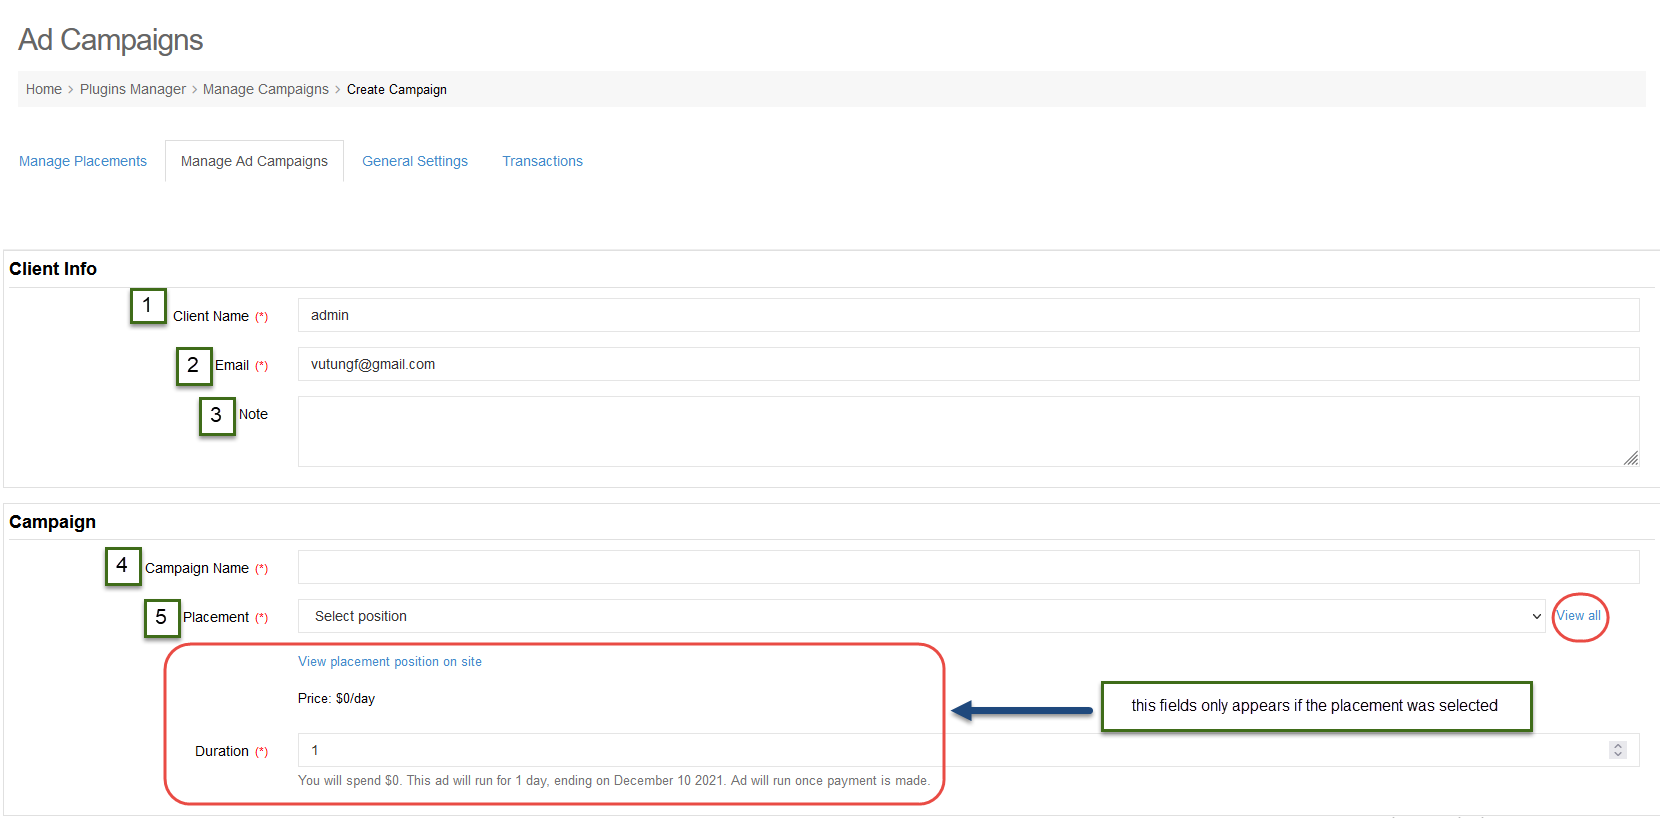
Client Info:
#1. Enter Client Name.
#2. Enter Email.
#3. Enter Note (option).
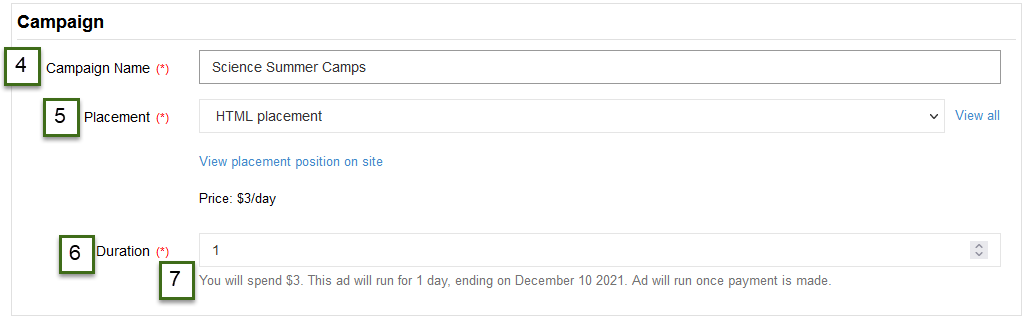
Campaign:
#4. Enter Campaign Name
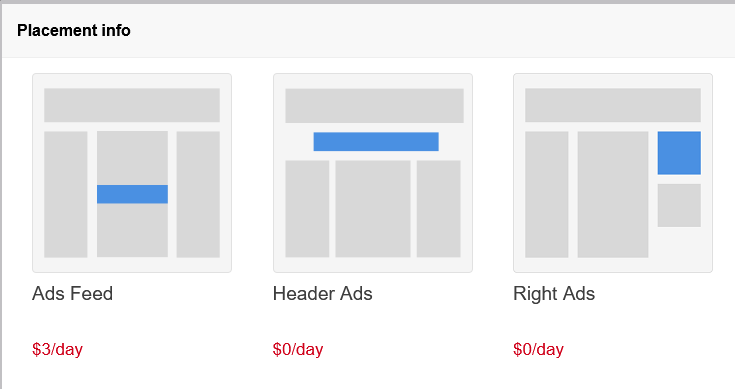
#5. Select placement (Click “View all” to view all Placements information before select)
Placement info:
#6. Duration: Select the number of days to run the ad.
#7. Show the total amount to be paid and the ad end date, the value will auto calculate base on selected placement and Duration. This is read-only, can’t change.
Banner:
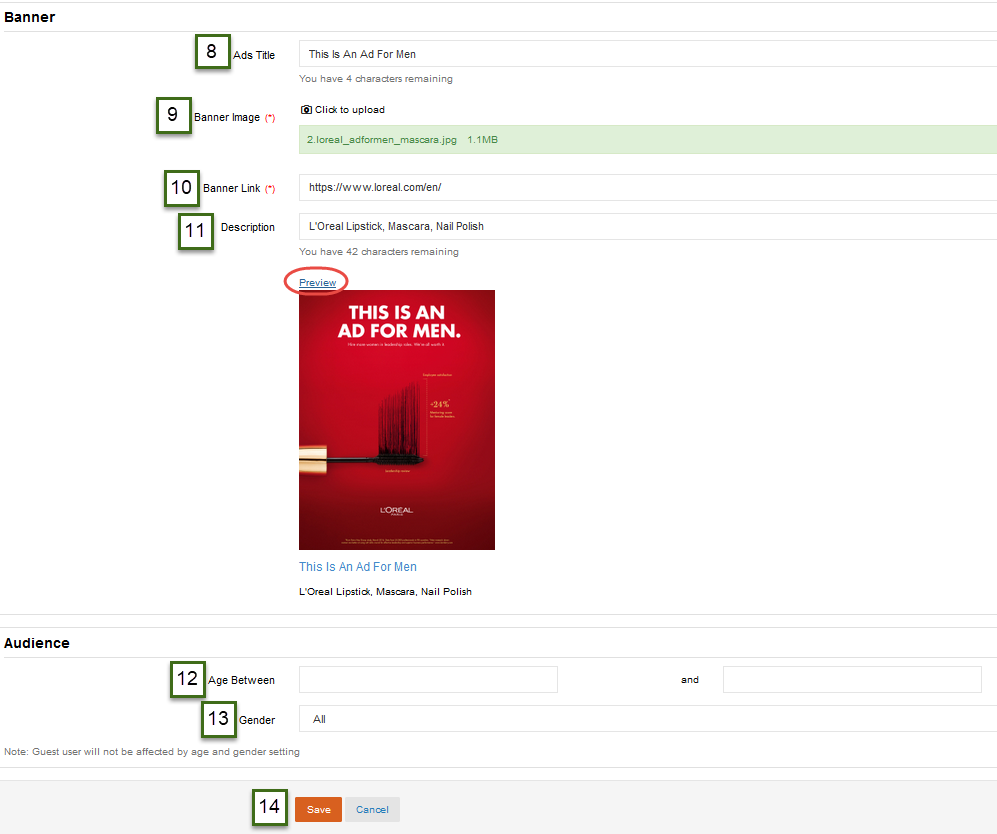
#8. Enter Ads Title: This field will appears if selected position placement is HTML or Feed.
#9. Upload Banner Image: allow extensions: jpg, jpeg, png, gif.
#10. Enter banner link on the textbox.
#11. Enter Description: This field will appears if selected position placement is HTML or Feed.
+ Click preview to view ads.
Audience (option)
#12. Enter age can view ads.
#13. Choose gender can view ads.
#14. Click “Save” button to a created campaign.
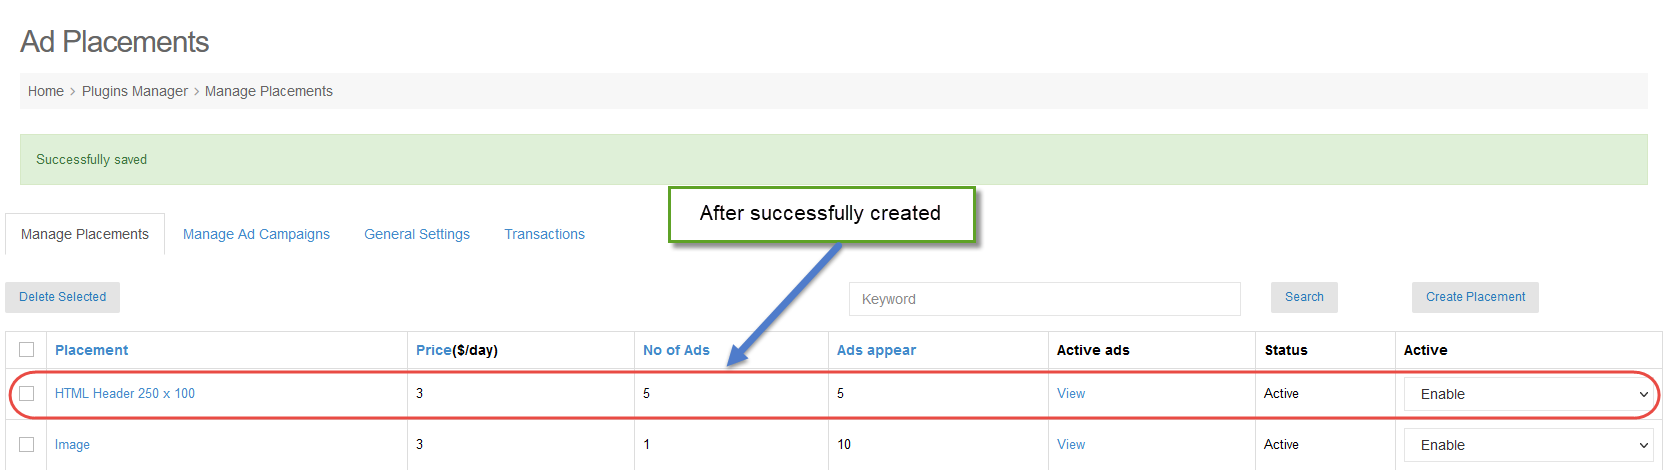
After successfully created:
Method 2: Front-end.
Step 1: Click “See your ad here” title link or “Advertise with us” at footer

or

Step 2: Fill all required fields
#1 –> # 14: Enter on fields same as method 1
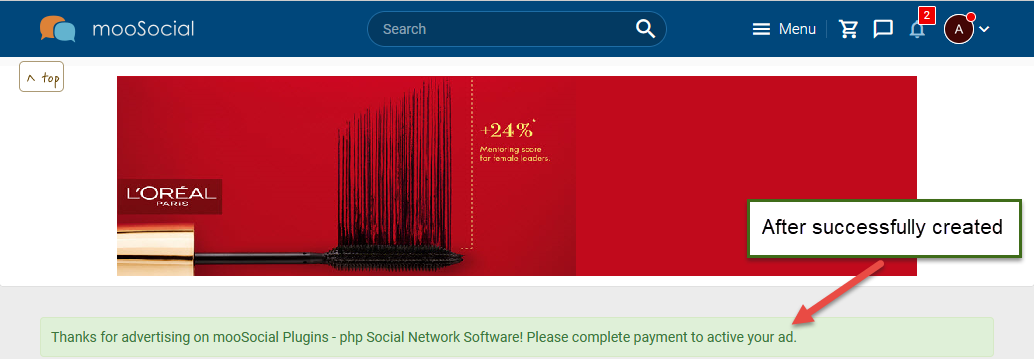
After successfully created:
- How to publish campaigns in the frontend
Method 1: Admin active directly
Step 1: Go to: Admin Dashboard -> Plugins Manager -> Ads -> manage Ad Campaigns
Step 2: Select “Active”
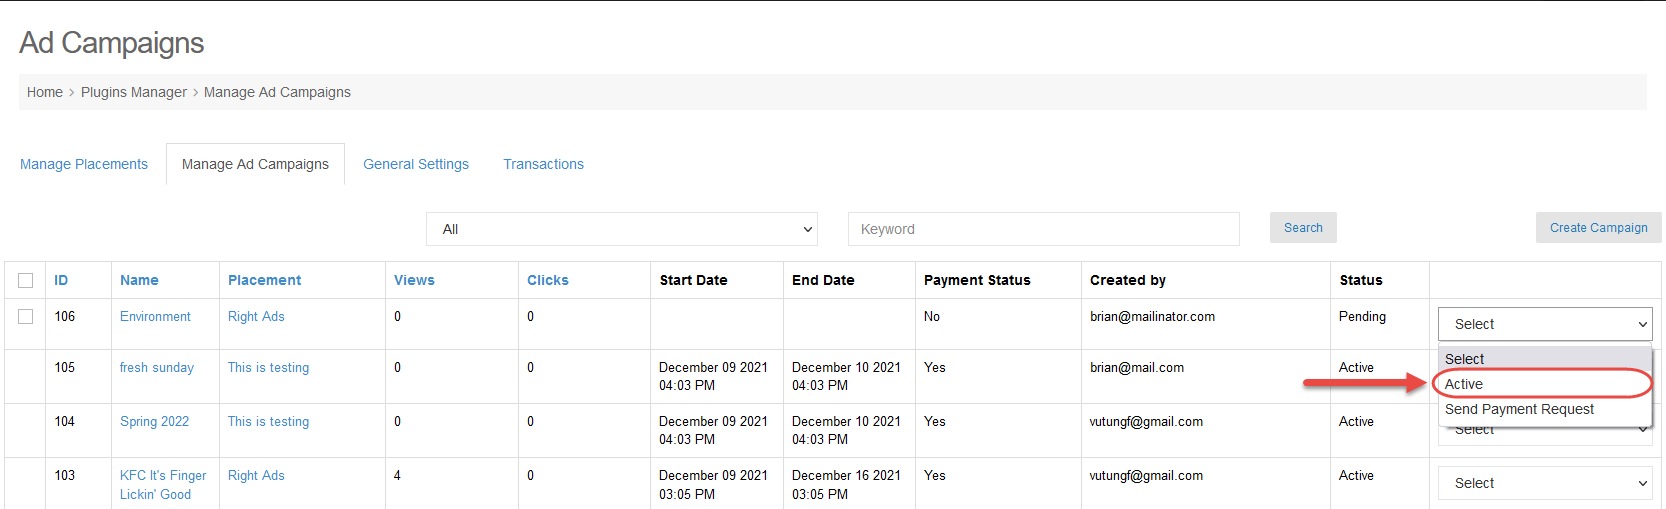
After active campaign:
(1) Start date: changed to at the time of activation
(2) End date: auto-fill based on a duration of the selected placement and start date
(3) Payment status changed to “Yes”
(4) Status changed to “Active”
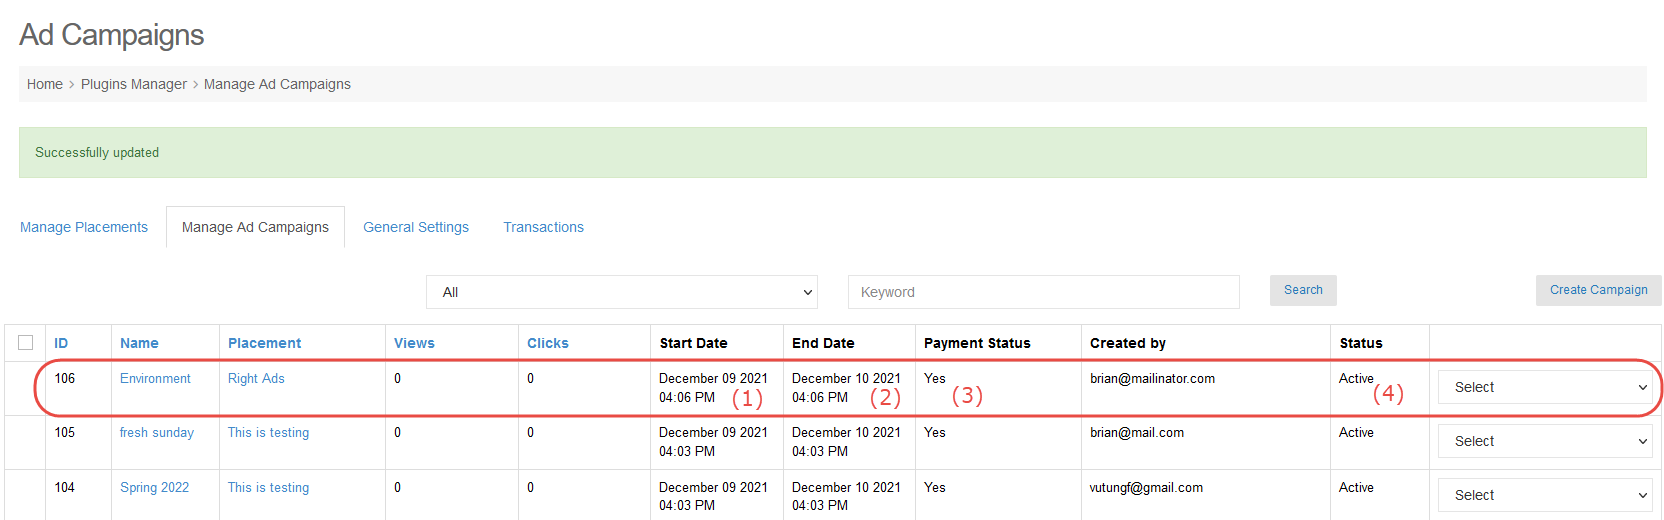
– After activated, you will receive an email with content below:
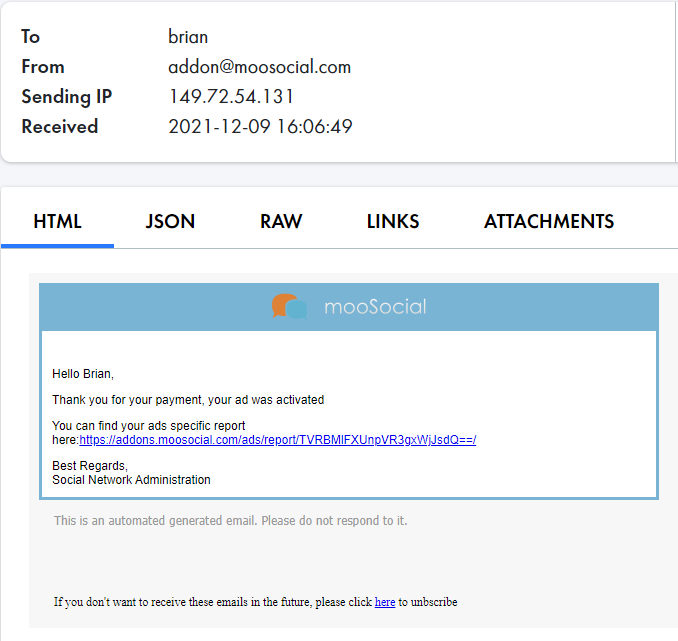
Step 3: Click on a link in this email, will direct to report campaign page.
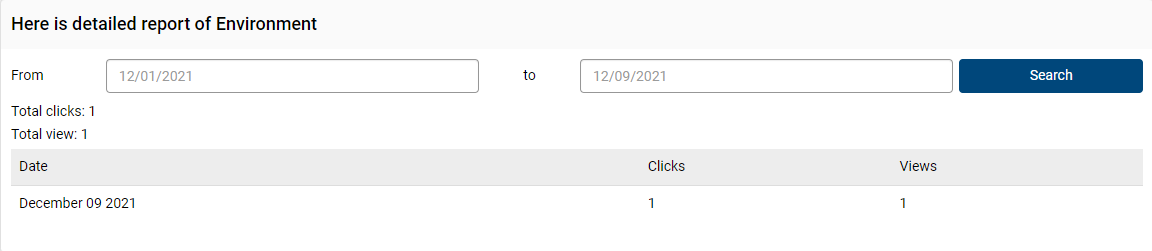
Step 4: You need to choose the time, and click “Search” button to view your report:
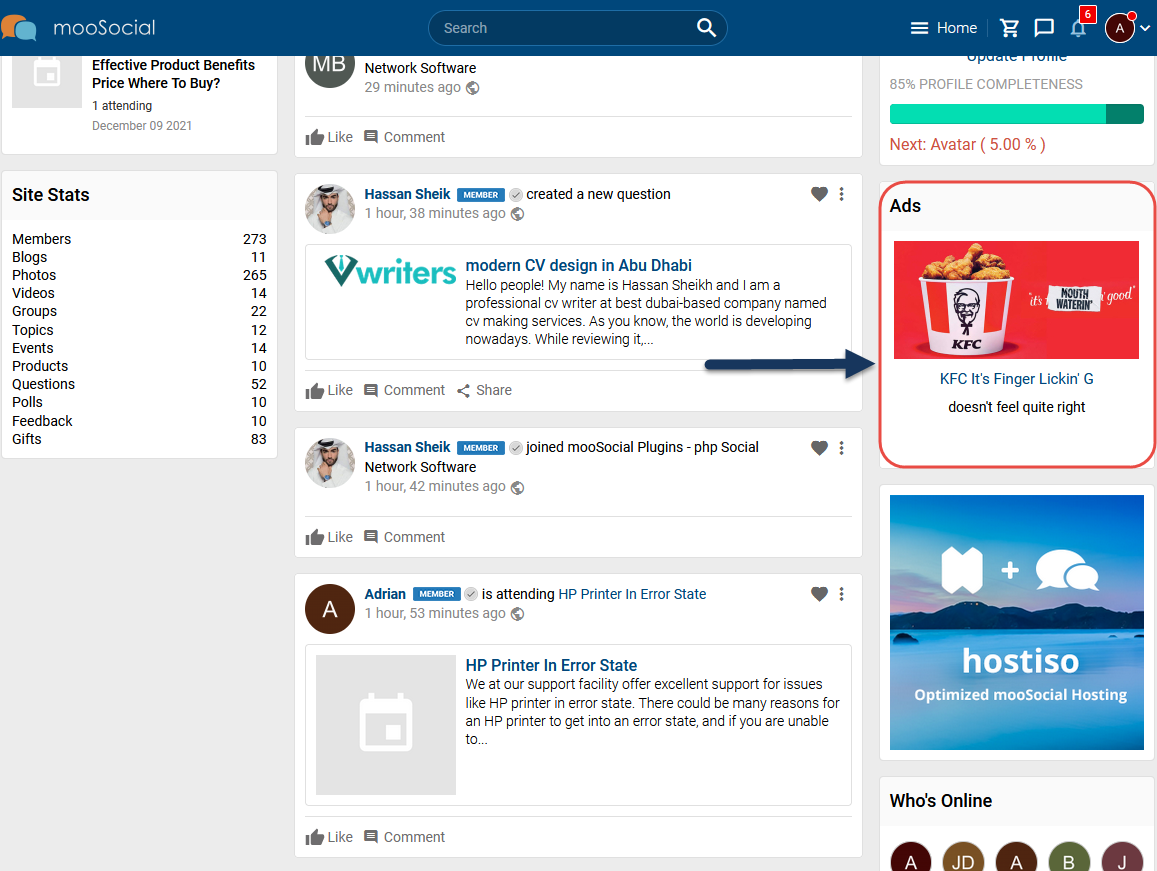
Step 5: Go to the site and view your ad at the website:
Method 2: Send the payment request
– Go to: Admin Dashboard -> Plugins Manager -> Ads -> Manage Ad Campaigns
– Click on the select box and choose “Send payment request”
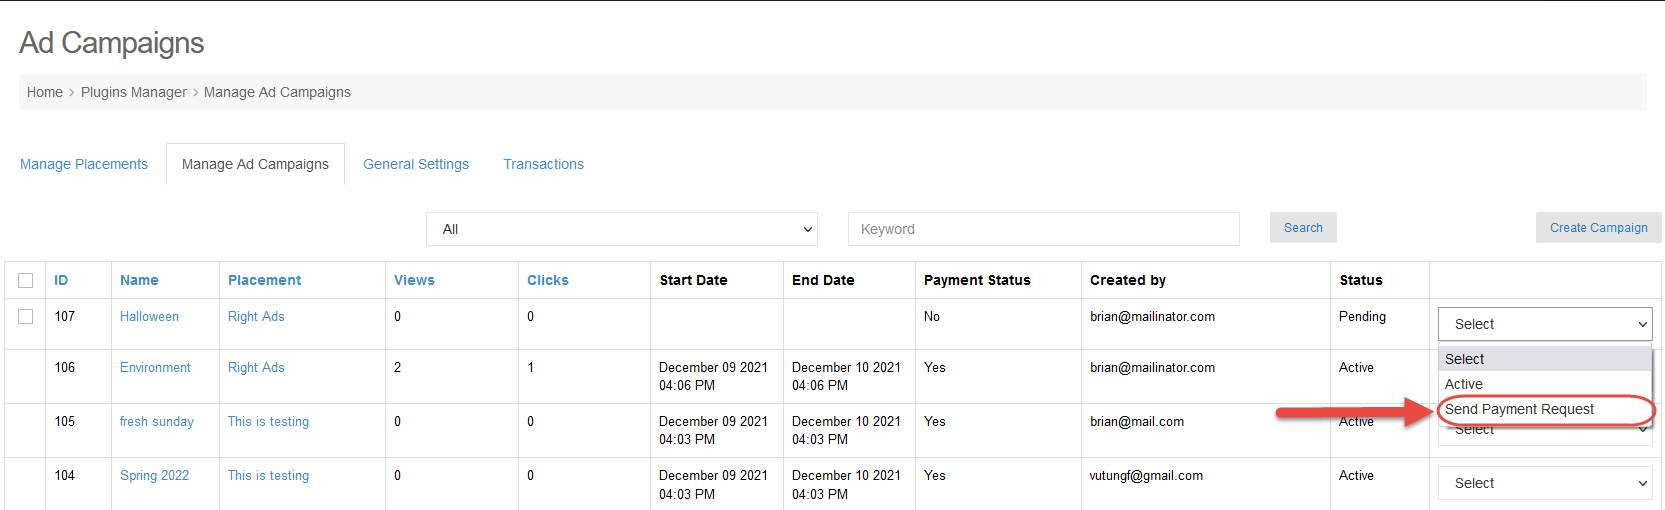
– After then campaign’s owner will receive an email with content below:
Step 1: Click on a link –> will direct to Gateways page to make a payment.
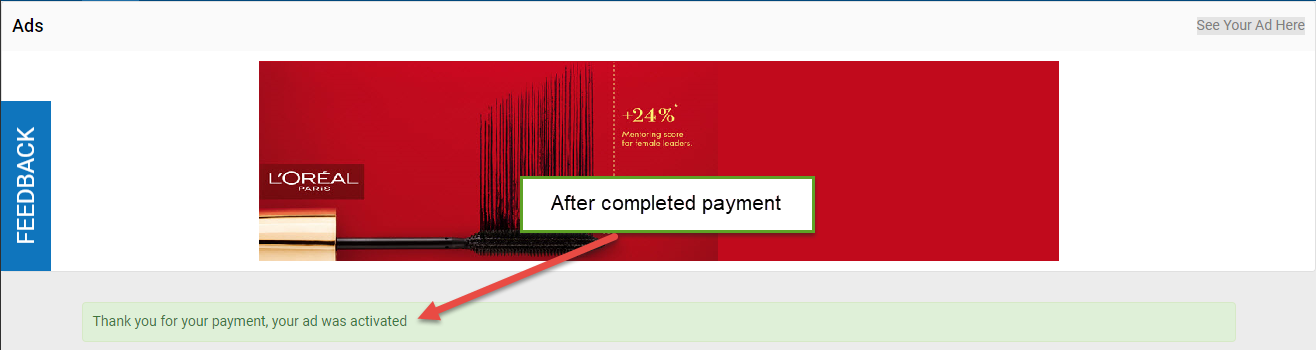
After completed your payment
– Campaign show in backend same as method 1
(1) Start date: is the date you made payment
(2) End date: auto-fill based on a duration of the selected placement and start date
(3) Payment status changed to “Yes”
(4) Status changed to “Active”
– After make payment, the campaign’s owner will receive an email with content below:
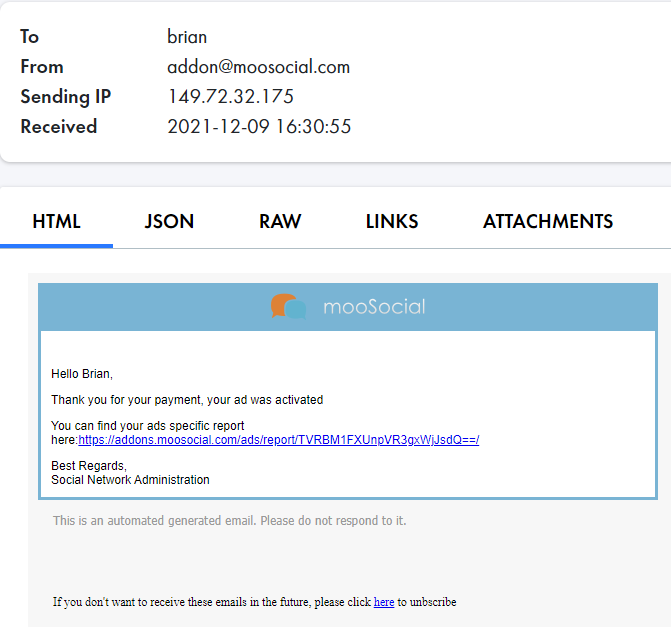
Step 2: Click on a link in this email to view your campaign report.
You can change “from” and “to” to view.
Detail campaign report has content below:
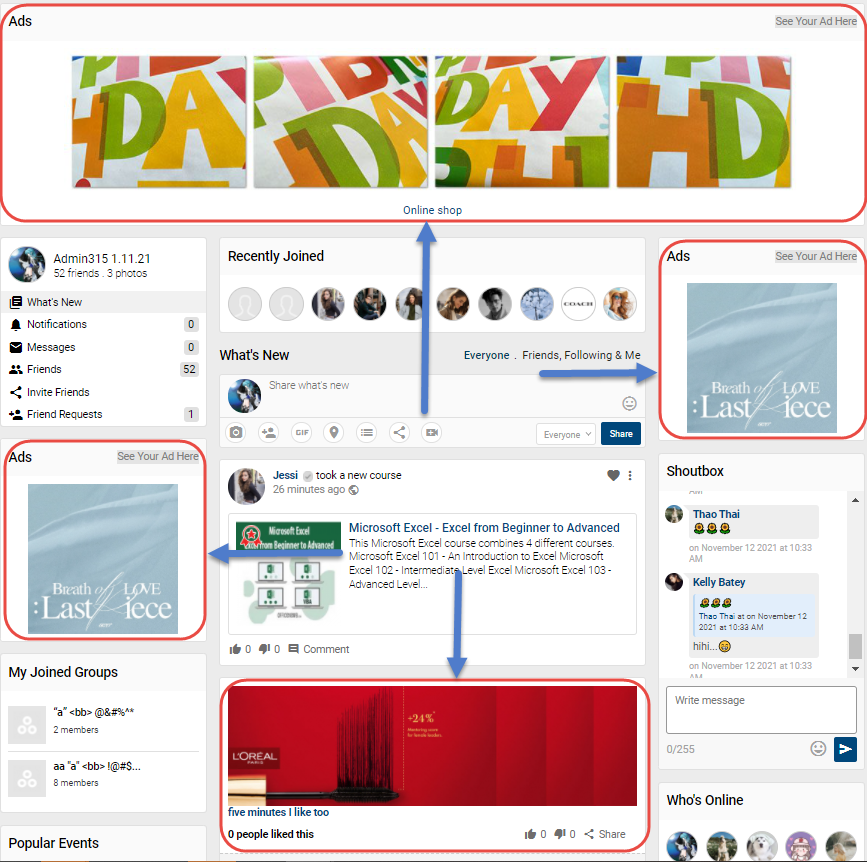
The sample for ads on site: