To avoid unwanted interactions, you can block users from using the Feedback plugin. When you block, you can block a specific user or block an IP address.
This tutorial will show you how to use block function.
BLOCK USER
Step 1. Go to Admin Control Panel.
Step 2. At Plugins Manager sidebar >> click on Feedback.
Step 3. Click on Block Users tab.
Block Users page will show all users and you can block user from posting feedback.
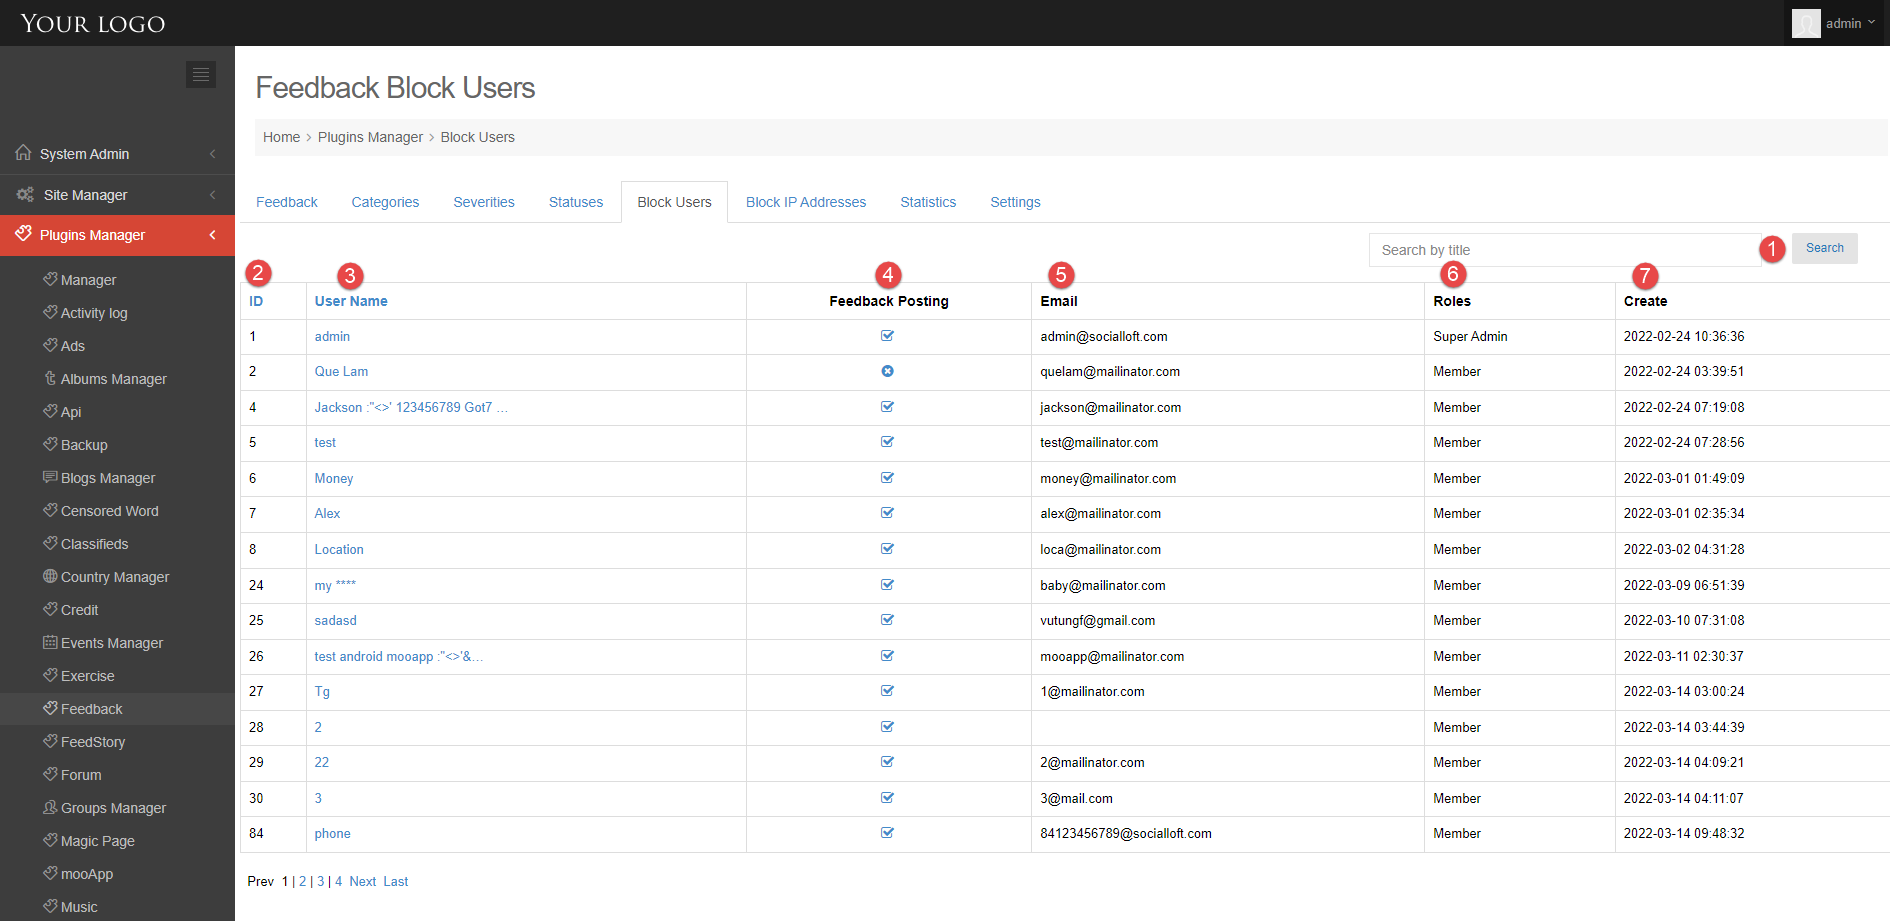
1. Search tool: enter user name and search.
2. User ID.
3. User name.
4. Feedback Posting: enable or disable post feedback permission for each user.
5. User email.
6. User role.
7. The date the user created the account
BLOCK IP ADDRESS
Step 1. Go to Admin Control Panel.
Step 2. At Plugins Manager sidebar >> click on Feedback.
Step 3. Click on Block IP Addresses tab.
At Block IP Addresses page, you can manage IPs to block from posting feedback.
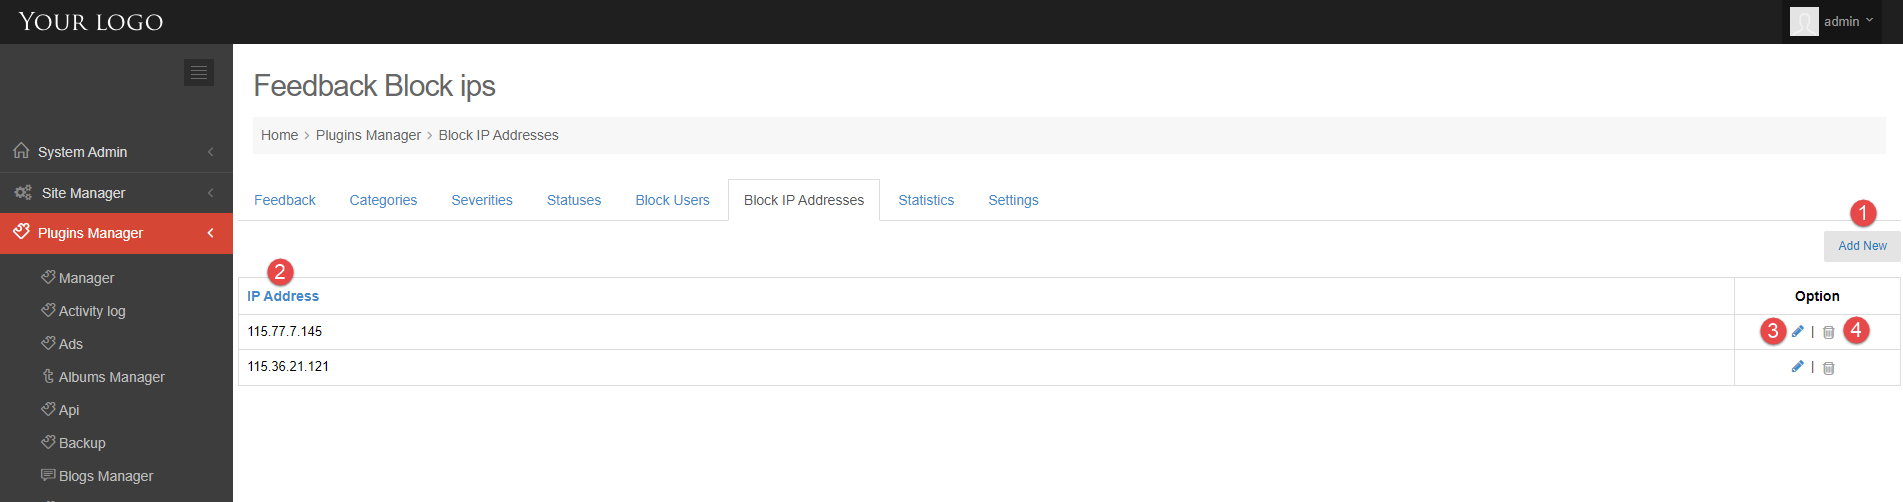
1. Add New button: open Add New IP popup, you can add new IP to block here.
2. IP Address is blocked
3. Edit IP: open Add New IP popup, you can edit IP here.
4. Click on this icon to delete IP
Feedback Status provides a status for each of user’s feedback reports, so users will have a better understanding of their report’s resolution status and know how many similar reports have been grouped with theirs.
Follow this tutorial to find out how to manage status.
1. Go to Admin Control Panel.
2. At Plugins Manager sidebar >> click on Feedback.
3. Click on Status tab.
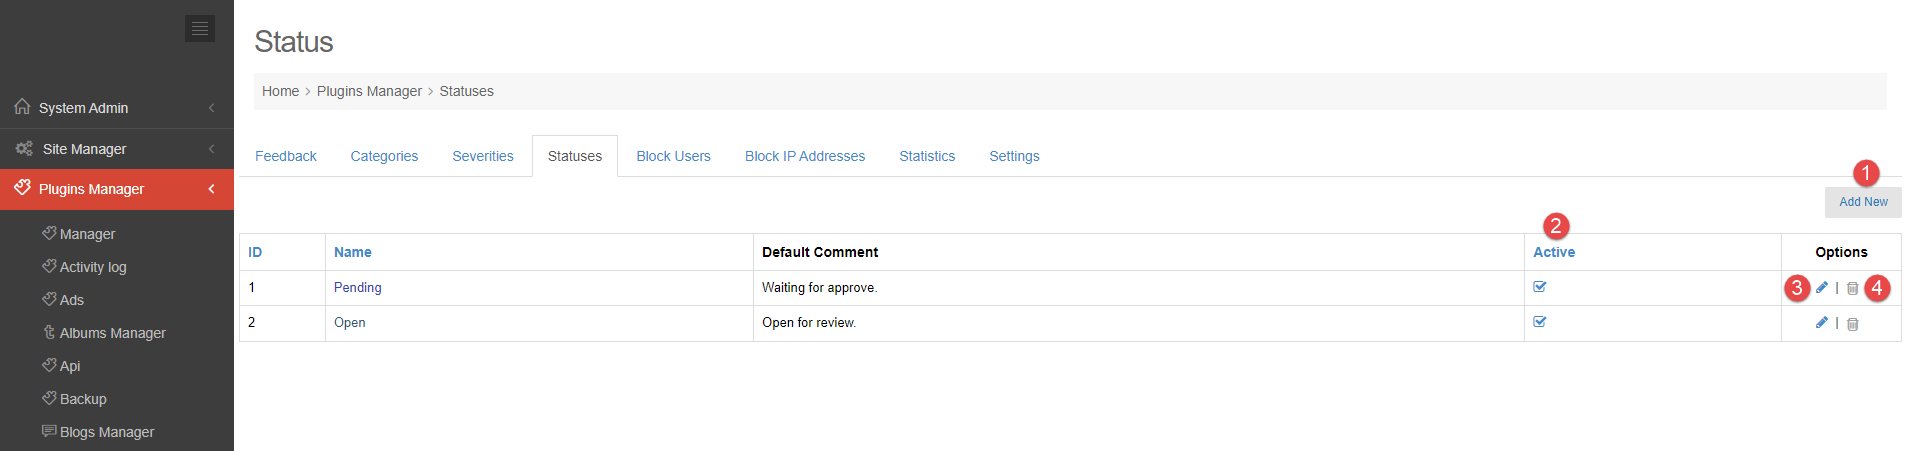
To manage status, you will need to know how to:
1. Add new status.
2. Active/Inactive status.
3. Edit status.
4. Delete status.
1. ADD NEW STATUS.
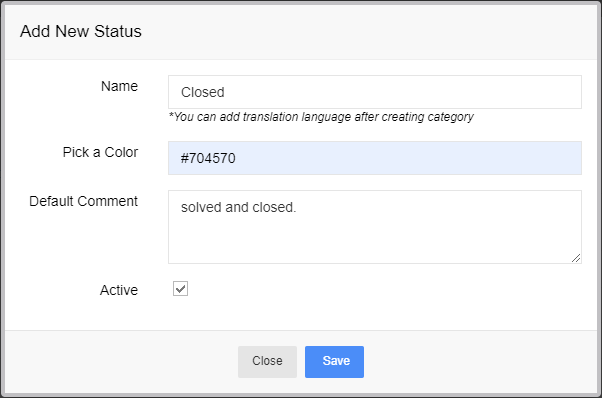
Step 1. Click on Add new button >> open Add New Status popup.
Step 2. Enter name, pick color and enter default comment.
Step 3. Check on Active >> Save.
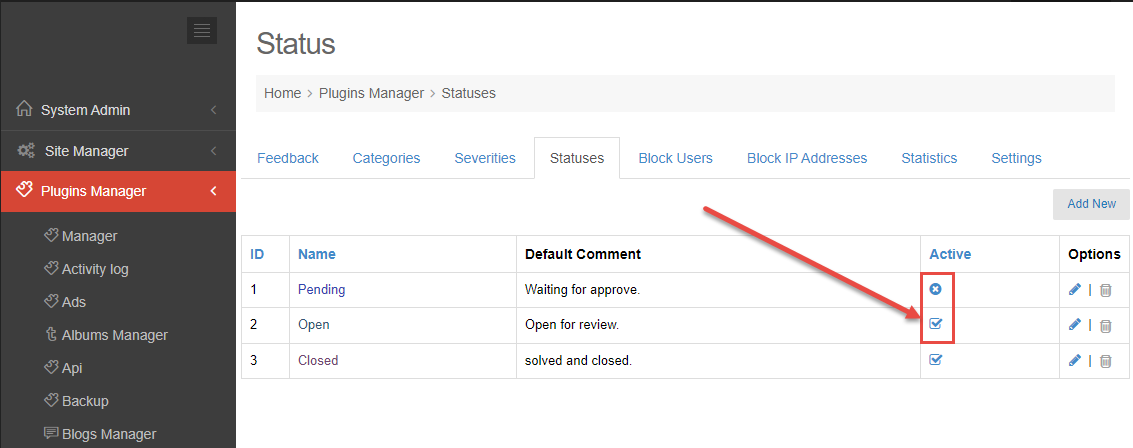
2. ACTIVE/INACTIVE STATUS.
Click on Active/Inactive icon in the Active column to Active/Inactive each status.
3. EDIT STATUS.
Step 1. Click on Edit icon in the Options column >> open Add New Status popup.
Step 2. Edit name, color, default comment or active
Step 3. Click on Save button.
4. DELETE STATUS.
Click on Delete icon in the Options column to delete each status.
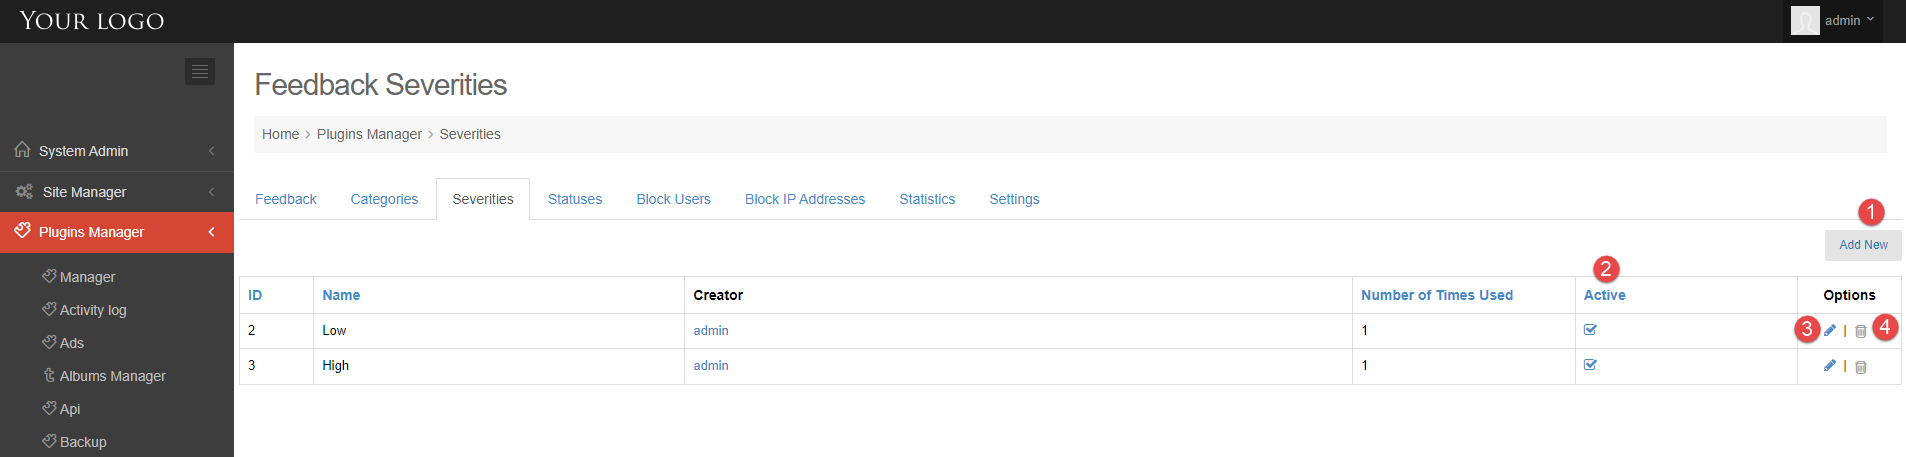
Admin will create severity so that users can self-assess their feedback severity. In this tutorial we will explain how you should create, edit or delete a severity.
1. Go to Admin Control Panel.
2. At Plugins Manager sidebar >> click on Feedback.
3. Click on Severity tab.
To manage severities, you will need to know how to:
1. Add new severity.
2. Active/Inactive severity.
3. Edit severity.
4. Delete severity.
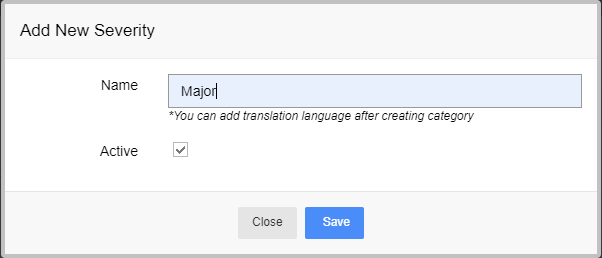
1. ADD NEW SEVERITY.
Step 1. Click on Add new button >> open Add New Severity popup.
Step 2. Enter name.
Step 3. Check on Active >> Save.
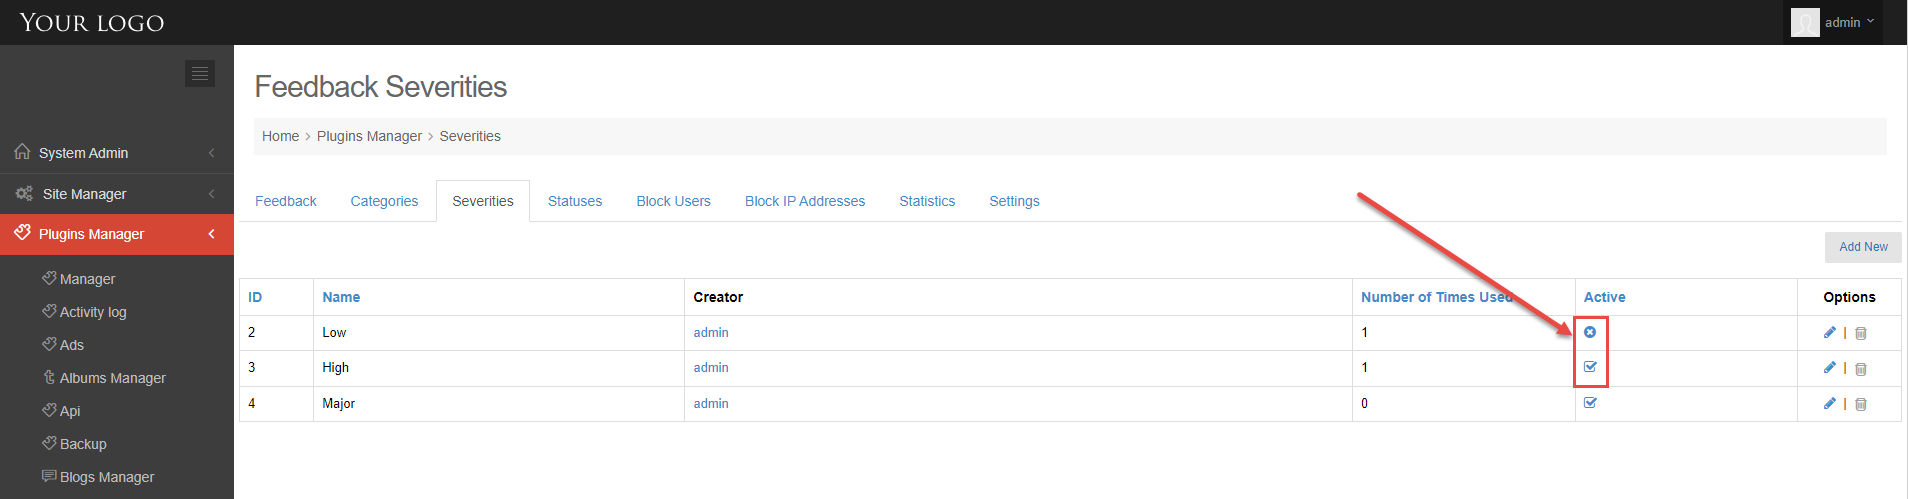
2. ACTIVE/INACTIVE SEVERITY.
Click on Active/Inactive icon in the Active column to Active/Inactive each severity.
3. EDIT SEVERITY.
Step 1. Click on Edit icon in the Options column >> open Add New Severity popup.
Step 2. Edit name or Active
Step 3. Click on Save button.
4. DELETE SEVERITY.
Click on Delete icon in the Options column to delete each severity.
Admin can view and manage feedback received from users.
In this tutorial you will learn how do admin manage feedback.
1. Go to Admin Control Panel.
2. At Plugins Manager sidebar >> click on Feedback.
Admin can manage the following information:
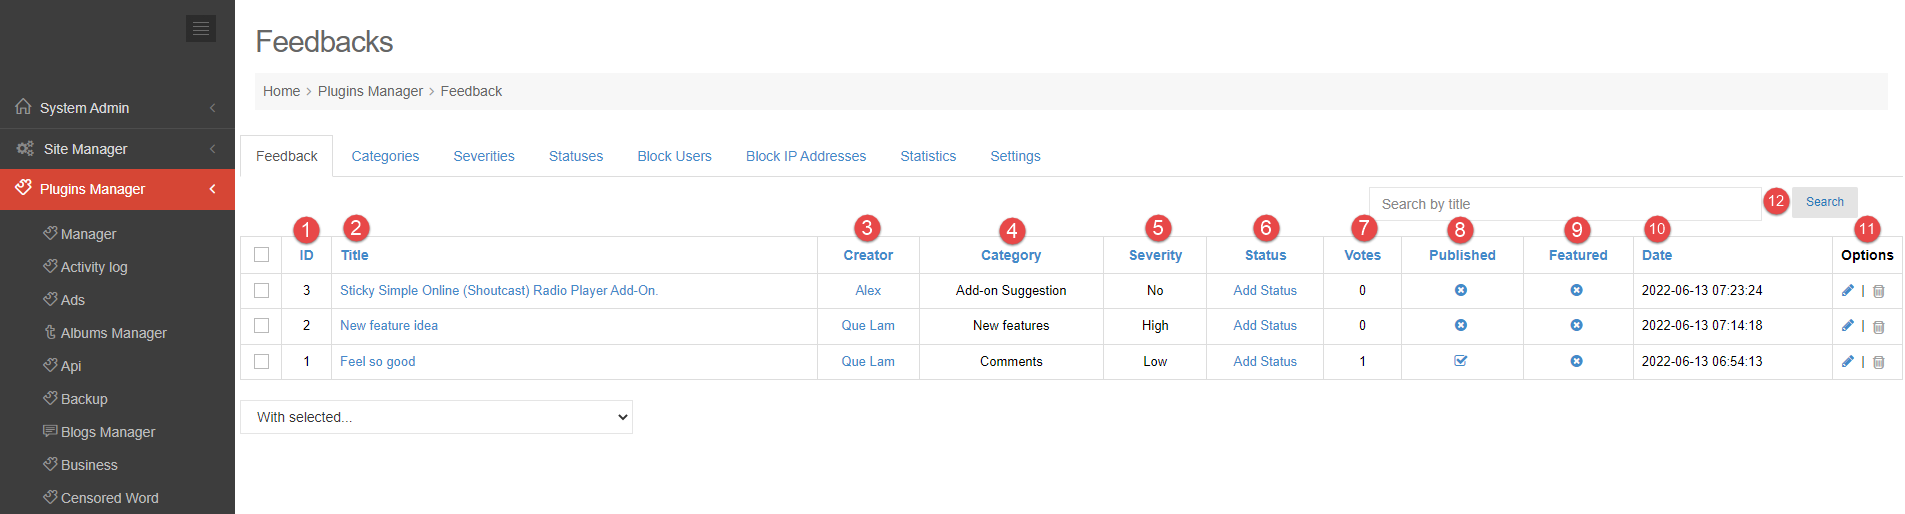
1. Feedback ID: can sort by ID when click on.
2. Feedback Title: redirect to Feedback detail page.
3. Feedback Creator: redirect to User profile page.
4. Category of feedback
5. Feedback Severity: if feedback creator is not choose severity, it will show ‘No’ here.
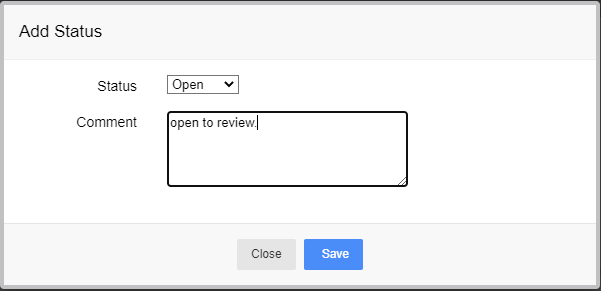
6. Status: open Add Status popup, admin can add status for each feedback.
7. Votes: show the number of votes.
8. Published: publish or unpublish feedback.
9. Featured: enable or disable feature feedback.
10. Date of creating feedback
11. Options: there are 2 options:
– Edit: open Edit feedback popup.
– Delete: delete feedback.
12. Search: enter keyword and search feedback.
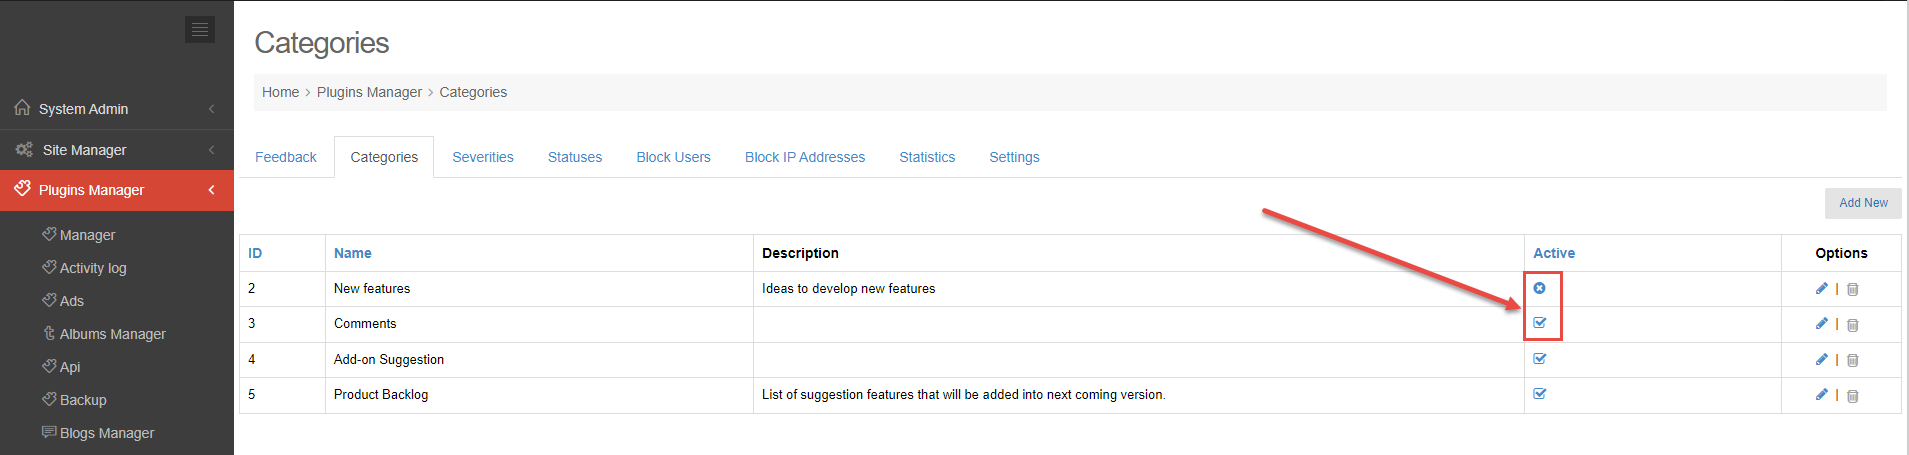
Categories is used mainly for separating the theme of feedback from one another and grouping them by certain criteria. In this tutorial we will explain how you should create, edit or delete a category.
1. Go to Admin Control Panel.
2. At Plugins Manager sidebar >> click on Feedback.
3. Click on Categories tab.
To manage categories, you will need to know how to:
1. Add new category.
2. Active/Inactive category.
3. Edit category.
4. Delete category.
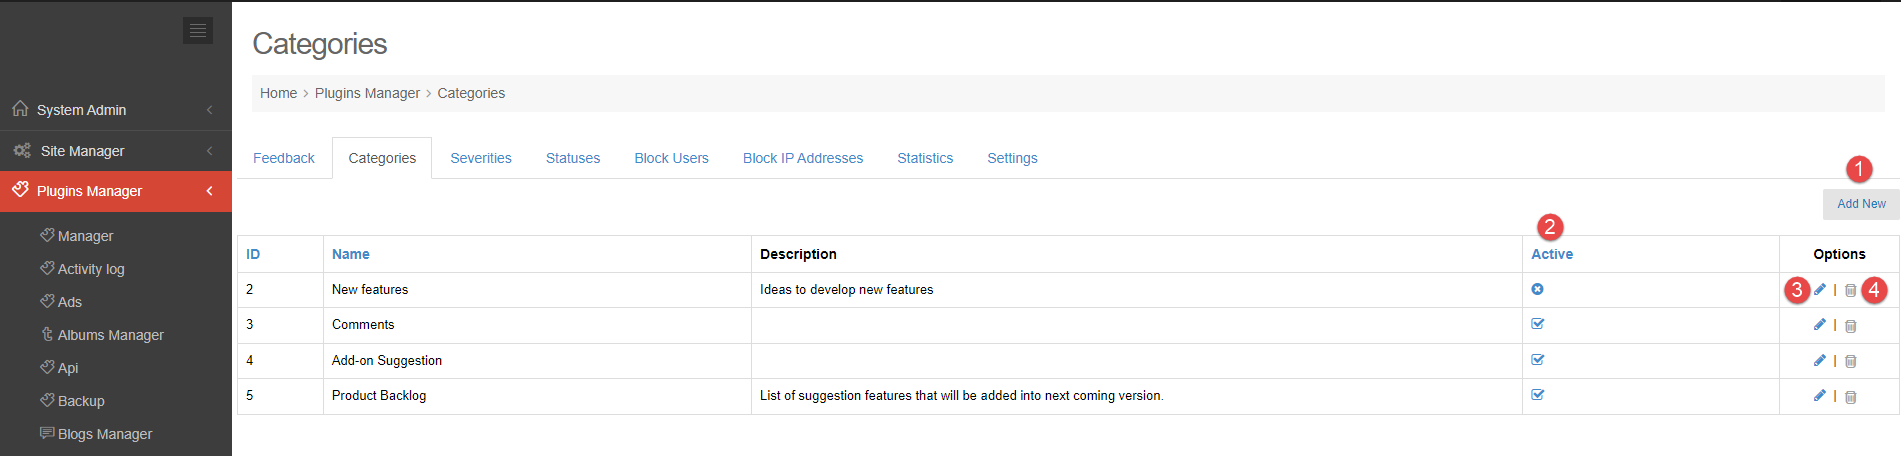
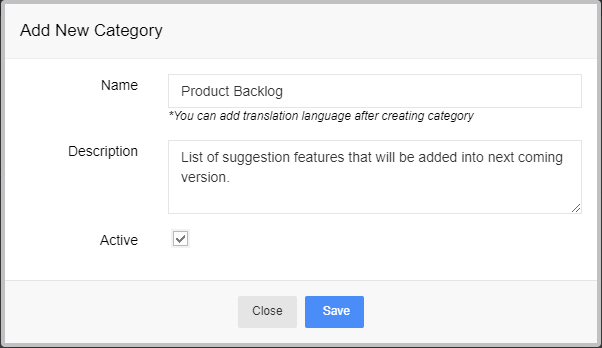
1. ADD NEW CATEGORY.
Step 1. Click on Add new button >> open Add New Category popup.
Step 2. Enter name and description.
Step 3. Check on Active >> Save.
2. ACTIVE/INACTIVE CATEGORY
Click on Active/Inactive icon in the Active column to Active/Inactive each category.
3. EDIT CATEGORY.
Step 1. Click on Edit icon in the Options column > open Add New Category popup.
Step 2. Edit name, description or active
Step 3. Click on Save button.
4. DELETE CATEGORY.
Click on Delete icon in the Options column to delete each category.