Archives

How the subscription feature of the business directory works

One-time package
ontimepackage

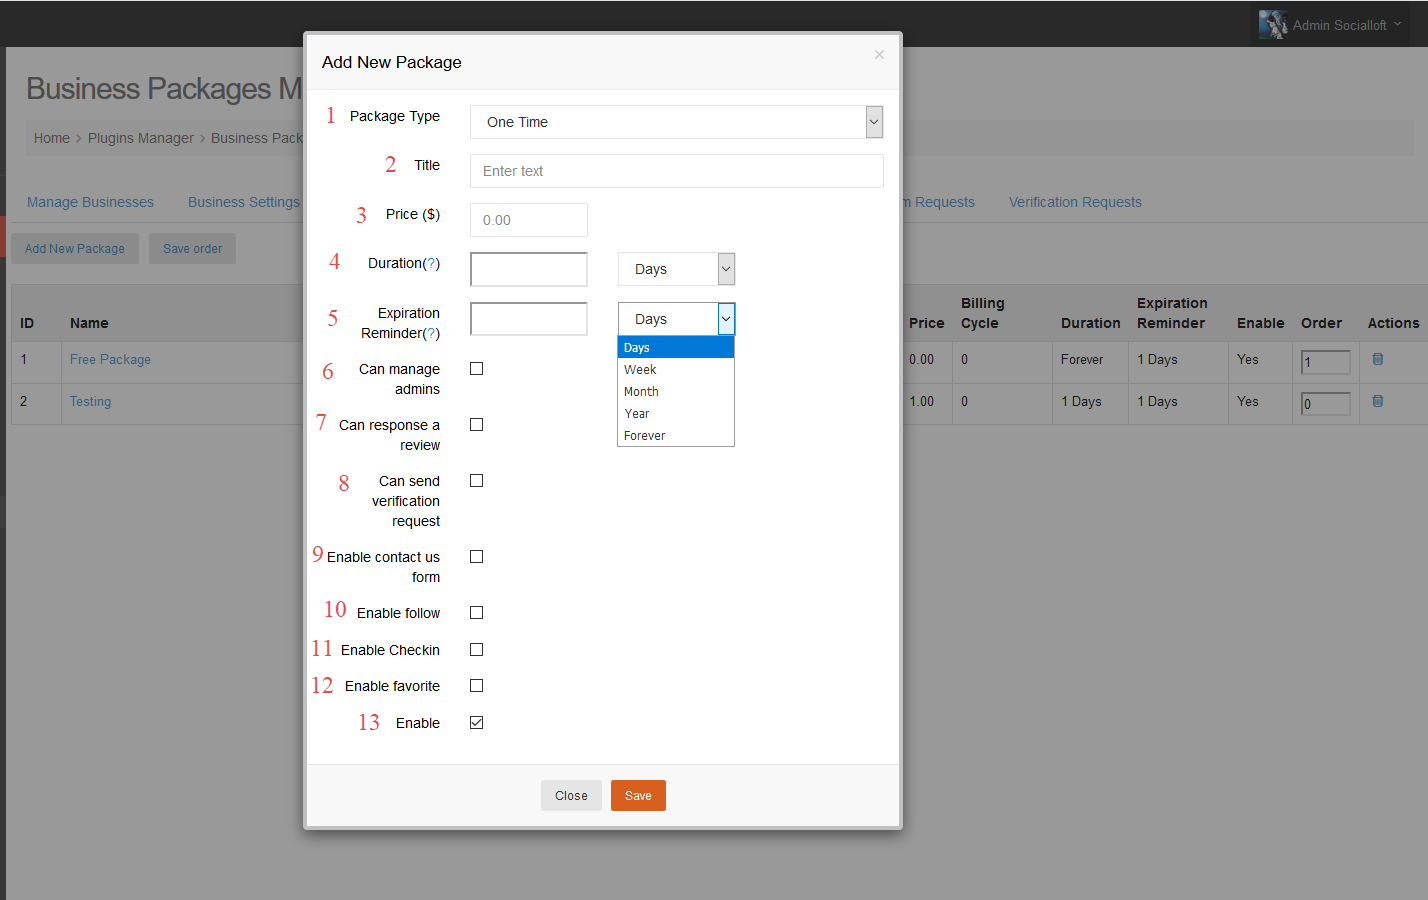
#1: Select your package type

#2: Enter your Title

#3: Enter your price of the package

#4: Maximum duration of this plan. For one-time plans, the plan will expire after the period of time set here.

#5: Specifies time before expiration to send renewal reminder

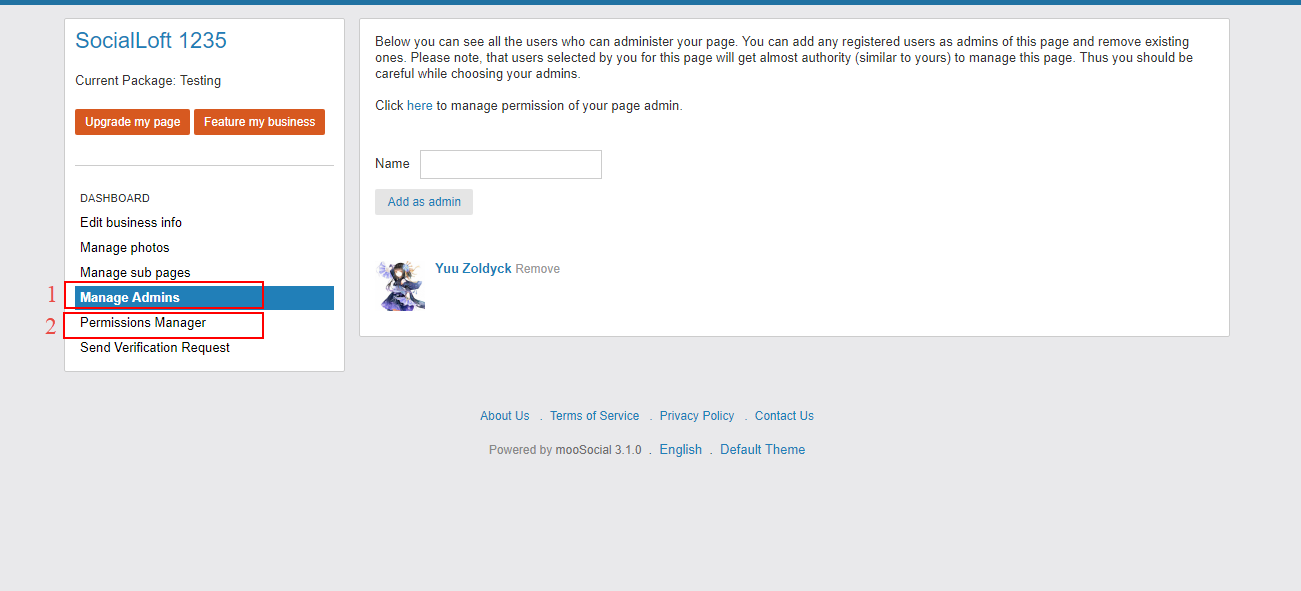
#6: If “Can manage admins” is checked, it will show here.

1. You can add any registered users as admins of this page and remove existing ones.

2. You can manage permissions that admins can do here

ontimepackage1

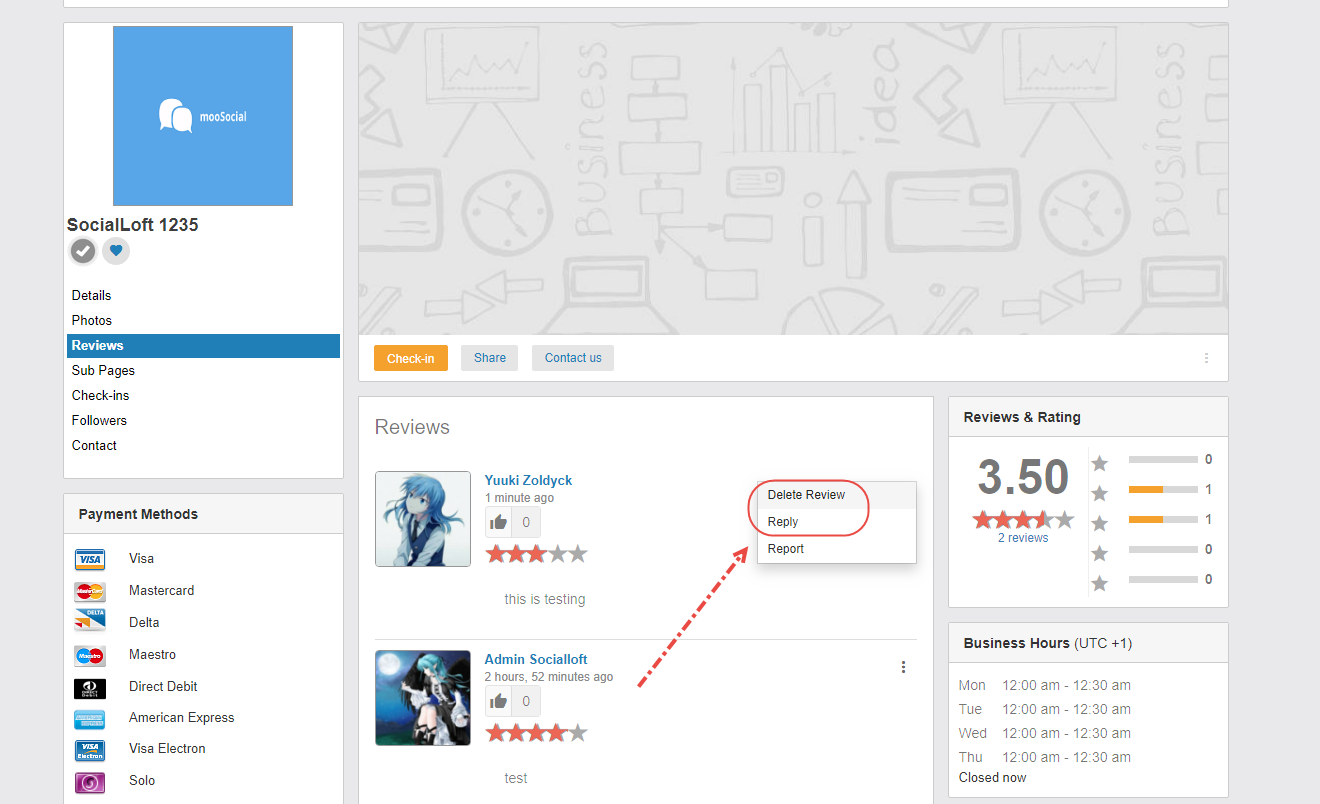
#7: If “Can reponse a review” is checked, it will show here. You can delete reivew or reply reivew.

ontimepackage2

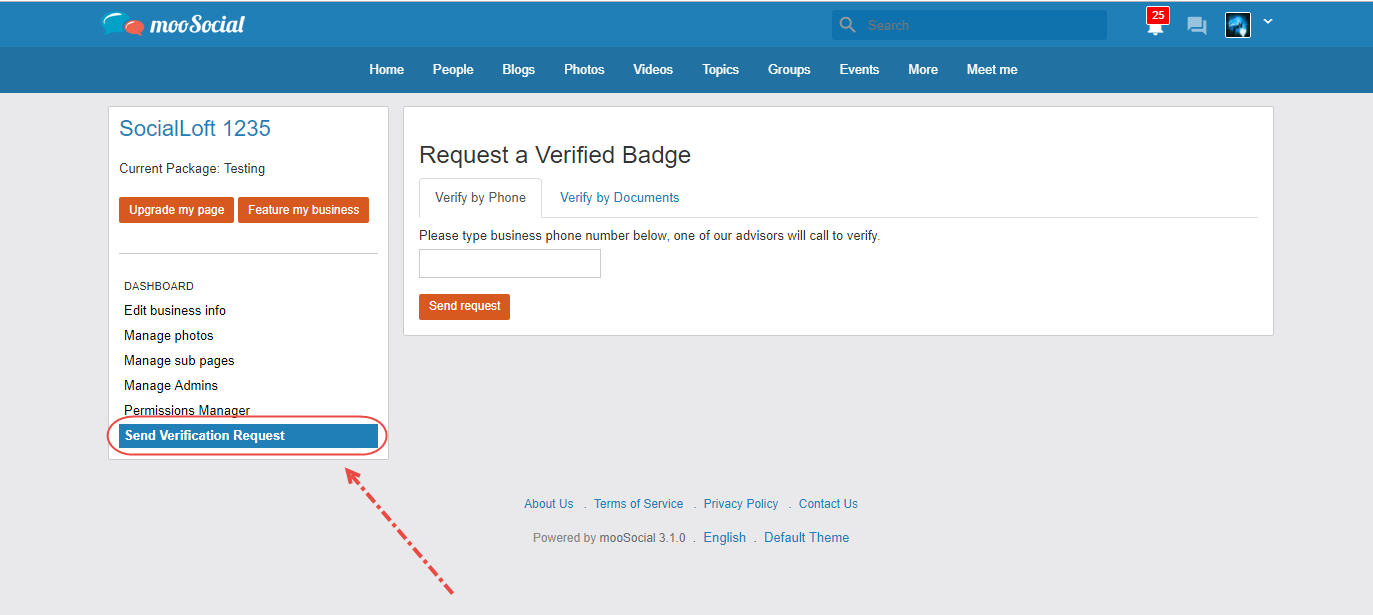
#8: If “Can send verification request” is checked, it will show here

ontimepackage3

#9: If “Enable contact us form” is checked, it will show here

ontimepackage4

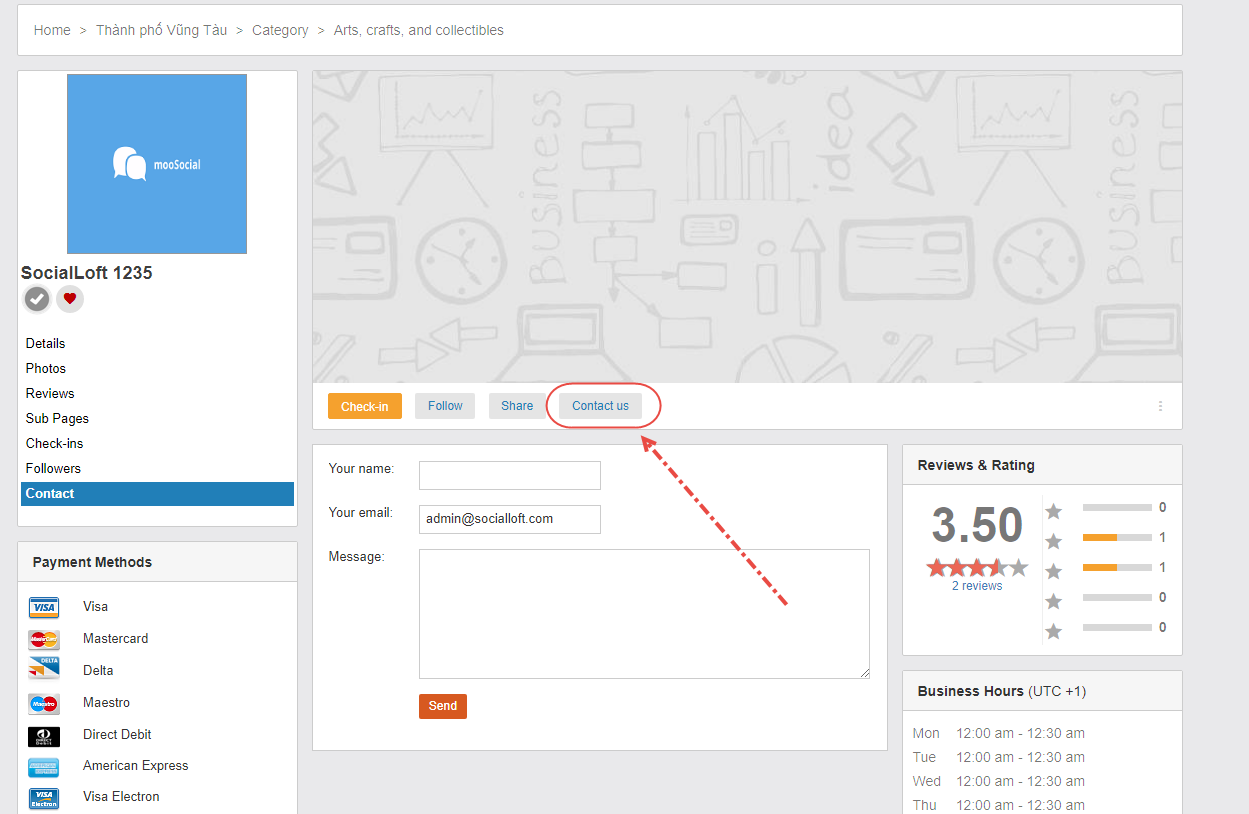
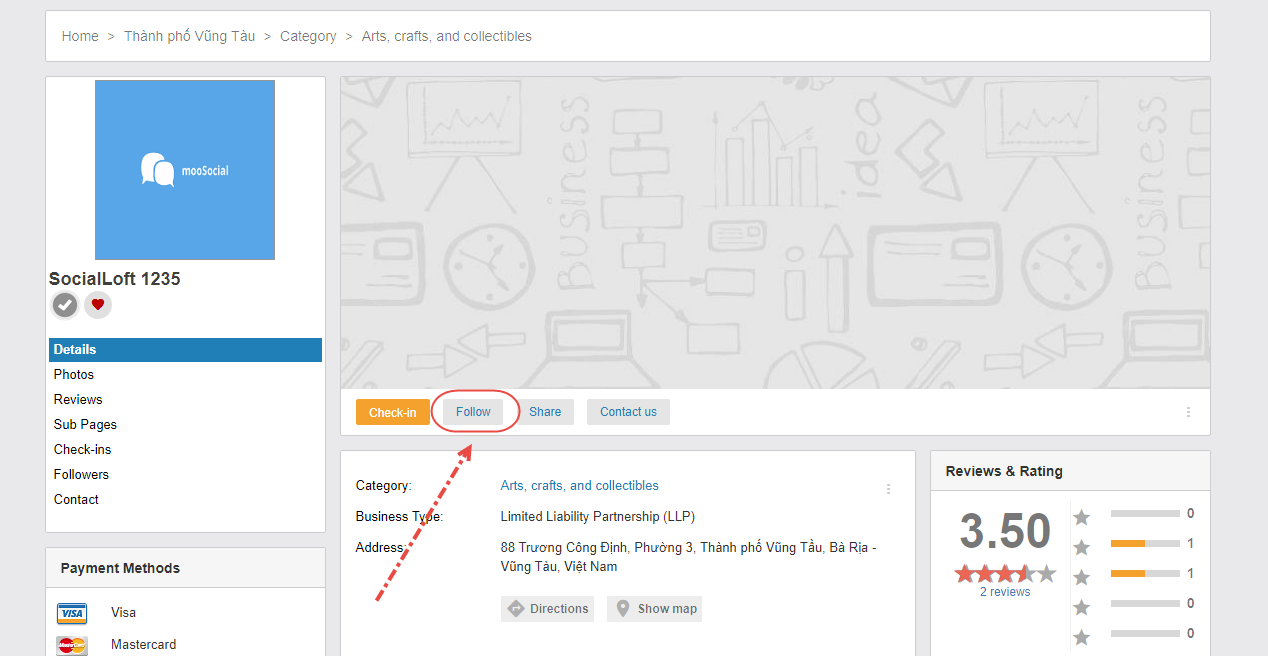
#10: If “Enable follow” is checked, it will show here

ontimepackage5

#11: If “Enable checkin” is checked, it will show here

ontimepackage6

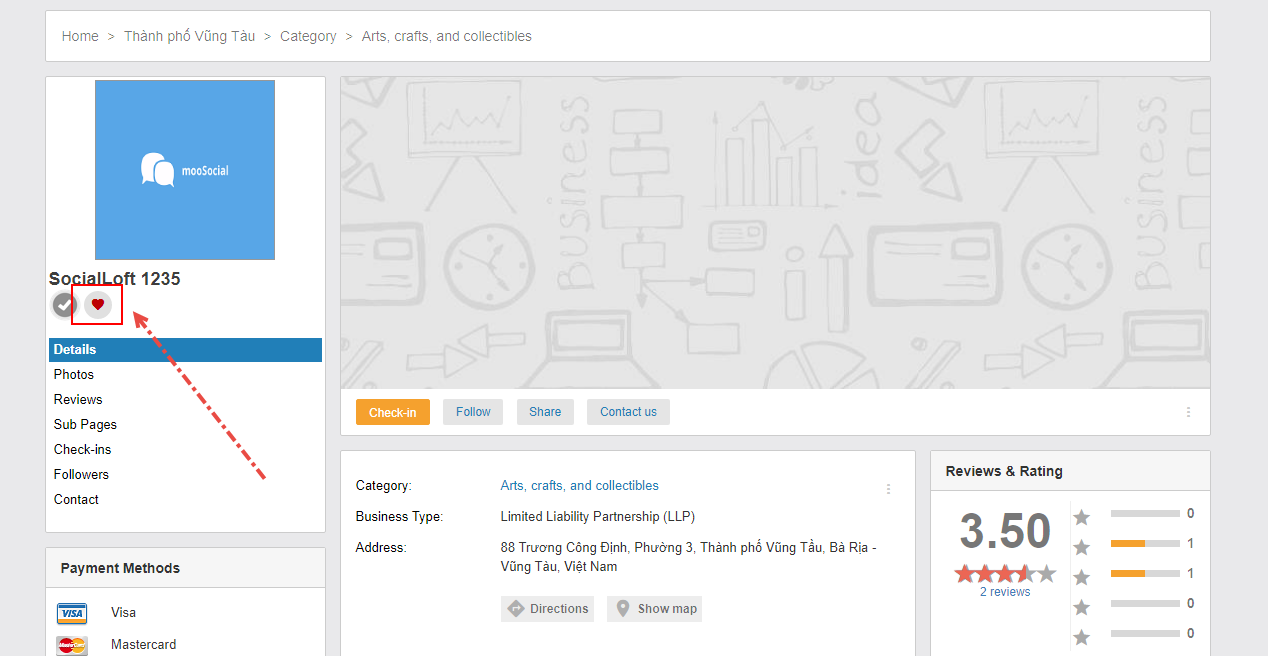
#12: If “Enable favorite” is checked, it will show here

ontimepackage7

#13: If “Enable” is checked, this package is shown at front-end
Recurring package
recurepackage

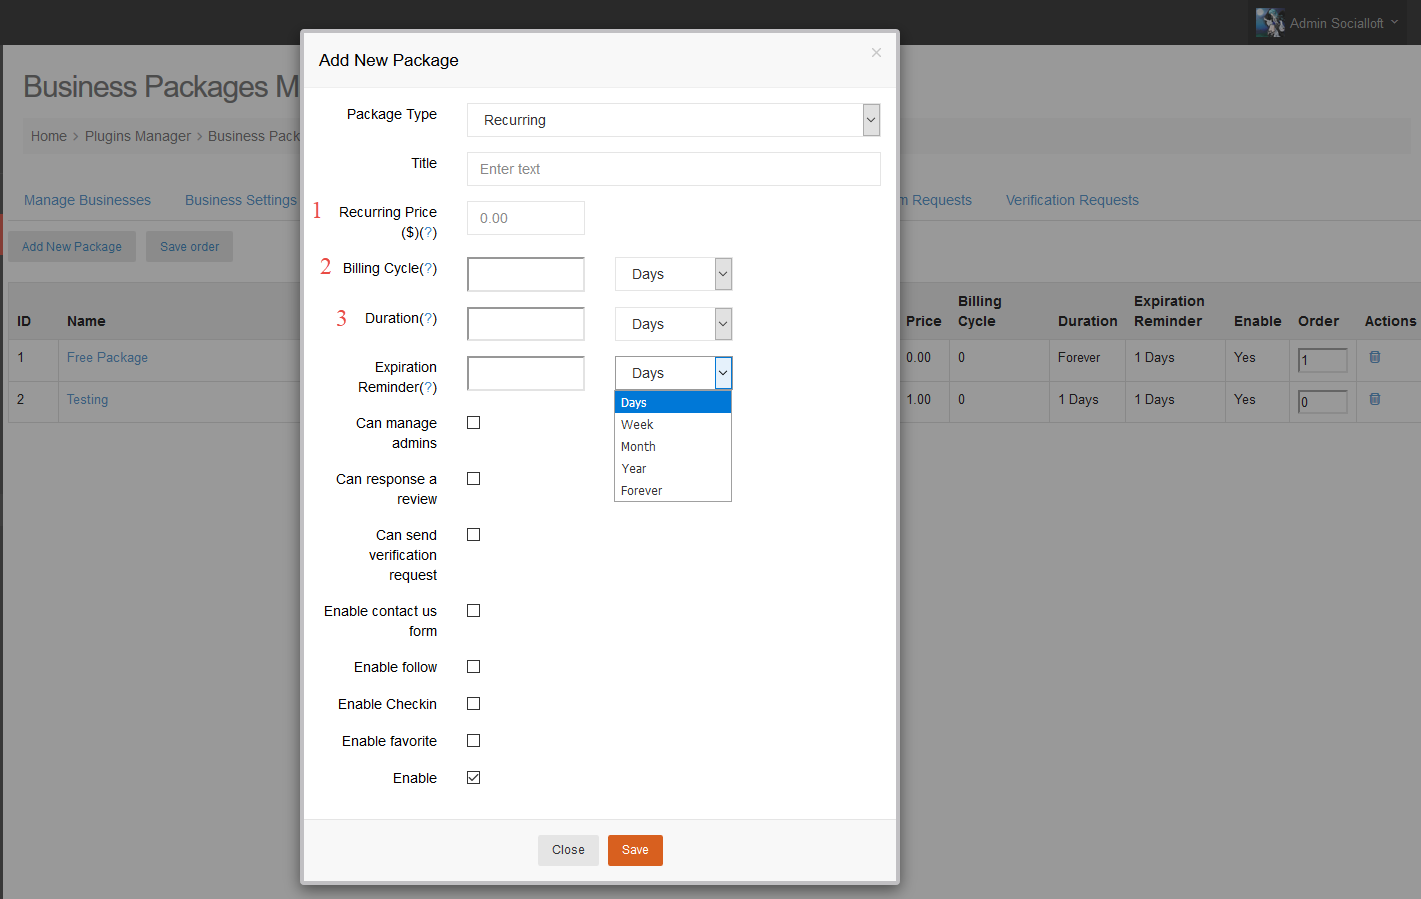
#1: Enter your price of the package

#2: Time duration of each billing cycle

#3: Maximum duration of this plan. For recurring plans, the user will be billed at the above billing cycles for the period of time specifies here
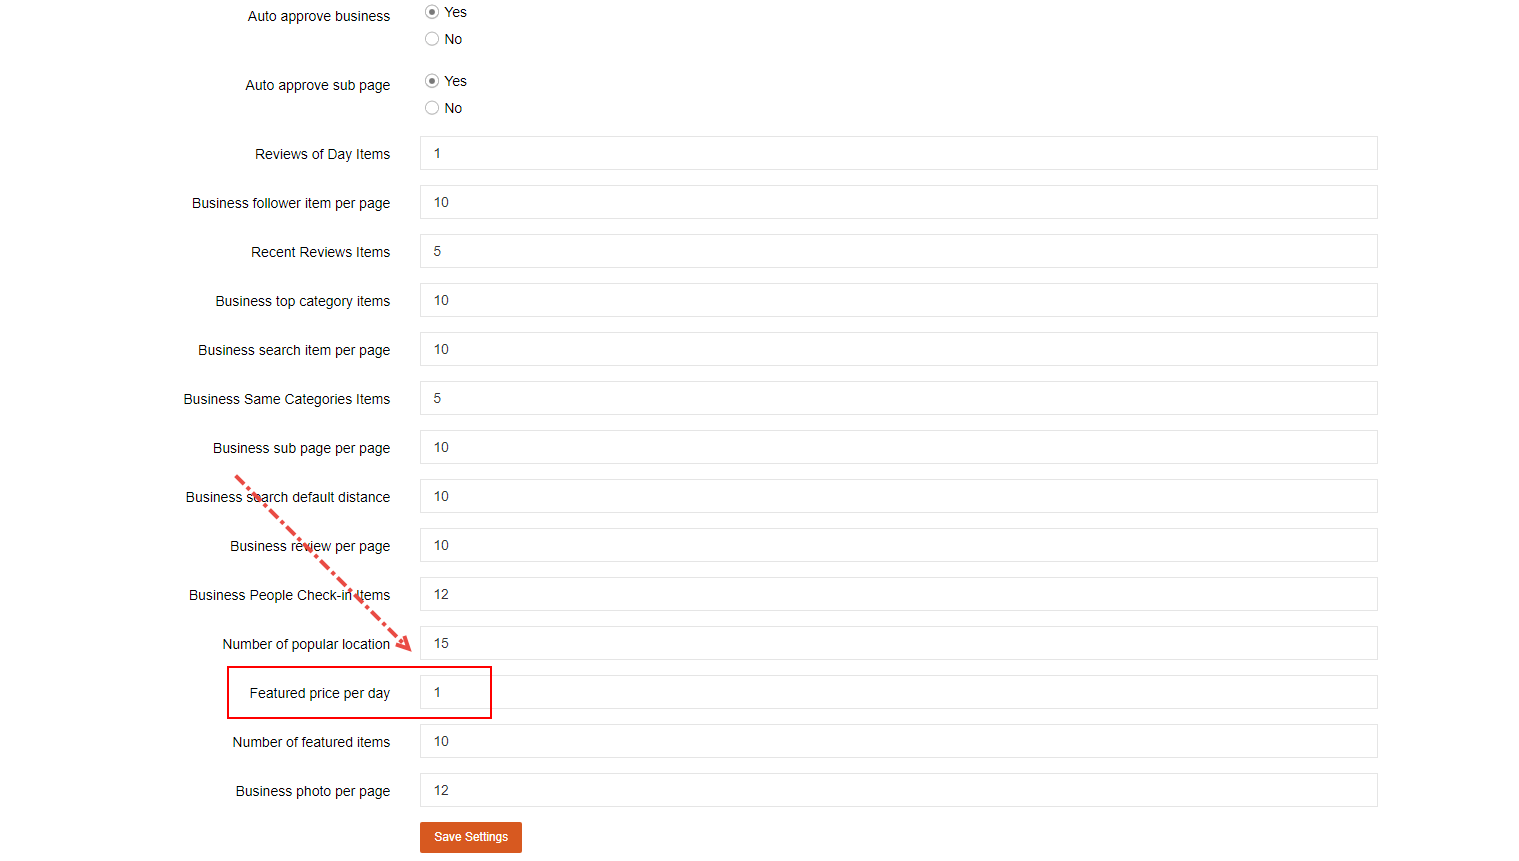
Feature business
 – Admin directs to Plugin Manager/ Business/ Business Settings –> sroll down and enter featured price per day

bussinesspackage

 – To feature business, edit business –> click on on Feature my business –> click on Feature it now

bussinesspackage1

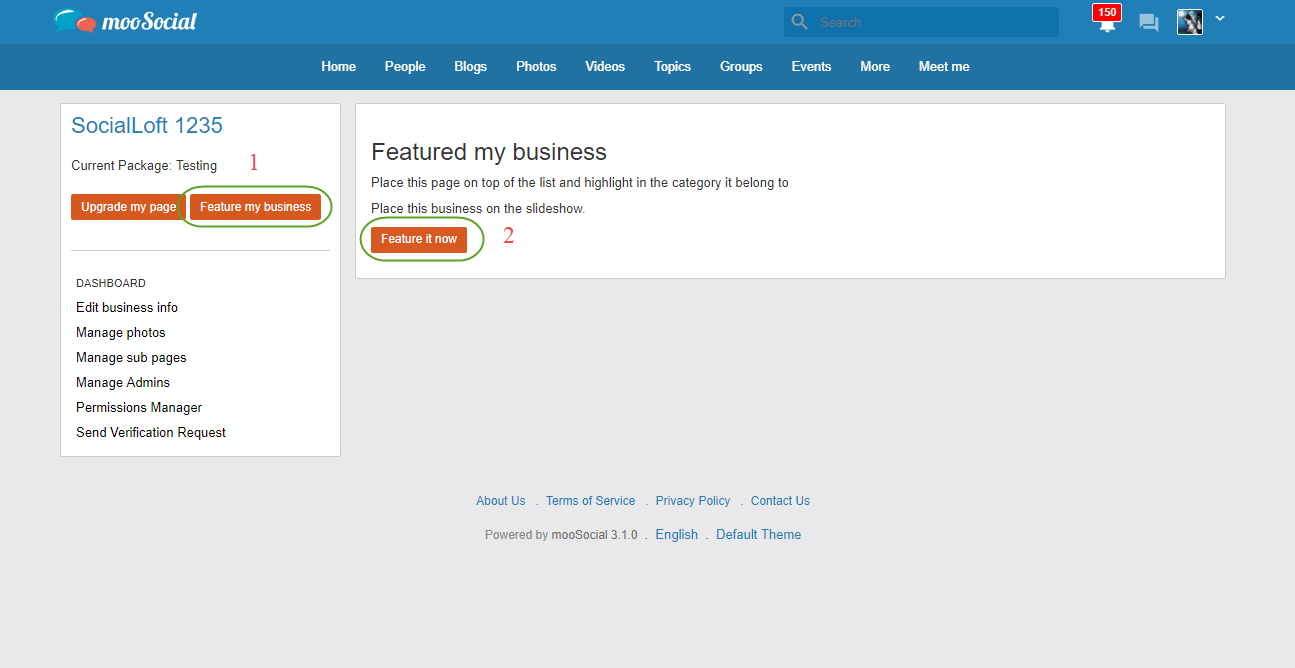
 After click on Feature it now button, it show like this

bussinesspackage2


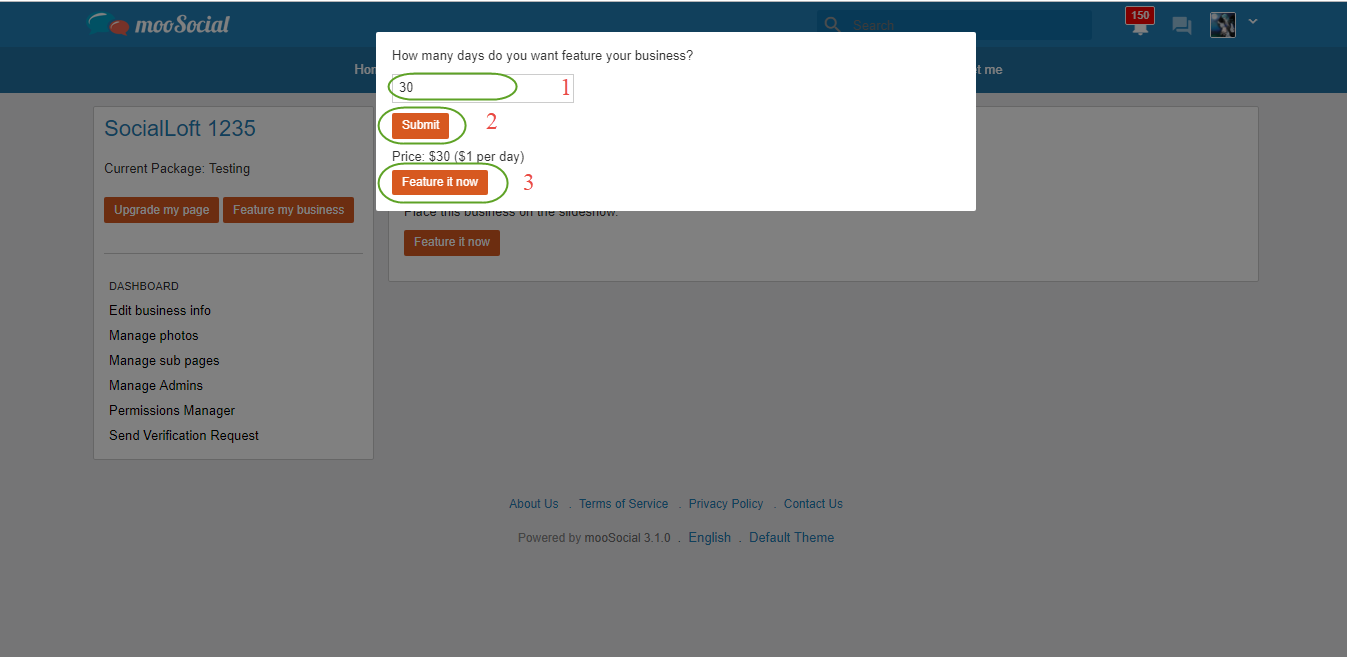
#1: Enter days you want to feature your business

#2: Click on Submit button

#3: Click on Feature it now

How to Change/Modify Landing Page via Landing Page plugin

After install plugin, please go to,http://yoursite.com/admin/landing_manager/landing_manager_settings At Setting page, You will see 2 options :

Option 1: Static HTML Page

This option allows using a static HTML page to be your new Landing Page of Moosocial Site.

You can copy image, CSS, and jquery from elsewhere and make it becomes your style.

It also allows you add a link from your landing page your current Moosocial site such as Login page, Sign up page, privacy, terms…

You need to know a little Front-End develop skills to use this option or you can follow our simple instruction here:

1. Copy your HTML, CSS, IMAGE.

Access source via FTP or Cpanel

Modify your HTML page in.app\app\Plugin\LandingManager\View\Elements\static\index.ctp Note: You can not change the name in a file, must use ‘index’

Next, Replace your CSS file app\webroot\landing_manager\static\css This CSS file contains all of your new landing page CSS. You also can add another CSS file and can declare it by below instruction.

Your jquery file can be stored app\webroot\landing_manager\static\js

And finally, Landing Page Image will be stored in app\webroot\landing_manager\static\img

Now we can move on to declare those files you already added above in step 2

2. How to use CSS and IMAGE from a static page.

Our Moosocial core use $this->request->webroot to call file form app\webroot so we will use it like :

<link rel="stylesheet" href="<?php echo $this->request->webroot ?>landing_manager/static/css/yourname.css">

The same for JS file.

<script src="<?php echo $this->request->webroot ?>landing_manager/static/js/yourname.js">

and for the image.

<img src="<?php echo $this->request->webroot ?>landing_manager/static/img/yourname.png">

You can place those code in your tag and <head> now your landing page is ready.

Option 2: Custom Block Style

This option is ‘key factor’ of this plugin that contains some available block from our core widget such as popular topics, popular blogs, upcoming events, login, signup, … with some style has been applied.

Also, we added some new block: Features, testimonial, display location MAP …  Users can easily DRAG – DROP block position, disabled any block that not necessary for your site.

We also support up to 4 HTML blocks so you can add Ads, sponsor or something else and you can place it “multi-time” on your landing page.

We already add a block called “Feature block”, that help you easily show your site’s feature.

And our most favorite block is Testimonial Block, You can show your user feedback that and especially your location map.

With block list selected, you can move on to modify block to create your own style, we support change background, color, font size also change the main text ( translation language), and some setting that makes your block work smoothly

And we also add demo block at bottom of setting page, so you can view directly what you already changed before saving.


To change url at landing page’s footer section, please change direclty at ….app\Plugin\LandingManager\View\Elements\block\footer.ctp .

That’s all, you can view our demo here :

Demo View

Also join our community group to discuss, ask questions and help us improve this plugin.

How to Create Ad Placements

Ad Placements are “reserved” ad spaces defined by Site Admins to displays campaign generated ads. This tutorial demonstrates how ad placements are created and then be positioned on any pages using Layout Editor.

Step 1: Go to: Admin Dashboard -> Plugins Manager -> Ads -> Manage Placements.

Step 2: Click “Create Placement” button.

Ads 01

Step 3: Fill in all required fields

#1. Select Placement type: Html, Image or Feed.

#2. Enter Placement name

#3. Enter Description

#4. Enter Dimension: Width & Height

#5. Enter Price and Days

#6. Enter Ads appears: a Maximum number of ads can be placed in this placement.

#7. Enter Number of ads:  Number of ads could appear at the same time in this placement.

#8. Enable/Disable this placement.

#9. Select sample position:  This is just a preview “example” position where the placement would be in relative to different sectors of your site. It will be shown to users as an example when they chose this place for their campaigns. To establish actual “reserved” ad spaces, you will need to drag and drop this placement in Layout Editor after it is created.

#10. Click “Save” button to create placement.

ads 02


After successfully created:

ads 03

Step 4: Go to: Admin Dashboard -> Site Manager -> Themes Manager -> Layout Editor.

Step 5: Choose a page you would like to add an ad placement.

ads 04

Step 6: Drag and Drop Ads widget into selected page.

ads 05

Step 7: Fill in all required fields on pop-up:

#1. Enter the new title or use the default name.

#2. Select placement.

#3. Enable/Disable title.

#4. Check/uncheck Background Block.

#5. Choose User Group Access

#6. – Click “Save changes” button

ads 06

Step 8: Click “Save changes” to save changes.

ads 07

To test, create a campaign with recent placement

– Method 1: Go to Admin Dashboard -> Plugins Manager -> Ads -> Manage Ad Campaigns, click “Create Campaign”

– Method 2: Create a campaign on front-end by going to a page with ad placement and click “See your ad here”

ads 08

Enjoy it!

How to publish campaigns

Before creating a campaign, make sure placement already existing.

This tutorial wild show you how to create campaign.


1. How to create ads?


Method 1: Backend.

Step 1: Go to: Admin Dashboard -> Plugins Manager -> Ads -> Manage Ad Campaigns.

Step 2: Click “Create Campaign” button.

Ads


Step 3: Create Campaign

Ads_campaign


Client Info:

#1. Enter Client Name.

#2. Enter Email.

#3. Enter Note (option).


Campaign:

#4. Enter Campaign Name

#5. Select placement (Click “View all” to view all Placements information before select)


Placement info:

Ads_campaign_1


#6. Duration: Select the number of days to run the ad.

#7. Show the total amount to be paid and the ad end date, the value will auto calculate base on selected placement and Duration. This is read-only, can’t change.

Ads_campaign-2


Banner:

Ads_campaign-3


#8. Enter Ads Title: This field will appears if selected position placement is HTML or Feed.

#9. Upload Banner Image: allow extensions: jpg, jpeg, png, gif.

#10. Enter banner link on the textbox.

#11. Enter Description: This field will appears if selected position placement is HTML or Feed.

+ Click preview to view ads.

Audience (option)

#12. Enter age can view ads.

#13. Choose gender can view ads.

#14. Click “Save” button to a created campaign.


After successfully created:

Ads_campaign-4


Method 2: Front-end.

Step 1: Click “See your ad here” title link or “Advertise with us” at footer

Ads_campaign-5


or

Ads_campaign_0

Step 2: Fill all required fields

#1 –> # 14: Enter on fields same as method 1

Ads_campaign-6

After successfully created:

Ads_campaign-7

  1. How to publish campaigns in the frontend

Method 1: Admin active directly

Step 1: Go to: Admin Dashboard -> Plugins Manager -> Ads -> manage Ad Campaigns

Step 2: Select “Active

Ads_campaign-8


After active campaign:

(1) Start date: changed to at the time of activation

(2) End date: auto-fill based on a duration of the selected placement and start date

(3) Payment status changed to “Yes

(4) Status changed to “Active

Ads_campaign-9


– After activated, you will receive an email with content below:

Ads_campaign-10


Step 3: Click on a link in this email, will direct to report campaign page.

Step 4: You need to choose the time, and click “Search” button to view your report:

Ads_campaign-11


Step 5: Go to the site and view your ad at the website:

Ads_campaign-12


Method 2: Send the payment request

– Go to: Admin Dashboard -> Plugins Manager -> Ads -> Manage Ad Campaigns

–  Click on the select box and choose “Send payment request”

Ads_campaign-13


– After then campaign’s owner will receive an email with content below:

Ads_campaign-10


Step 1: Click on a link –>  will direct to Gateways page to make a payment.

After completed your payment

Ads_campaign-15


– Campaign show in backend same as method 1

Ads_campaign-9


(1) Start date: is the date you made payment

(2) End date: auto-fill based on a duration of the selected placement and start date

(3) Payment status changed to “Yes

(4) Status changed to “Active

– After make payment, the campaign’s owner will receive an email with content below:

Ads_1


Step 2: Click on a link in this email to view your campaign report.

You can change “from” and “to” to view.

Detail campaign report has content below:

Ads_campaign-11


The sample for ads on site:

Ads_campaign-16