In this article, I will show you how you can quickly config the Facebook and Twitter application integration for the Social Publisher plugin.
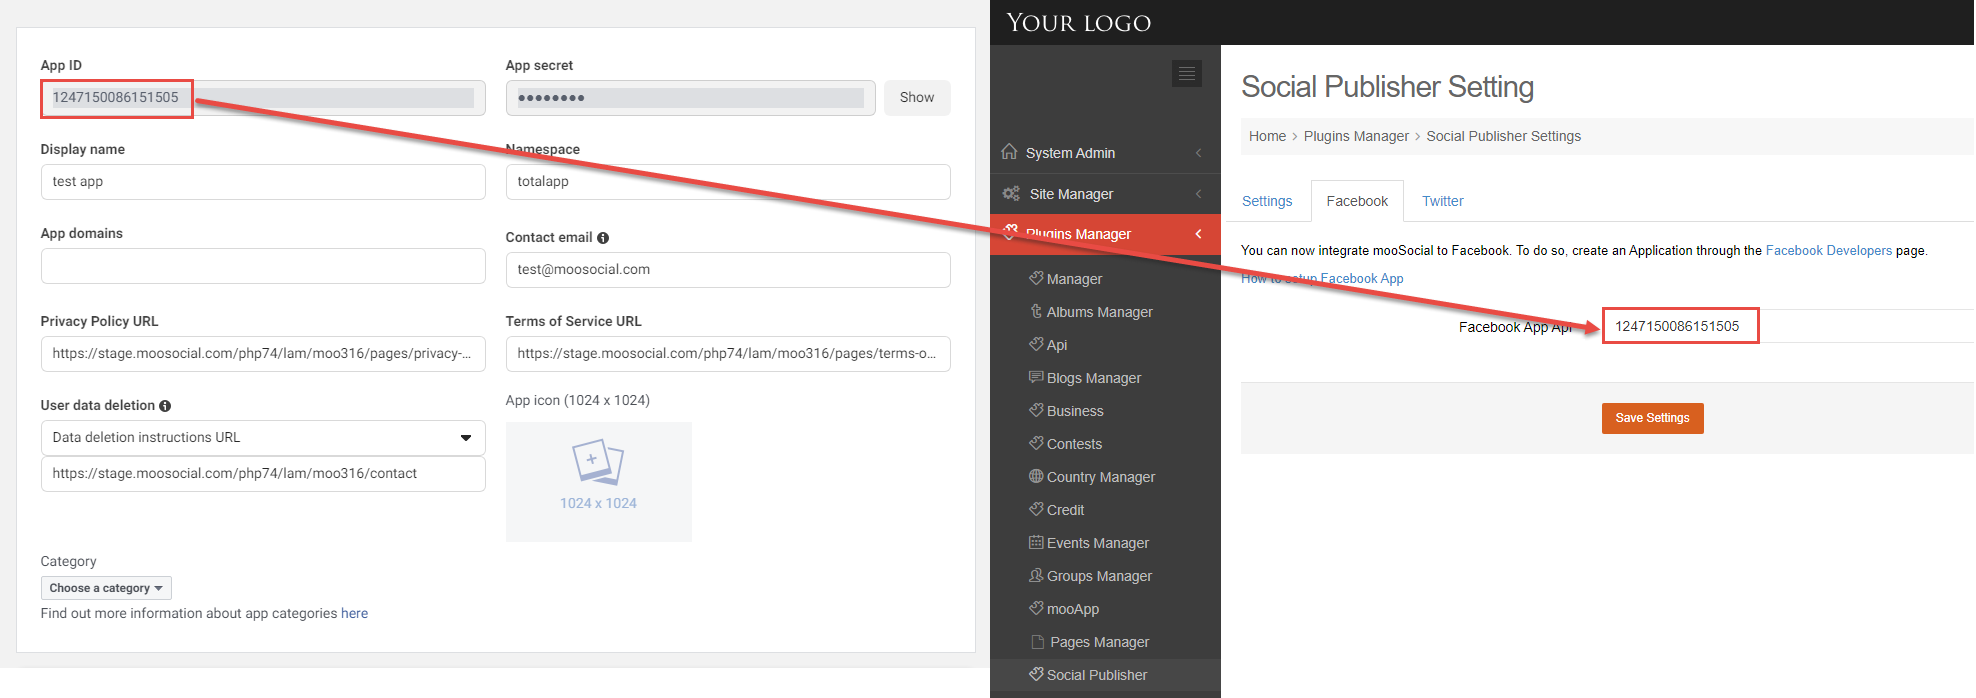
CONFIG FACEBOOK APP
1. Config the Facebook app and get App ID: please refer to the Facebook App Integration tutorial
2. After config Facebook app, return to your site and go to Admin Dashboard => Plugins Manager => Social Publisher.
3. Open Facebook tab => Paste App ID to Facebook App Api field => Save Settings.
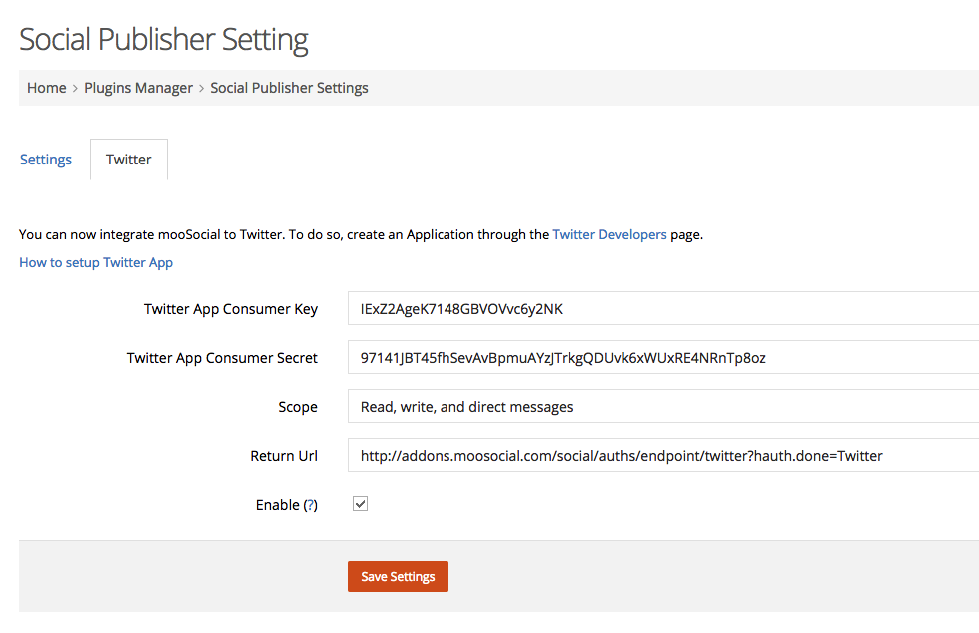
CONFIG TWITTER APP
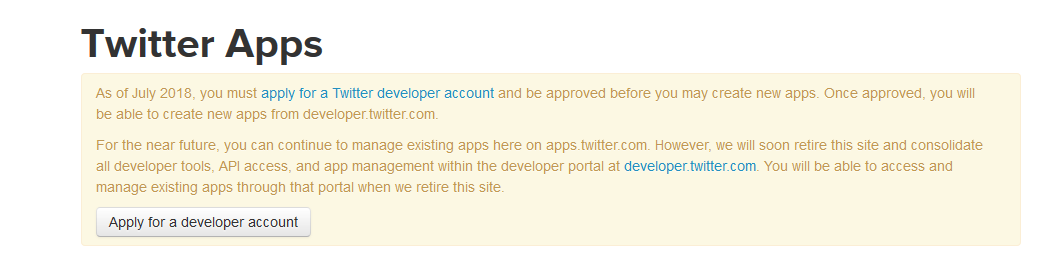
1. Go to https://developer.twitter.com/en/apps and login your Twitter developer account.
Note: if your account is not a developer account, you will get a message requesting “Apply for a developer account”, please click “Apply for a developer account” and follow all steps to apply developer account.
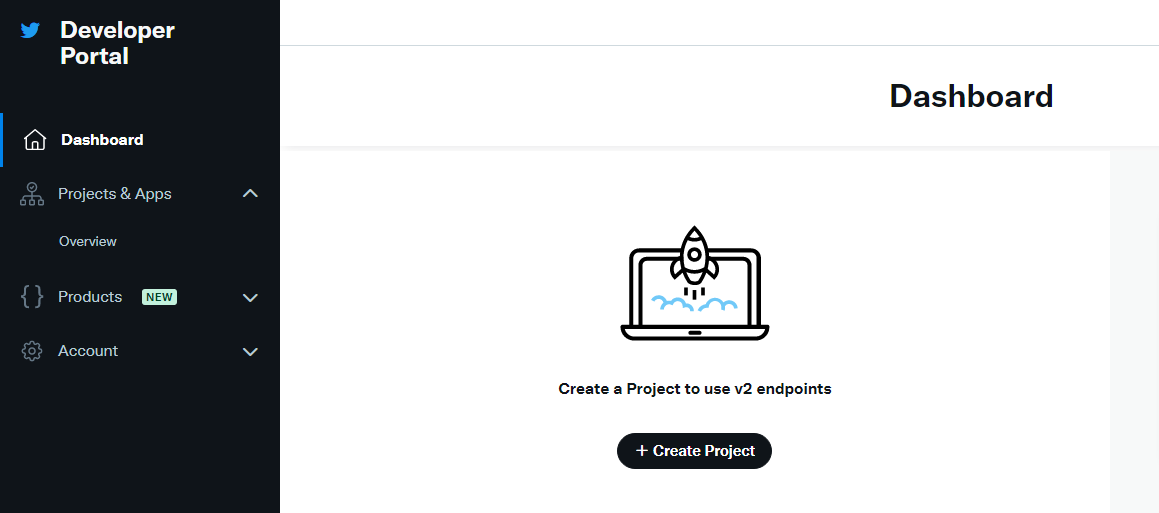
2. At Dashboard tab, click on Create Project button:
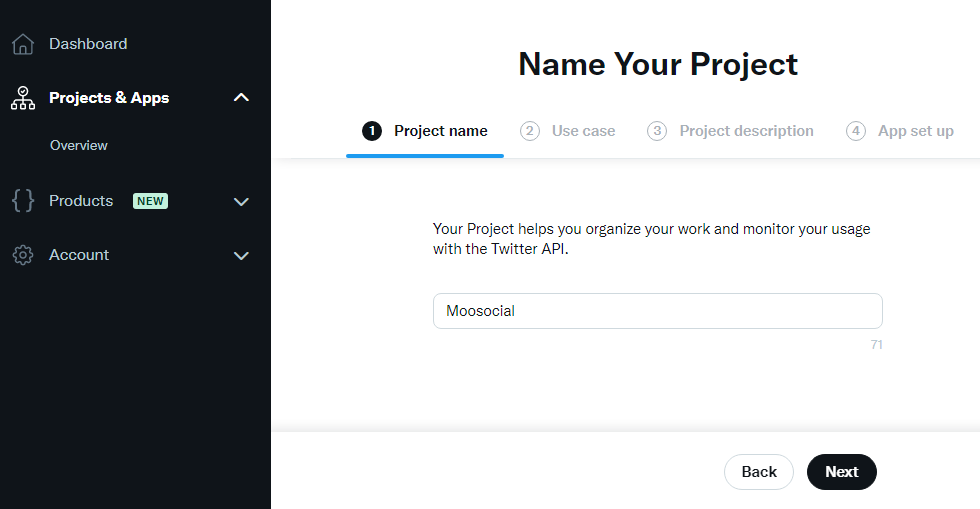
3. At Projects & Apps tab, you must fill all your project information.
3.1 Enter Project name and click on Next button.
3.2. Select a Use case and click on Next button.

3.3. Enter Project description and click on Next button.

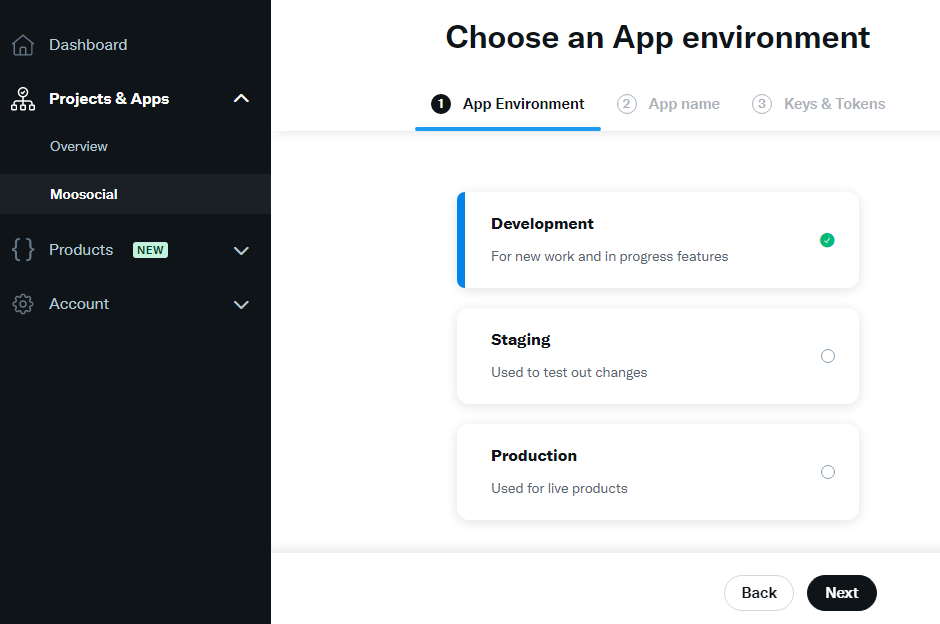
4. After create project successfully, you must fill all your application information.
4.1 Select your App environment and click on Next button.
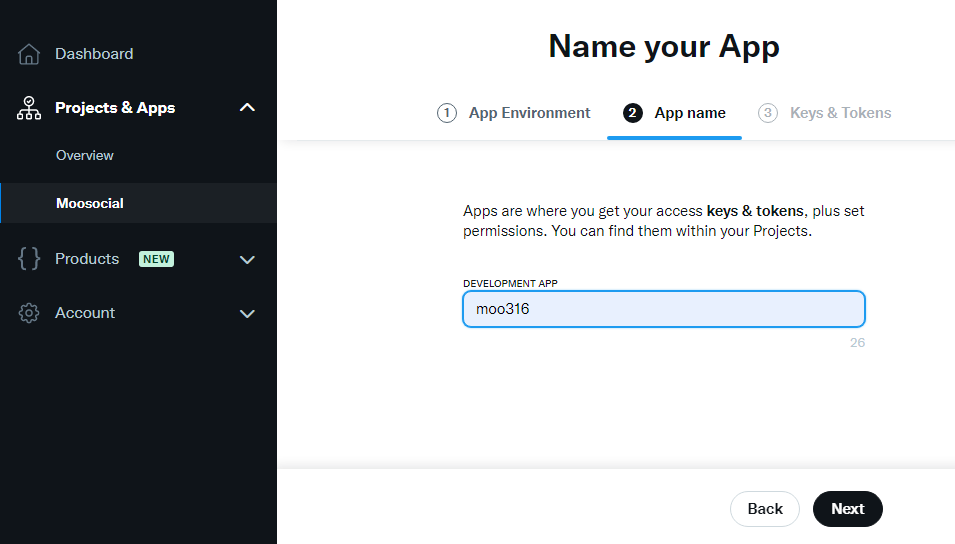
7. Enter your App name and click on Next button.
8. After creating the application successfully, you will see your keys and tokens. You must save API Key and API Key Secret for your own because they will not show again.
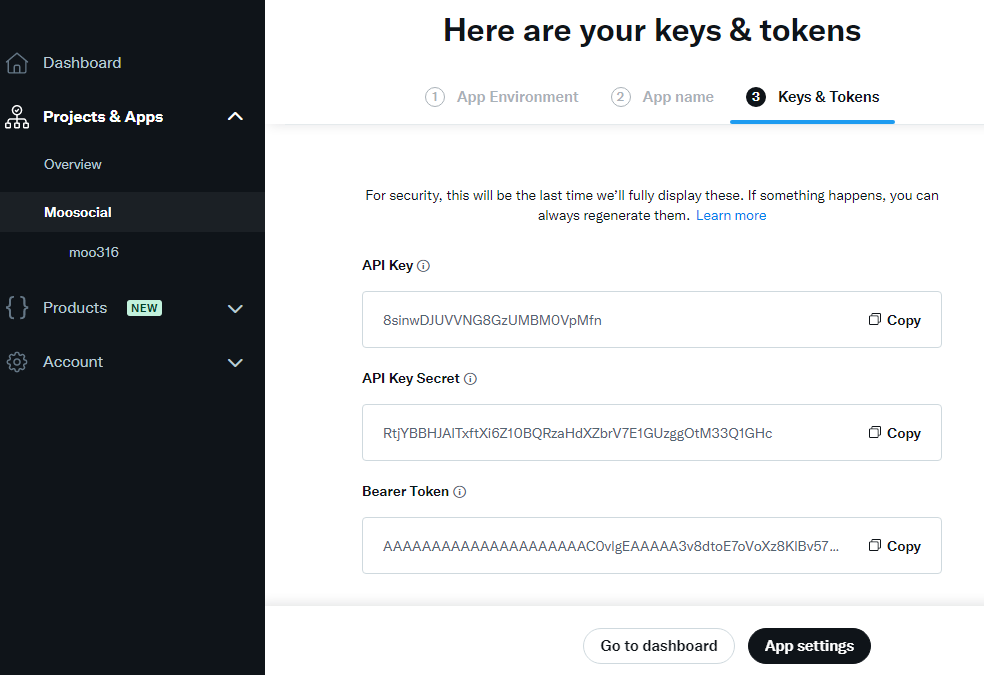
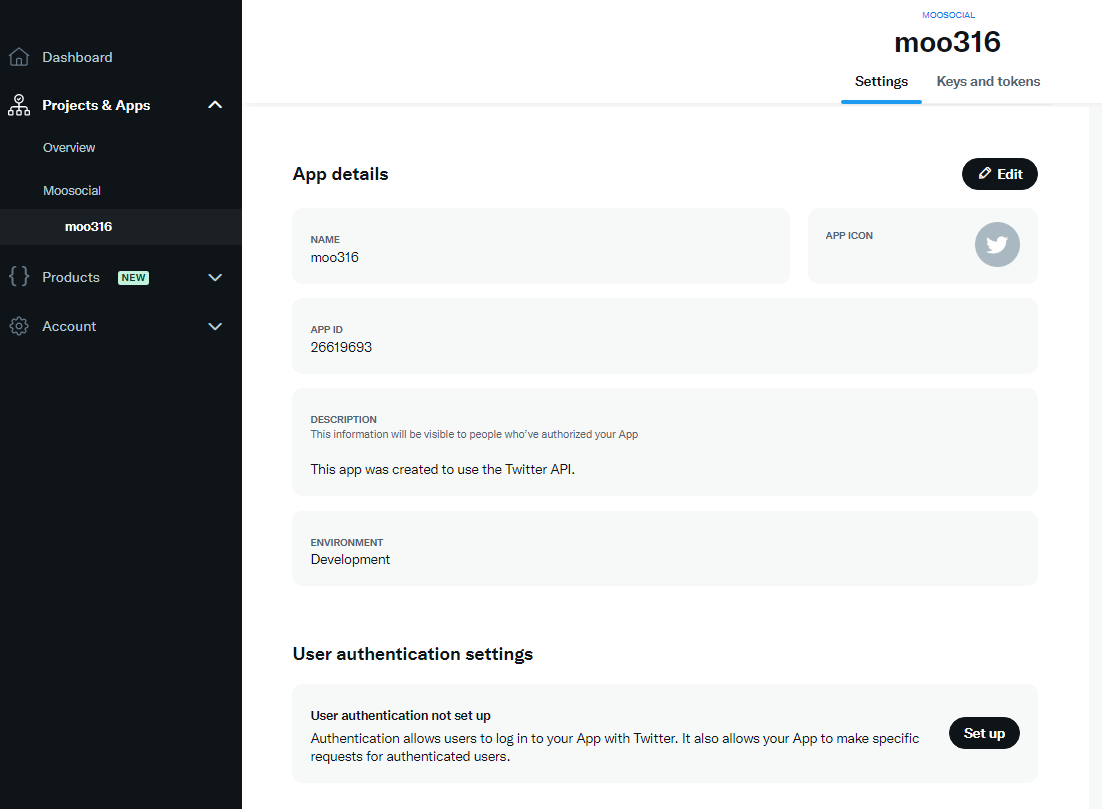
9. Click on App settings button.
10. At App settings page, click on Set up button.
11. You have to fill all your app settings.
11.1 App permission: select Read and write and Direct message.

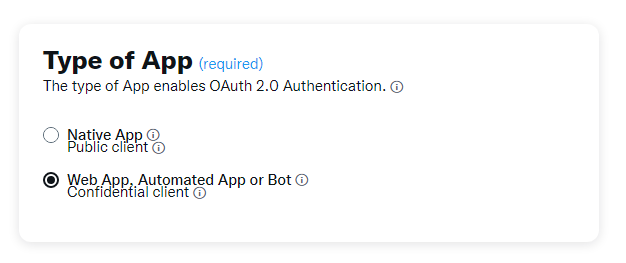
11.2. Type of App: select Web App, Automated App or Bot.
11.3 App info: enter app info and click on Save button.
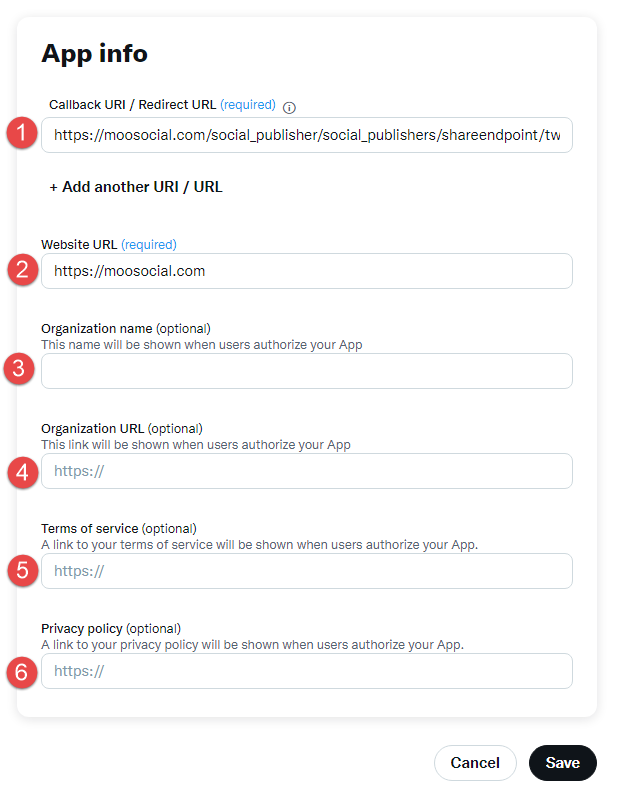
#1. Callback URl / Redirect URL:
enter [url your website]/social_publisher/social_publishers/shareendpoint/twitter
Example: https://moosocial.com/social_publisher/social_publishers/shareendpoint/twitter
#2. Website URL: enter your website URL.
#3. Organization name (optional): enter your organization name.
#4. Organization URL (optional): enter your organization URL.
#5. Terms of service (optional): enter your Terms of service URL.
#6: Privacy policy (optional): enter your Privacy policy URL.
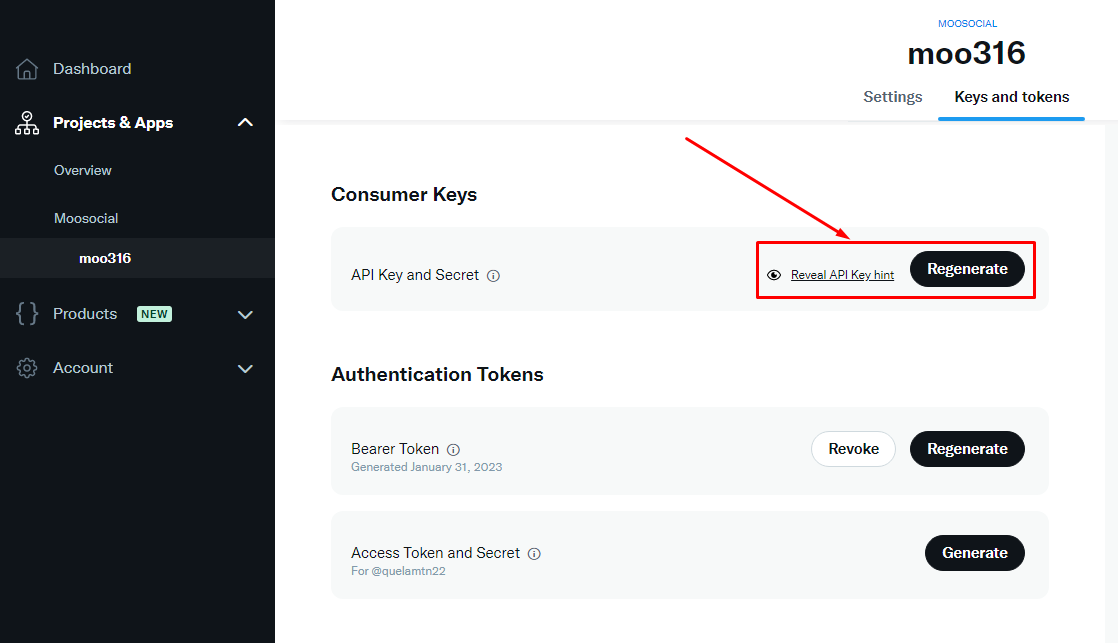
Note: In case you lose your API Key and API Key Secret, you can view the Reveal API Key hint or Regenerate it in the Keys and Tokens tab.
12. Return to your site, go to Admin Dashboard => Plugins Manager => Social Publisher.
13. Open the Twitter tab, and paste API Key to the Twitter App Consumer Key field and the API Key Secret to the Twitter App Consumer Secret field.

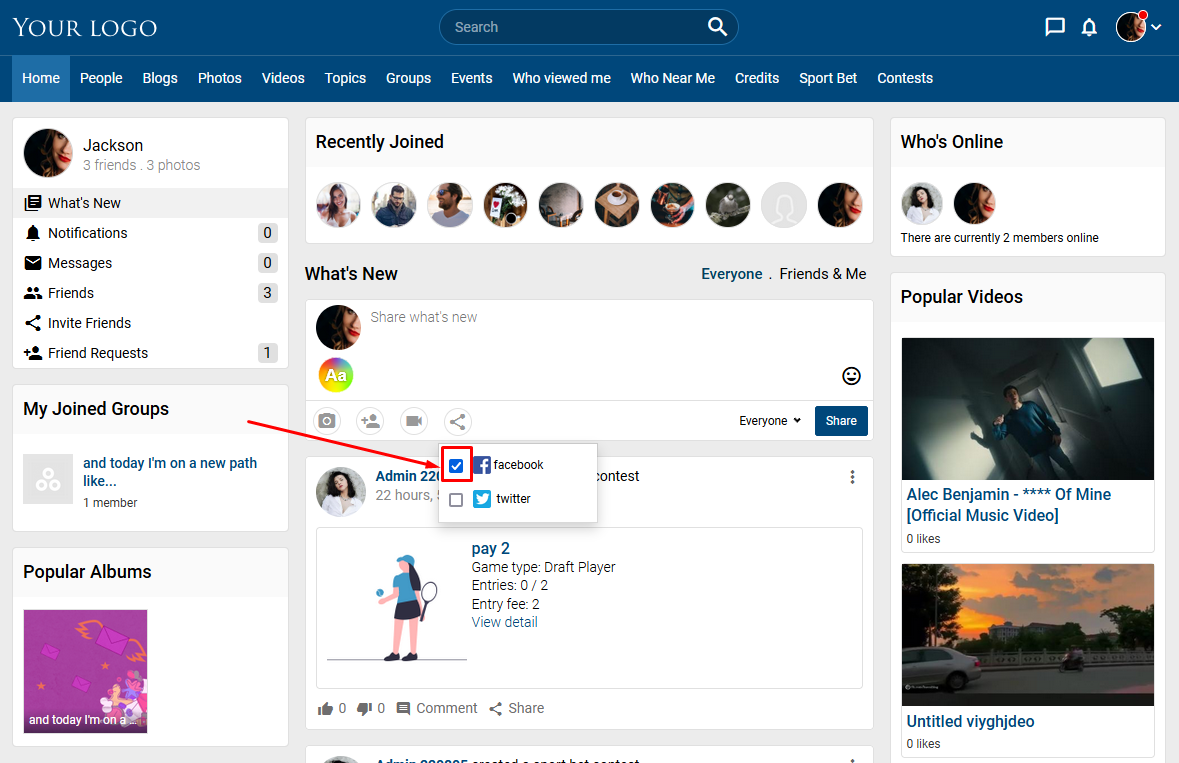
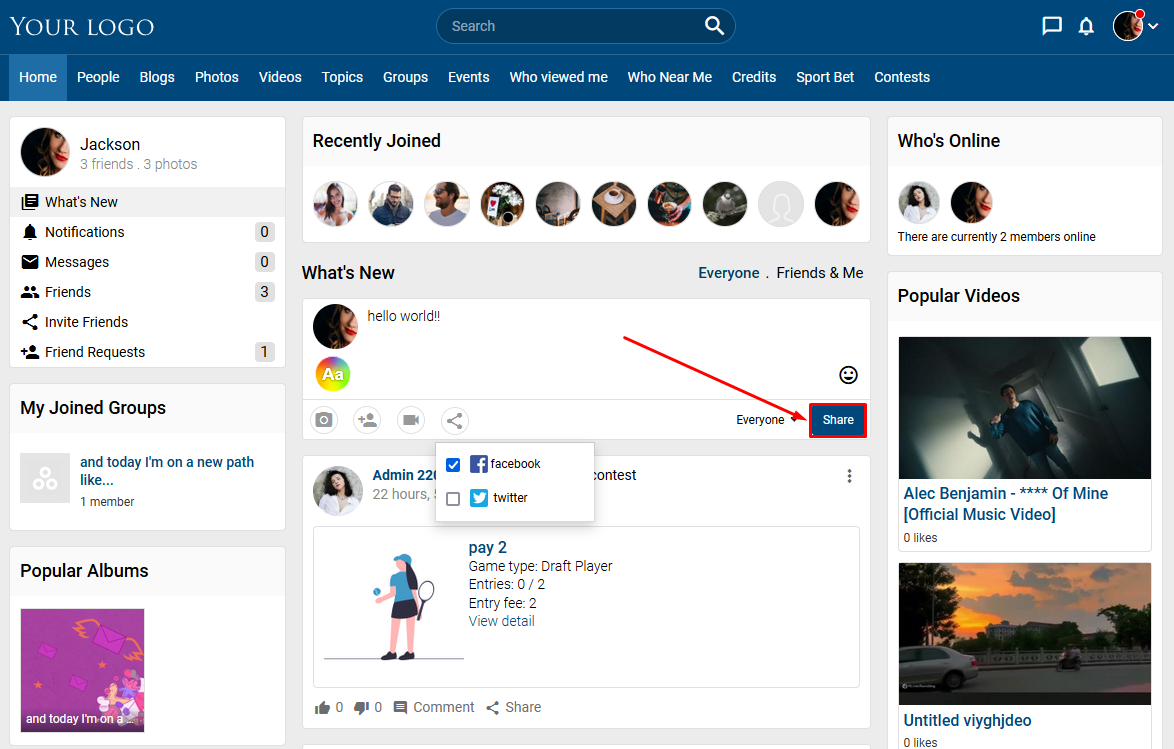
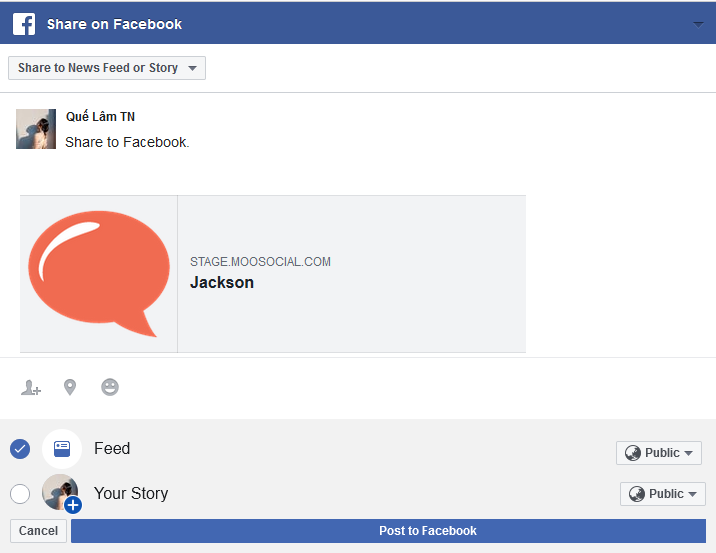
 Step 5. Enter caption and Post to Facebook.