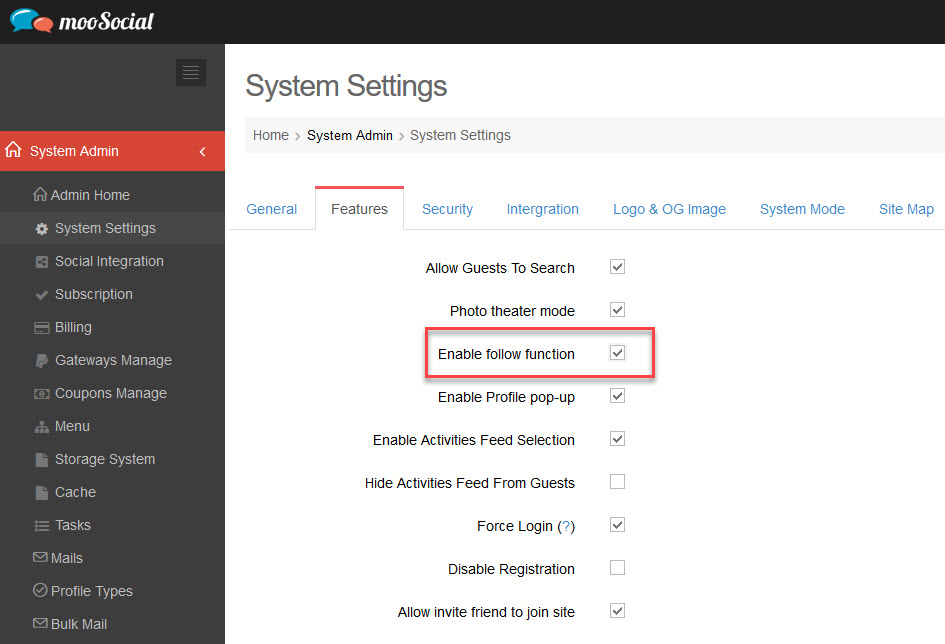
Access Admin Dashboard –> System Settings –> Features
Enable ‘Follow’ function by checking on ‘Enabble follow function’ checkbox. After enabling function, a new button call “Follow” will appear on member profile page. You can follow someone without adding friend to see update from him/her. If you’re friend with someone -> you will auto follow him/her
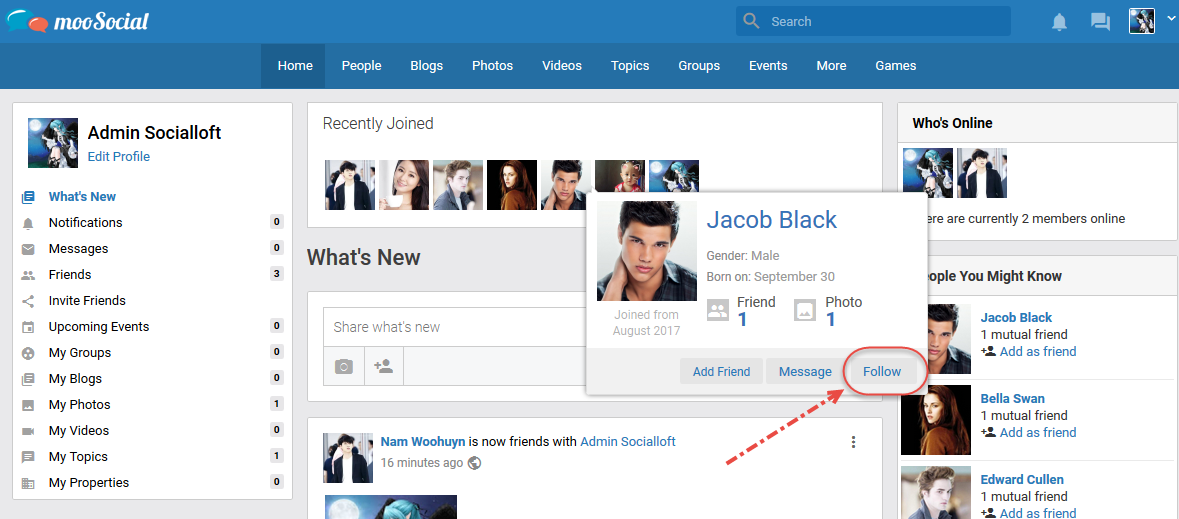
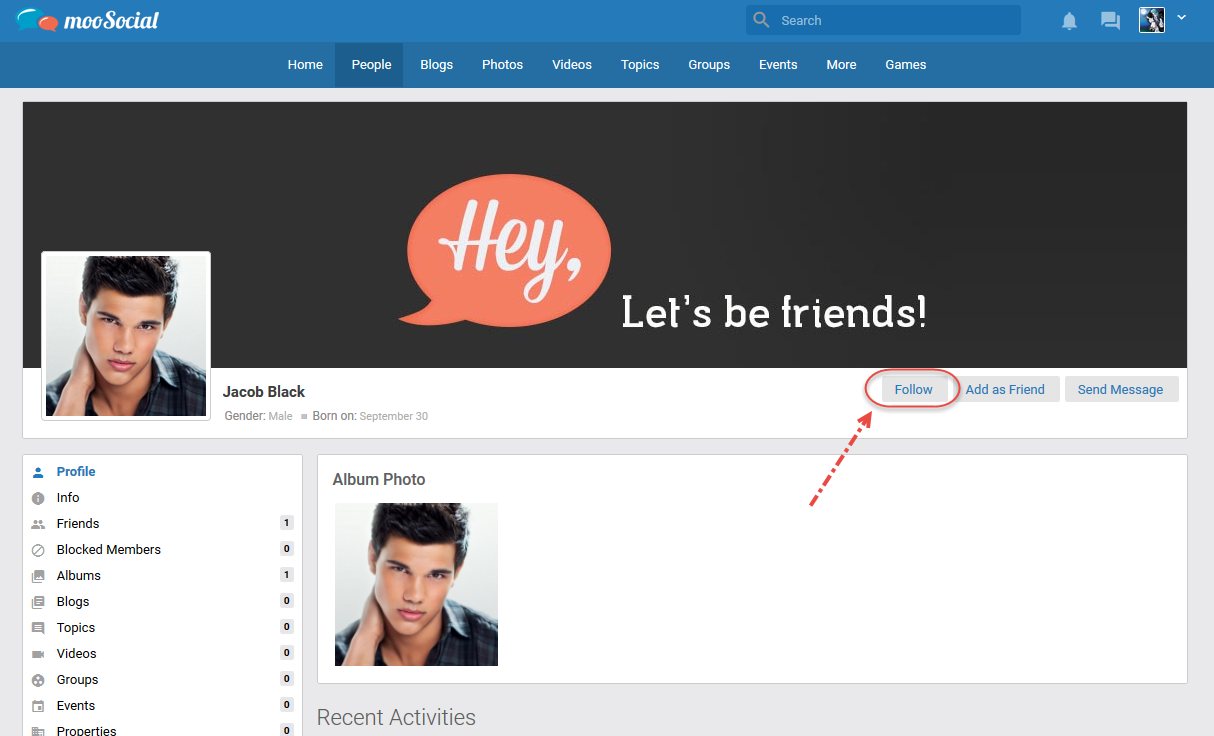
How to follow an user:
– Click on Follow button on Profile popup:
– Click on Follow button on User profile page:
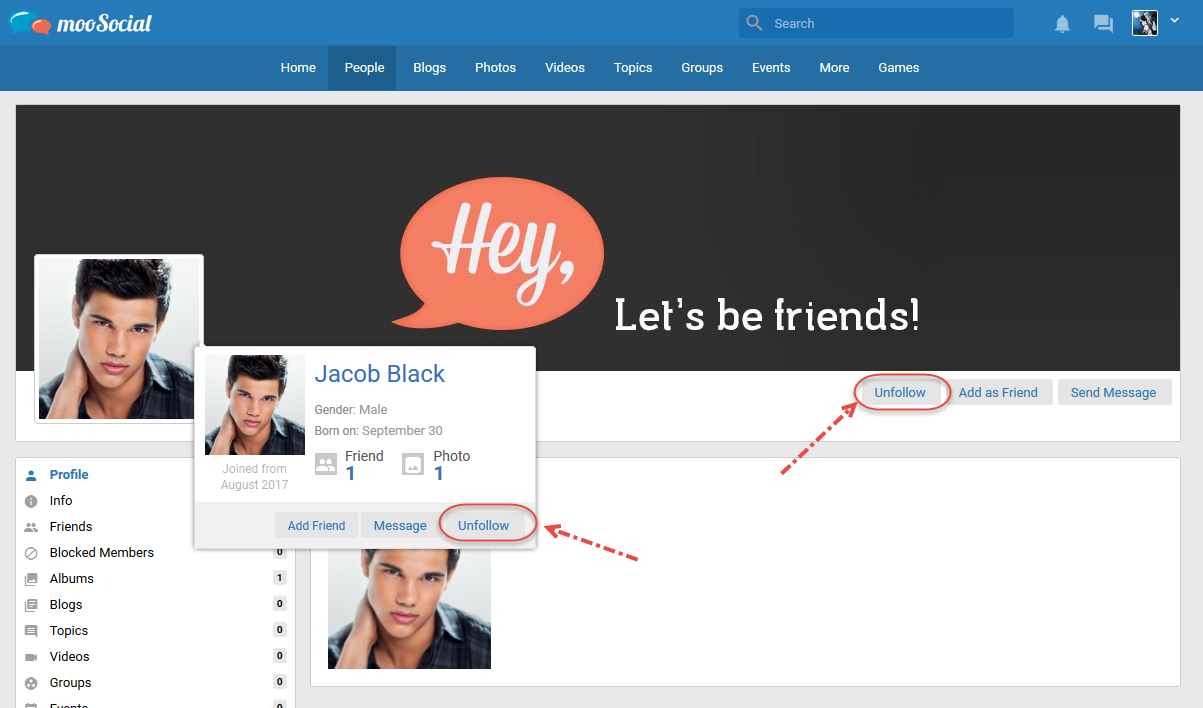
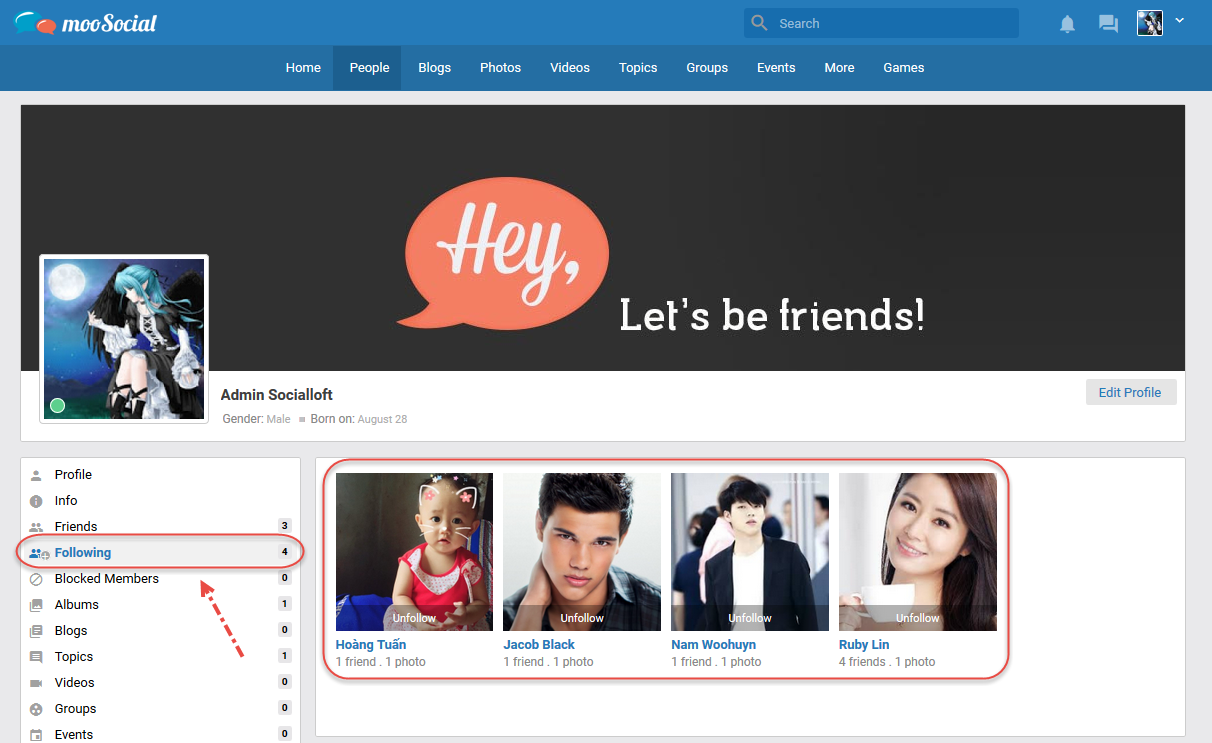
How to un-follow an user:
– Click on Unfollow button on Profile page OR Profile popup of the followed user.
– OR you can go to your profile page –> Following tab: choose user to un-follow
The un-followed users will be disappeared on Following tab
You should enable mail queue if a number of emails will send from your Niche Social Network site is over email sending limits of your hosting server. Here is how to configure:
1. Go to System admin -> Mails -> Mail settings tab -> Select “Yes, enable email queue” at Email Queue field.
2. Enter appropriate value into “Mail Count” field. Mail count is a number of emails will send out from your site every 1 minute (you can change this time interval by changing “Background Mailer” cronjob at System admin -> Tasks -> manage settings. If you’re not sure how to change it, please keep it default 1 minute. )
Ex: your hosting email sending limits per hour is 1500 emails (contact your hosting provider to know to get this number)
Number of emails can send max per minute will be: 1500/60 = 25 emails
–> Value for “Email count” will be 25 in this case.
Importance: if you enable email queue, email sending will be delayed as all emails will be added into queue first then send later.