Site Members can use the Shoutbox plugin to quickly leave lists of short messages on the website. Adding a shoutbox plugin will make your site more user-friendly and attractive, as well as increase the social network’s interactivity.
Follow the steps below to learn how to activate the shoutbox plugin.
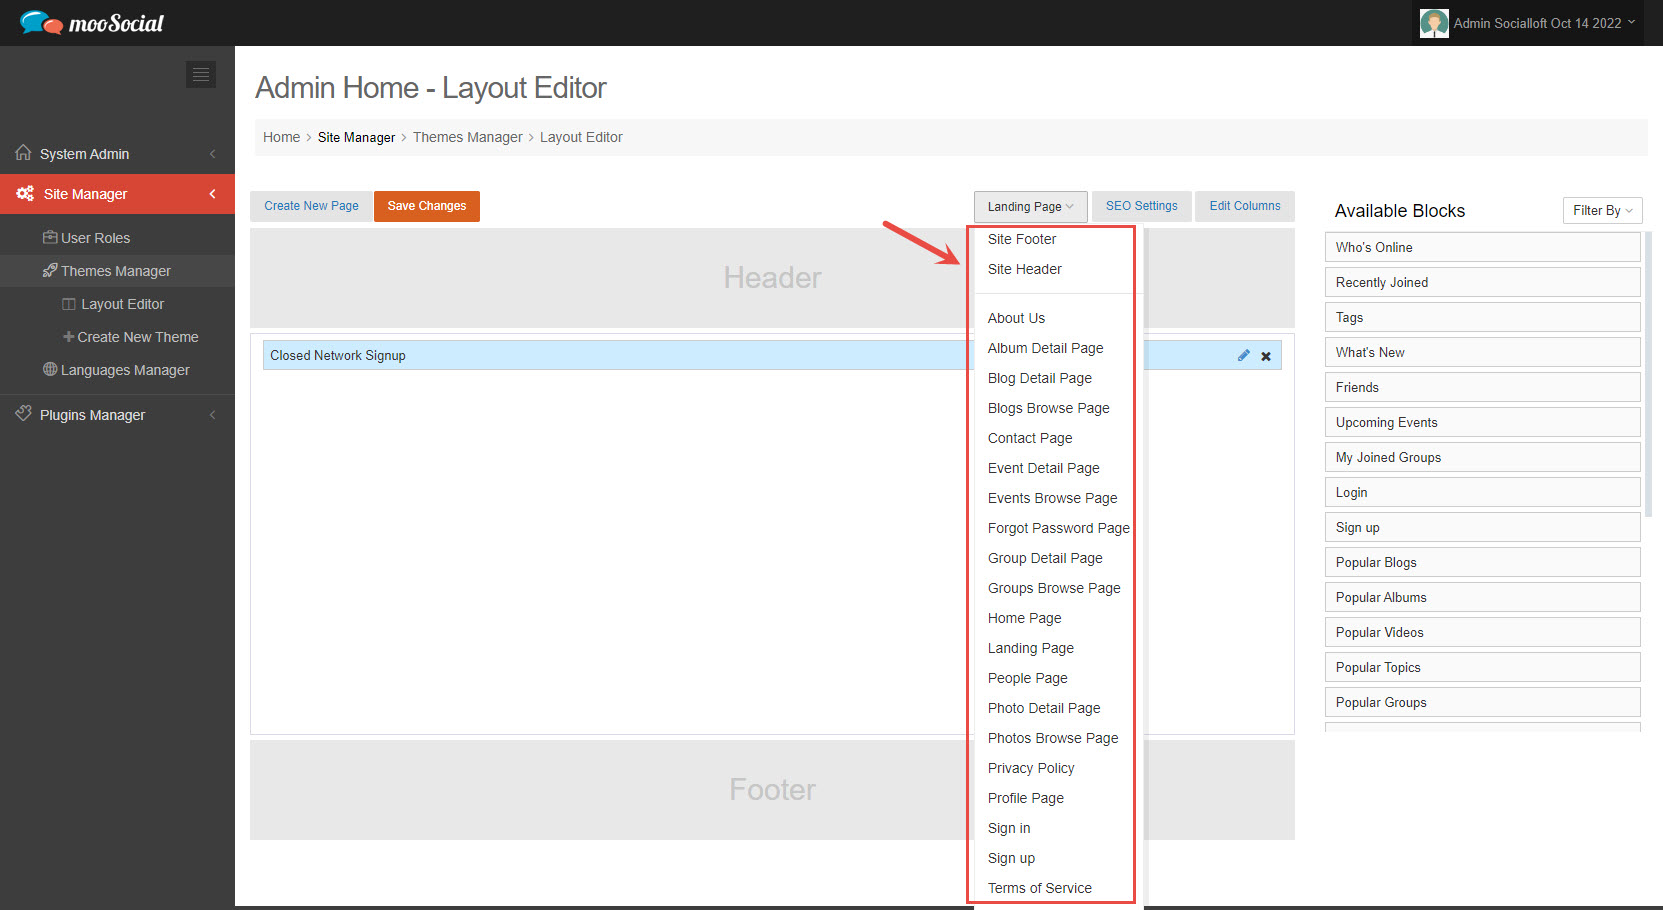
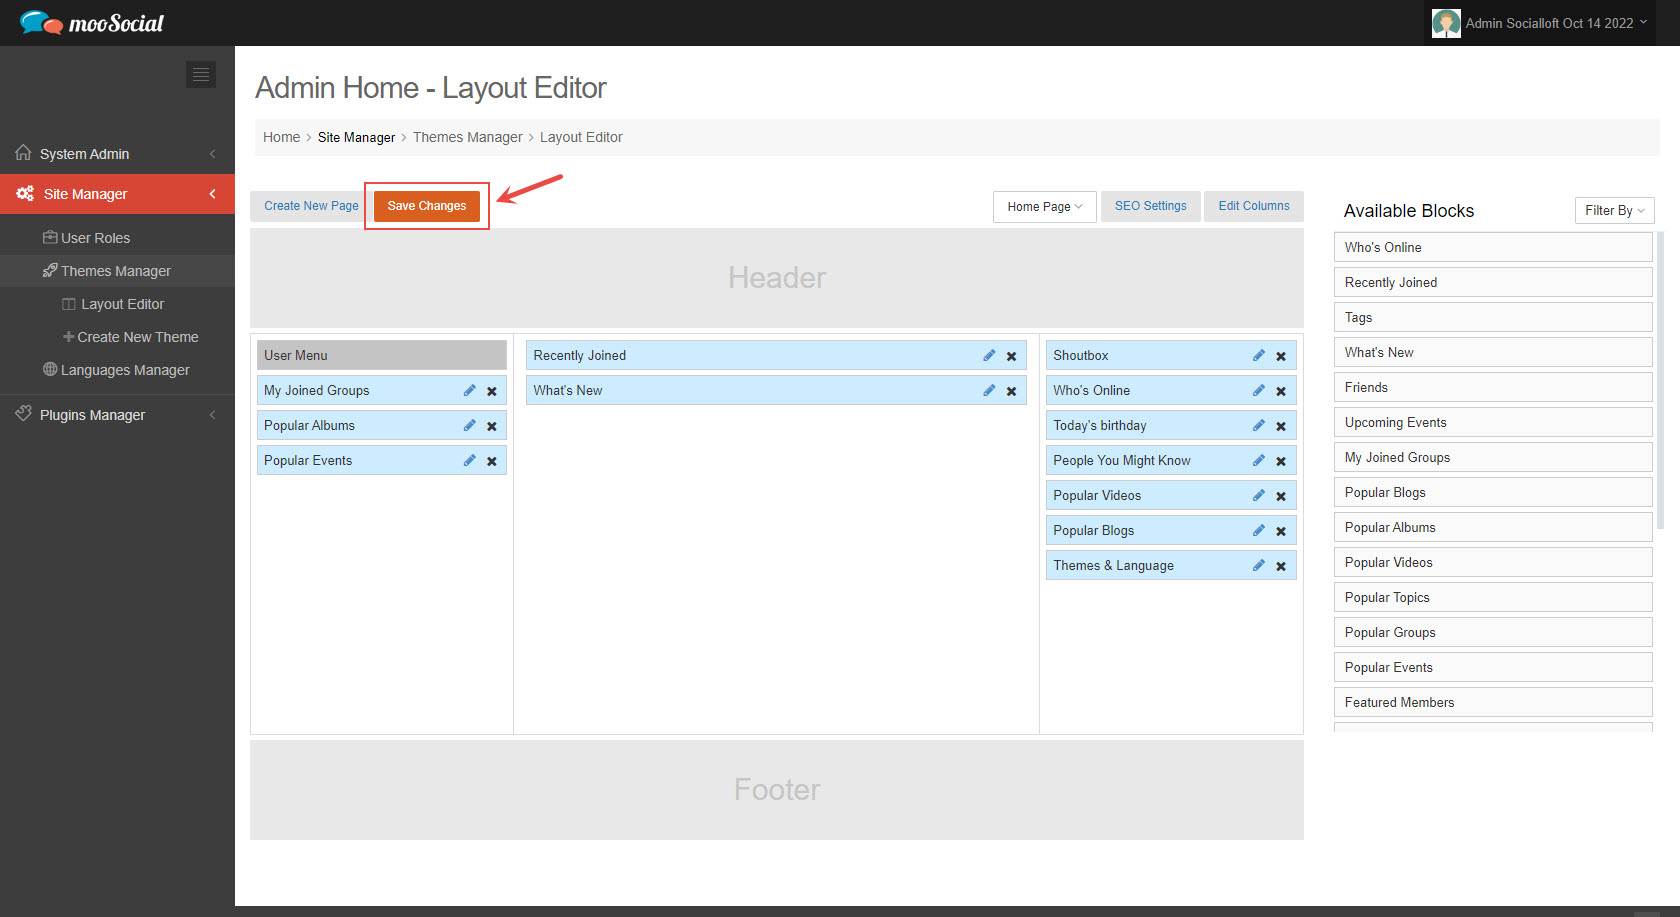
Step 1: Access to Admin Dashboard => Site Manager => Theme Manager => Layout Editor
Step 2: Select the page where you want the Shoutbox widget to appear. We’ll use the Home page in this article.
Step 3: Filter by Shoutbox plugin.
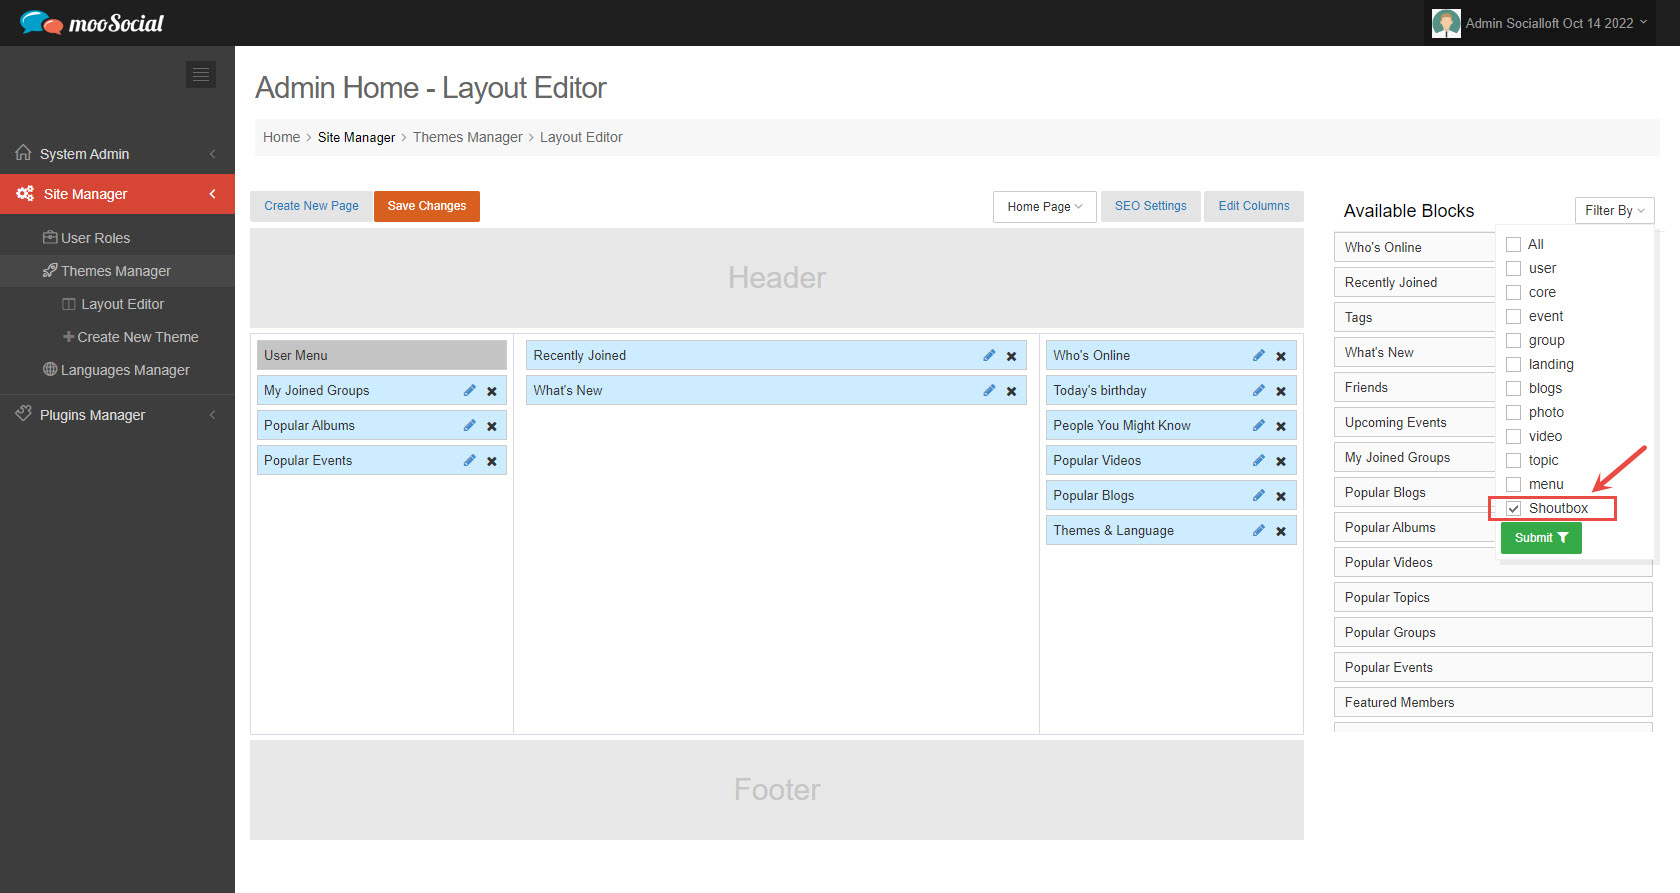
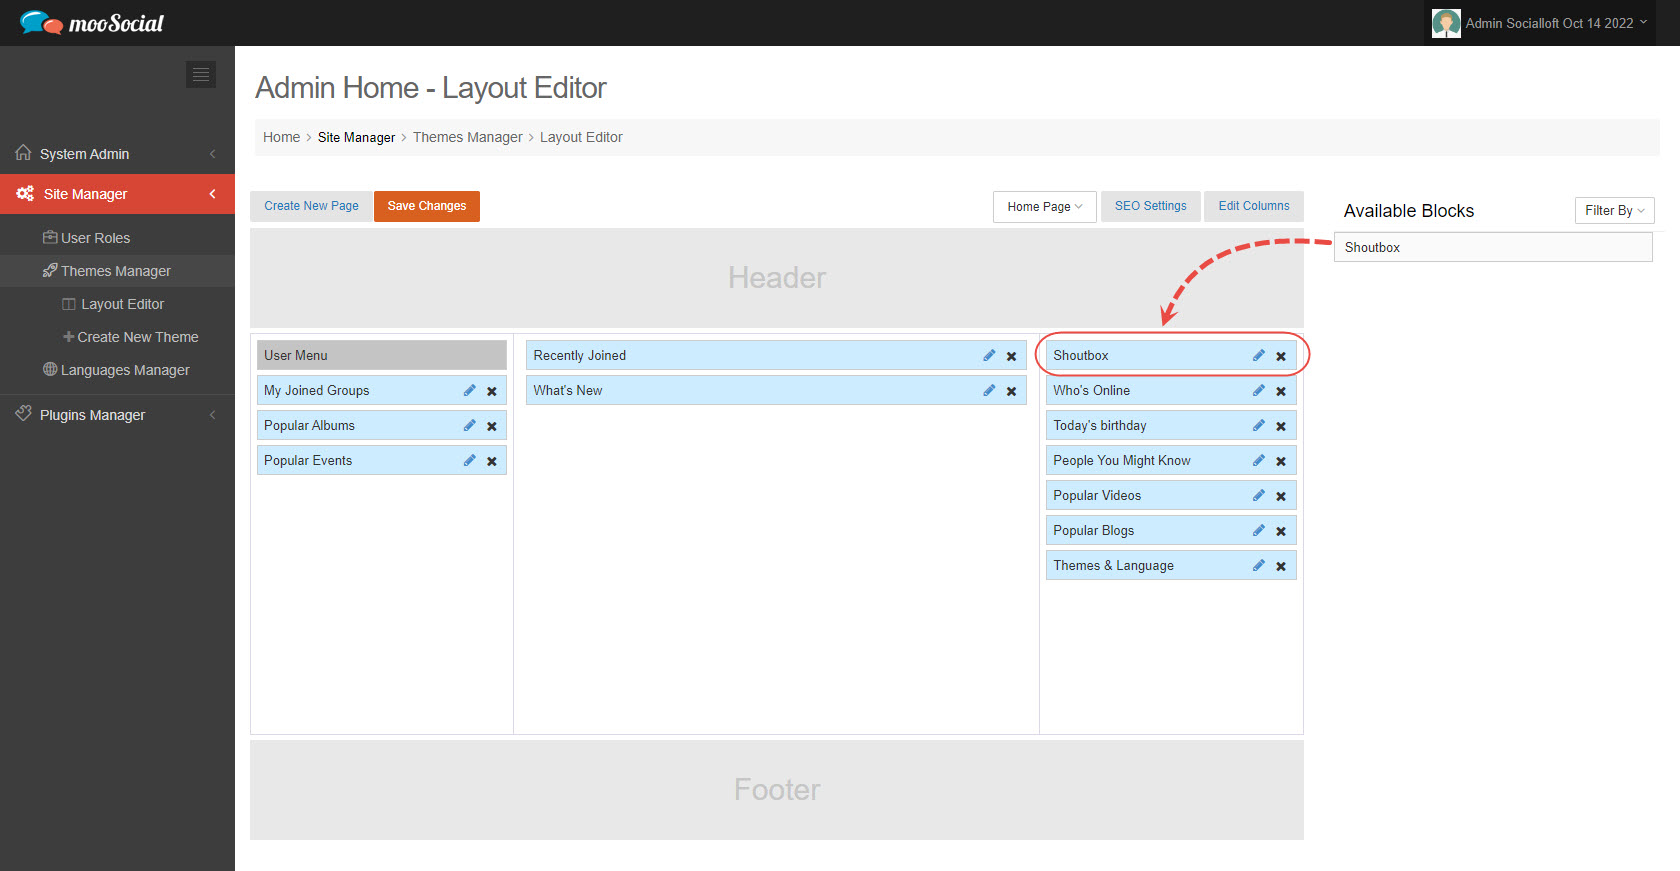
Then drag and drop the widget to Home Page.
Step 4: On the pop-up, fill in the components information.
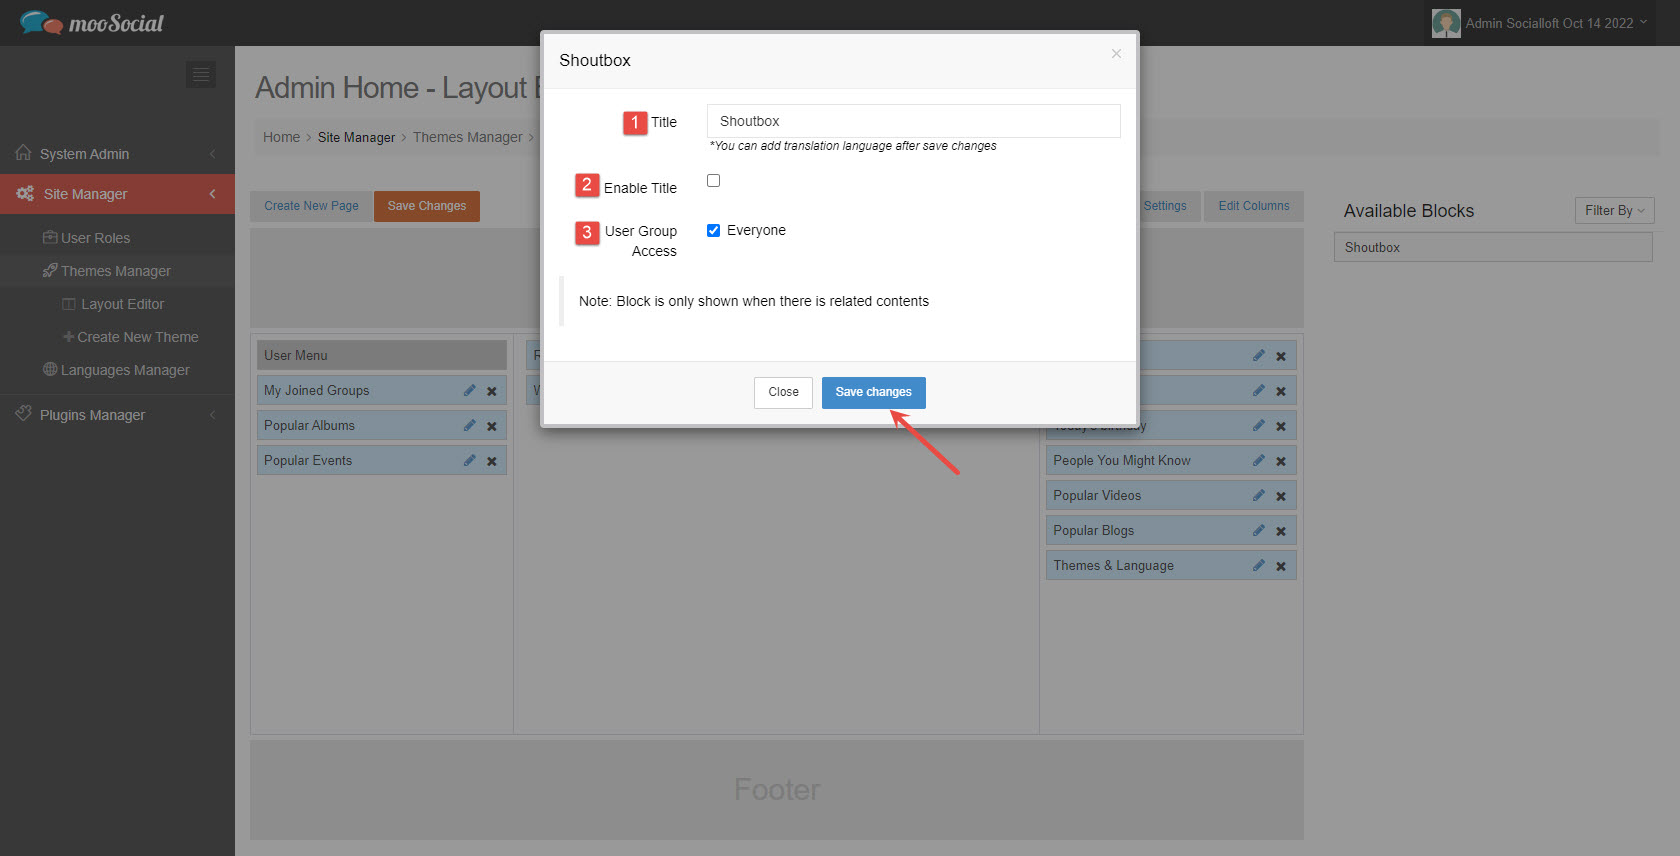
[1] Title: enter shoutbox widget title.
[2] Enable Title: enable or disable the shoutbox widget title.
[3] User Group Access: allow which User Roles can see the shoutbox widget.
After filling in all the information, click the Save Changes button.
Step 5: Save your changes by clicking the Save Changes button.
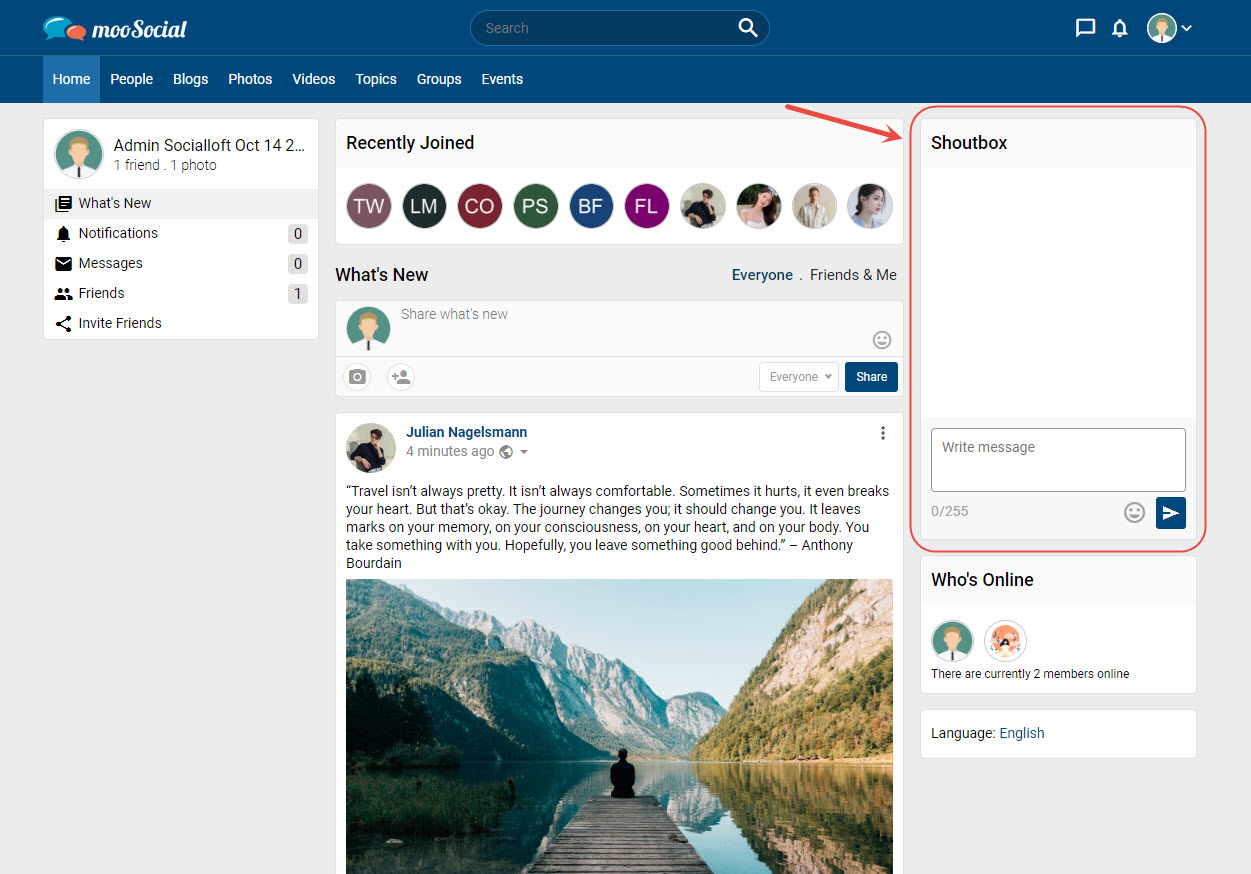
Step 6: (Front-end) The Shoutbox widget is now available on the Home page.