Documents need to be approved before visible on site. This article will show to you how admin do this process.
A. Please make sure Auto Approval When A Document Added setting is DISABLED.
Access to Admin Dashboard => Plugin Manager => Document => Setting tab.
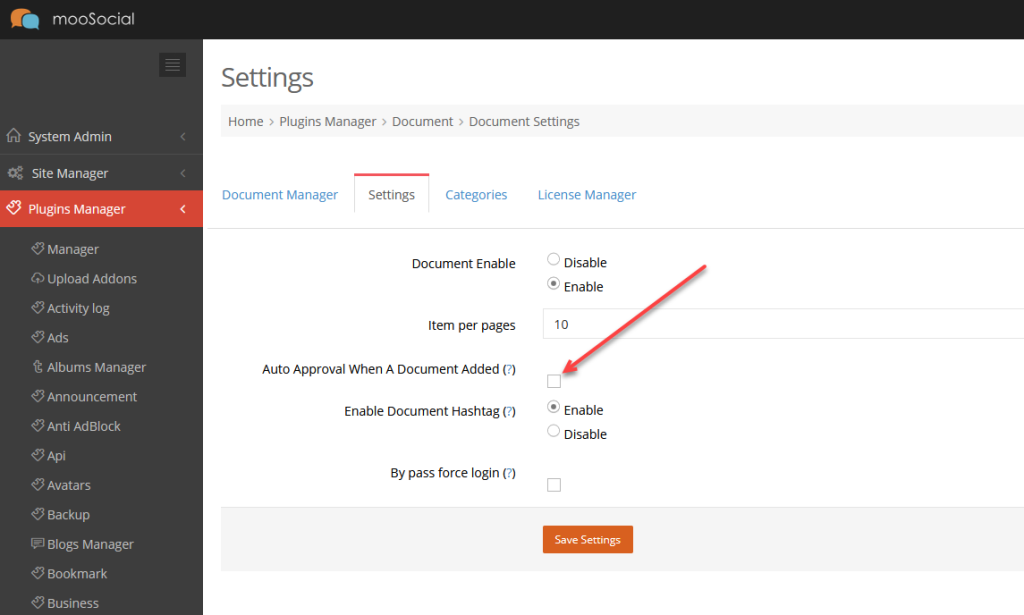
Uncheck Auto Approval When A Document Added checkbox and then click the Save settings button.
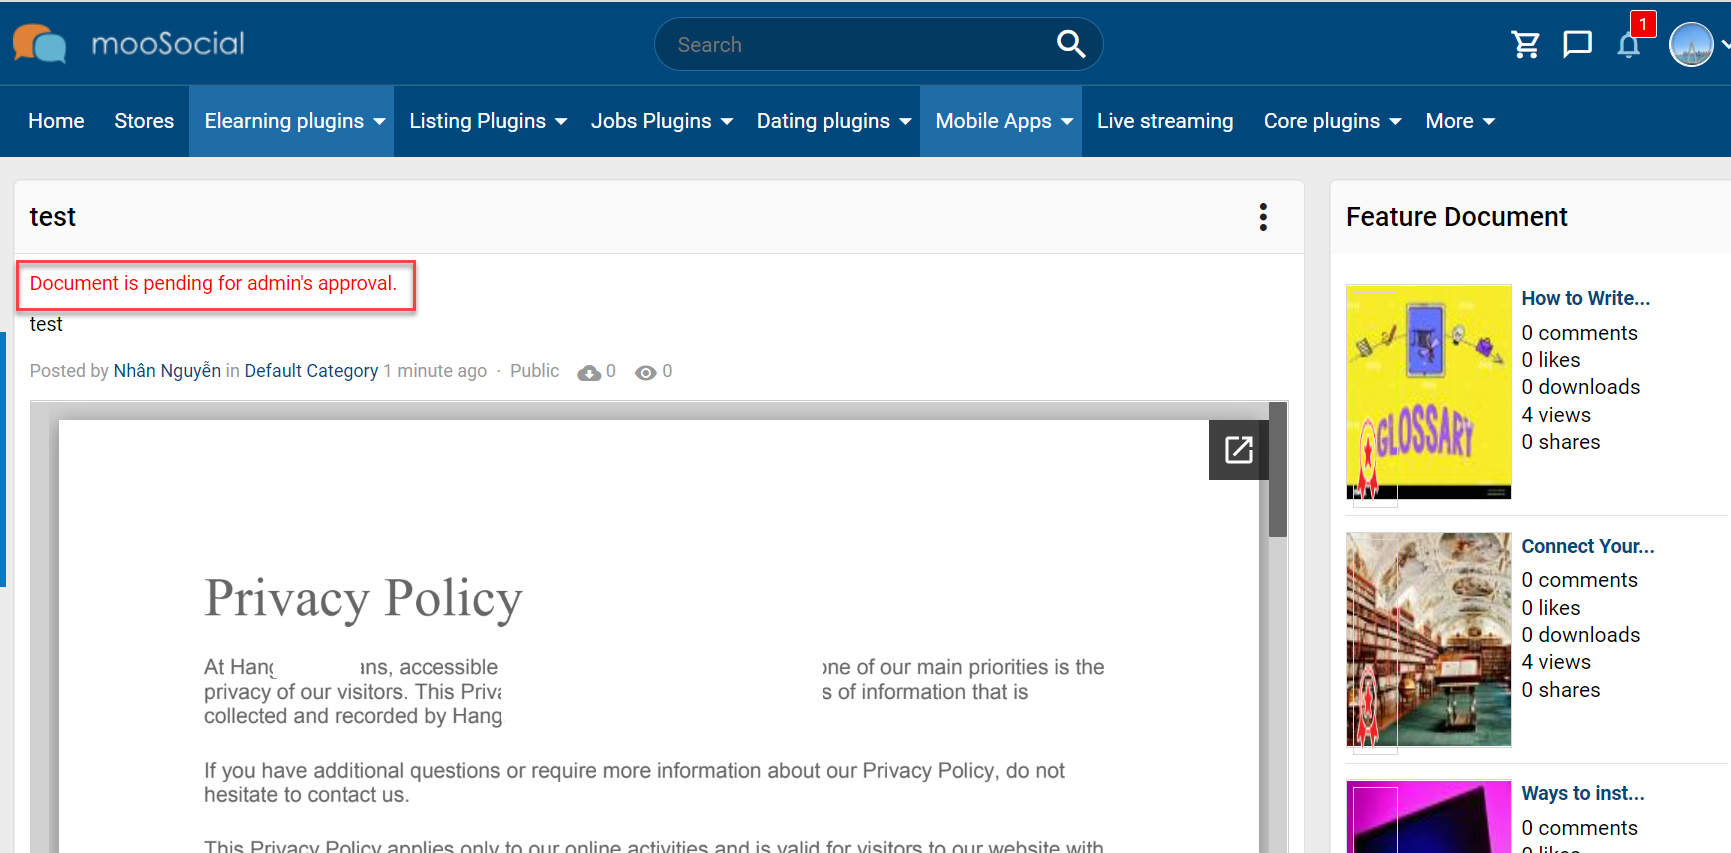
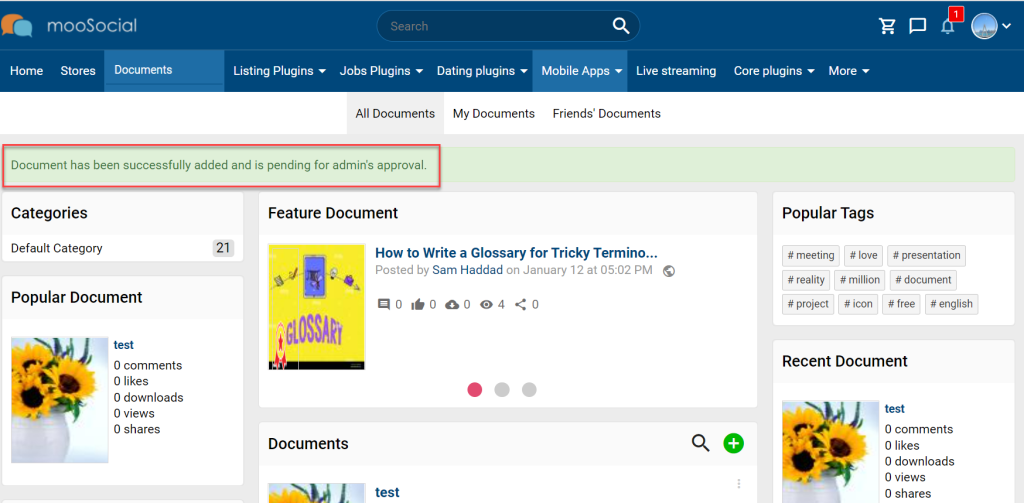
B. Site members will be see the pending approval message after document has been successfully added.
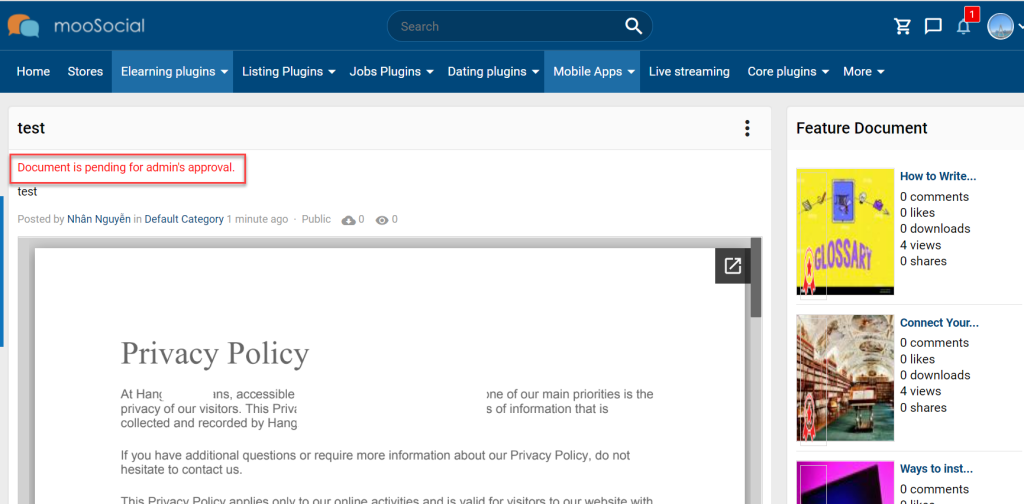
And a warning message when document owners view the document detail page.
C. To approve the pending documents:
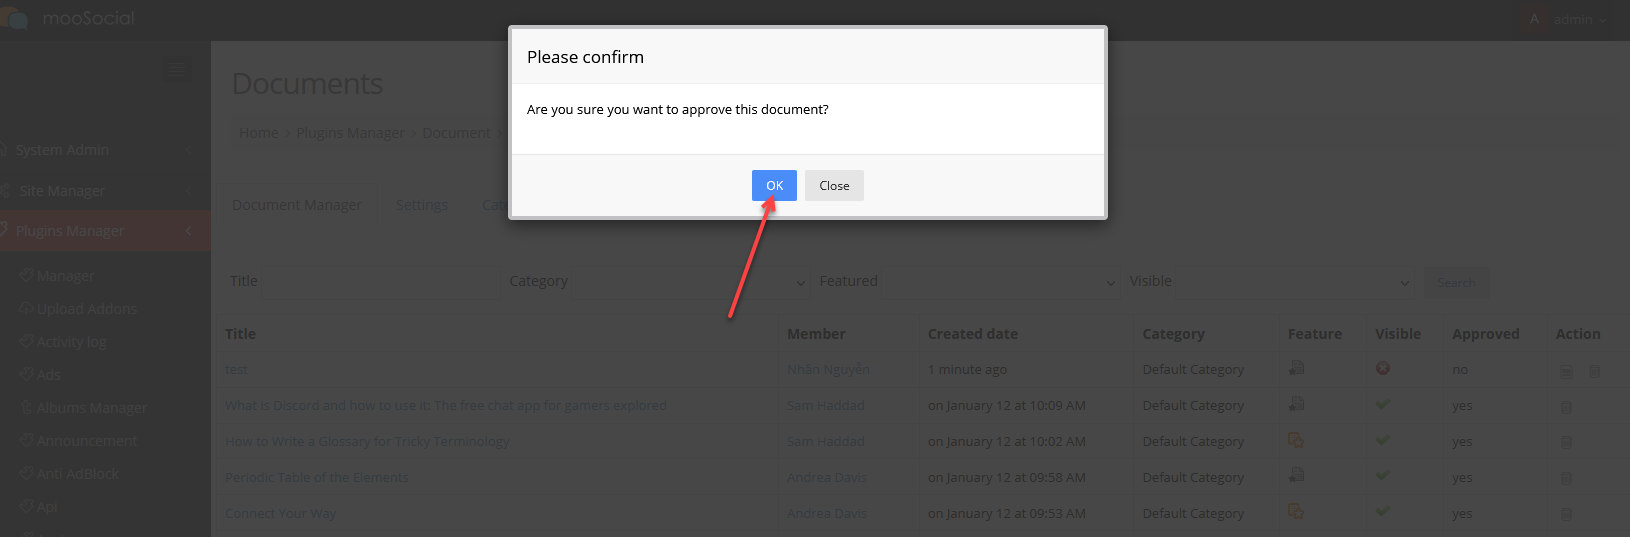
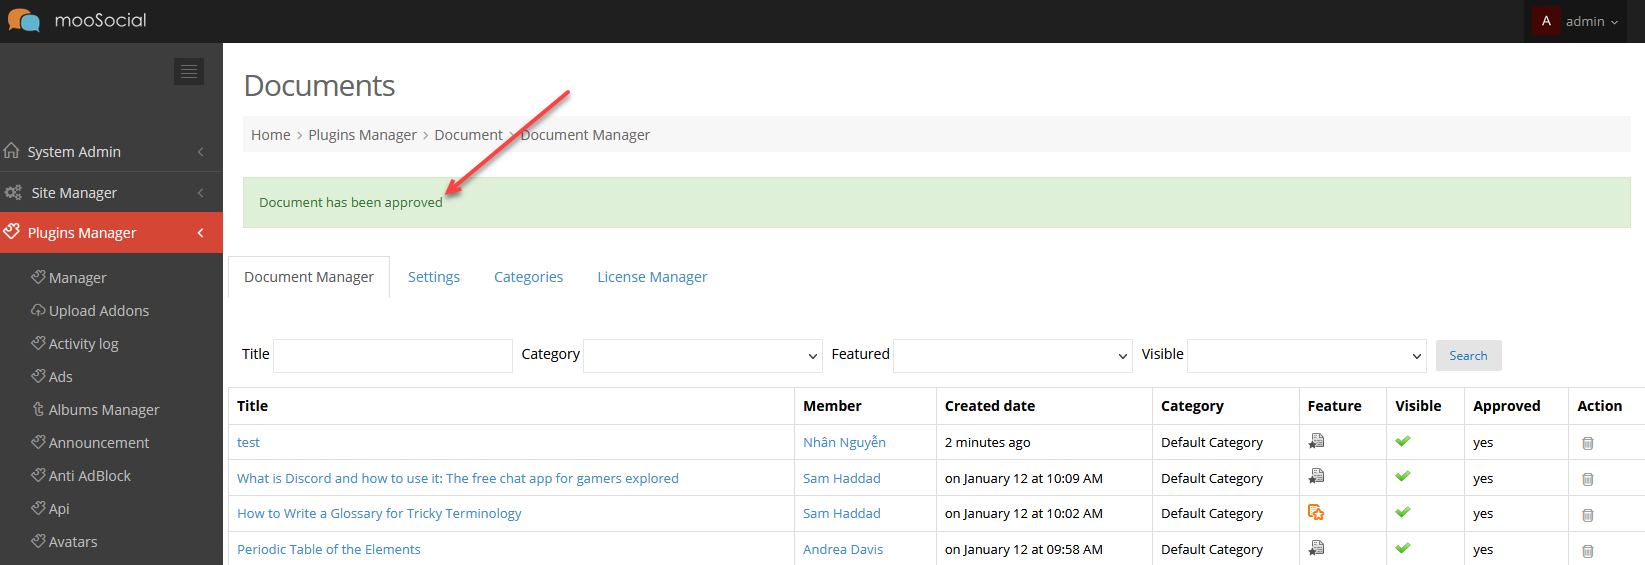
1. Access to Admin Dashboard => Plugin Manager => Document => Document Manager tab.
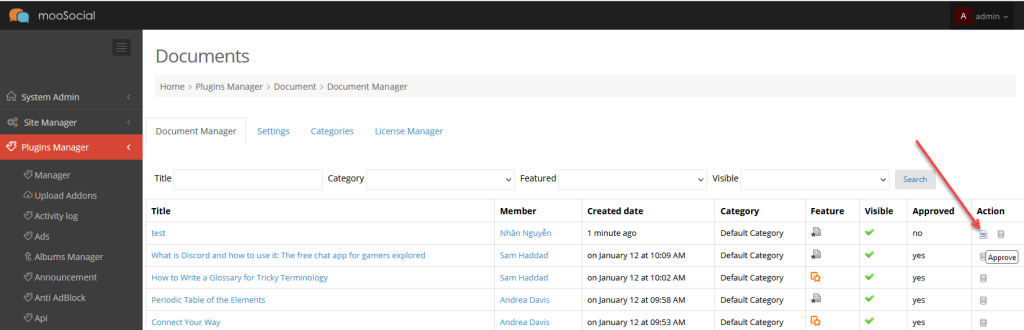
2. Click the Approve icon on the Action column >> Show the popup.

3. Click the OK button to confirm approval.

Each of documents usually have the separate license. Site admin can manage license in AdminCP.
Access to Admin Dashboard => Plugin Manager => Document => License Manager tab.
Admin can Add new, edit, delete licenses and view total of documents which used licenses:
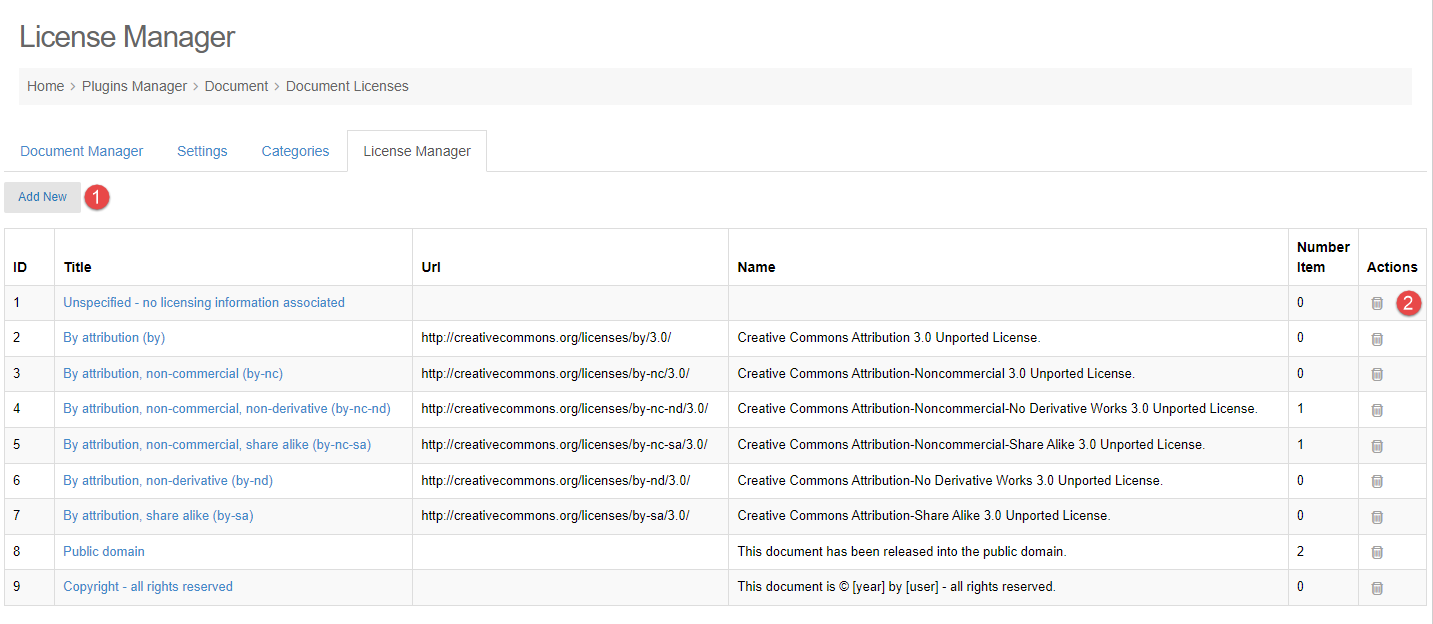
1. ADD NEW LICENSE
Step 1. Click the Add New button >> Show popup.
Step 2. On the popup, fill the license info:

- Title.
- Url.
- Name.
Step 3. Click the Save button.
NOTE: And admin can click the [license_title] to EDIT license.
2. DELETE LICENSE
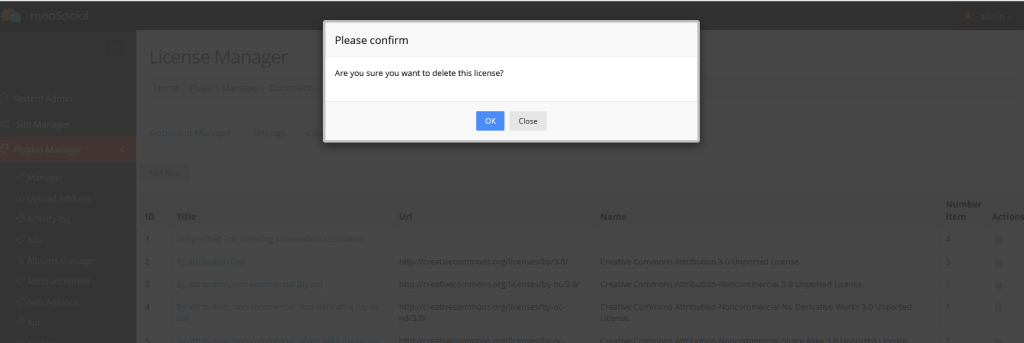
Click the Delete button to delete the license. >> Show the popup.
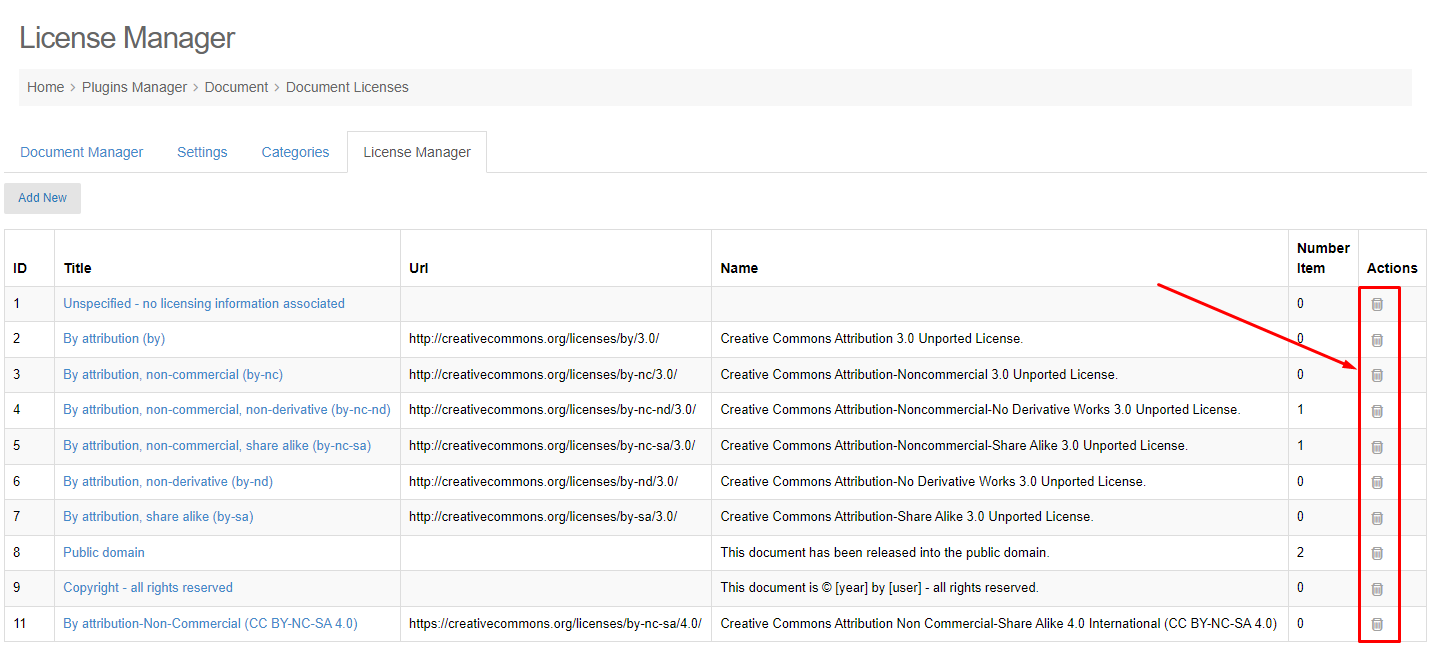
Click the OK button to confirm deletion.
After members pay to input their profile into Spotlight area, the transactions will be tracked in Manage Transaction tab.
Access to Admin Dashboard => Plugin Manager => Spotlight => Manage Transaction tab.
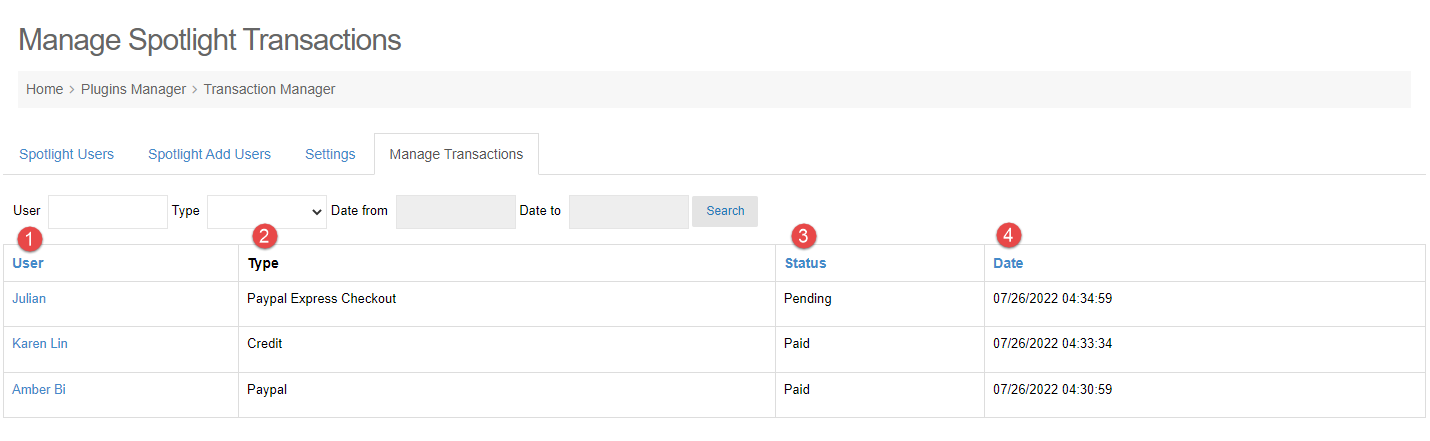
Transaction information:
1. User: show user name.
2. Type: show the payment gateway that user used to pay.
3. Status: show the transaction status.
4. Date: show the date time info that user made the payment.
By the way, can search transactions:
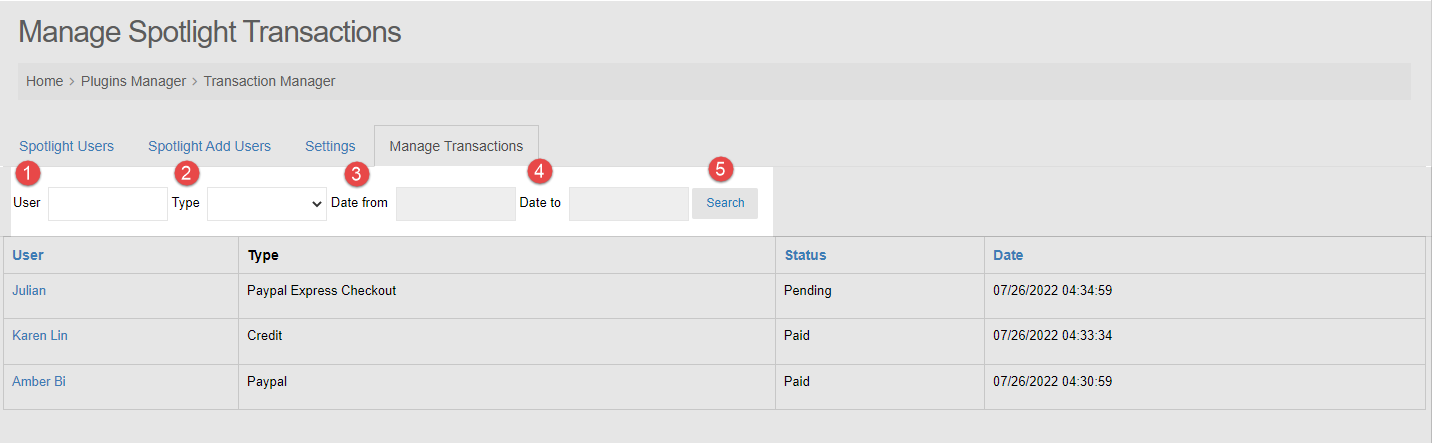
1. User: enter keywords to search transactions by user name
2. Type: search by the payment gateway type.
3&4. Date from and Date to: select the date to search.
5. Search button.
A guide on what spotlight settings do and how to use them.
Access to Admin Dashboard => Plugin Manager => Spotlight => Settings tab.
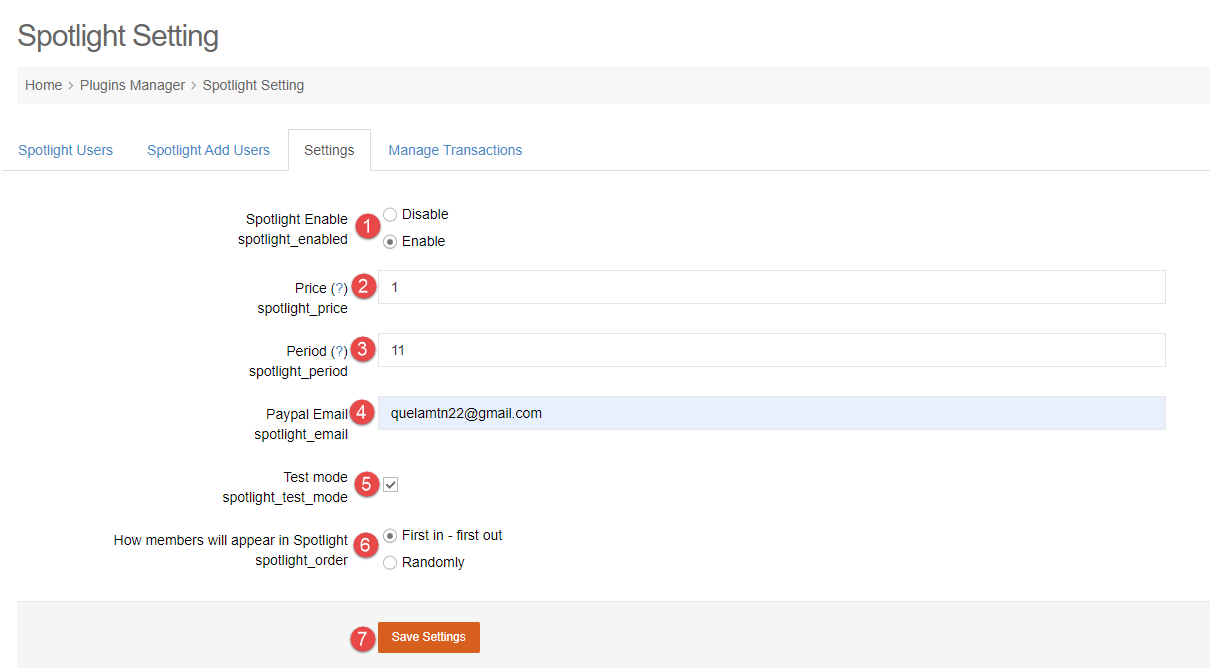
1. Spotlight Enable: enable or disable plugin.
2. Price: enter the price which member have to pay to put profile into Spotlight area.
3. Period: fill the duration period (days) which profile is into Spotlight area after member makes payment successfully.
4. Paypal Email: enter paypal email which will get money if members pay to put their profile into Spotlight area.
5. Test mode: enable Test mode for the payment process.
6. How members will appear in Spotlight: choose the way members will be shown into Spotlight area after done payment.
7. Save settings button.
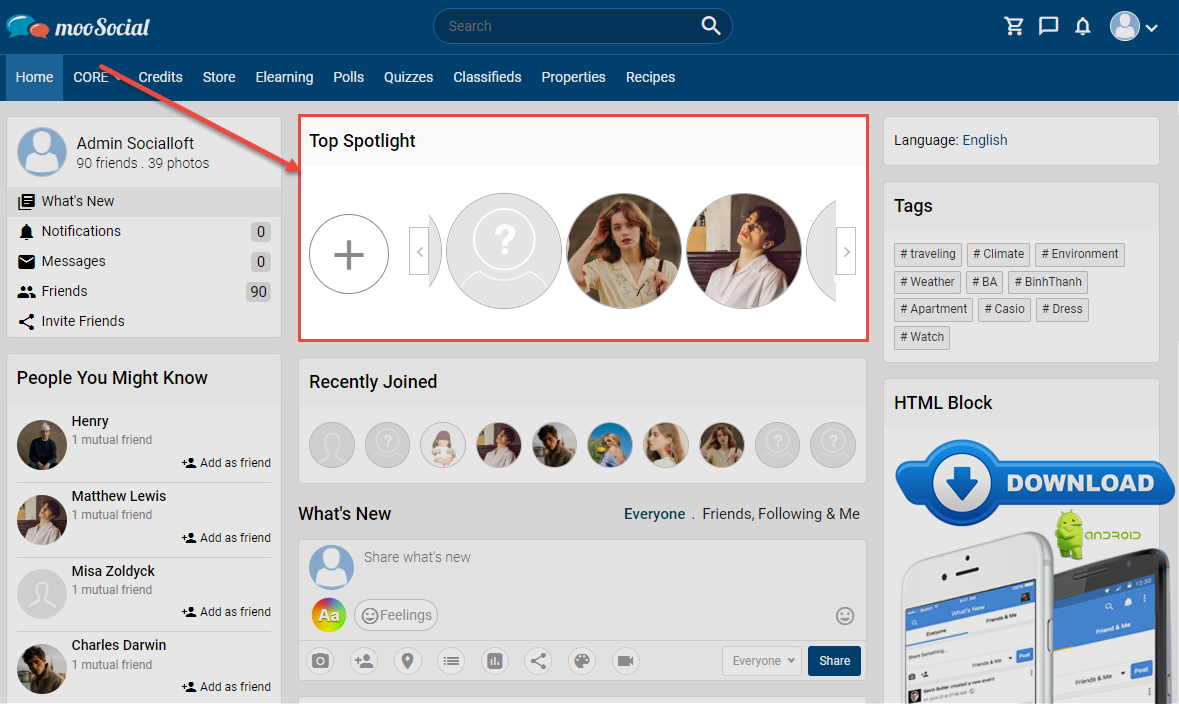
To use Spotlight plugin, you have to drag Spotlight widget to a page. This tutorial will guide to you how to do it.
Step 1. Access to Admin Dashboard >> Site Manager >> Themes Manager >> Layout Editor
And then selecting a page that you want to display Spotlight. Here, we will guide to you to show widget at Home page
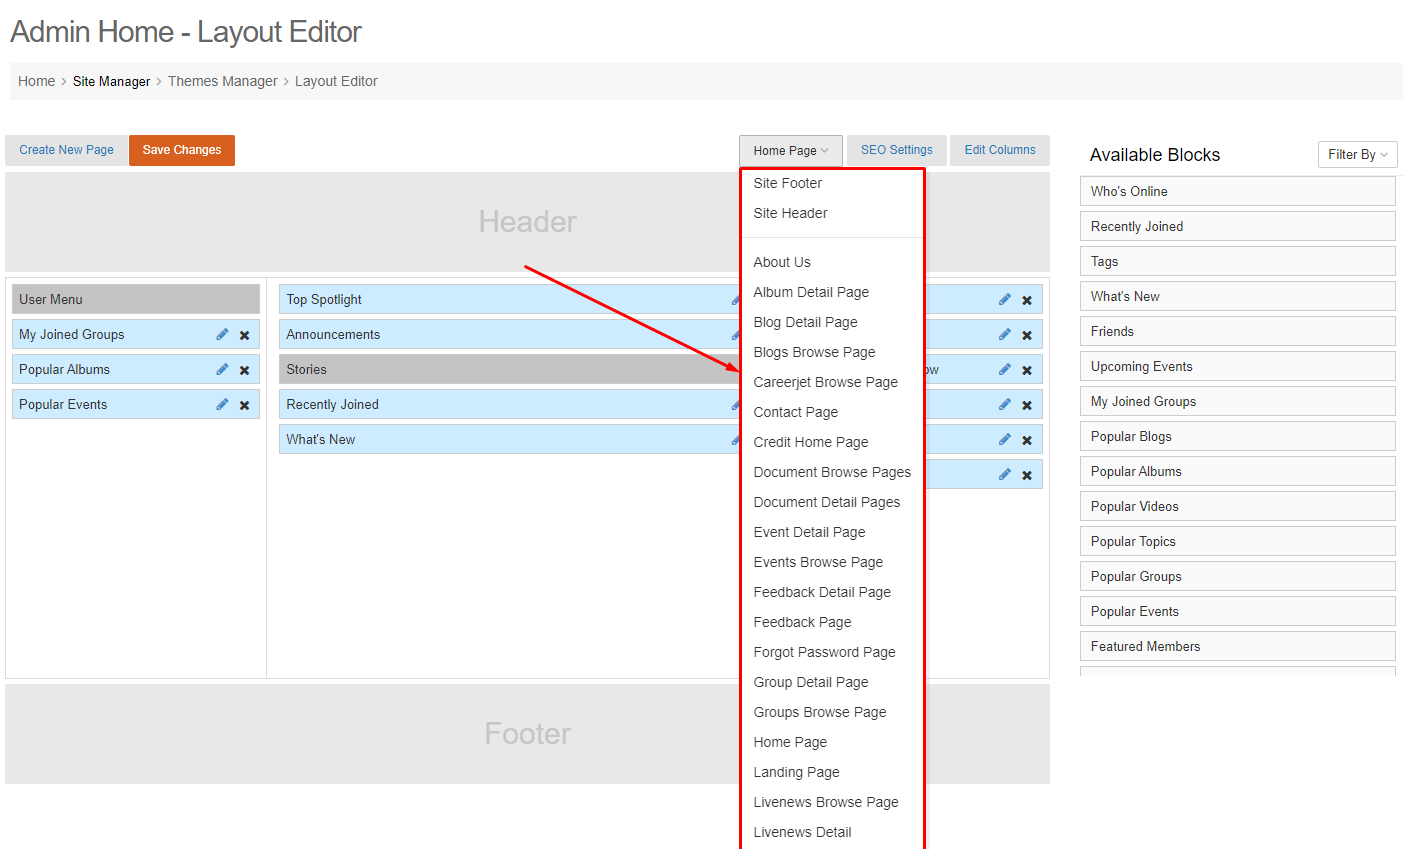
Step 2. Click the Filter By and select Spotlight. >> Then, click the Submit button.

Step 3. Drag and drop the widget to Home page. >> Show the popup.
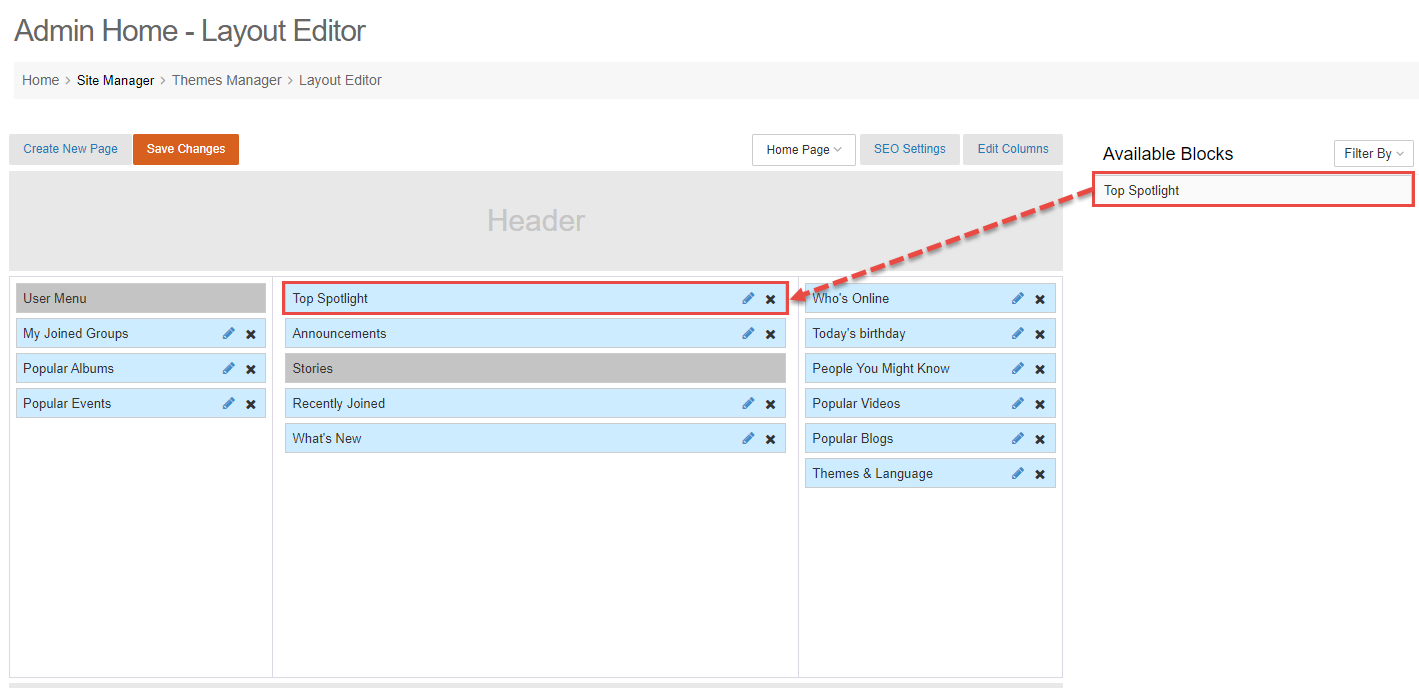
Step 4. Fill info:
- Title: enter Spotlight widget title.
- Enable title: enable or disable the widget title.
- User Group Access: select the user roles which its members can see the widget on Home page.
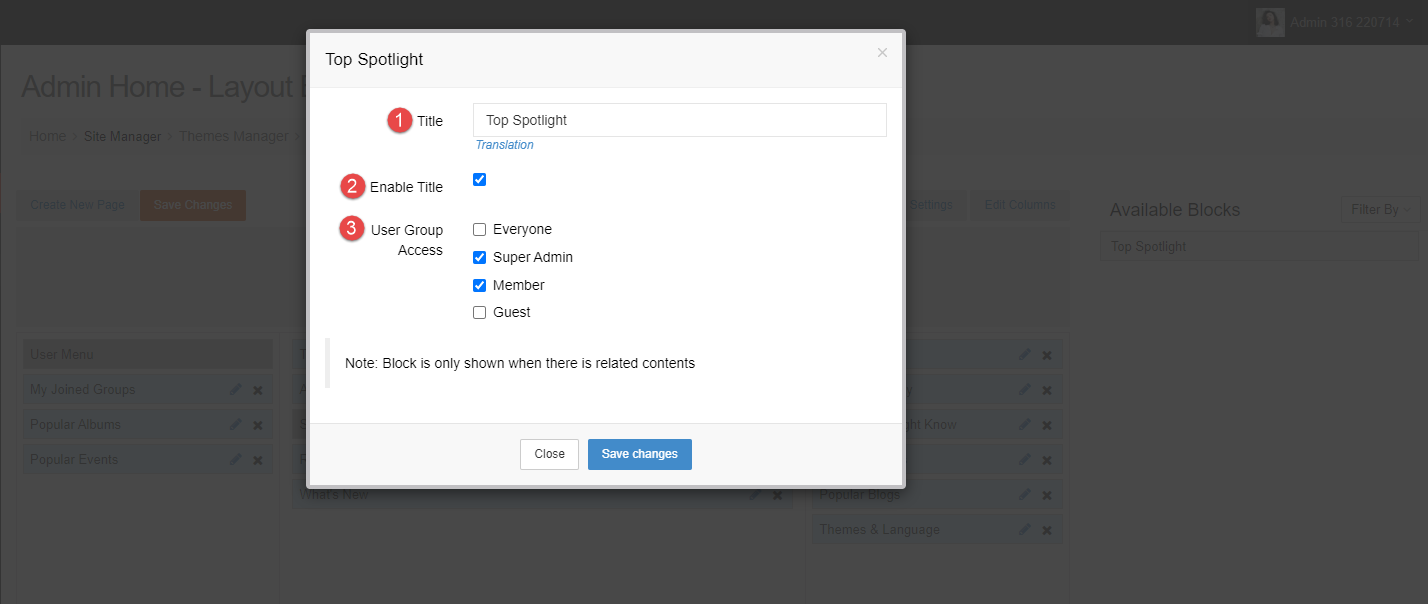
Step 5. Click the Save changes button. >> Spotlight widget will be shown at Home page of your site.