Access Admin Dashboard –> System Settings –> Features
Enable the Cookie Warning function by checking the “Enable Cookies” checkbox => Click on the Save Settings button.

After enabling this function, when users visit your website, they will see the cookie consent banner.

When the Site Admin logs in to the Admin Dashboard, they will see the version and branding of mooSocial in Admin Panel.

Follow the steps below to learn how to remove the version and branding.
- Access Admin Dashboard => System Settings => General

[1] Uncheck the “Show all mooSocial branding” checkbox to remove mooSocial branding.
[2] Check on the “Hide mooSocial version” checkbox if you want to hide the mooSocial version.
=> Click on Save Settings button.
- Go to Admin Home page: The mooSocial version and branding have been removed.

Hopefully, this tutorial was helpful for you.
Access Admin Dashboard => System Settings => Security
Enable the ‘Approve Users’ function by checking on the “Approve Users” checkbox => Click on the Save Settings button.
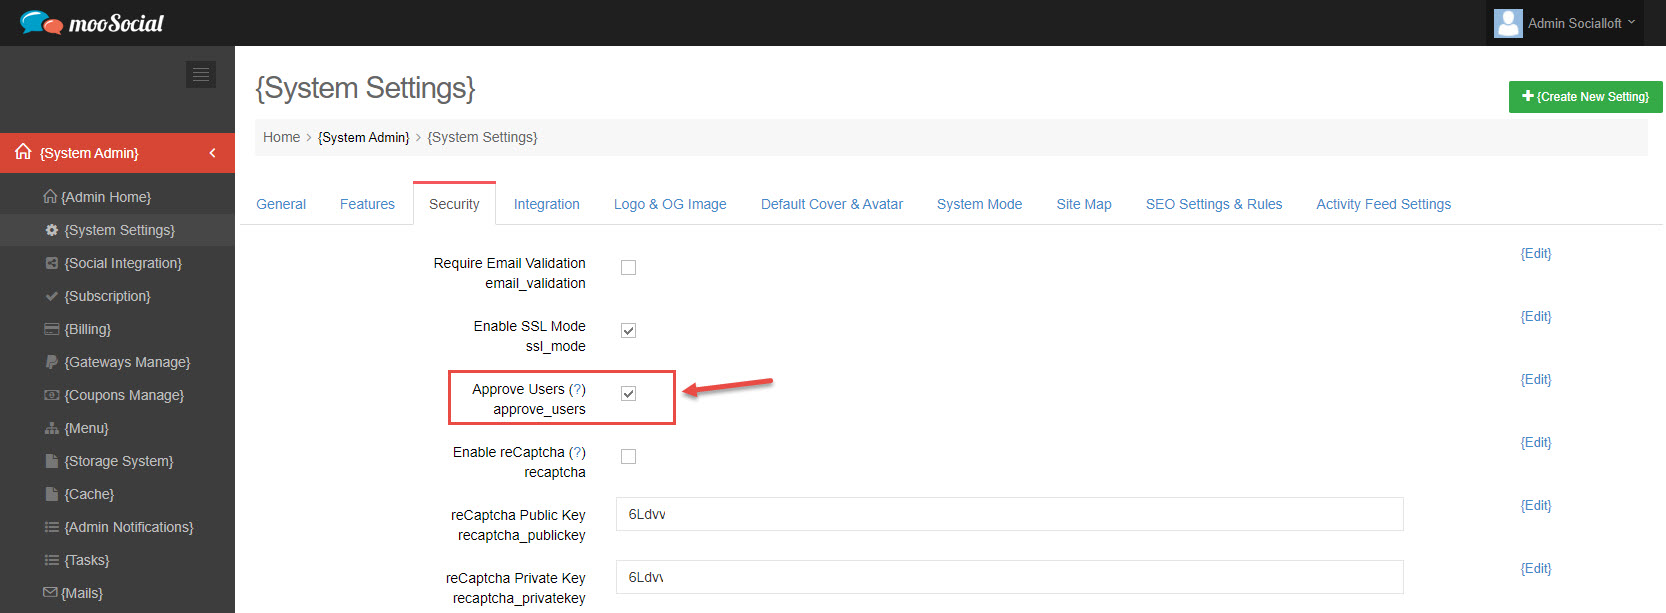
After enabling the function, your site will go into approved only mode.
When a new user registers to join your site, the account will be pending until the Site Admin approves the request.

To approve join requests, the Site Admin goes to Admin Dashboard => Users Manager
The Approved status will be “No” when your site turns to approved mode.

Click on the account you want to accept the request to join

Change the Approved status to “Yes” => Save Changes button.

Now Users can now join your site.
By default, member will see homefeeds after they login into your community, want the system to load difference page? Please follow below steps:
1. Login as admin
2. Go go admin dashboard
3. Go to System admin -> System settings -> Features tab.
4. Find “Home page after logged in” and fill in the name of the new URL (See below screenshot). Click on Save changes, login again to check to see how it work.
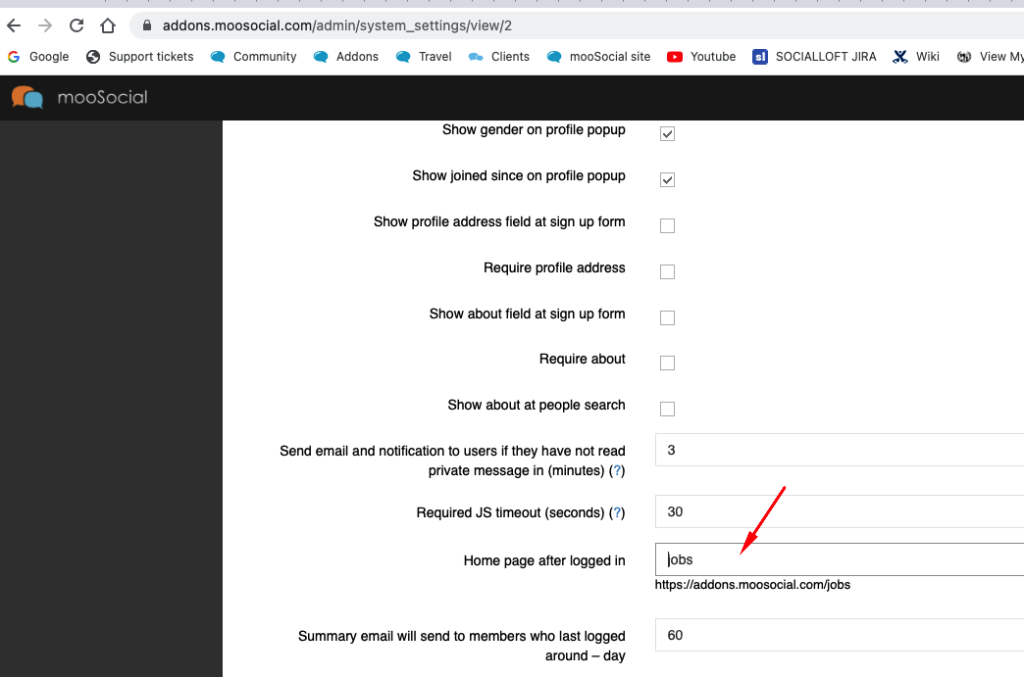 In this screenshot, member will be redirected to browse jobs page after login, you can configure for it to redirect to photos, videos….
Hope it helps.
1. Login to your admin dashboard
2. Go to Site manager > Theme Manager
3. Click Default Theme
4. Click Theme Settings Tab
5. Select Light to apply on Normal Theme
6. Select Section to customize
7. Appearance Setting
# Layout Tab
# Layout Tab > Body Section Setting
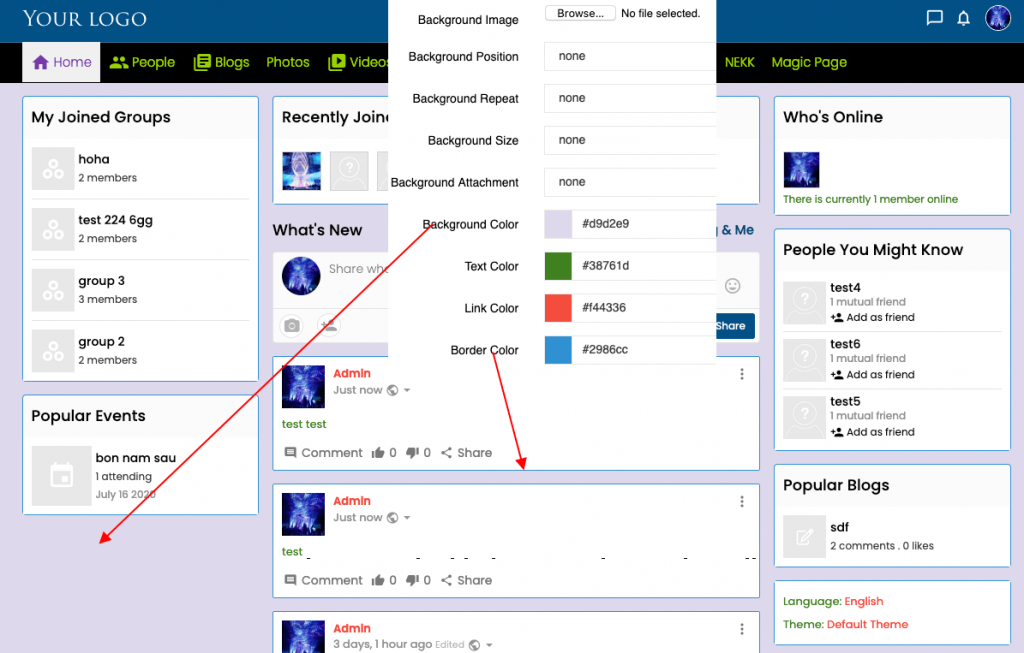
# Layout Tab > Header Section Setting

# Layout Tab > User section setting
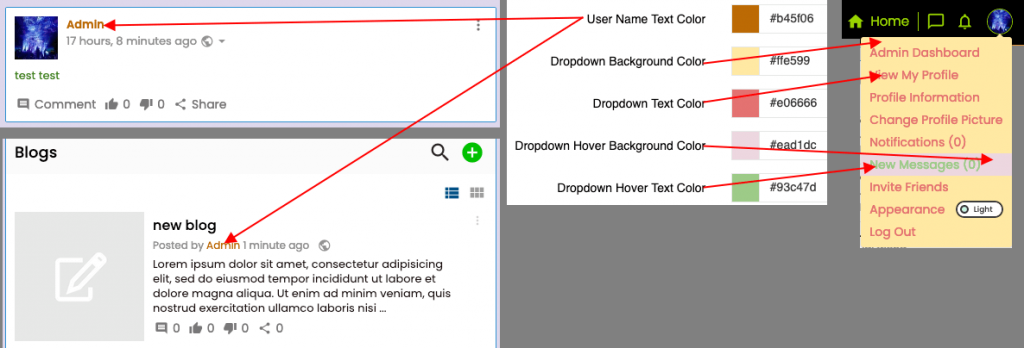
# Layout Tab > List Items Settings
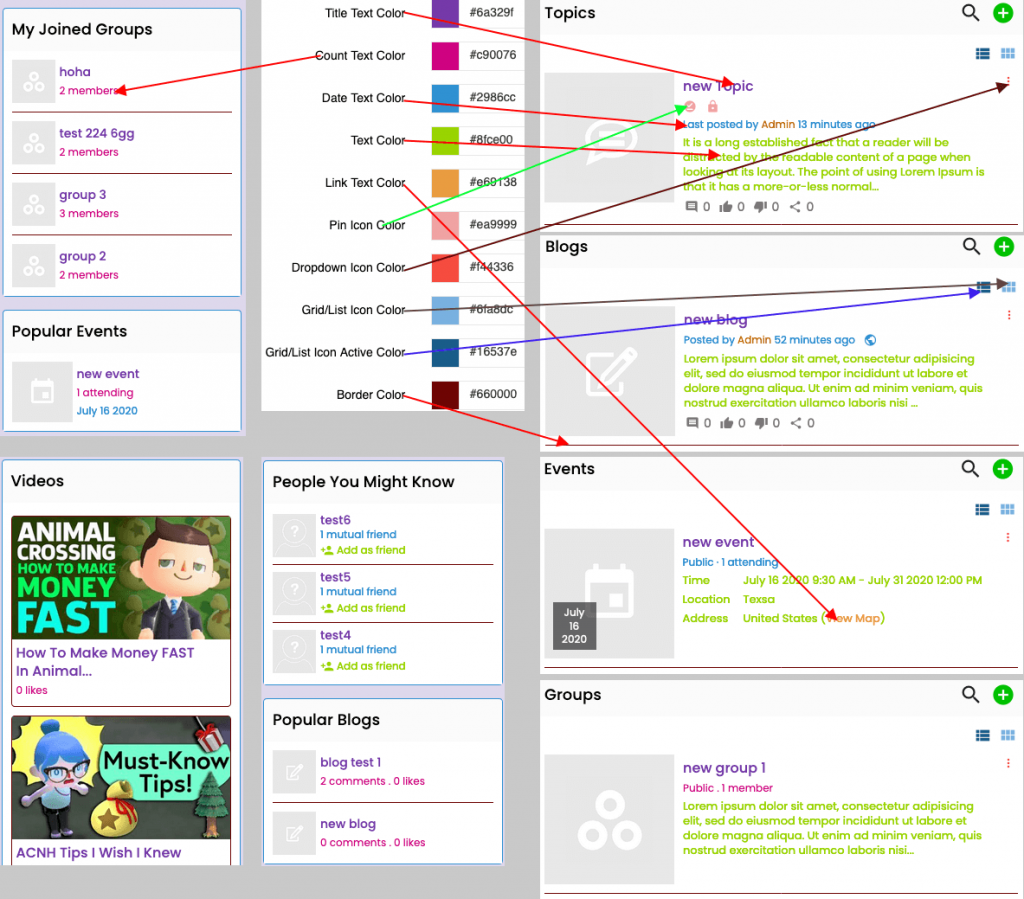
# Layout Tab > Like section settings
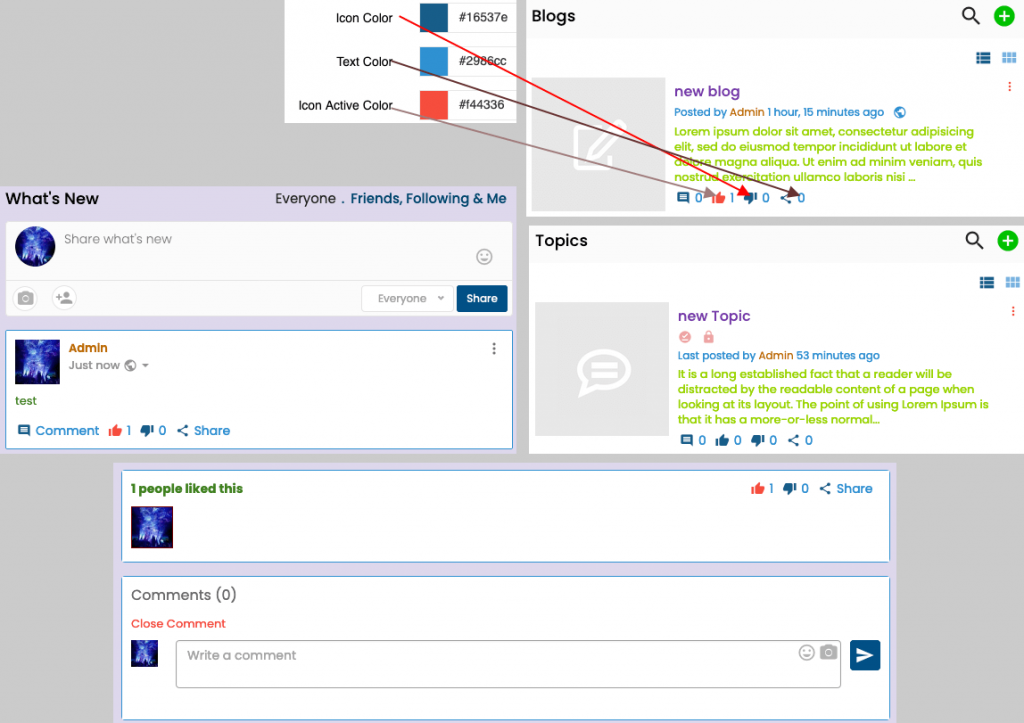
# Layout Tab > Footer

# Menu Section
# Menu > Navigation
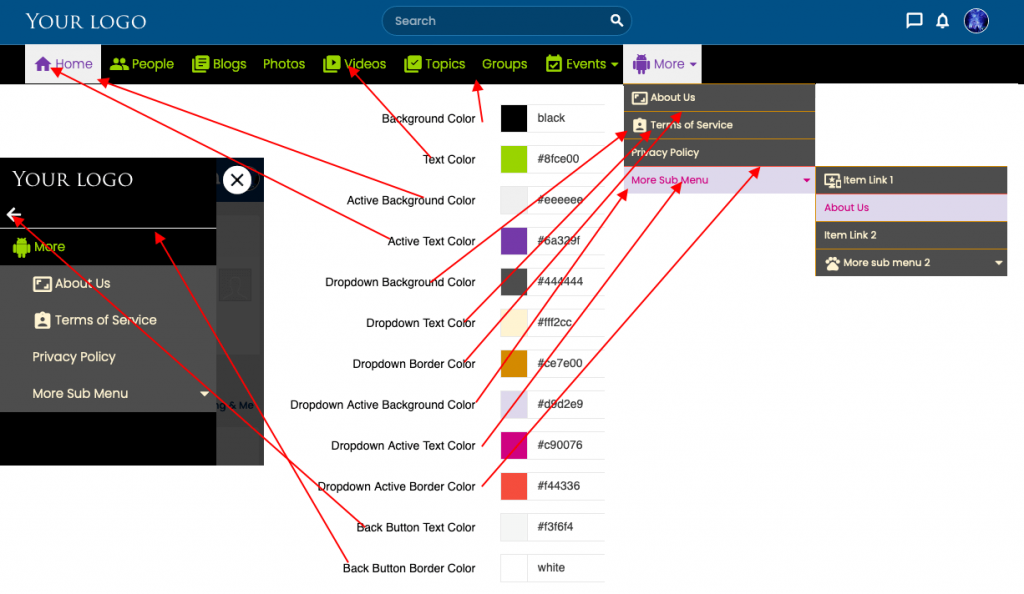
# Menu > Sticky Menu
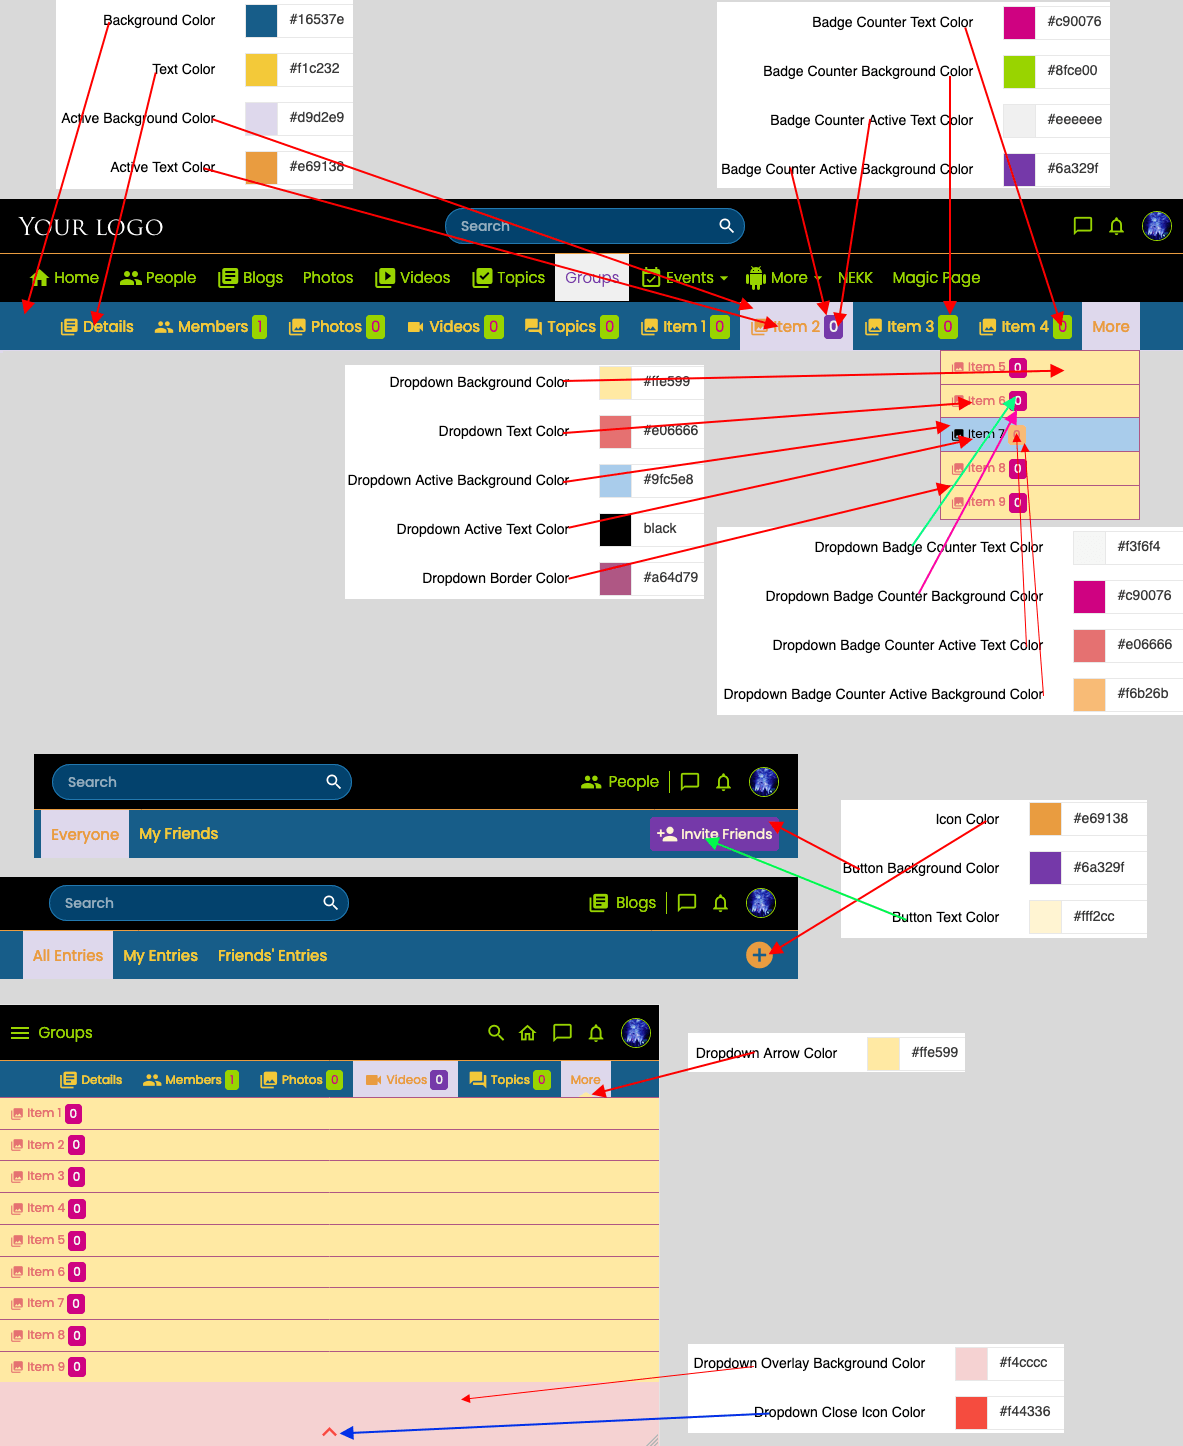
# Menu > Category Menu

# What’s New Section
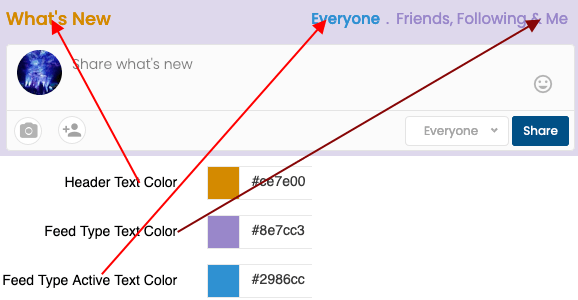
# What’s New > Feed Header Section
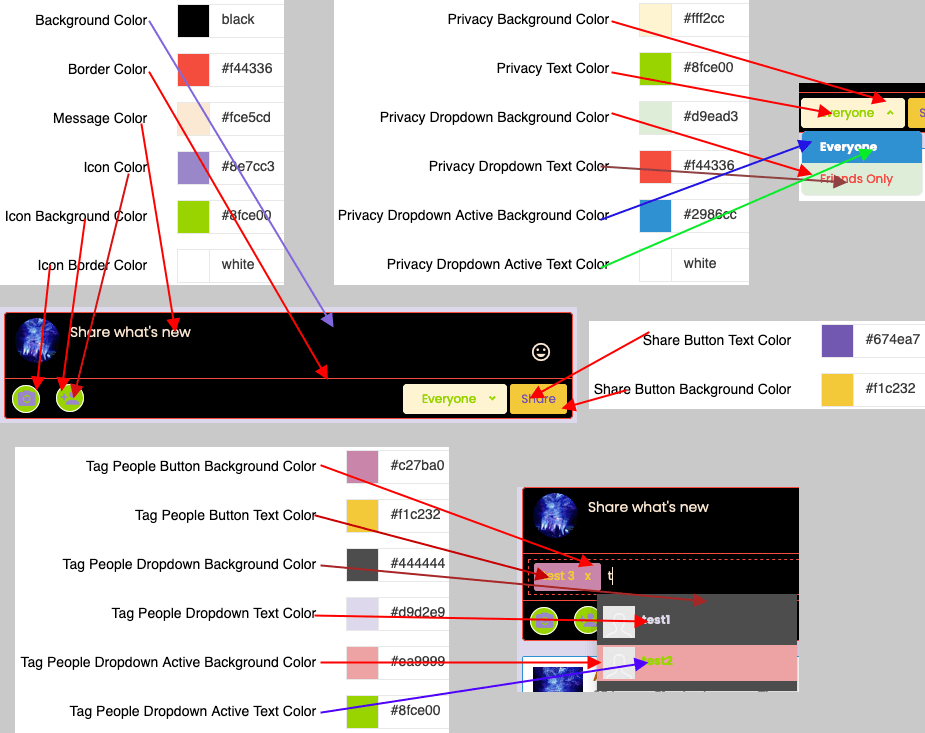
# What’s New > Status Box
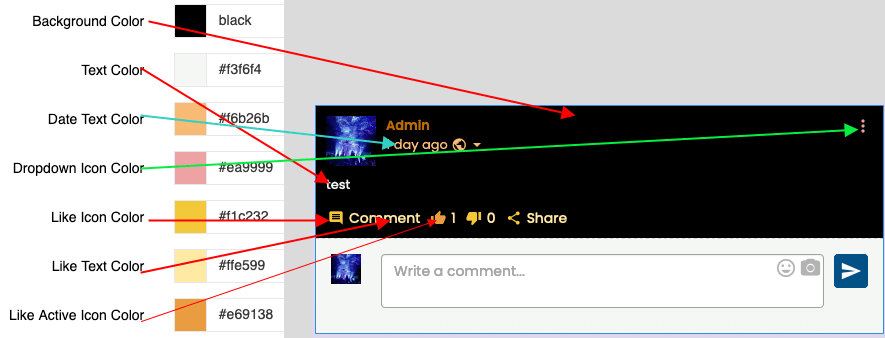
# What’s New > Feed Item
# What’s New > Feed Comment
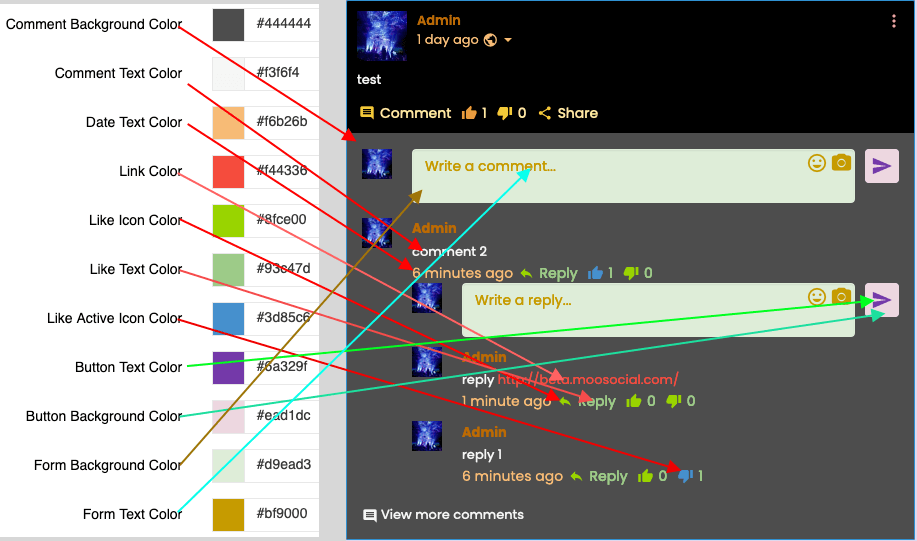
# Comment section

# Profile Section > Header Profile Section

# Global Search Section

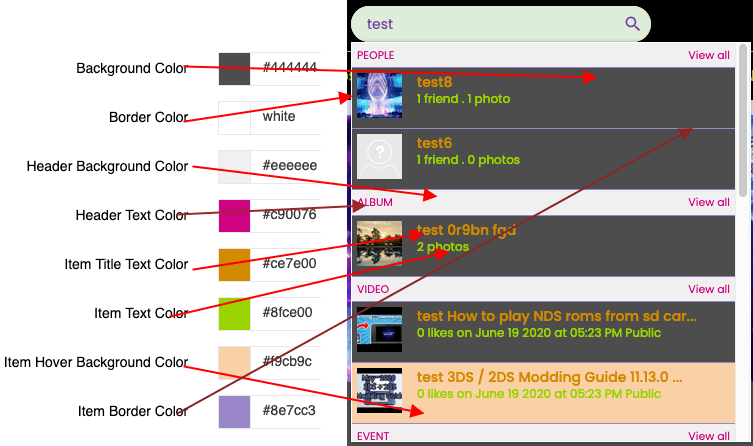
# Block Settings
# Block > Block

# Block > Content Search Setting
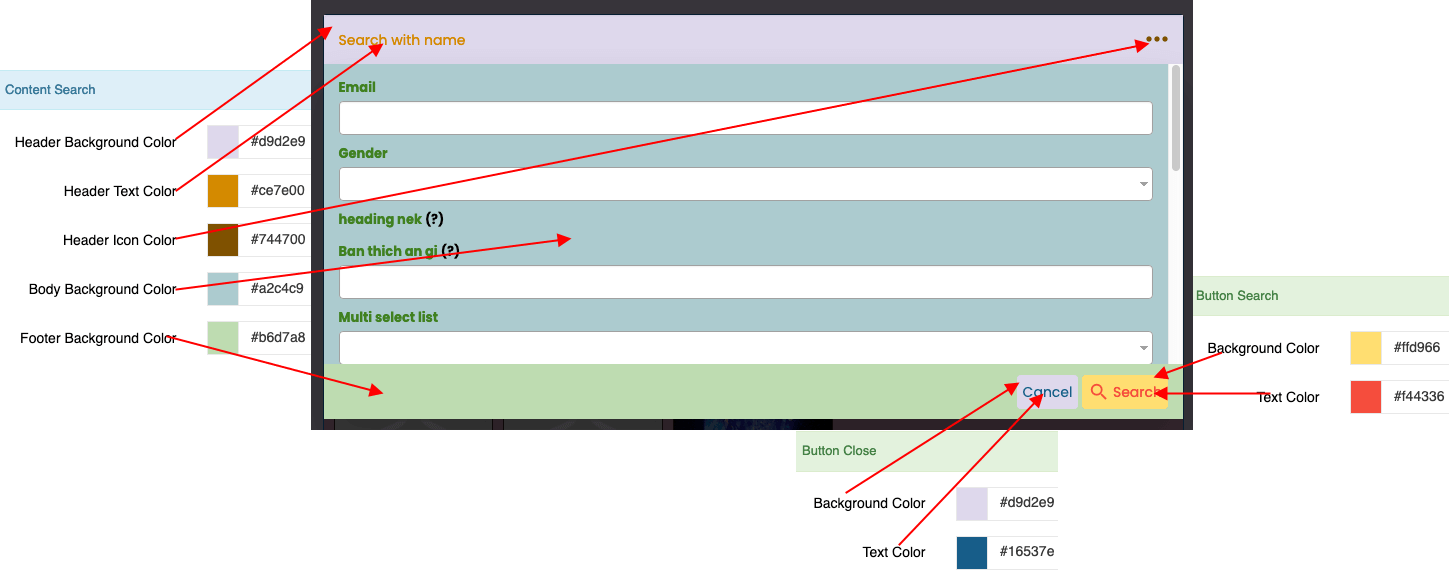
# Modal settings

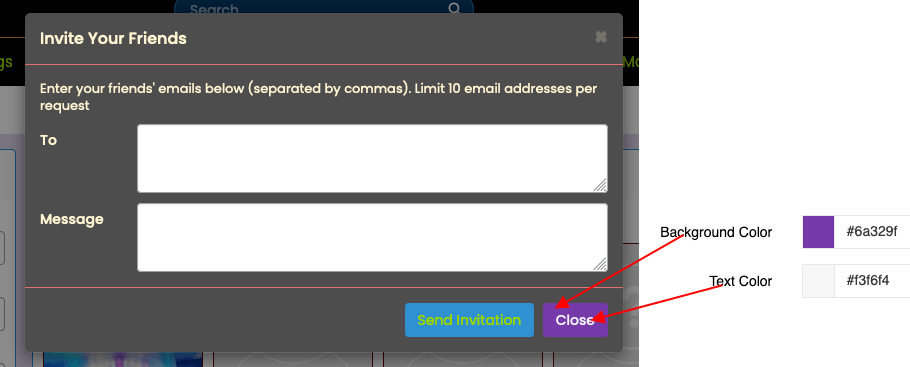
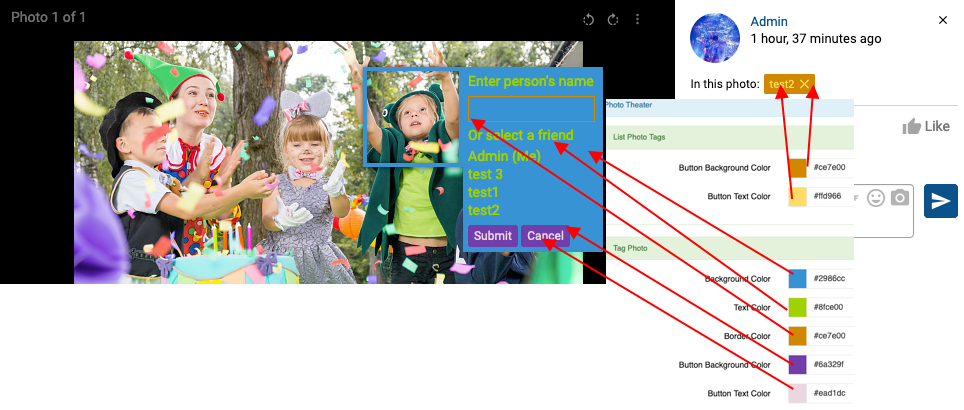
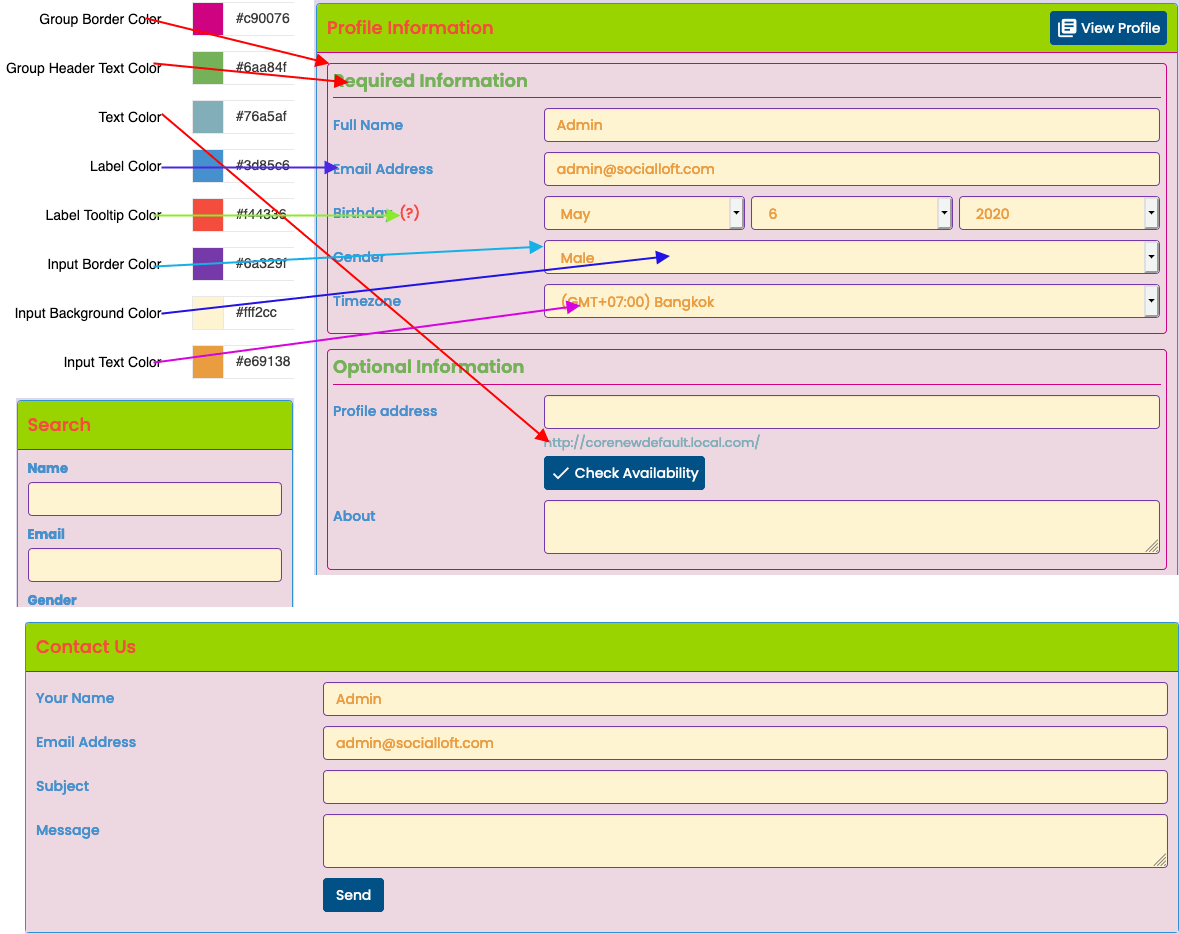
# Form

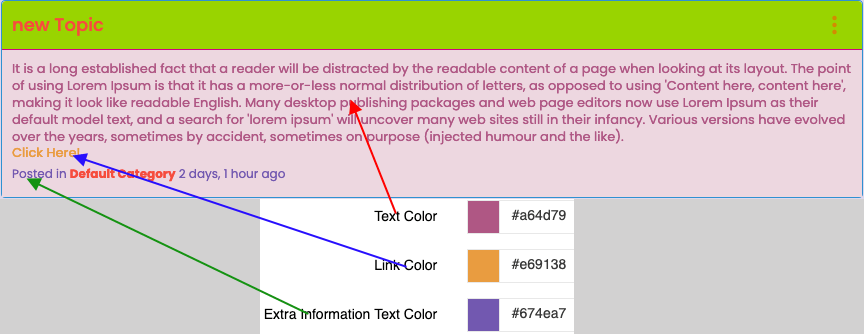
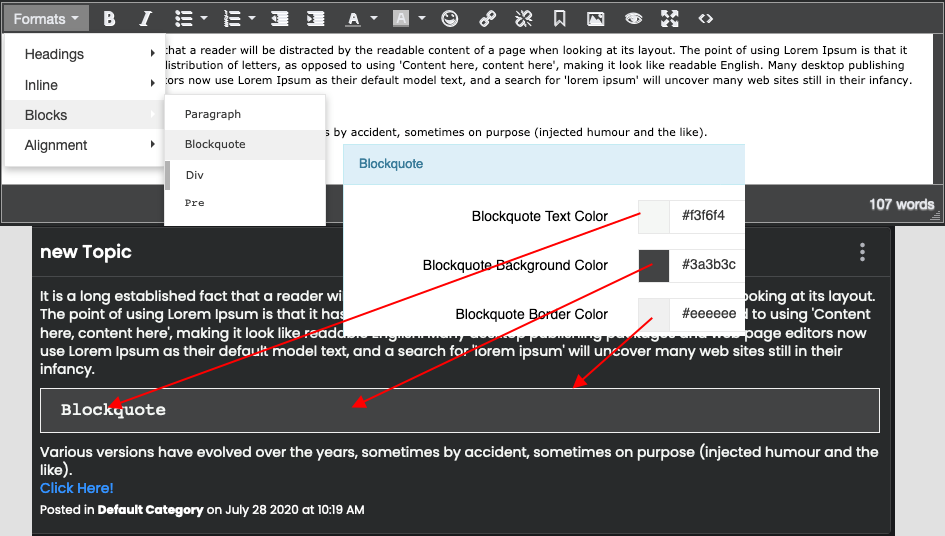
# Content
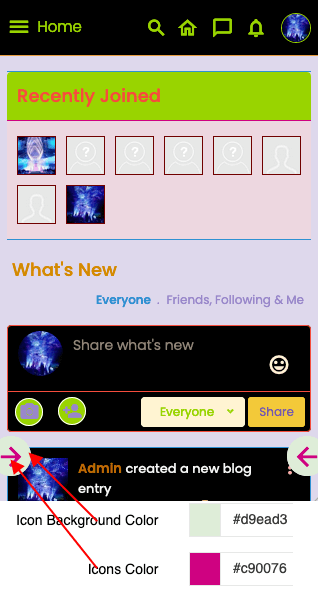
# Mobile Responsive
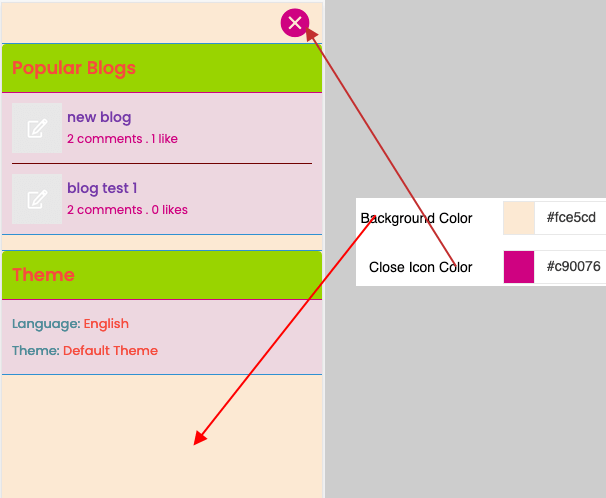
# Notification
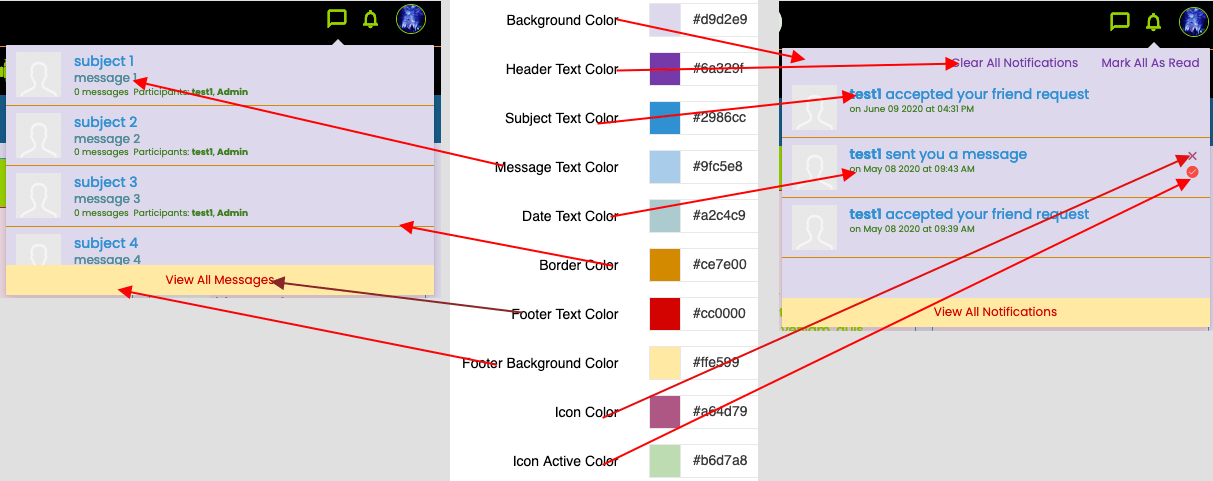
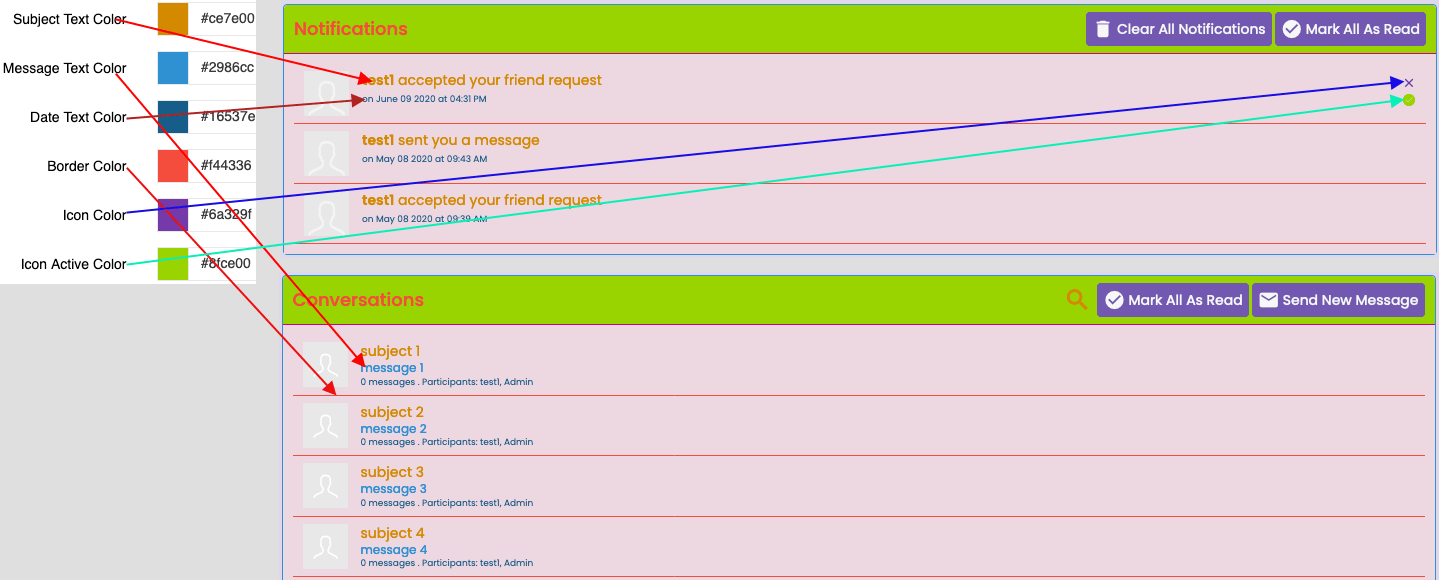
# More SEction
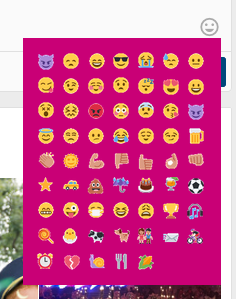
#Emoji
# More Menu Popup
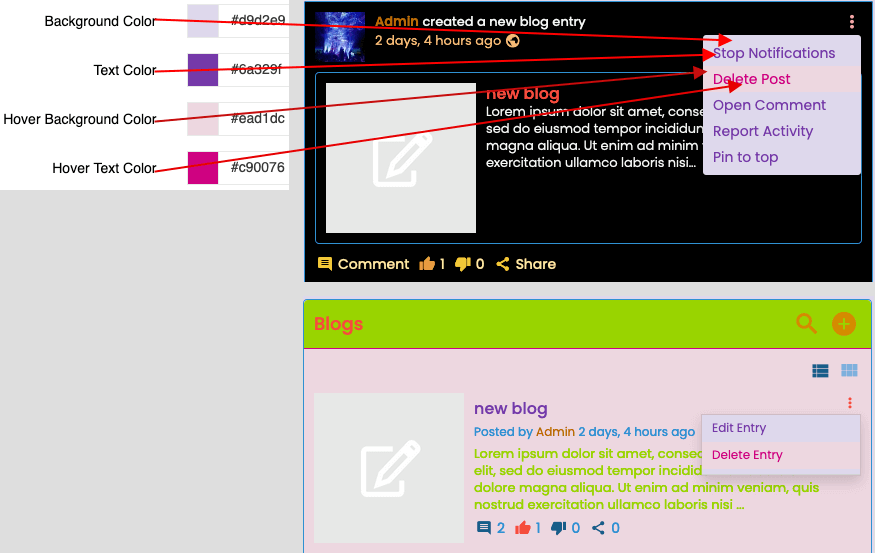
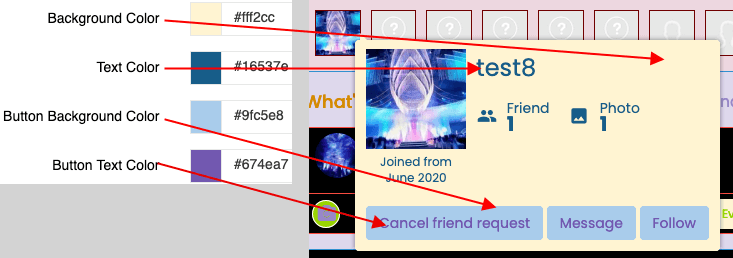
#Profile Popup
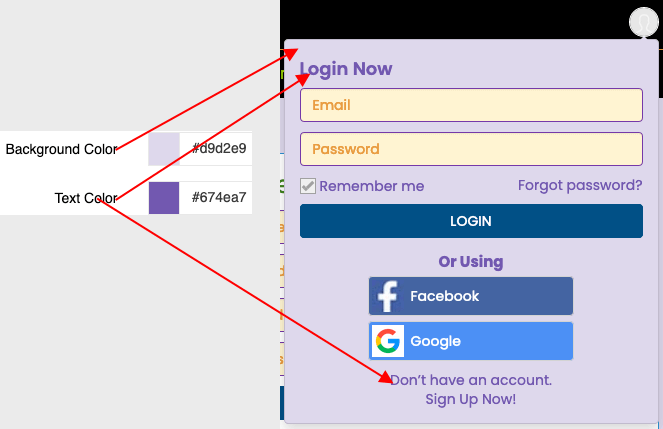
# Login Popup
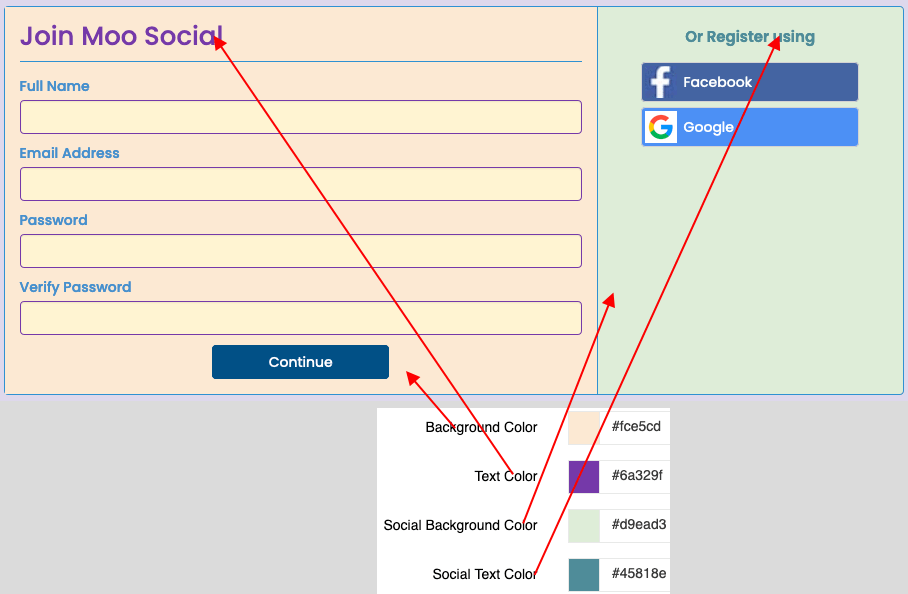
# SIgn up Page
# Login Page
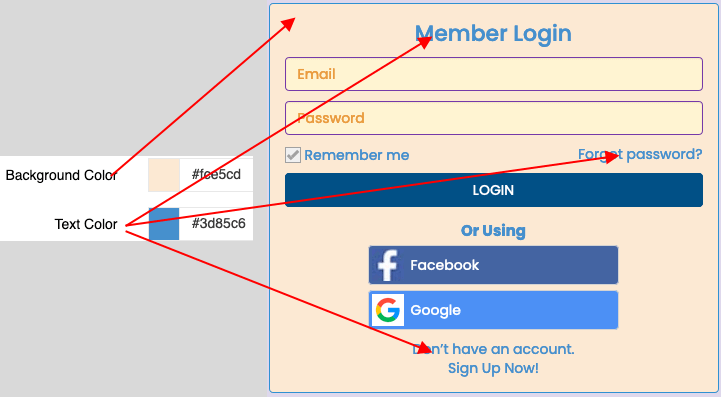
# Landing Page

# Tags Block

#Cookies

8. Check the apply to landing page if you want your settings to applied to non login page
9. Check/Uncheck to enable or disable settings
10. You can customize dark theme like you did with light theme
12. Save and Check again your site


