Install new language
Two ways to create a new language into your site:
+ Installed existing language
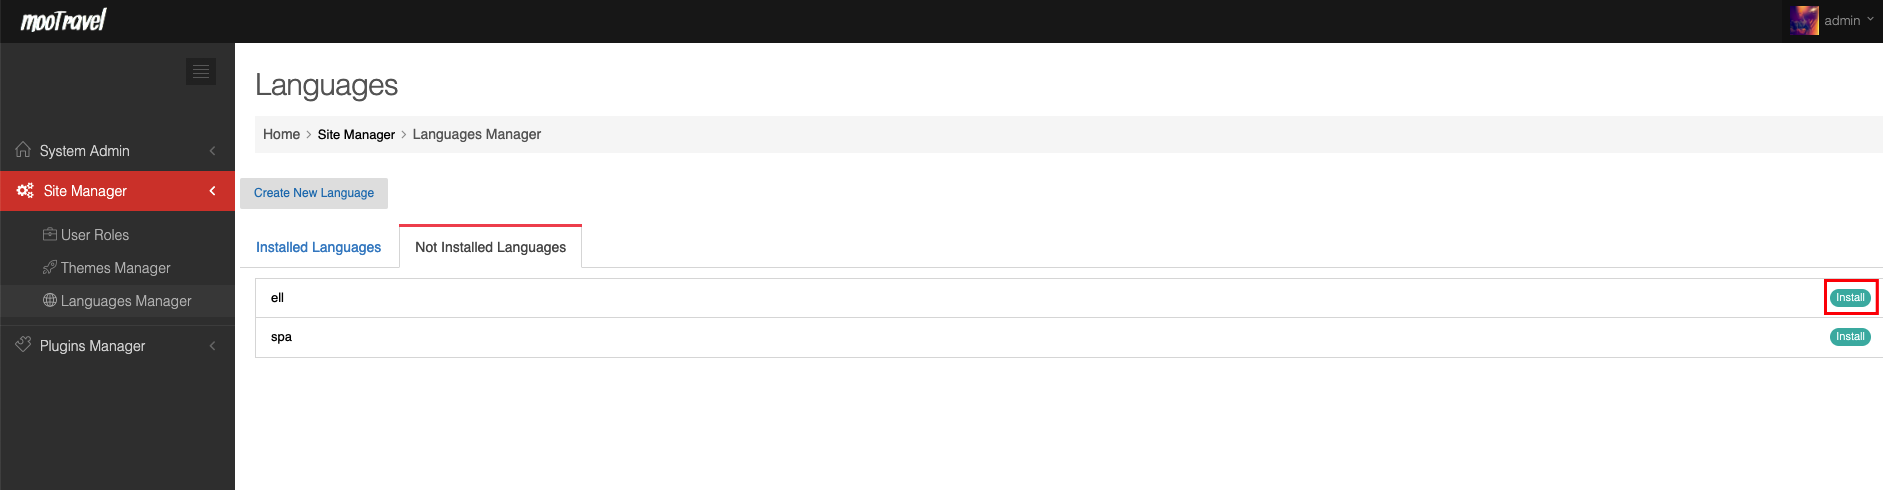
Admin panel -> site manager -> languages manager -> Not installed language tab -> Click on “Install” button to install your desired languages. If the languages that you want to install is not inside the list, please contact us for support

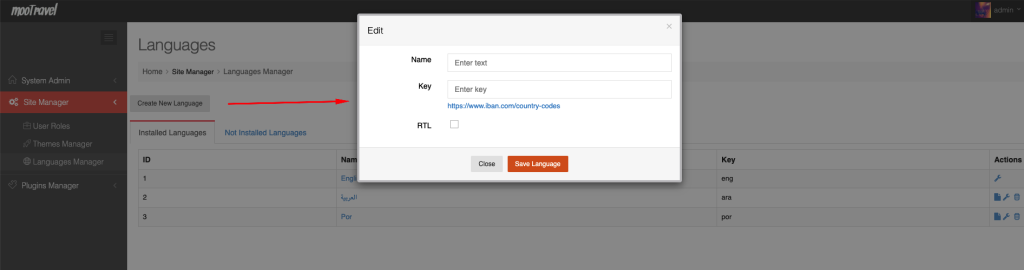
+ Create a new language
Admin panel -> site manager -> languages manager -> Click on “Create New language” button to create a new language
Translate the phrases that have not be translated to your language yet
If the the language that you just installed or created is not fully translated, you need to translate more by yourself. Please follow the below steps to do that.
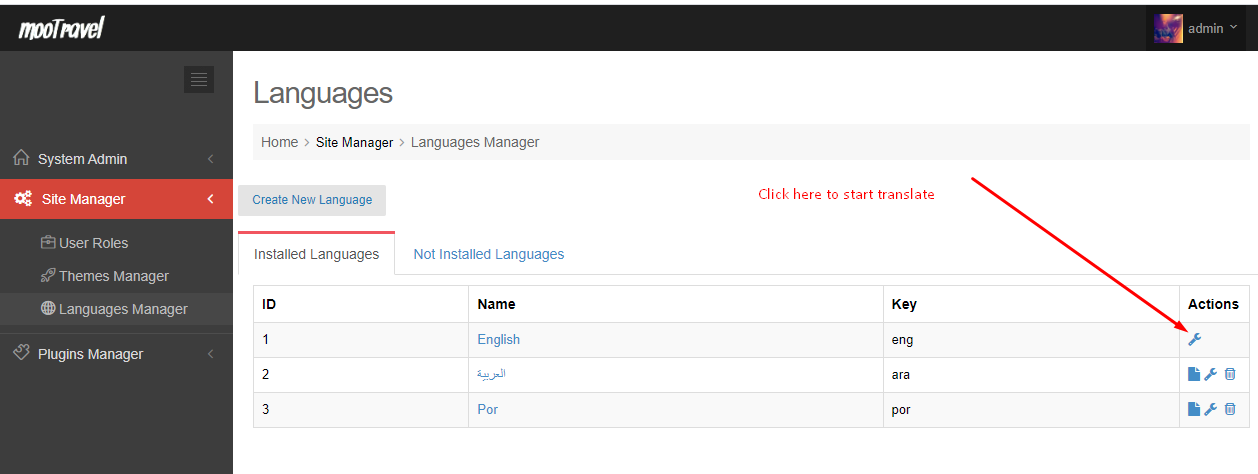
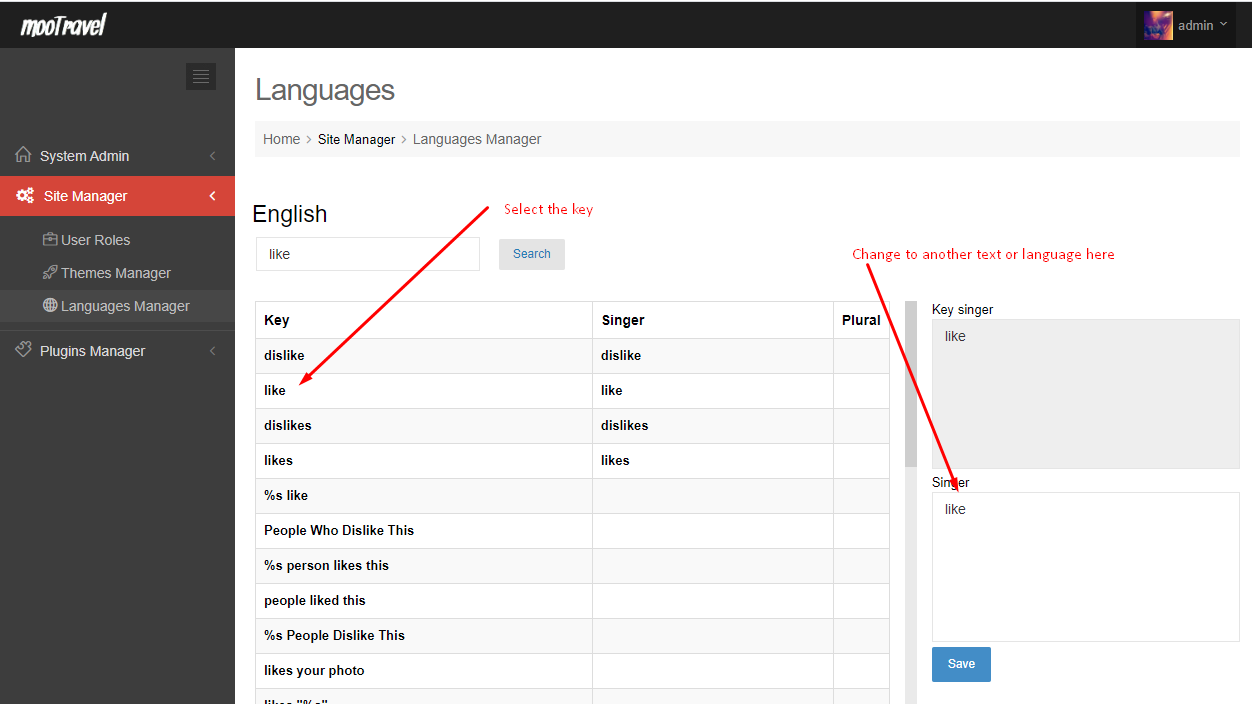
Admincp -> Site manager > Language Manager
# Click Translate icon (see below screenshot)

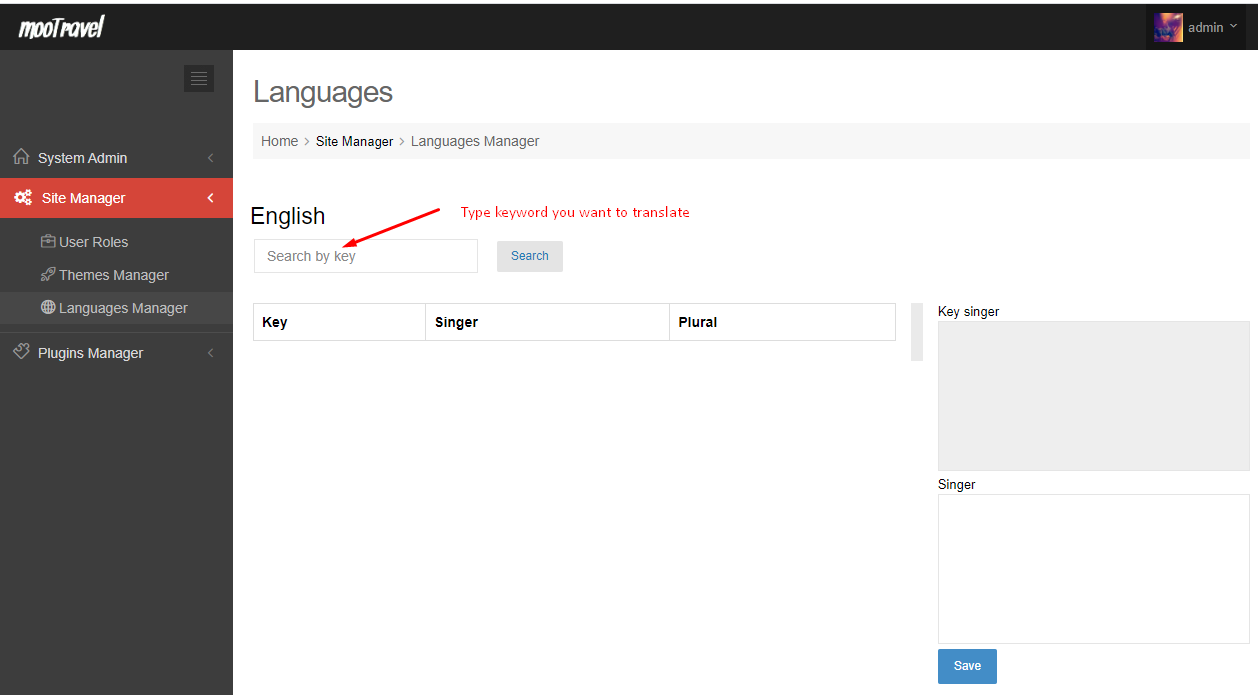
# Search phrases you want to translate or change

# Select one result from the list and translate or change it to new phrase
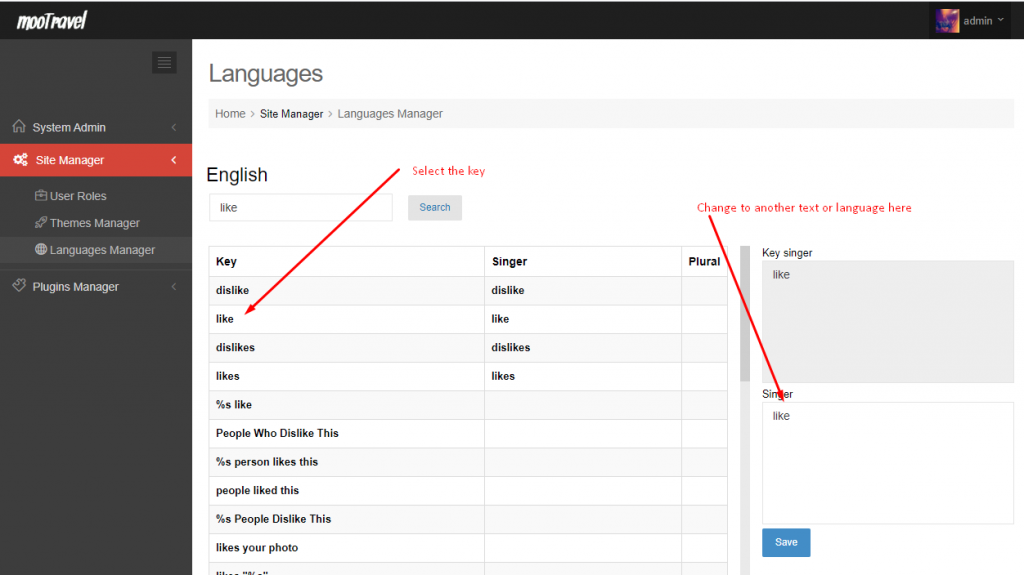
# Save and clear global cache and browser cache to check again
Translate for Menu or Widget using Admin Dashboard
In this section, we will show you how to Translate Menu’s title, Widgets Title, Categories of the plugin to other languages.
Translate Menu
Admin Dashboard -> System Admin > Menu.

Click on “Translation” link to open popup, Inside the popup, select language then enter text to translate it to the selected language. Don’t forget to clear global cache and browser cache
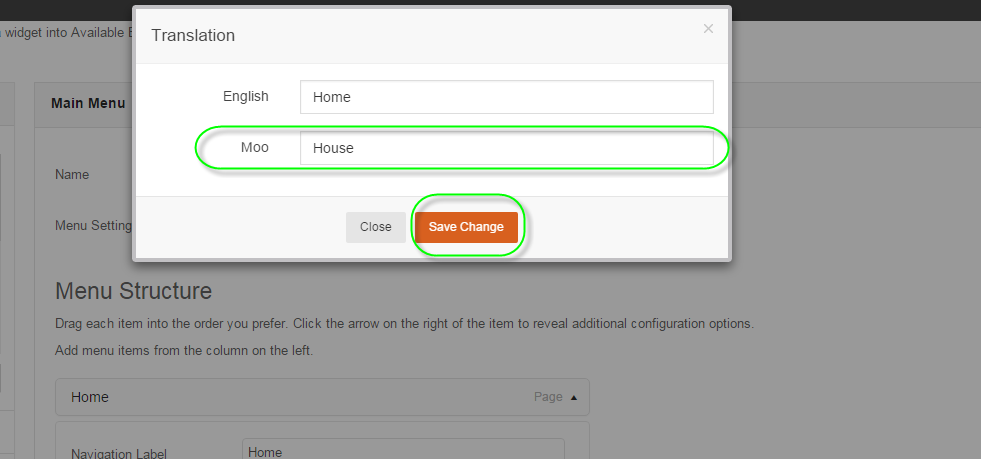
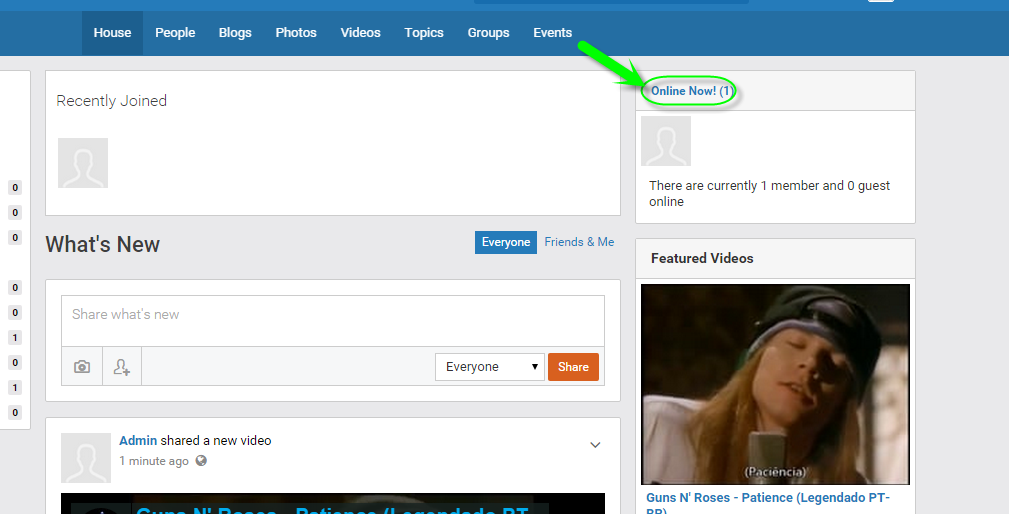
Let us return to Front-end, select the language that you just translated to check to see if it works or not

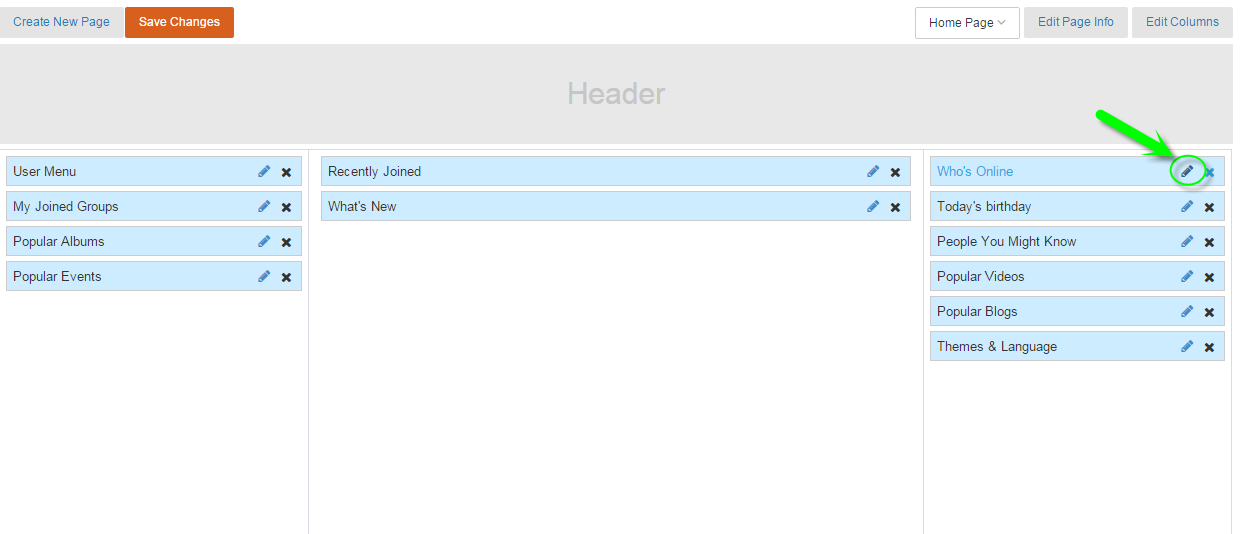
Translate Widget:
Admin Dashboard -> Site Manager -> Themes Manager -> Layout Editor.
At Layout Editor, select the page that contains that widget that you want to translate the title
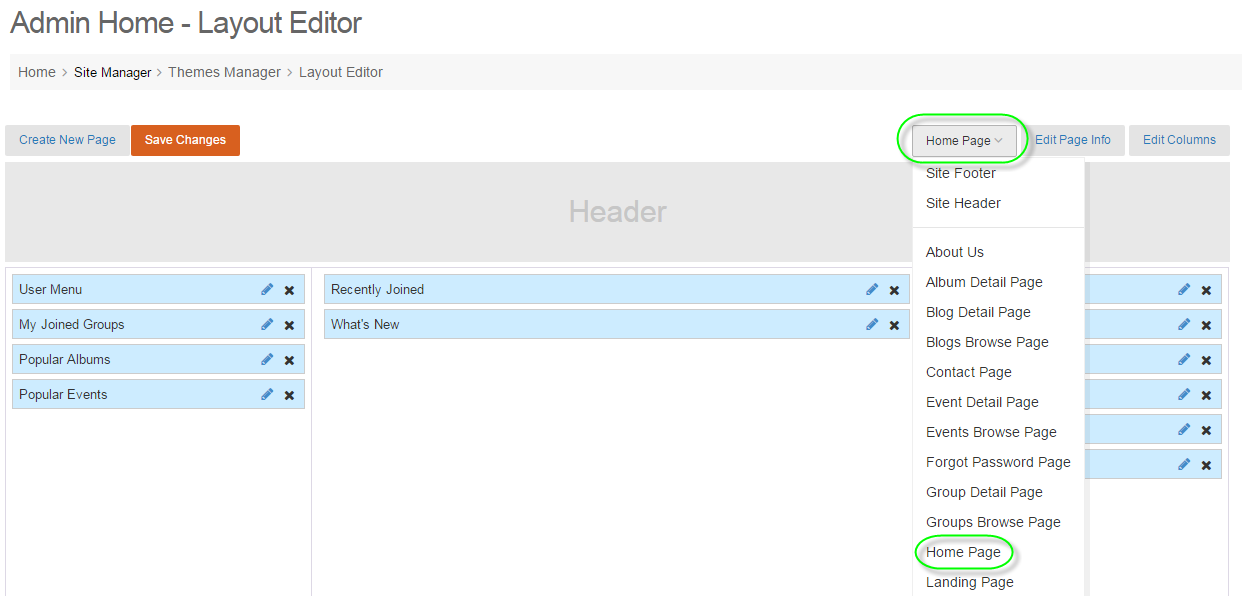
Click on “Edit” icon of the widget.
Click on “Translation” link inside the popup to translate
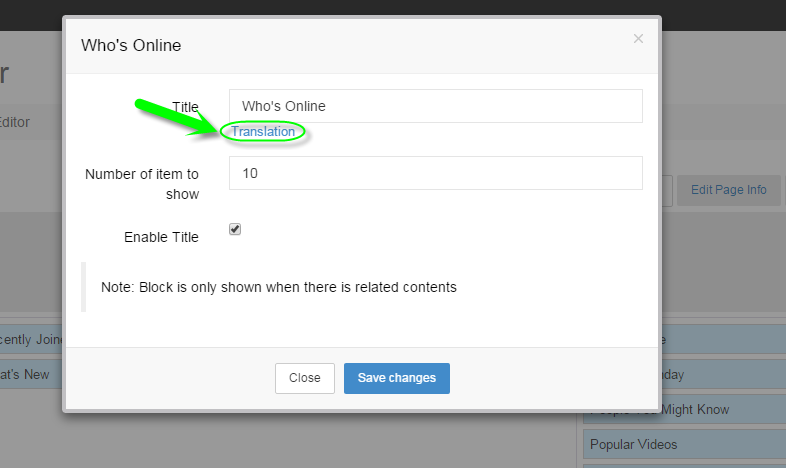
Select language that you want to translate into, then enter text and save your changes.
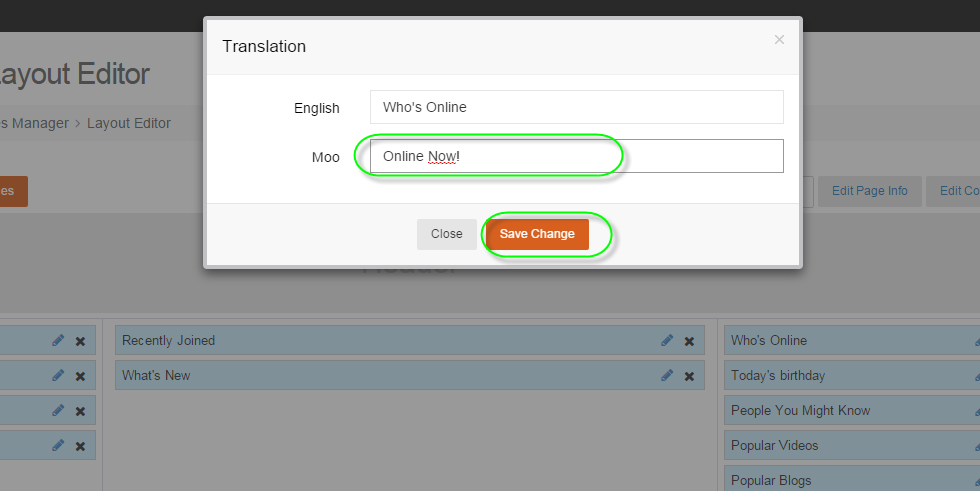
Clear browser cache and global cache then check again at user side.
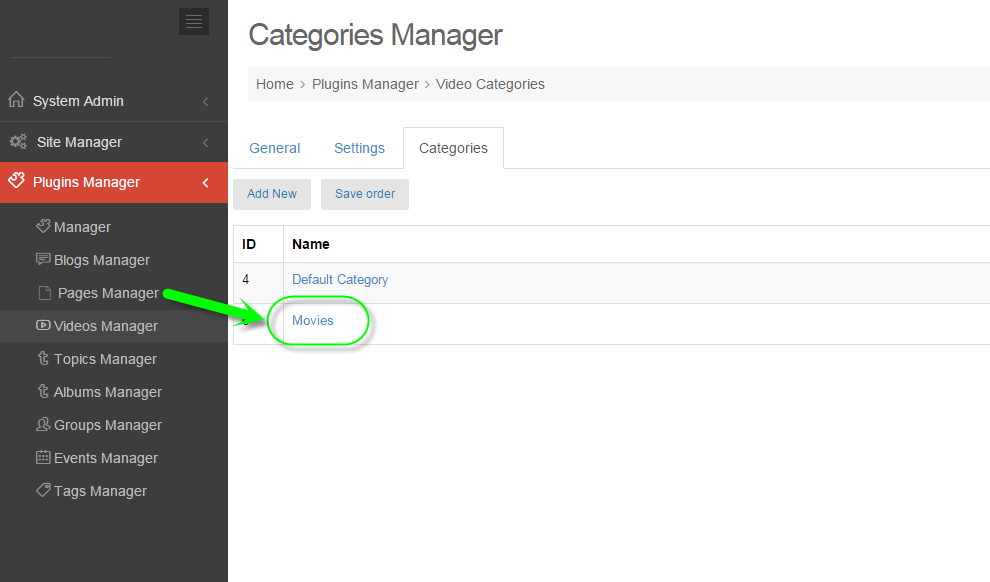
Translate plugin categories
This section will show you how to translate categories of a plugin. Below is categories of videos plugin

#Go to the Plugin Category’s Manager.
select a Category you want to translate.
Click on “Translation” link to open a popup
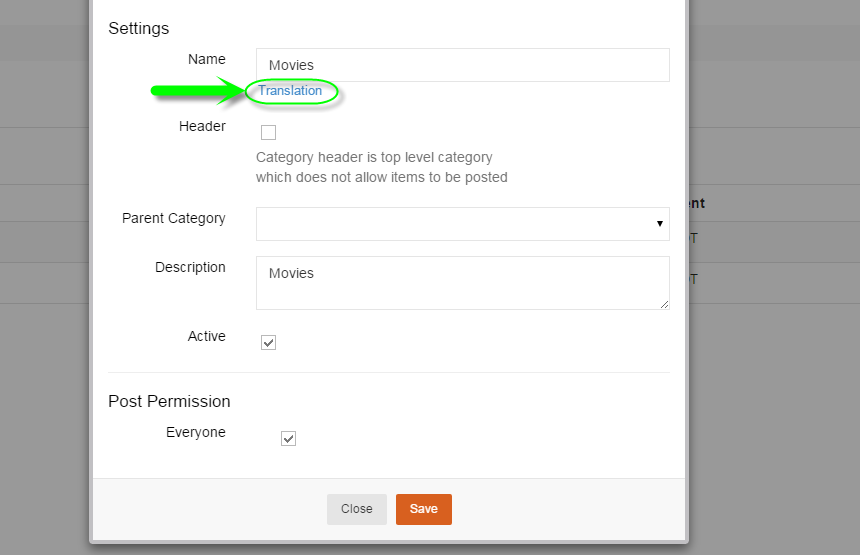
Select language and enter text that you want to translate.

Click save changes and check again at users side
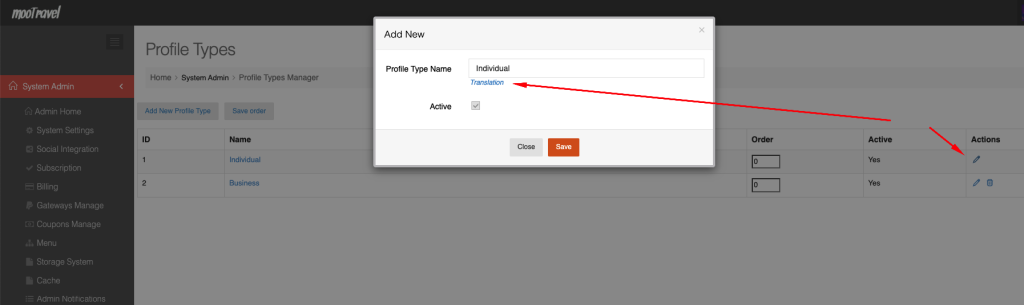
Translate Profile type and fields
How to translate profile type
Admin panel -> System admin -> Profile types
Click on “Edit” button of the type that you want to translate to open popup. You can translate profile type to other language there.
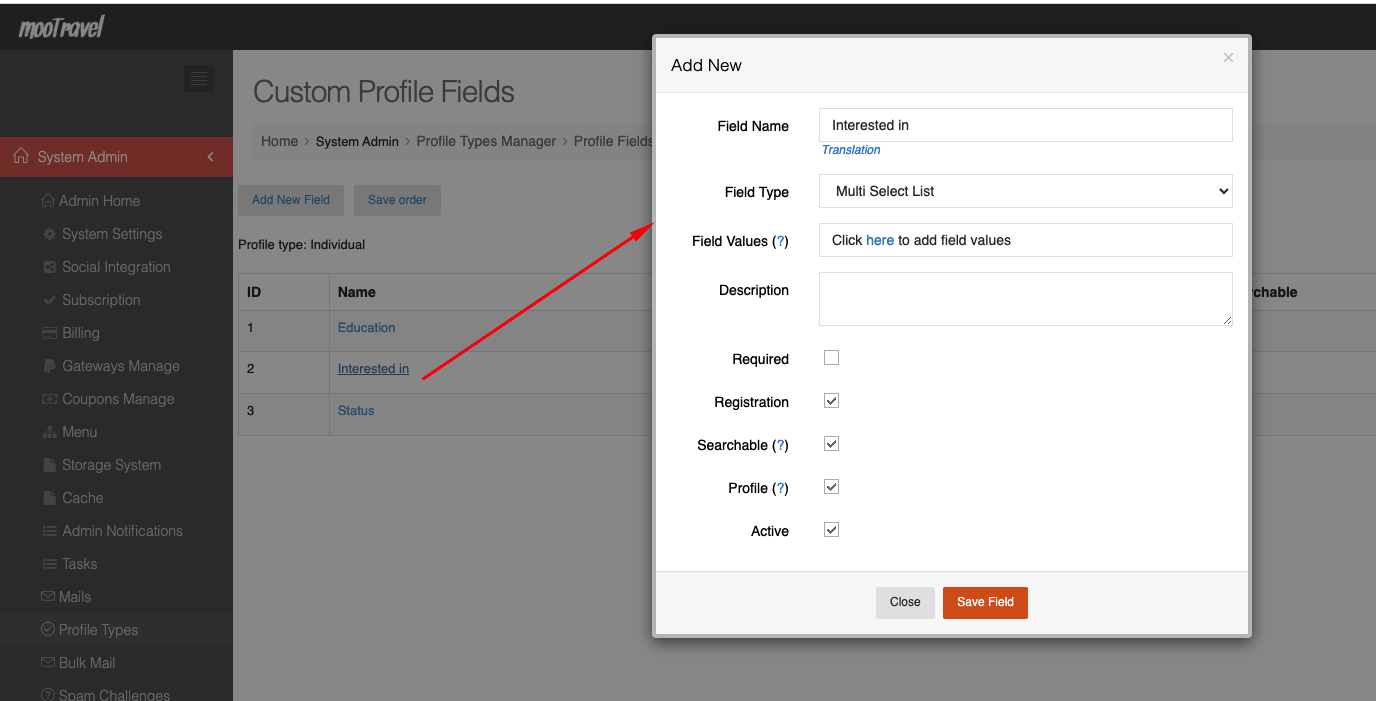
How to translate profile fields
Admin panel -> System admin -> Profile types -> Select a type -> Select a field
Click on “field name” that you want to translate to open popup. You can translate profile field to other language there.

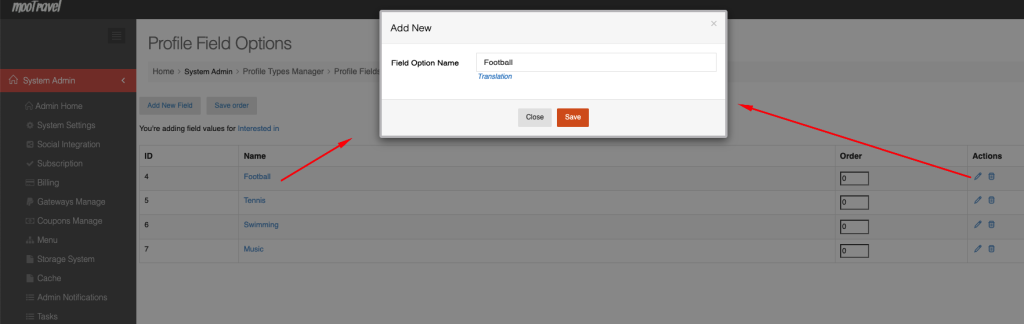
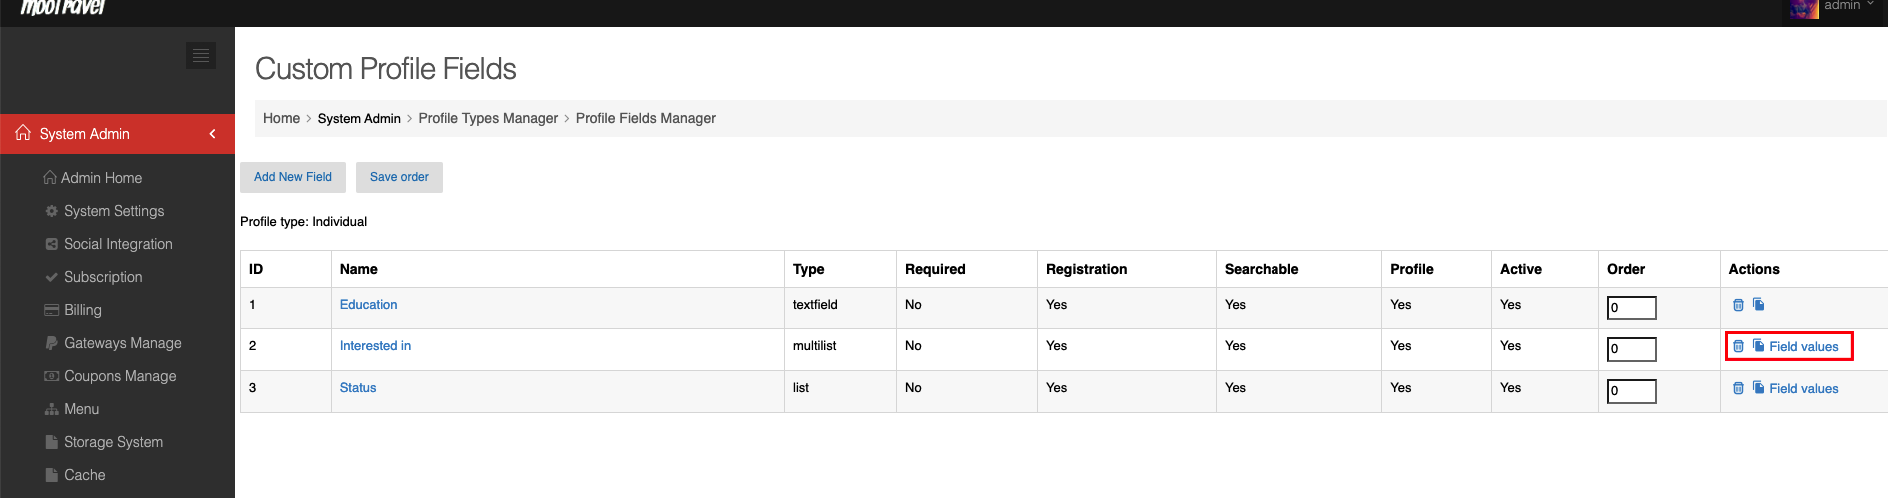
How to translate options inside a field
Admin panel -> System admin -> Profile types -> Select a type -> Select a field -> Field values

Click on “value name” that you want to translate to open popup. You can translate field value to other language there.